This article provides a guide on developing and deploying web and mobile applications using AWS Amplify, including authentication and backend management.
Welcome to this comprehensive guide on AWS Amplify. In this article, you will learn how to quickly develop and deploy web and mobile applications using AWS Amplify. We will work within an AWS Cloud9 environment using an event planner app that has been pre-deployed and tested. This demo covers initializing an Amplify environment, adding authentication, and reviewing the app within AWS Amplify Studio.
During the initialization process, you’ll be prompted for a project name along with several configuration details. For example:
spartan sage:~/environment/webapp/my-event-planner $ amplify initNote: It is recommended to run this command from the root of your app directory? Enter a name for the project (myeventplanner)
The default configuration typically uses Visual Studio Code as the default editor, specifies a JavaScript app type, and selects a framework such as Vue. Below is a sample configuration:
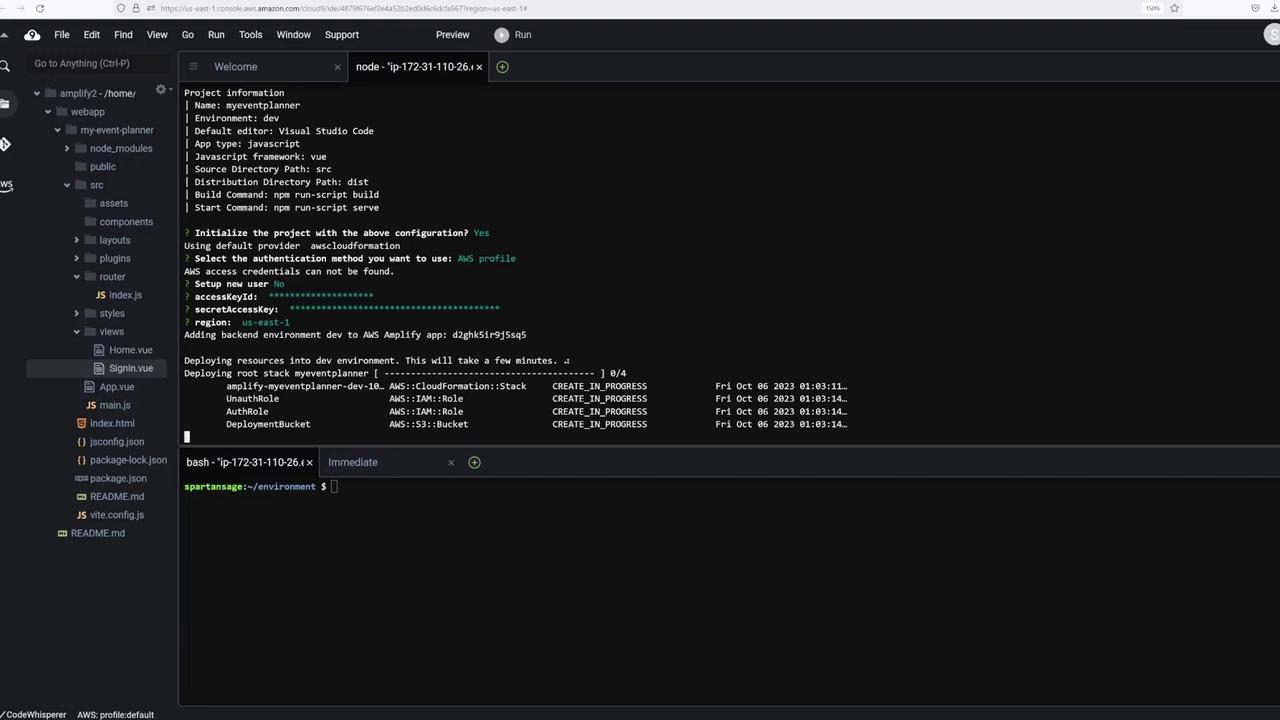
spartan sage:~/environment/webapp/my-event-planner$ amplify initNote: It is recommended to run this command from the root of your app directory? Enter a name for the project: myeventplannerProject information: Name: myeventplanner Environment: dev Default editor: Visual Studio Code App type: javascript Javascript framework: vue Source Directory Path: src Distribution Directory Path: dist Build Command: npm run-script build Start Command: npm run-script serve? Initialize the project with the above configuration? (Y/n)
After confirming your settings, the CLI will request your AWS profile credentials (access key and secret access key). Once provided, Amplify deploys the backend resources. An excerpt from the deployment log may look like this:
node -ip-172-31-110-26:~Project information| Name: myeventplanner| Environment: dev| Default editor: Visual Studio Code| App type: javascript| Javascript framework: vue| Source Directory Path: src| Distribution Directory Path: dist| Build Command: npm run-script build| Start Command: npm run-script serve| Initialize the project with the above configuration? YesUsing default provider: awscloudformation| Select the authentication method you want to use: AWS profileAWS access credentials can not be found.| Setup new user? No accessKeyId: ****************** secretAccessKey: ****************** region: us-east-1Adding backend environment dev to AWS Amplify app: d2ghksi5r95sq5Deploying resources into dev environment. This will take a few minutes.Deploying root stack myeventplanner [amplify-myeventplanner-dev-10...] 2/4AWS::CloudFormation::Stack CREATE_IN_PROGRESSAWS::IAM::Role CREATE_COMPLETEAWS::S3::Bucket CREATE_IN_PROGRESS...bash -ip-172-31-110-26:~/spartan$ ~/environment $
Once the environment has been initialized, verify the status with:
spartan sage:~/environment/webapp/my-event-planner $ amplify status
Running the command from the root of your project helps avoid configuration issues.
To secure your application, add Cognito-based authentication. In this demo, manual configuration is used to create a Cognito user pool along with an admin group. Execute the following command from the My Event Planner directory:
You will then encounter prompts similar to the following:
Using service: Cognito, provided by: awscloudformationThe current configured provider is Amazon Cognito.Do you want to use the default authentication and security configuration? Manual configurationSelect the authentication/authorization services that you want to use: User Sign-Up, Sign-In, connected with AWS IAM controls (Enables per-user Storage features for images or other content, Analytics, and more)Provide a friendly name for your resource that will be used to label this category in the project: myeventplannerAuthEnter a name for your identity pool: myeventplannerIdentityPoolAllow unauthenticated logins? (Provides scoped down permissions that you can control via AWS IAM) NoProvide a name for your user pool: myeventplannerUserPoolDo you want to enable 3rd party authentication providers in your identity pool? NoHow do you want users to be able to sign in? EmailDo you want to add User Pool Groups? YesProvide a name for your user pool group:
Proceed by creating the necessary user pool groups (e.g., an “admins” group) and follow the remaining configuration steps. This process sets up essential registration features, including email-based sign-up, while keeping multi-factor authentication disabled.Push your changes to AWS Amplify with the following command:
amplify push
This action provisions the necessary AWS Cognito resources such as the user pool and identity pool.
Verifying in AWS Amplify Console and Amplify Studio
After deploying authentication resources, verify your backend configuration in the AWS Amplify Console. This console displays details such as hosting environments, backend configurations, and authentication settings.To pull the latest configuration, run:
$ amplify pull --appId d29ghk5irj95q5 --envName dev
Afterward, click on “Launch Studio” in the Amplify Console to access a graphical interface for managing backend resources, user management, and deployment activity. Notice that changes made via the CLI will be reflected in Amplify Studio.Below is an image displaying the AWS Amplify Console with project configuration details:
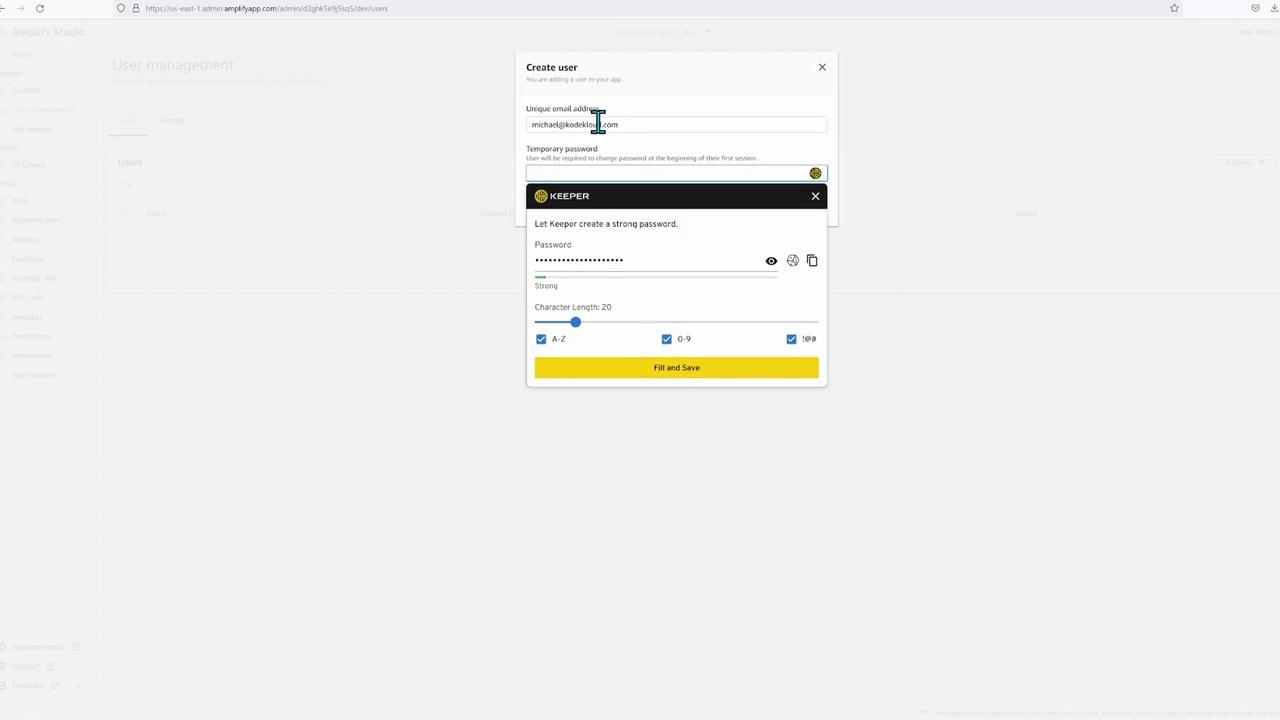
Within Amplify Studio, select “Launch Studio” and allow any necessary pop-ups. Then, navigate to the “User Management” section under the Management tab. Initially, no users are displayed. You can either register users manually or allow user self-signup.For demonstration, create a user (e.g., Michael at KodeKloud) with a temporary password and assign them to the “admins” group. The image below shows the “Create user” form:
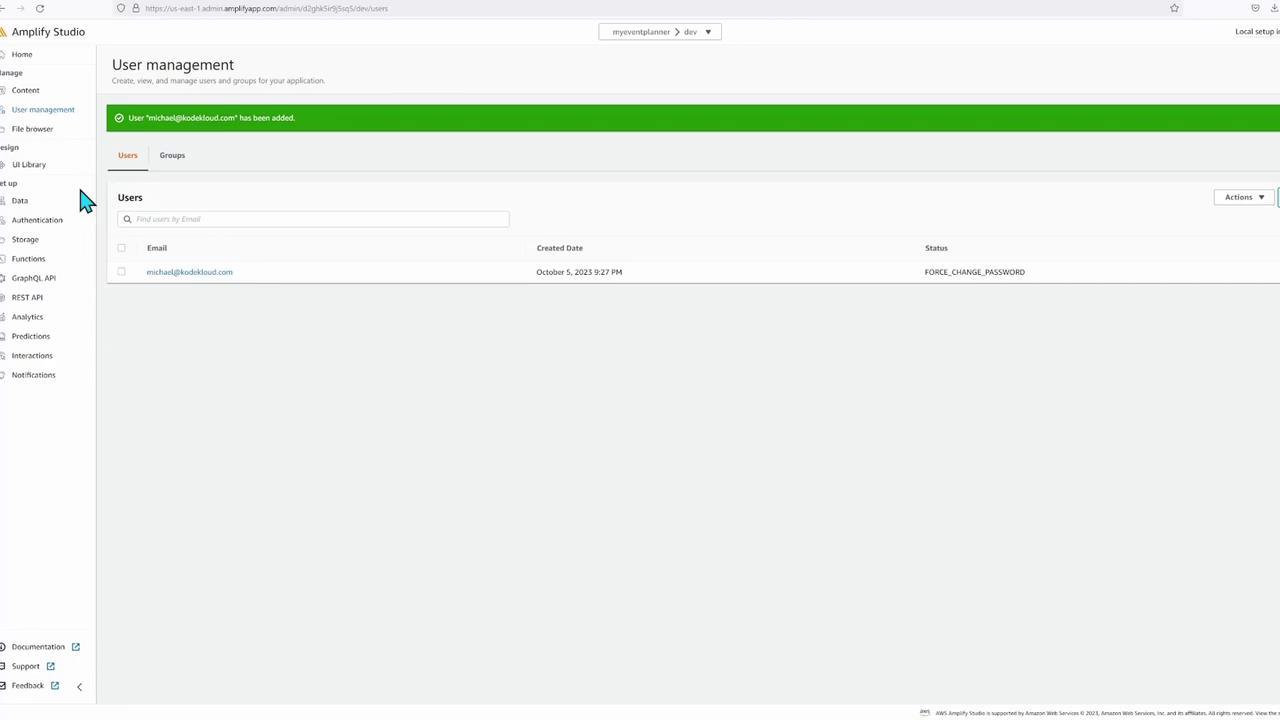
After the user is created, you will see confirmation and status details as shown here:
Beyond authentication, AWS Amplify offers a suite of features including analytics, REST APIs, Lambda functions, and GraphQL (AppSync) for API development. Although this demo focuses on authentication, you can extend functionality to include file storage, data modeling, and more backend resources.For instance, to add a function, use:
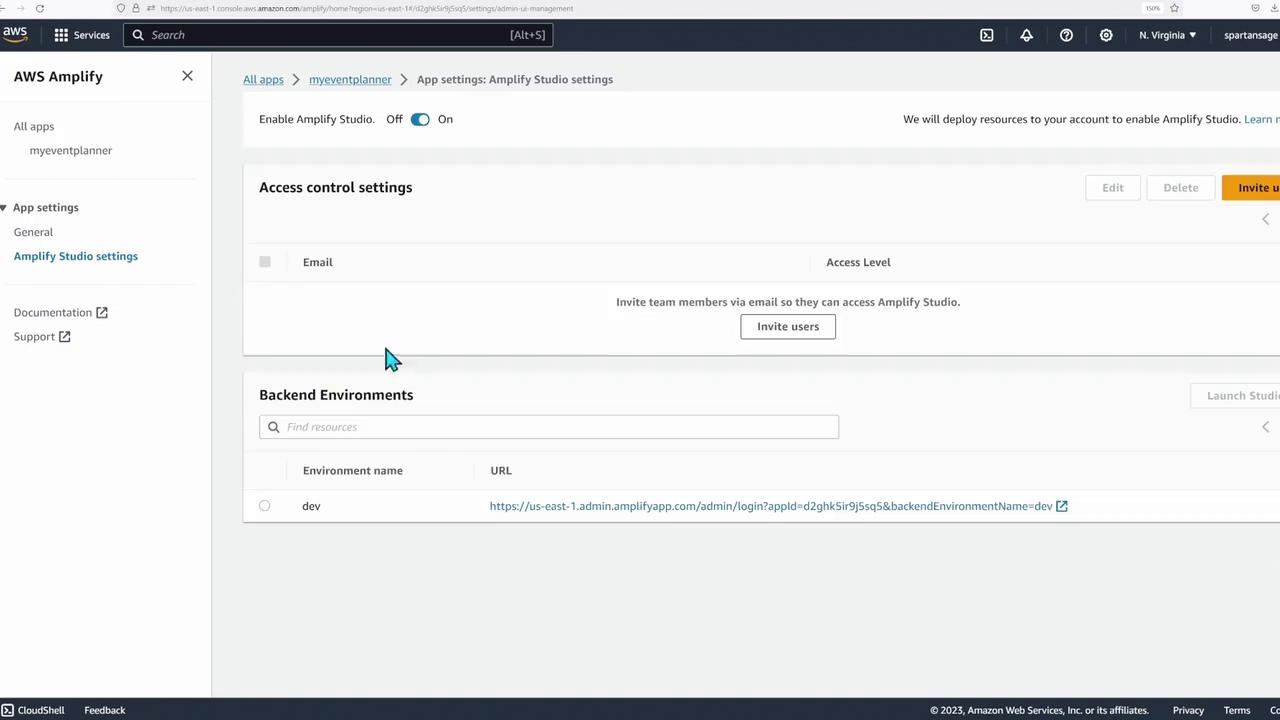
Revisit the AWS Amplify Console to monitor and manage your backend. In the backend environment tab, view the “dev” environment with details on authentication and hosting configurations. The image below shows access control and backend environment details:
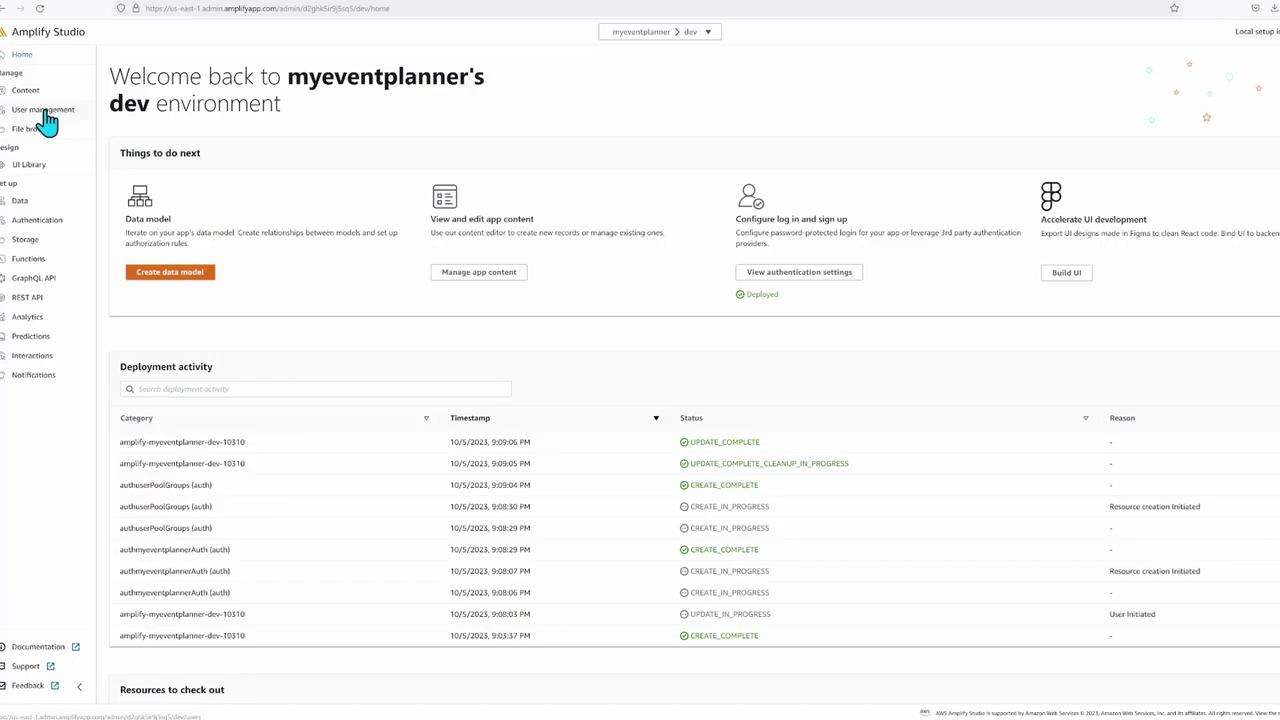
Additionally, explore Amplify Studio for data modeling, UI development, and further backend configurations:
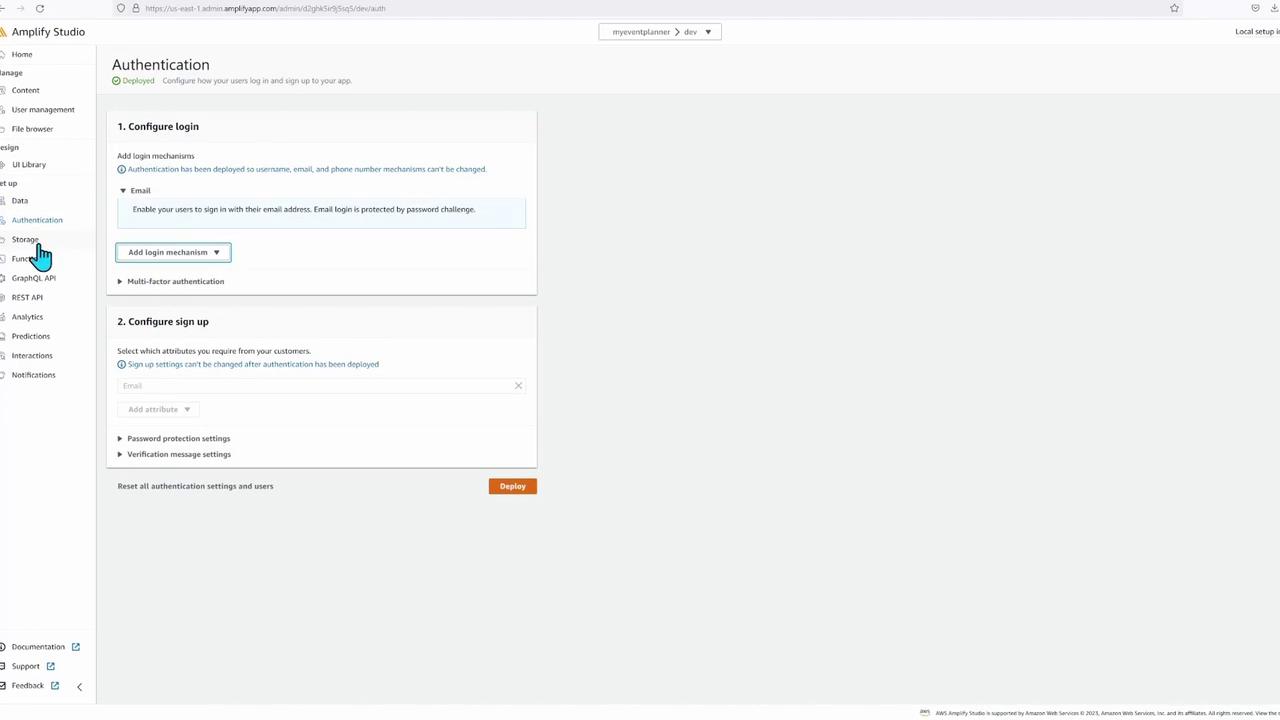
Review the authentication configuration in detail:
This guide demonstrated how to initialize an AWS Amplify environment, add Cognito-based authentication, and manage backend resources using both the AWS CLI and Amplify Studio. AWS Amplify simplifies the deployment of web and mobile applications, enabling you to focus on enhancing features and scaling your application efficiently.Thank you for following along with this AWS Amplify demo. Happy coding!