Creating an Instance
-
Log in and Select Region:
Start by logging in to the Amazon Connect console. In this example, we are working in the Northern Virginia region. -
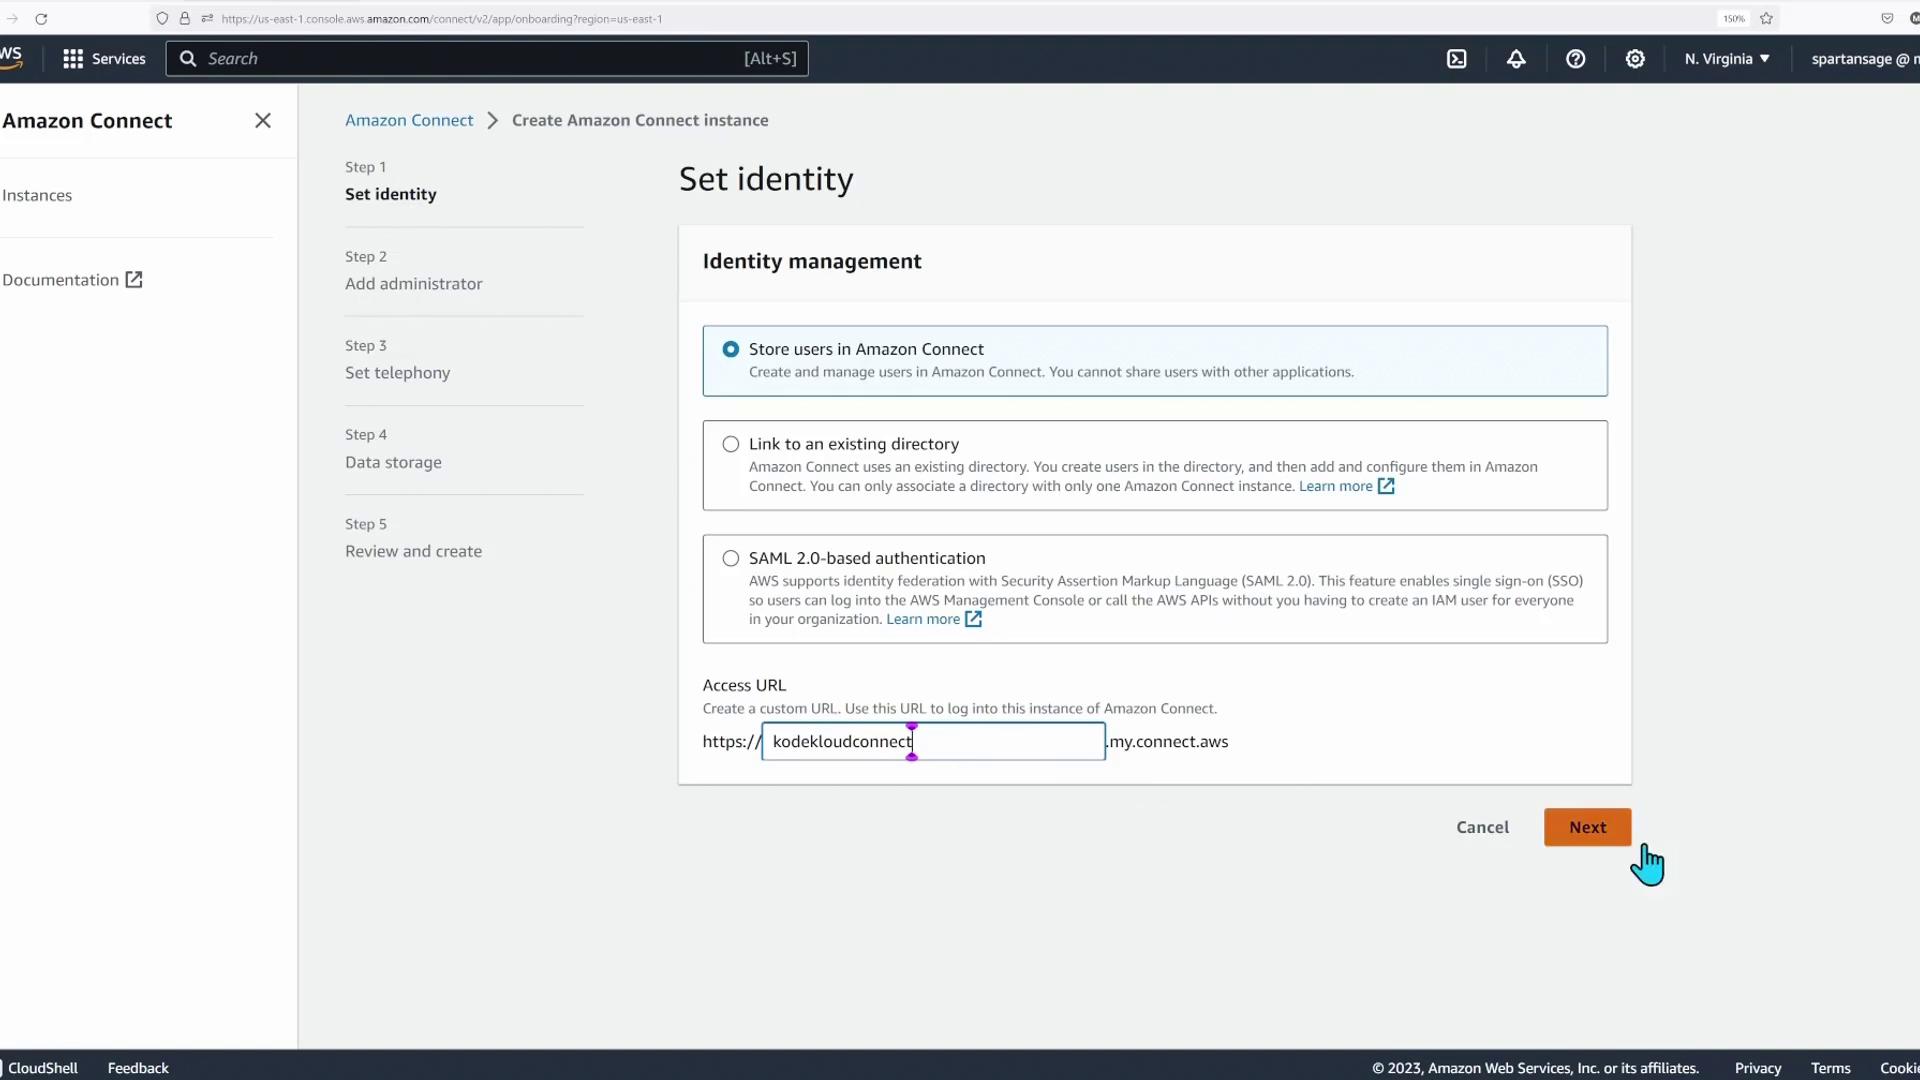
Add a New Instance:
Begin by adding a new instance. In this setup, we are using Amazon Connect’s native user directory, without external directory or SAML-based integration.- Name the instance “KodeKloudConnect.myConnect.aws” and click Next.
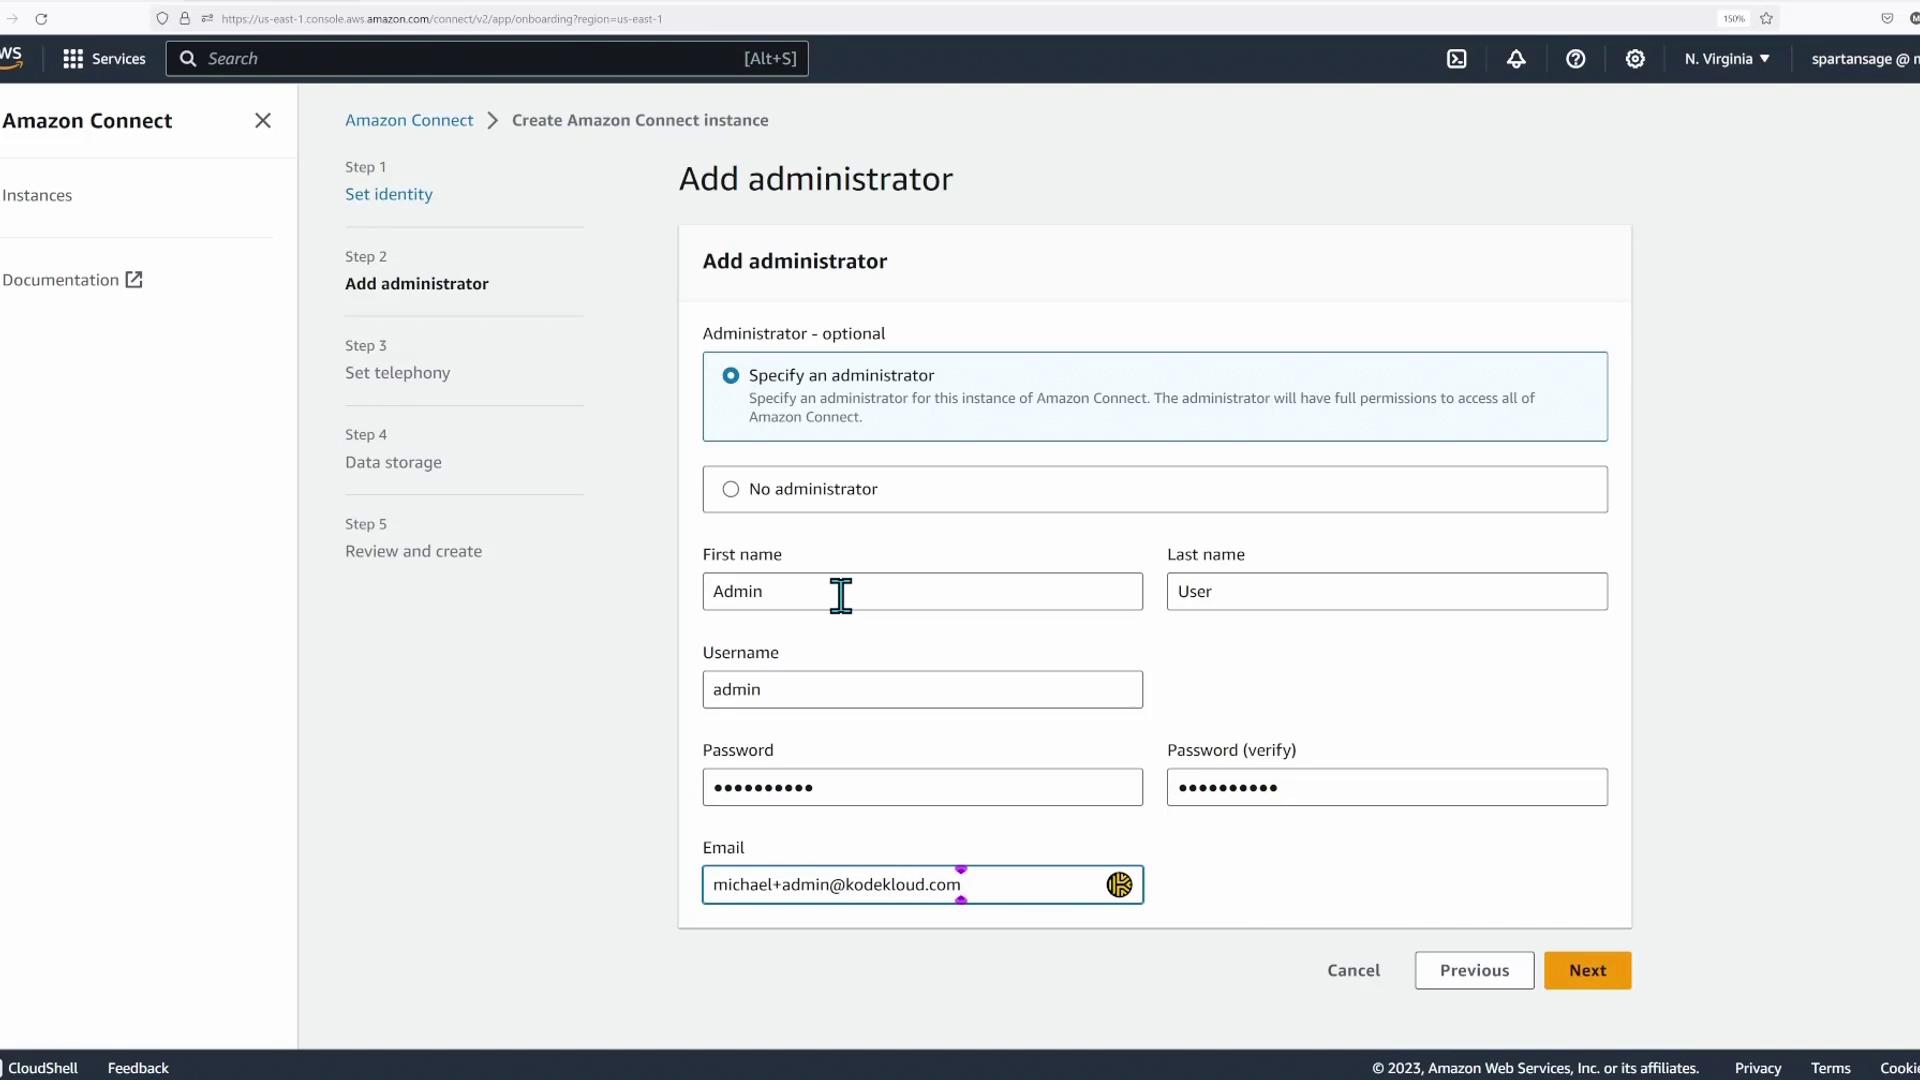
- Administrator Setup:
Provide administrator credentials by entering the username “admin,” a memorable password, and an email address such as Michael@KodeKloud.com.
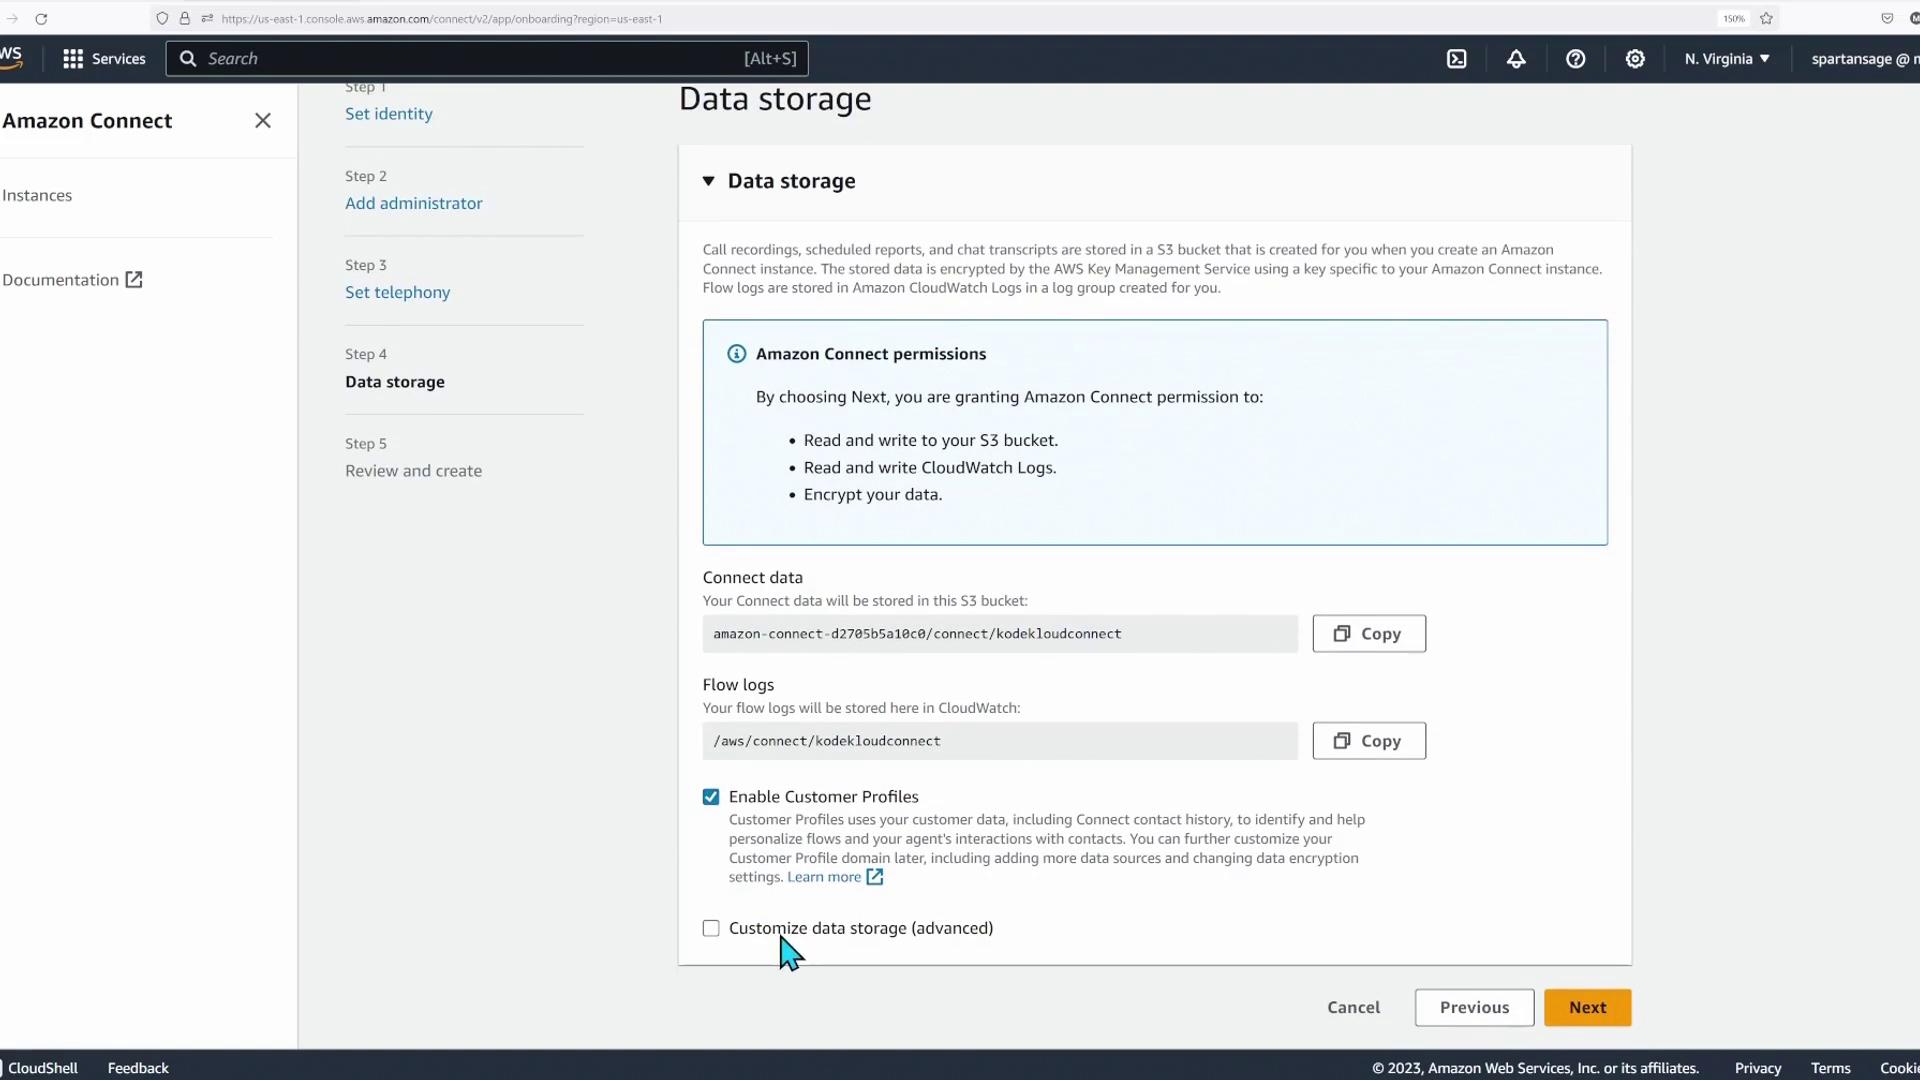
- Telephony and Data Storage:
Since this is a contact center instance, enable both incoming and outgoing calls. The default data storage configuration automatically creates an S3 bucket.- Select the “Amazon Connect bucket” option and click Next.
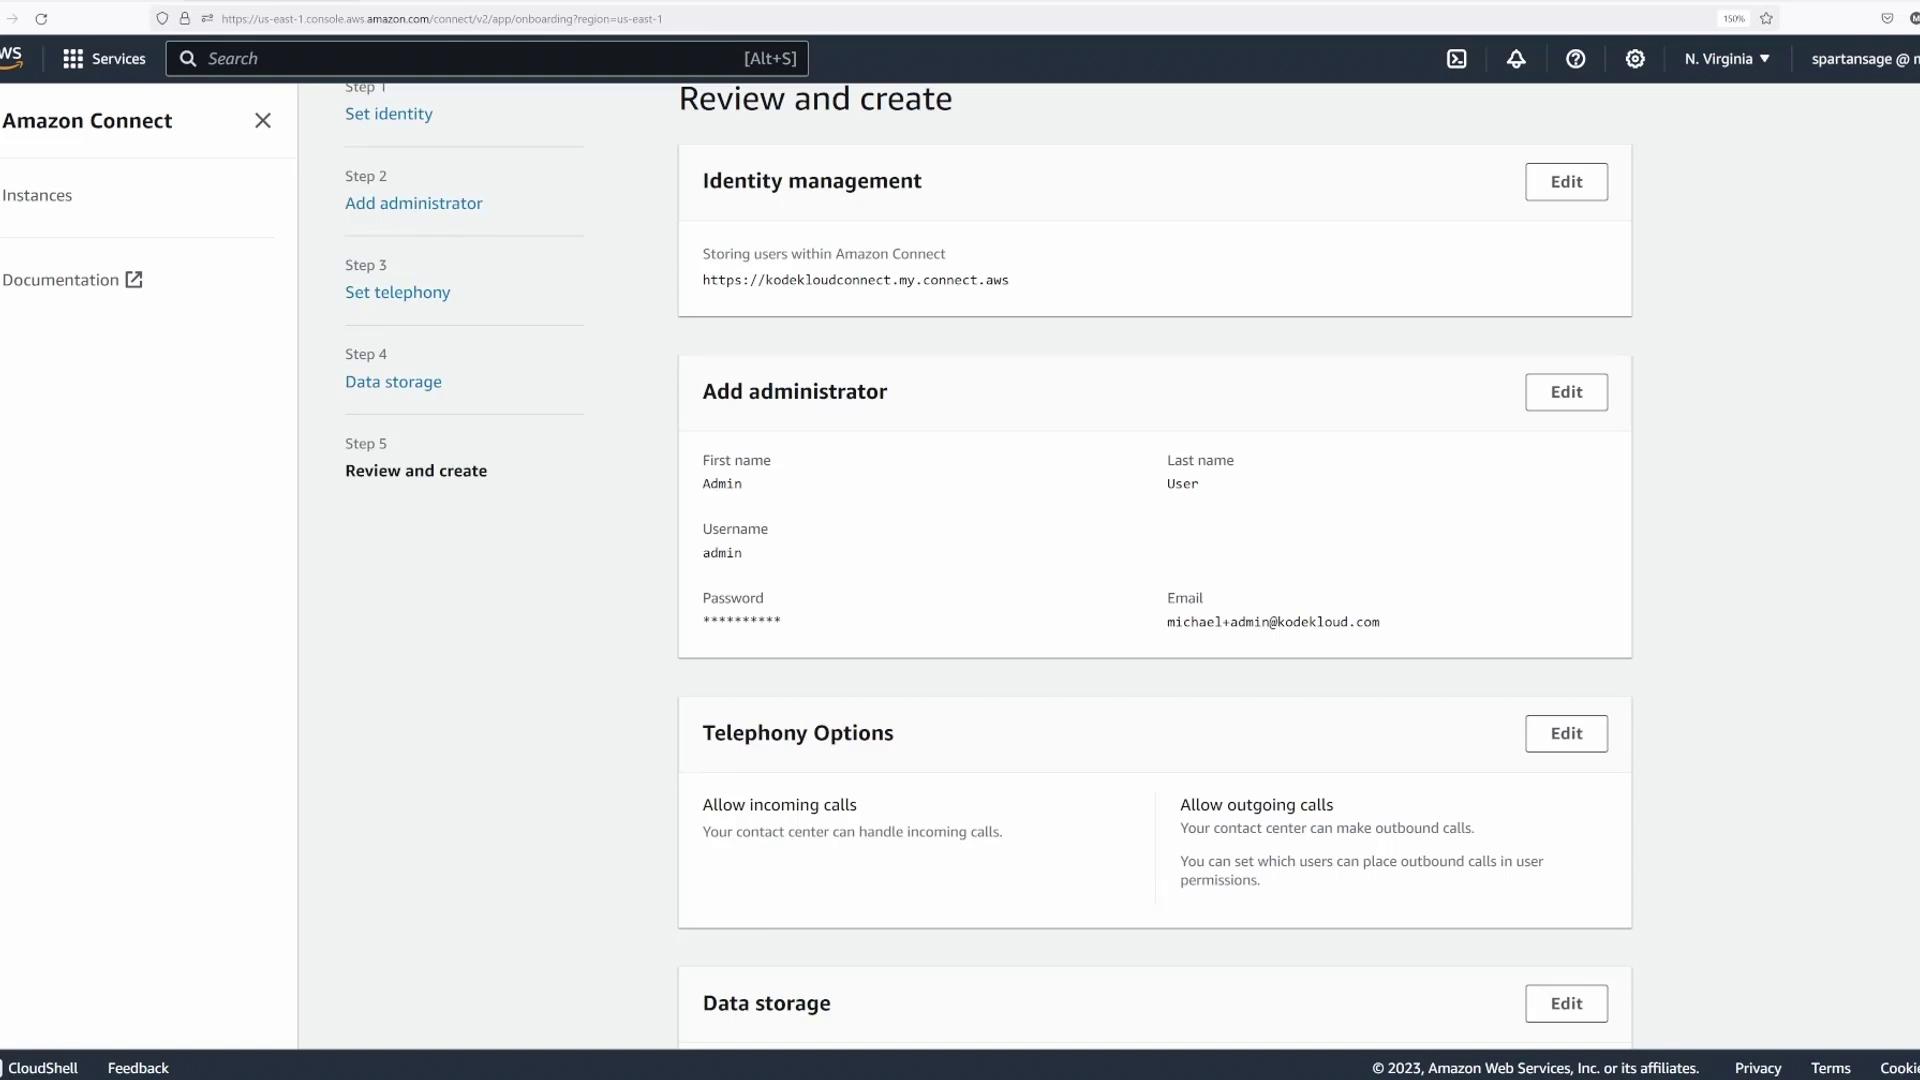
- Review Settings:
Verify all the settings on the summary page—identity management, telephony options, flow logs, encryption keys, and administrator details—before clicking Create Instance.
- Instance Activation:
Once the instance status changes to Active, a unique URL will be provided. Click this URL (it will open in a new tab) and log in using the admin credentials. The initial dashboard allows configuration of queues, routing profiles, and agent settings.
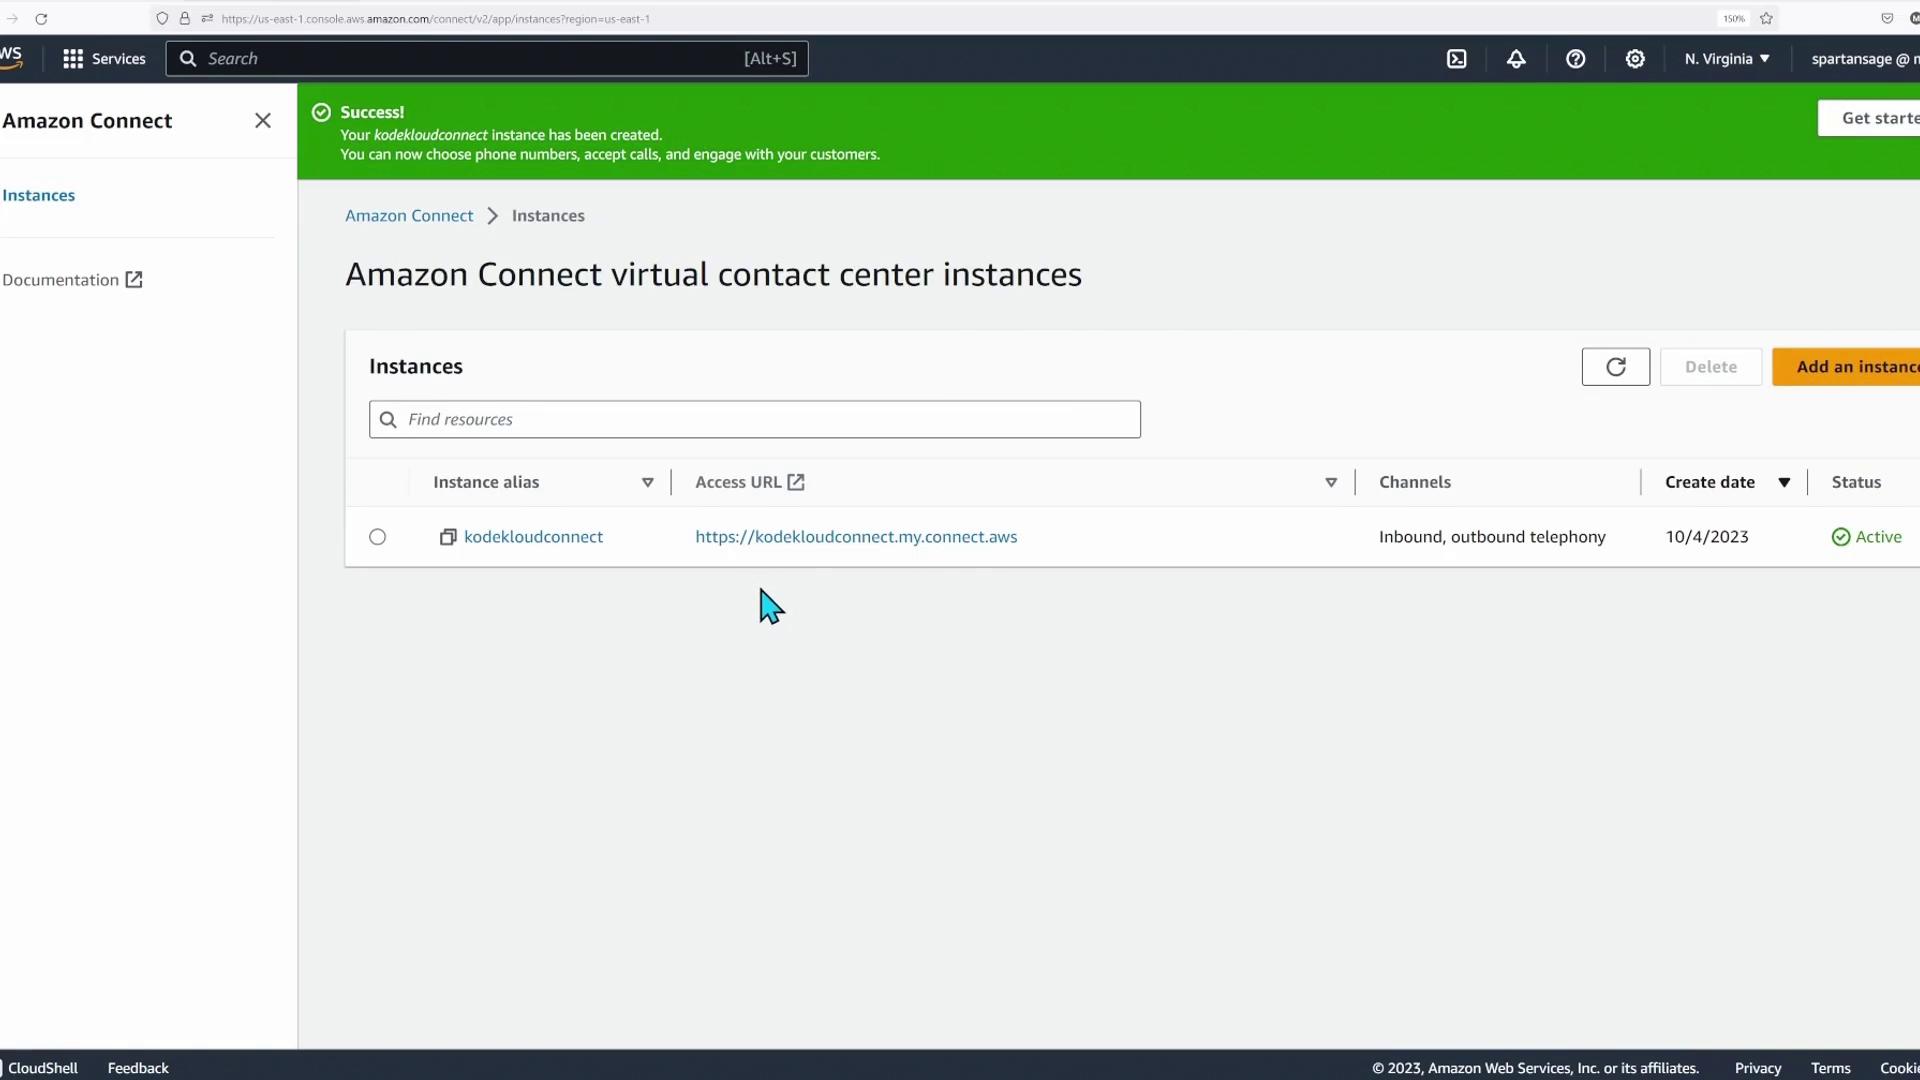

Ensure that the instance is fully active and accessible via the provided URL before proceeding to further configurations.
Configuring Routing: Hours of Operation and Queues
Proper configuration of hours and queues is essential for efficient call routing.Setting Up Hours of Operation
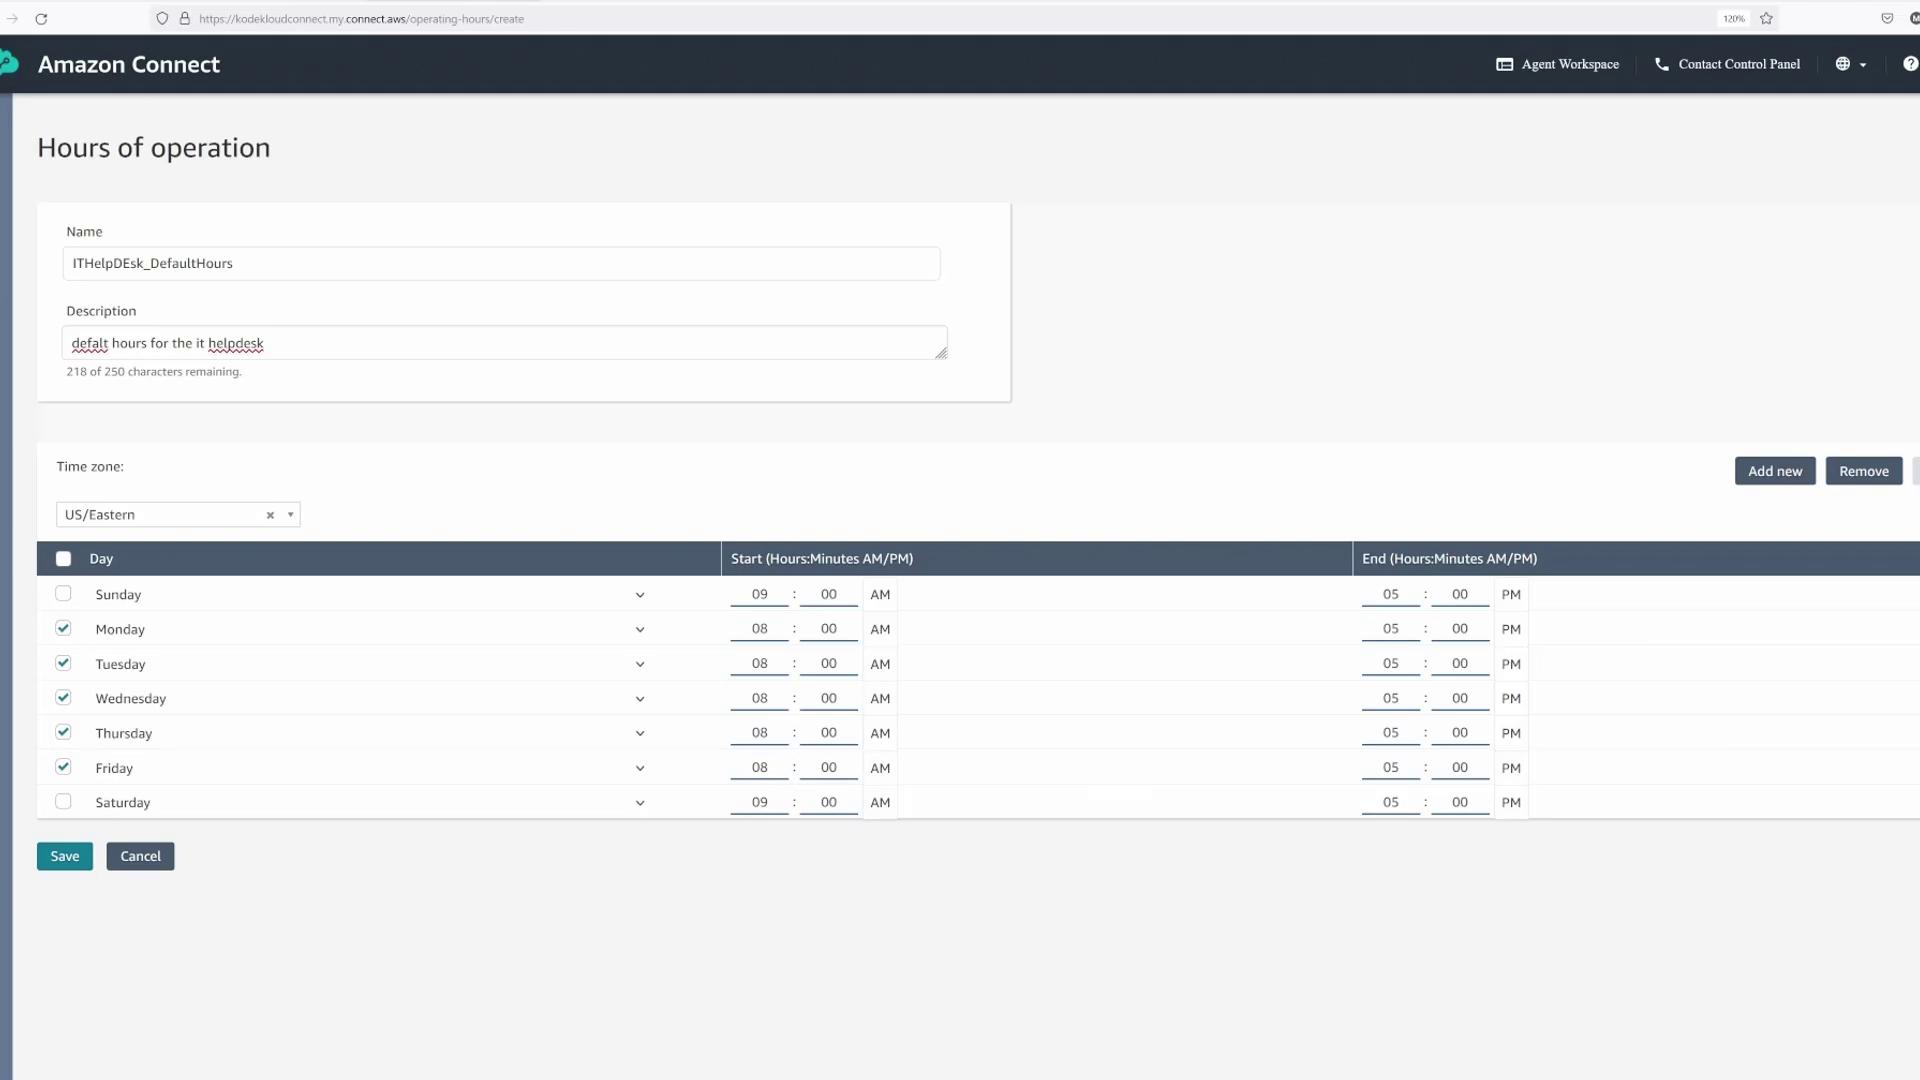
- Navigate to Routing > Hours of Operation from the dashboard.
- Click Add new hours.
- Enter “IT helpdesk default hours” as the name and provide a description like “Default hours for the IT helpdesk.”
- Set the time zone to US Eastern, then define the working days (Monday through Friday) with operating hours from 8 AM to 5 PM.
- Click Save.
Creating Queues
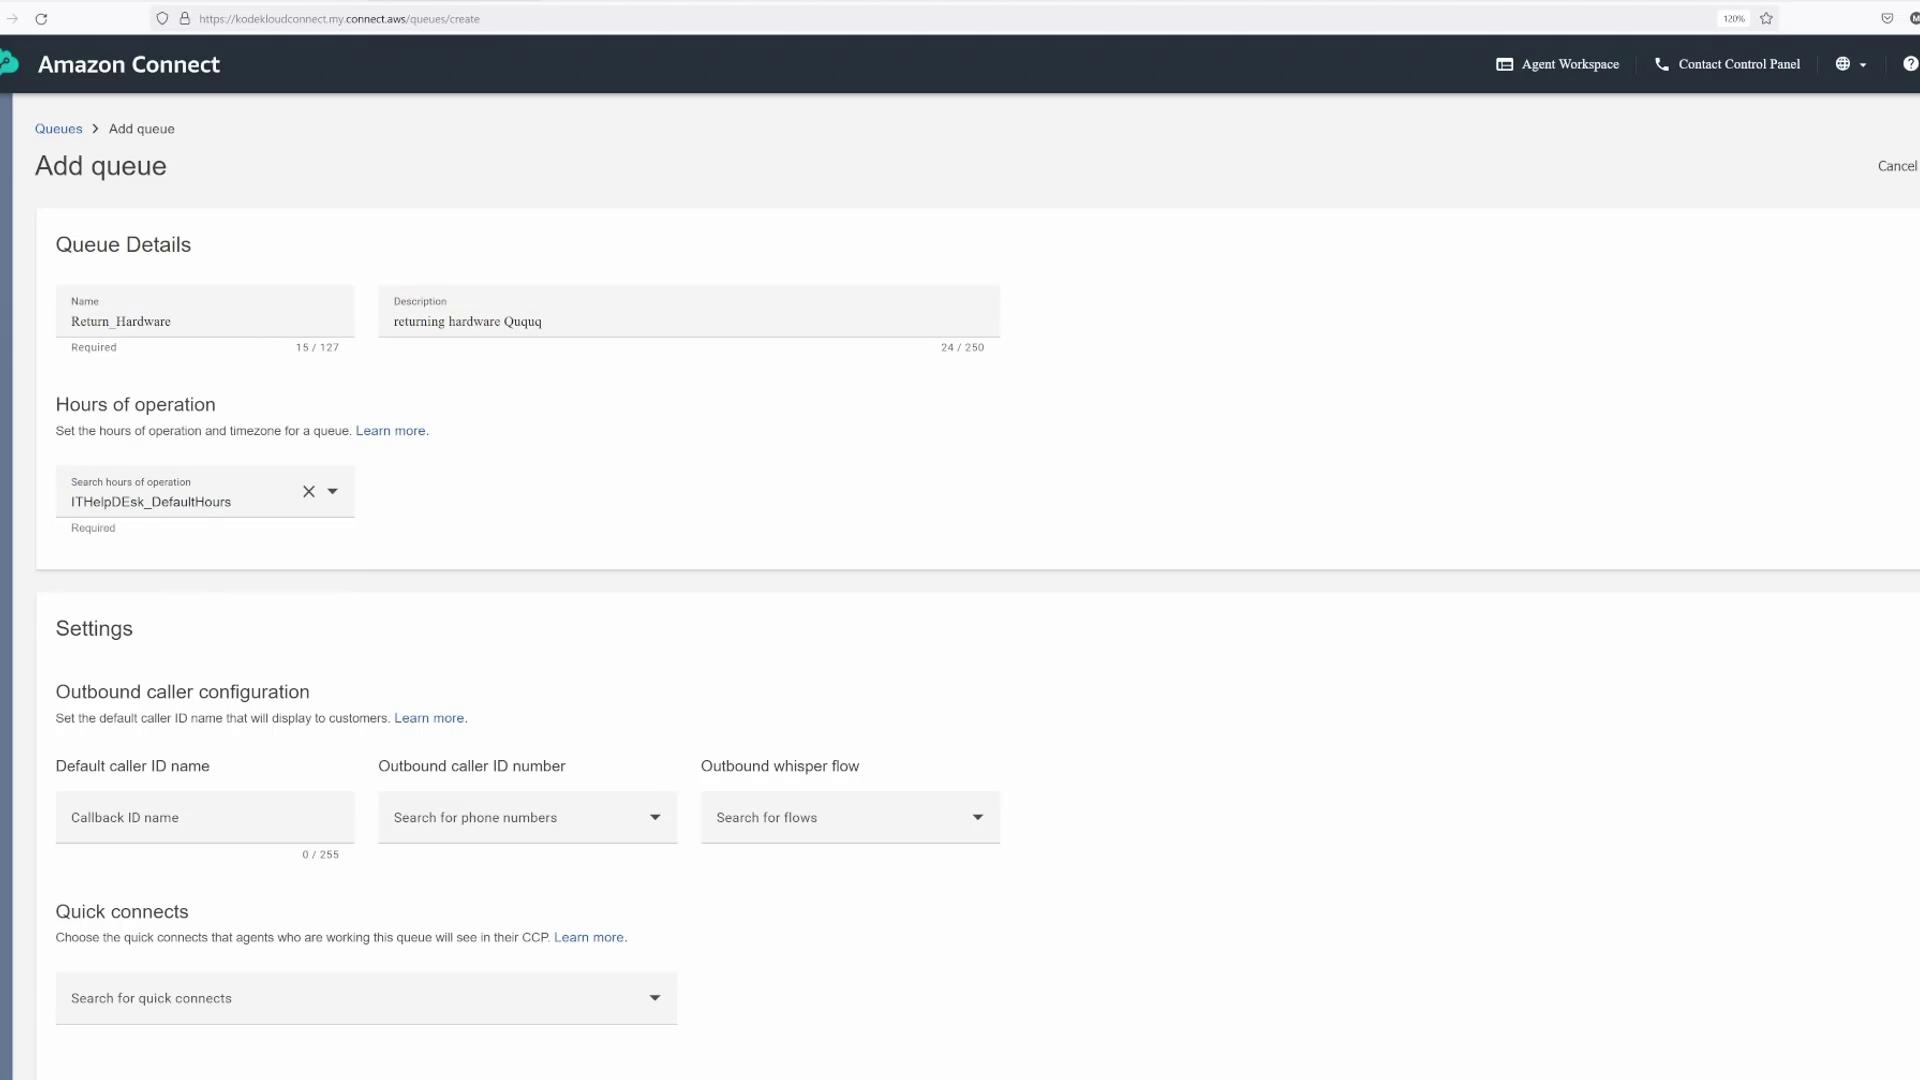
- Navigate to Routing > Queues and click Add queue.
- For the first queue, named “return to hardware,” select “IT helpdesk default hours” as the operating hours. Optionally, specify the maximum contacts and quick connects before clicking Save.
- Repeat the process for the second queue, “IT helpdesk tech support,” with similar settings and click Save.
Creating Routing and Security Profiles
Routing and security profiles are crucial for directing contacts to the right agents with appropriate permissions.Creating a Routing Profile
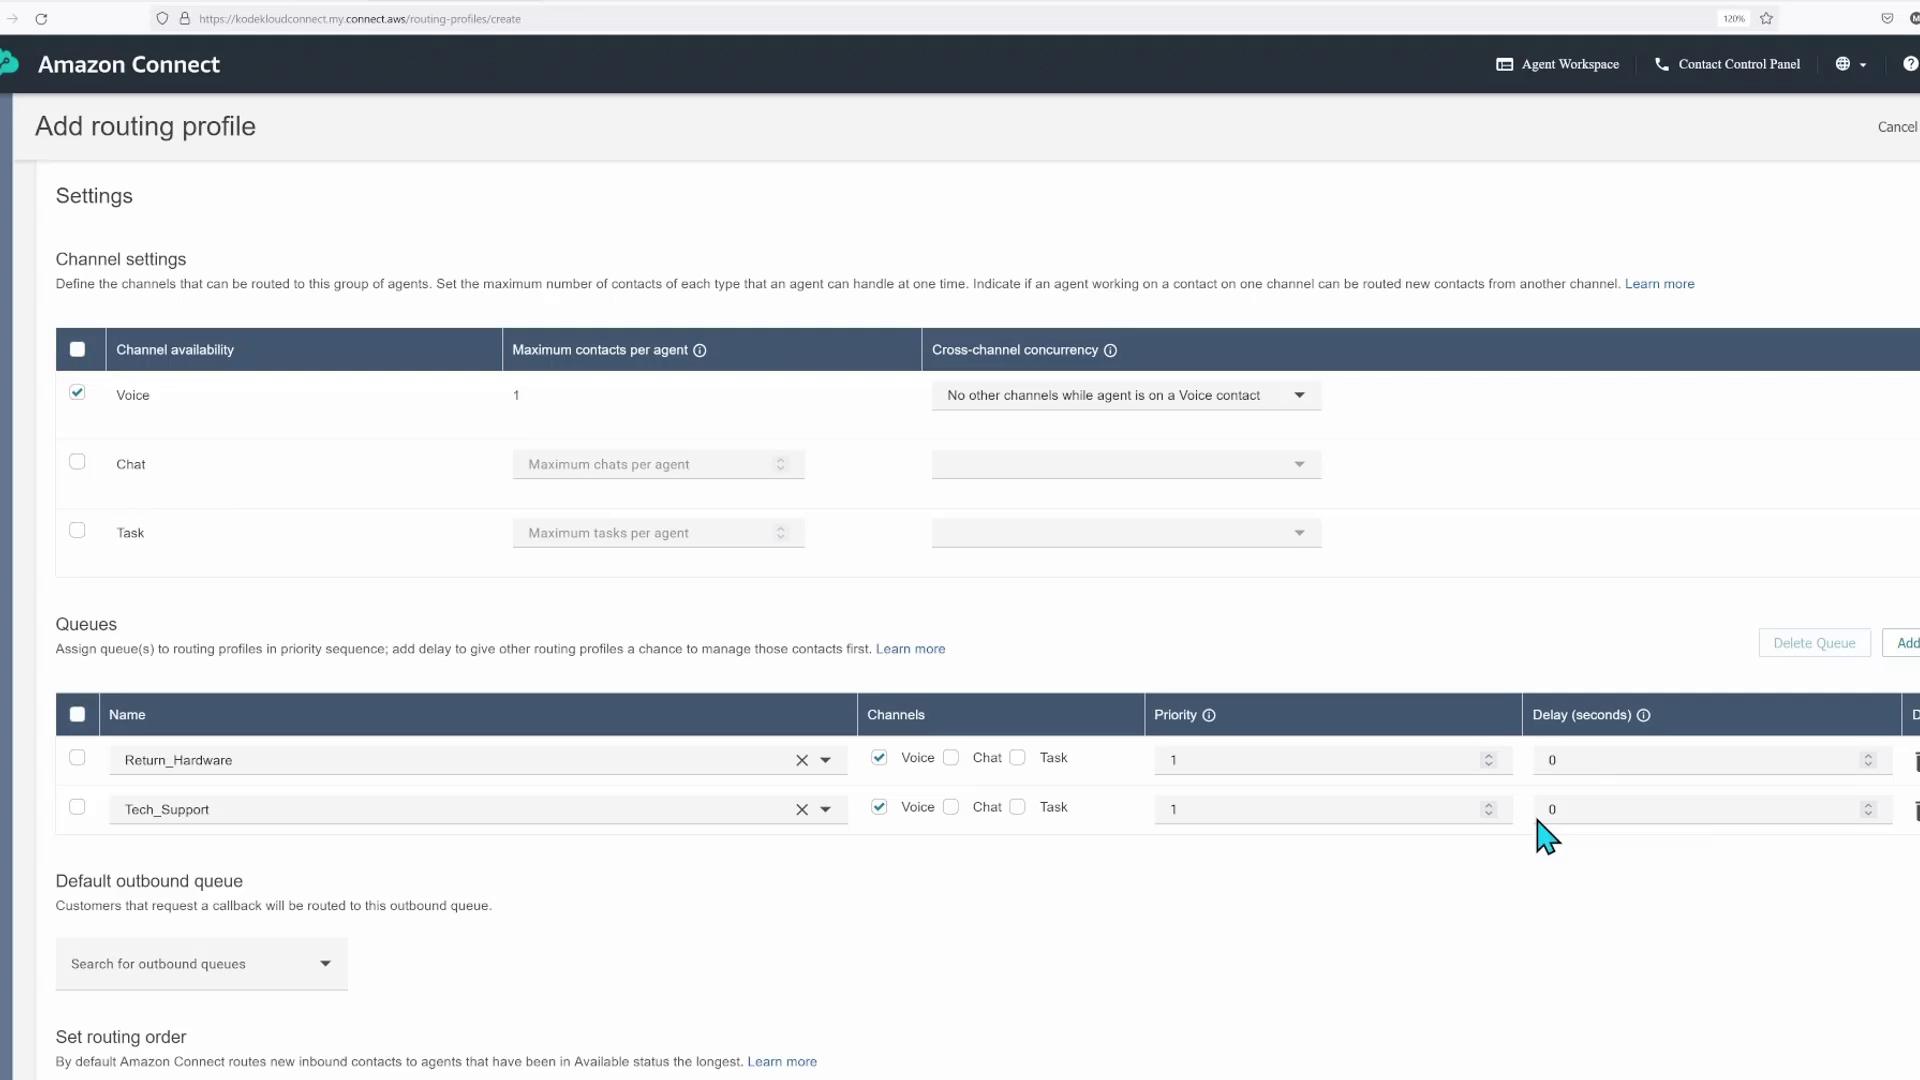
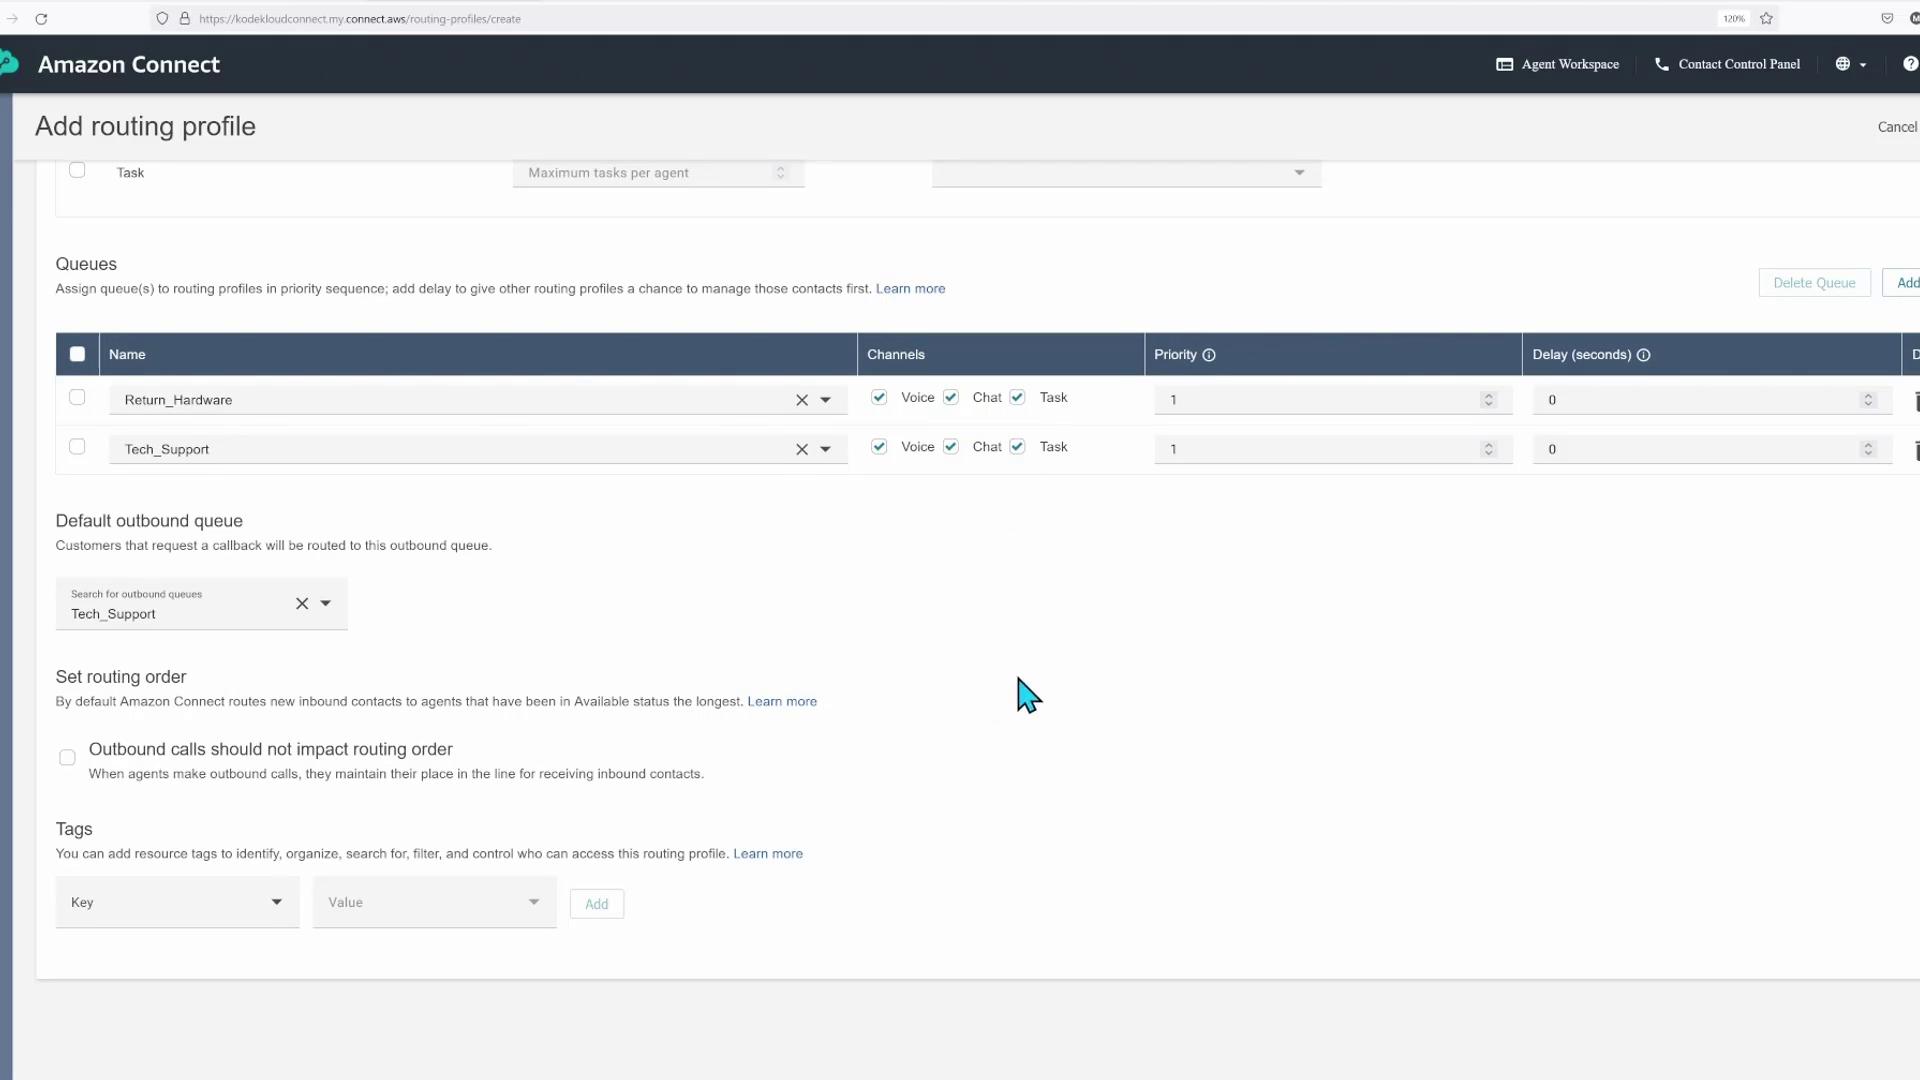
- Navigate to Users > Routing profiles.
- Click Add routing profile.
- Name the profile “IT helpdesk_default” and add a description such as “Default user routing profile for IT helpdesk.”
- Under channel settings, select Voice. Add both the “return hardware” and “tech support” queues. Assign a priority value (e.g., 1 for high priority) and a delay (set to 0).
- Enable Chat and Task channels if needed.
- Click Save.
Reviewing Security Profiles
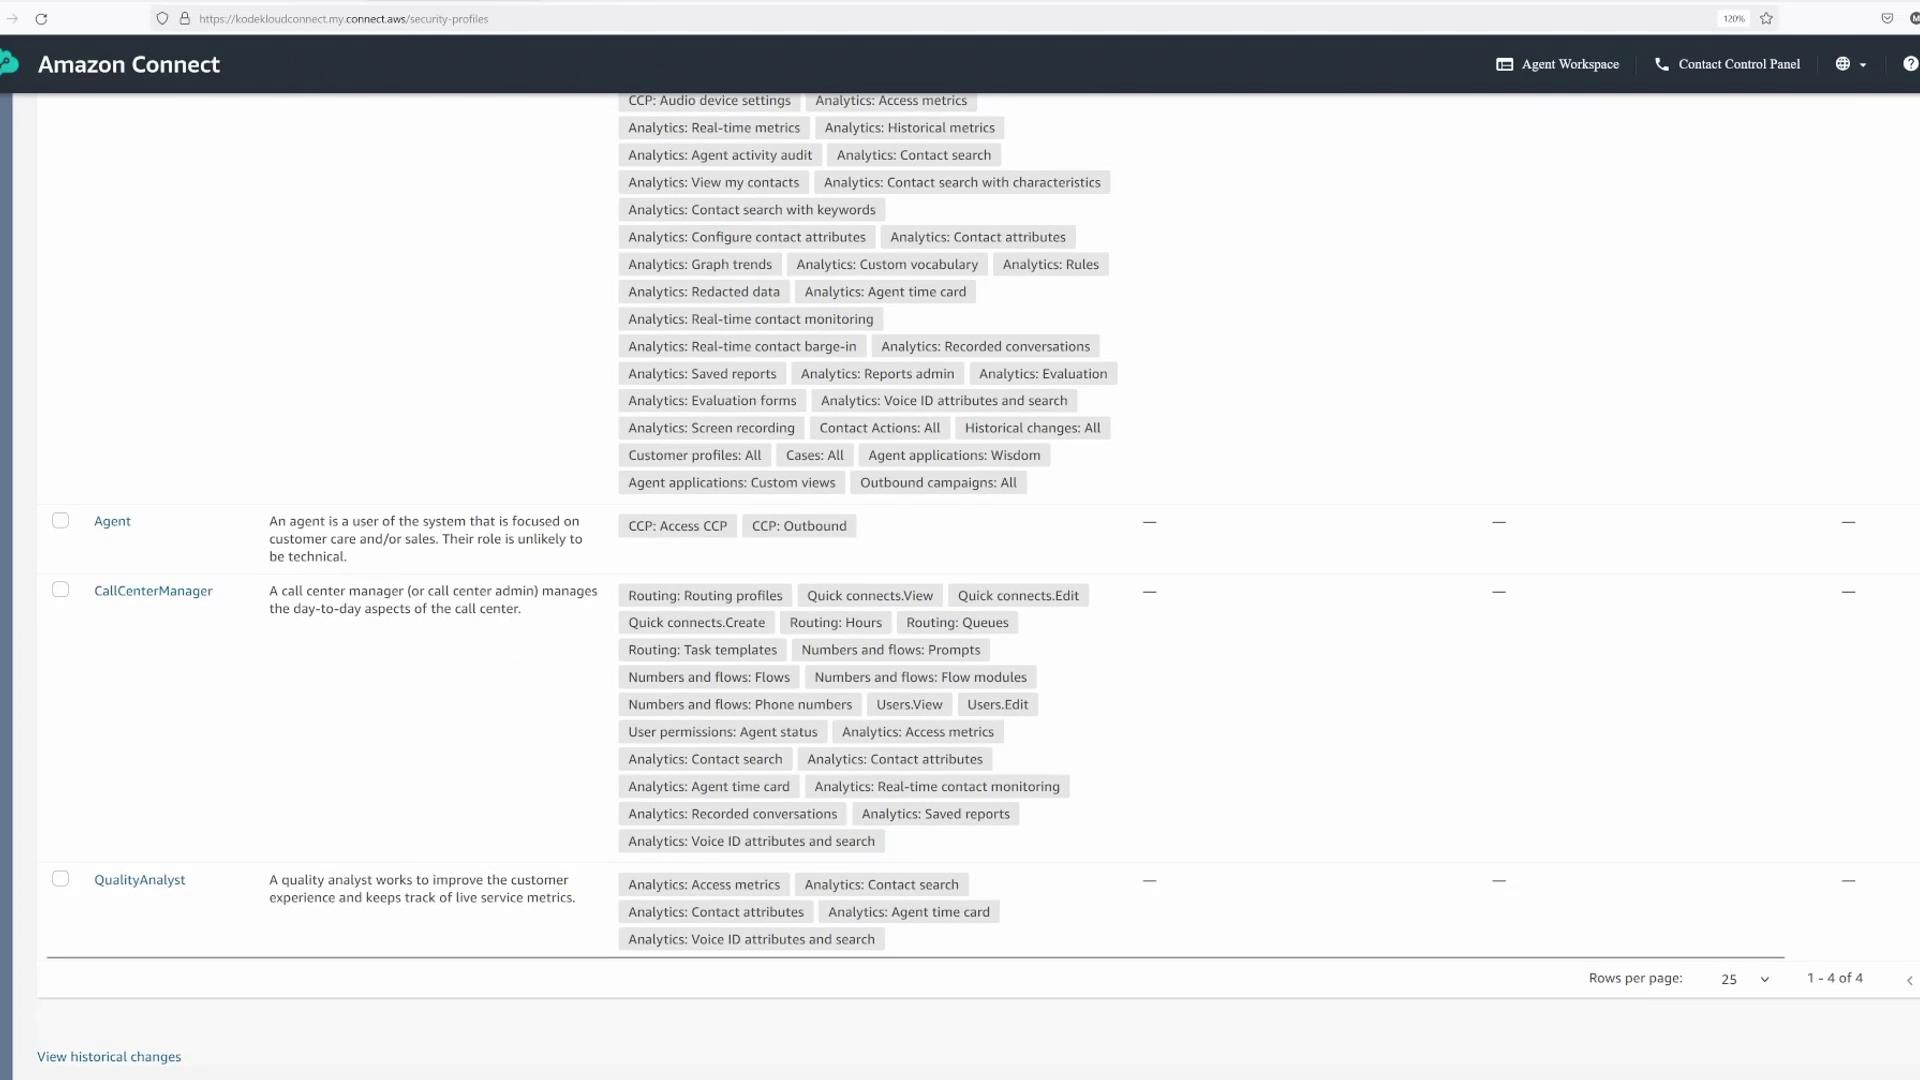
Security profiles determine role-based permissions for agents and managers.- Navigate to Users > User security profiles.
- Observe the available profiles such as Admin, Agent, Call Center Manager, and Quality Analyst.
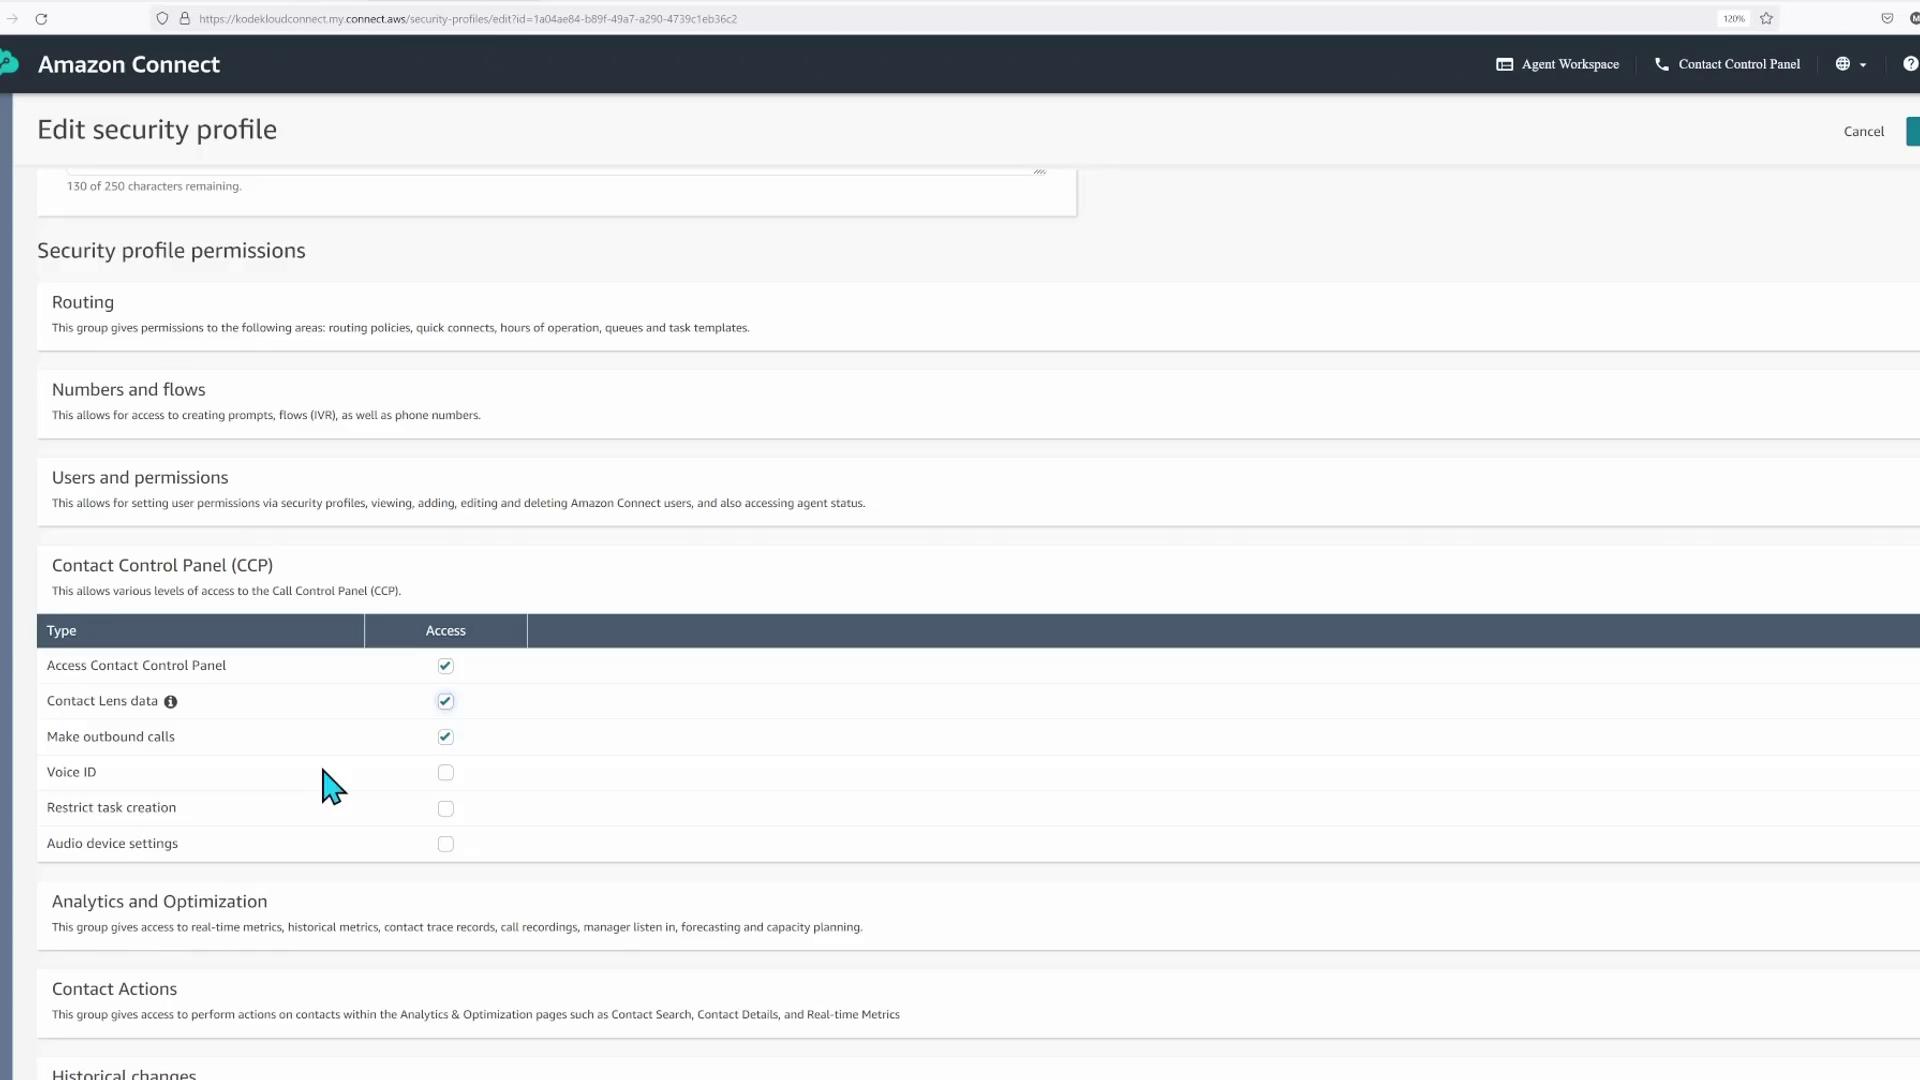
- Click the Agent profile and examine the permissions under the Contact Control Panel. Confirm that contact lens data, Customer Profiles, Agent Applications, and Wisdom settings are properly enabled.
- Click Save after confirming the settings.
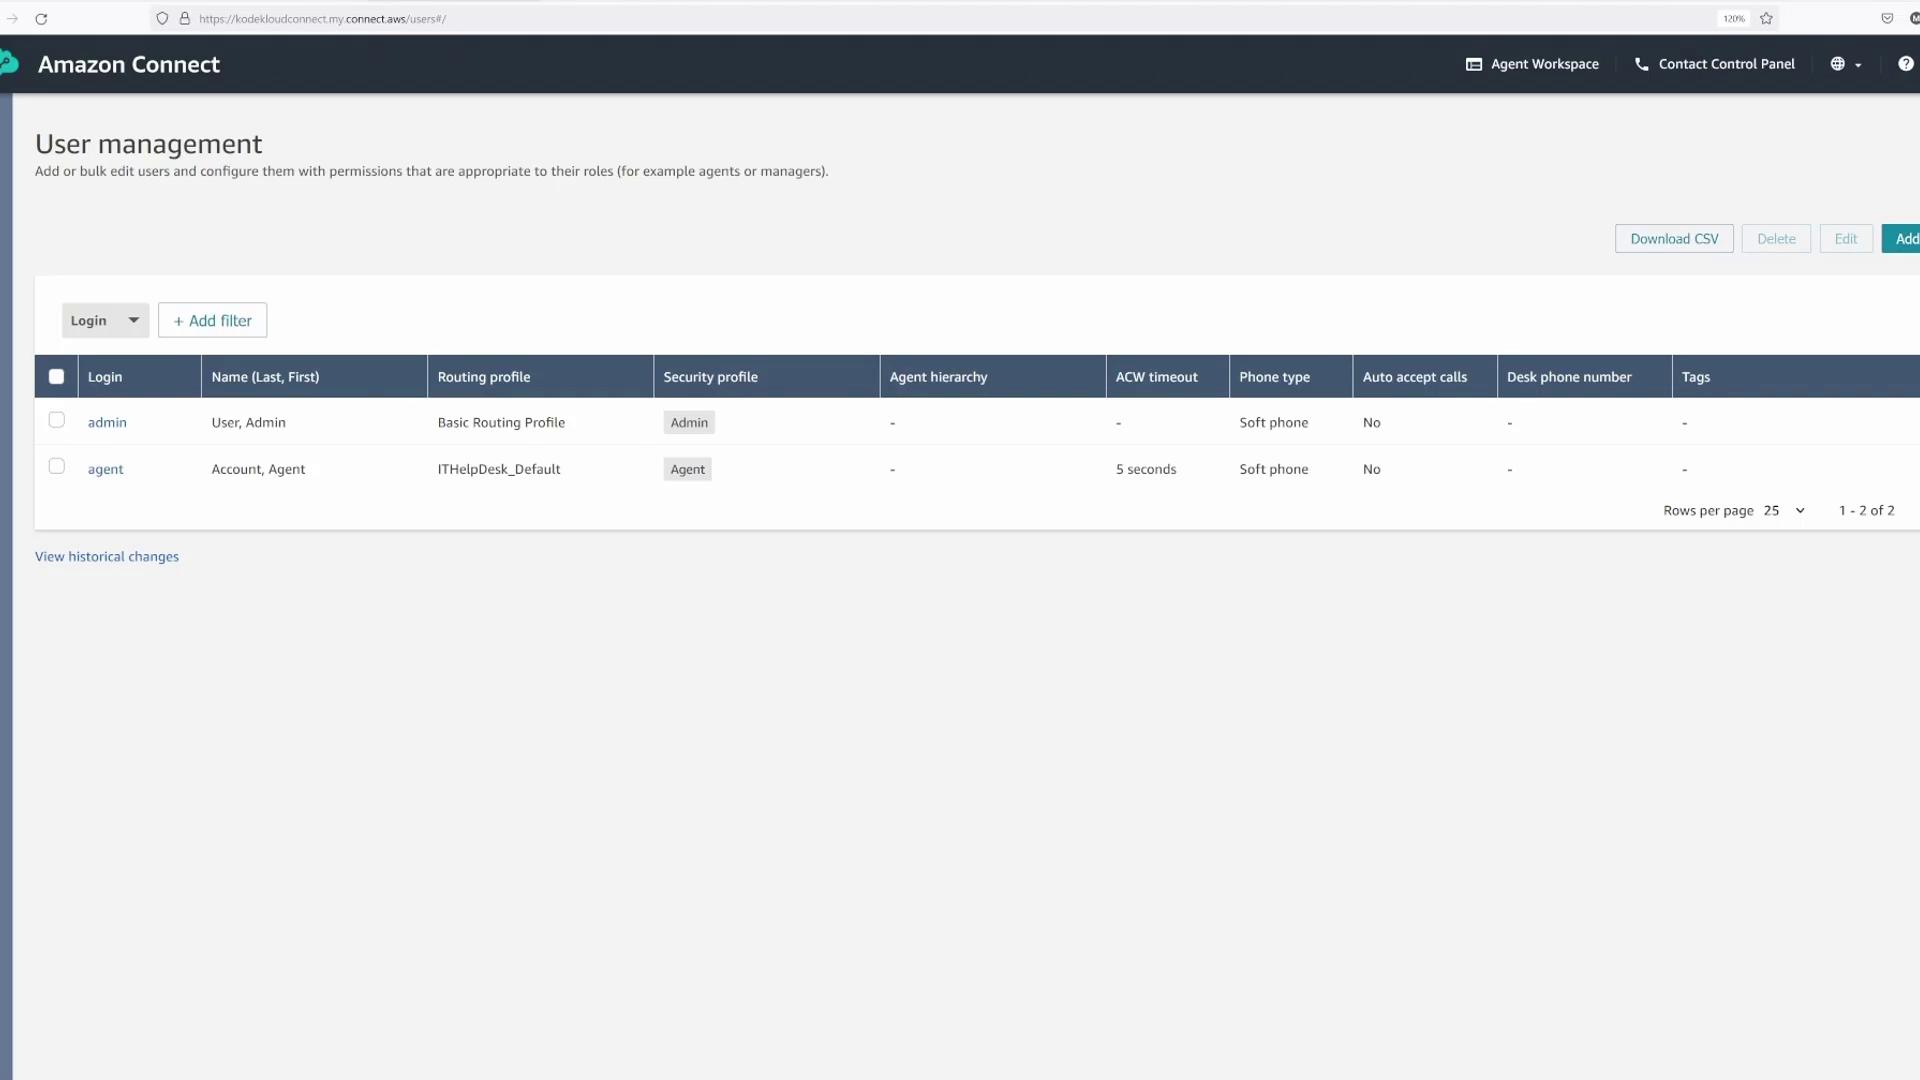
Creating Users
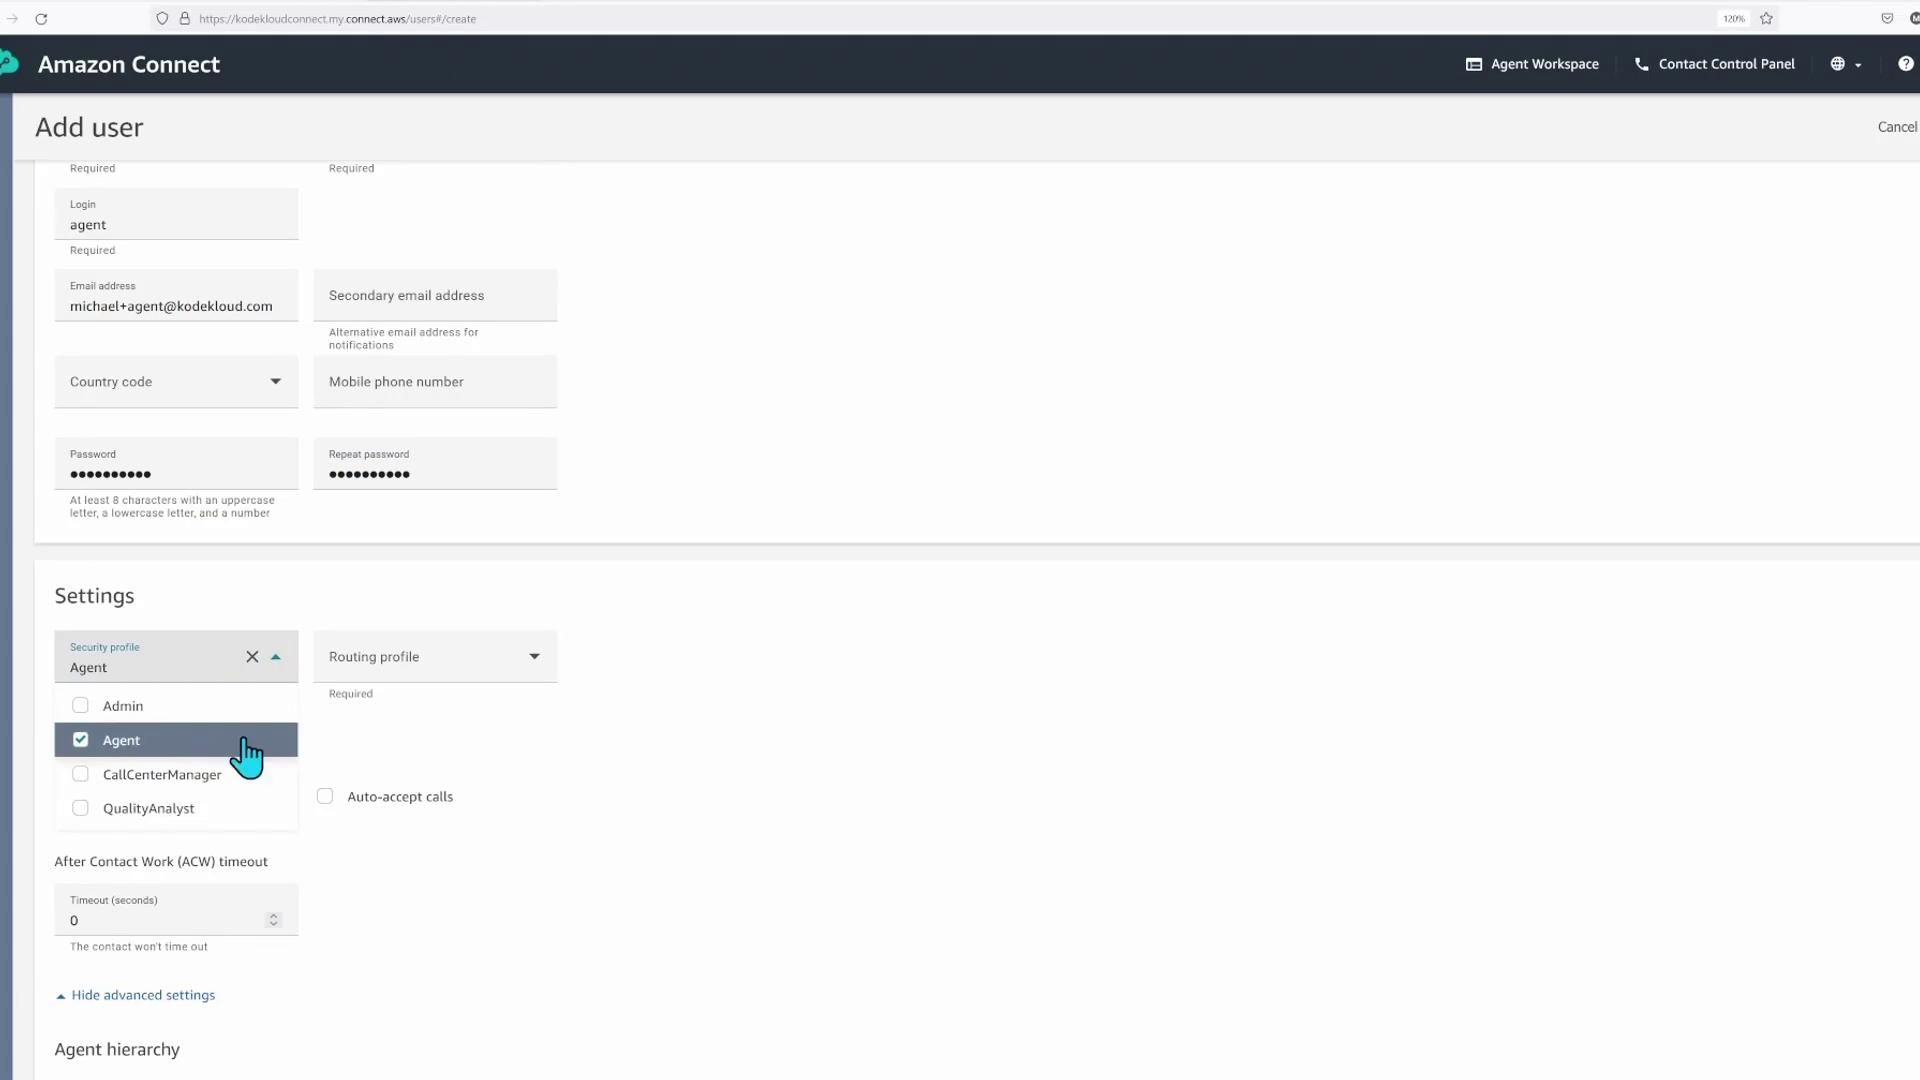
Create a user to serve as an agent with the necessary profiles and settings.- Navigate to Users > User management and click Add user.
- Enter the agent’s login details (for example, login: “agent” and email: “michaelplusagent@kodekloud.com”). Note that the plus-sign in the email is used for labeling only.
- If a phone number is not required, skip or remove it.
- Assign the “Agent” security profile and the IT helpdesk routing profile created earlier.
- Configure additional settings such as softphone usage and after-call work timeout (e.g., 5 seconds). Remember, setting the timeout to zero will keep the call active until manually closed.
- Click Save.
Creating Contact Flows
Contact flows manage the handling of incoming calls. This example covers two flows: a “Transfer to Queue” flow and a main contact flow.Transfer to Queue Flow
- Navigate to Routing > Flows and click Create flow.
- Name the flow (e.g., “Transfer to Queue Workflow”) and add an optional description.
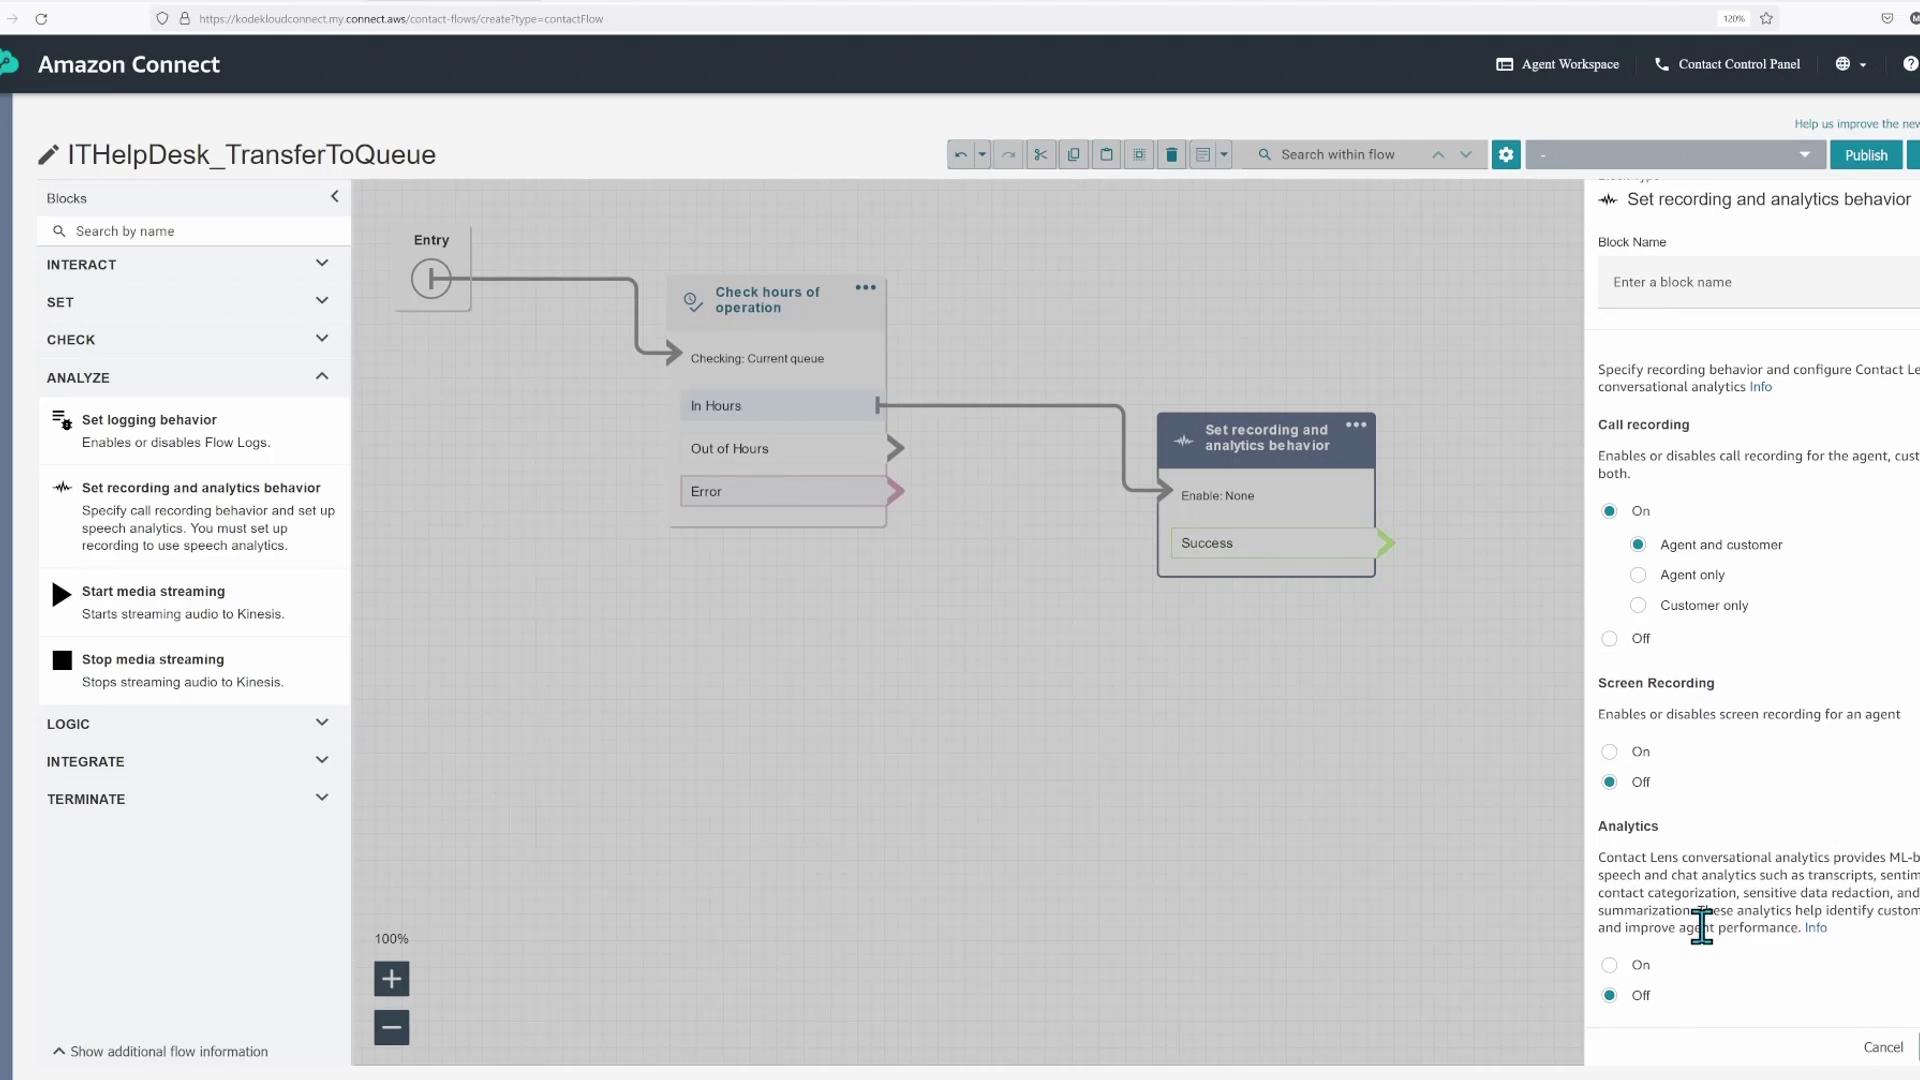
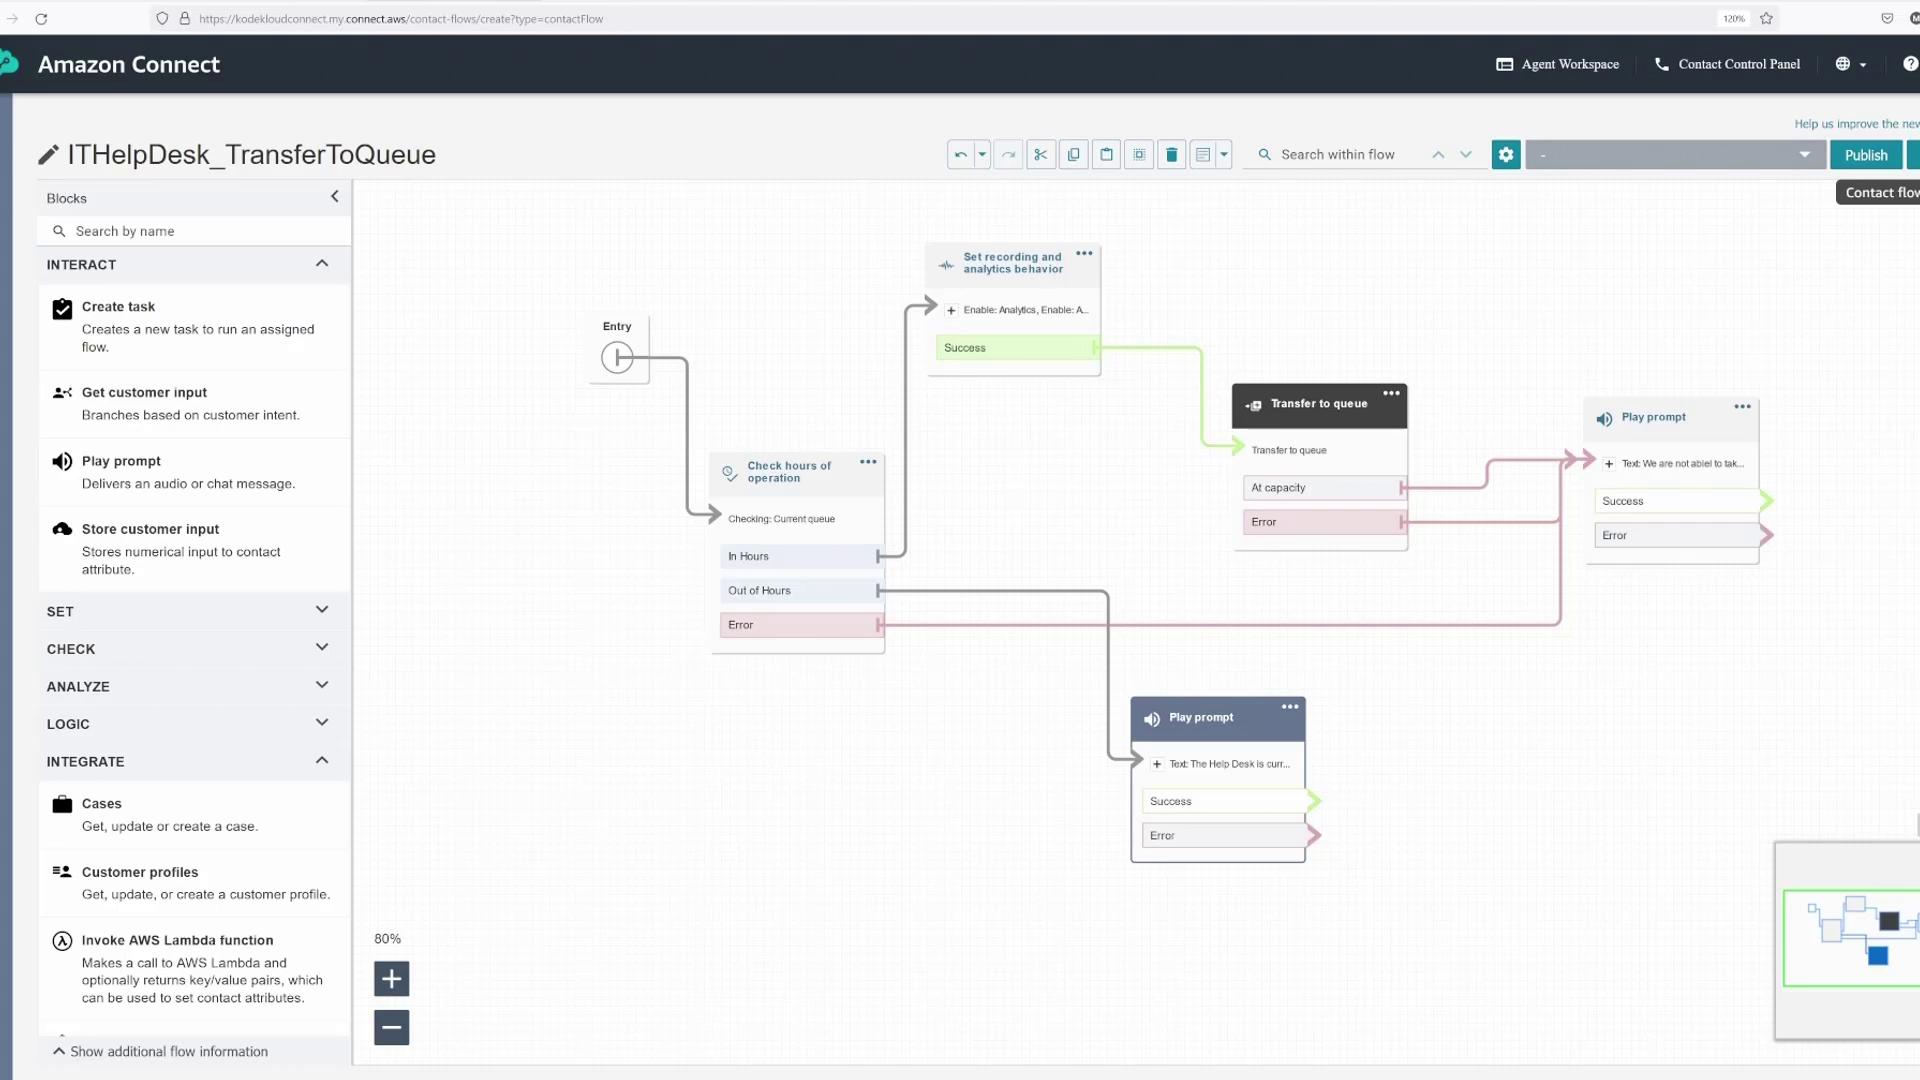
- In the flow designer, follow these steps:
- Check Hours of Operation:
Place a Check Hours of Operation block, connecting it to the Entry block. - Set Recording and Analytics:
Add a Set Recording and Analytics Behavior block. Configure it to enable call recording for both the agent and customer, and enable Contact Lens conversational analysis, speech analytics, and chat analytics. Connect the “in-hours” branch from the previous block.
- Check Hours of Operation:
- Transfer to Queue:
Add a Transfer to Queue block linked to the success branch of the recording block. - Play Prompt:
Include a Play Prompt block with text-to-speech configured with a message such as “If we are not able to take your call right now, please try again later.” Ensure error and capacity branches from the recording block also route to this prompt. - Disconnect:
Optionally, add a Disconnect block after handling the transfer.
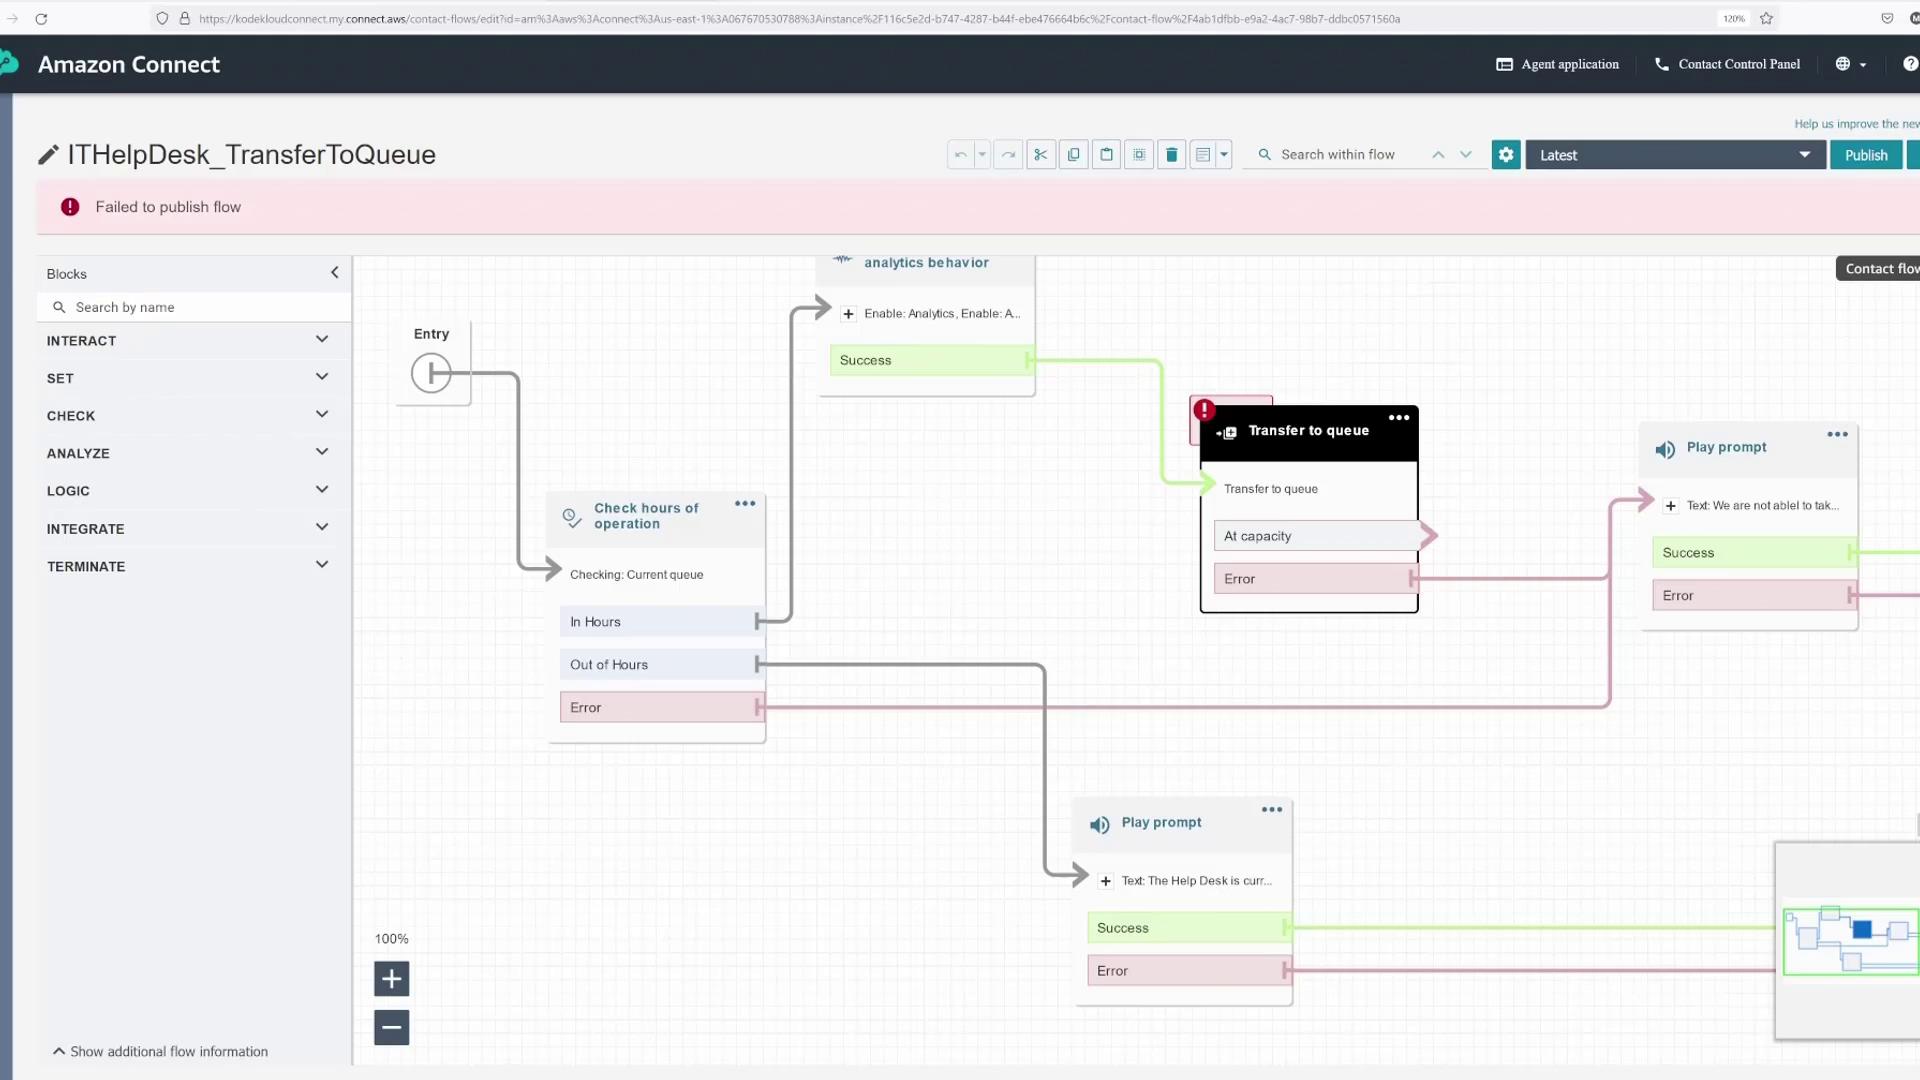
- Review all branch connections, then click Save and Publish.
Main Contact Flow
- Navigate to Routing > Flows and click Create flow.
- Name the flow (e.g., “Help Desk Main Flow”) and add an optional description.
- In the flow designer, complete these steps:
- Set Logging Behavior:
Place a Set Logging Behavior block in the Analyze section and connect it to the Entry block. - Set Voice:
Insert a Set Voice block and choose the default voice (for example, Joanna for US English).
- Set Logging Behavior:

- Play Welcome Prompt:
Add a Play Prompt block with text-to-speech configured to deliver a welcome message (e.g., “Welcome to the Blunder Muffin IT Help Desk.”) and connect it to the Set Voice block. - Set Working Queue and Transfer:
Insert a Set Working Queue block and select the tech support queue. Then, add a Transfer to Queue block that uses this working queue. (If issues occur with the dropdown, ensure that the transfer flow is published.)
- Make sure the flow ends correctly with termination and disconnect, then click Save and Publish.
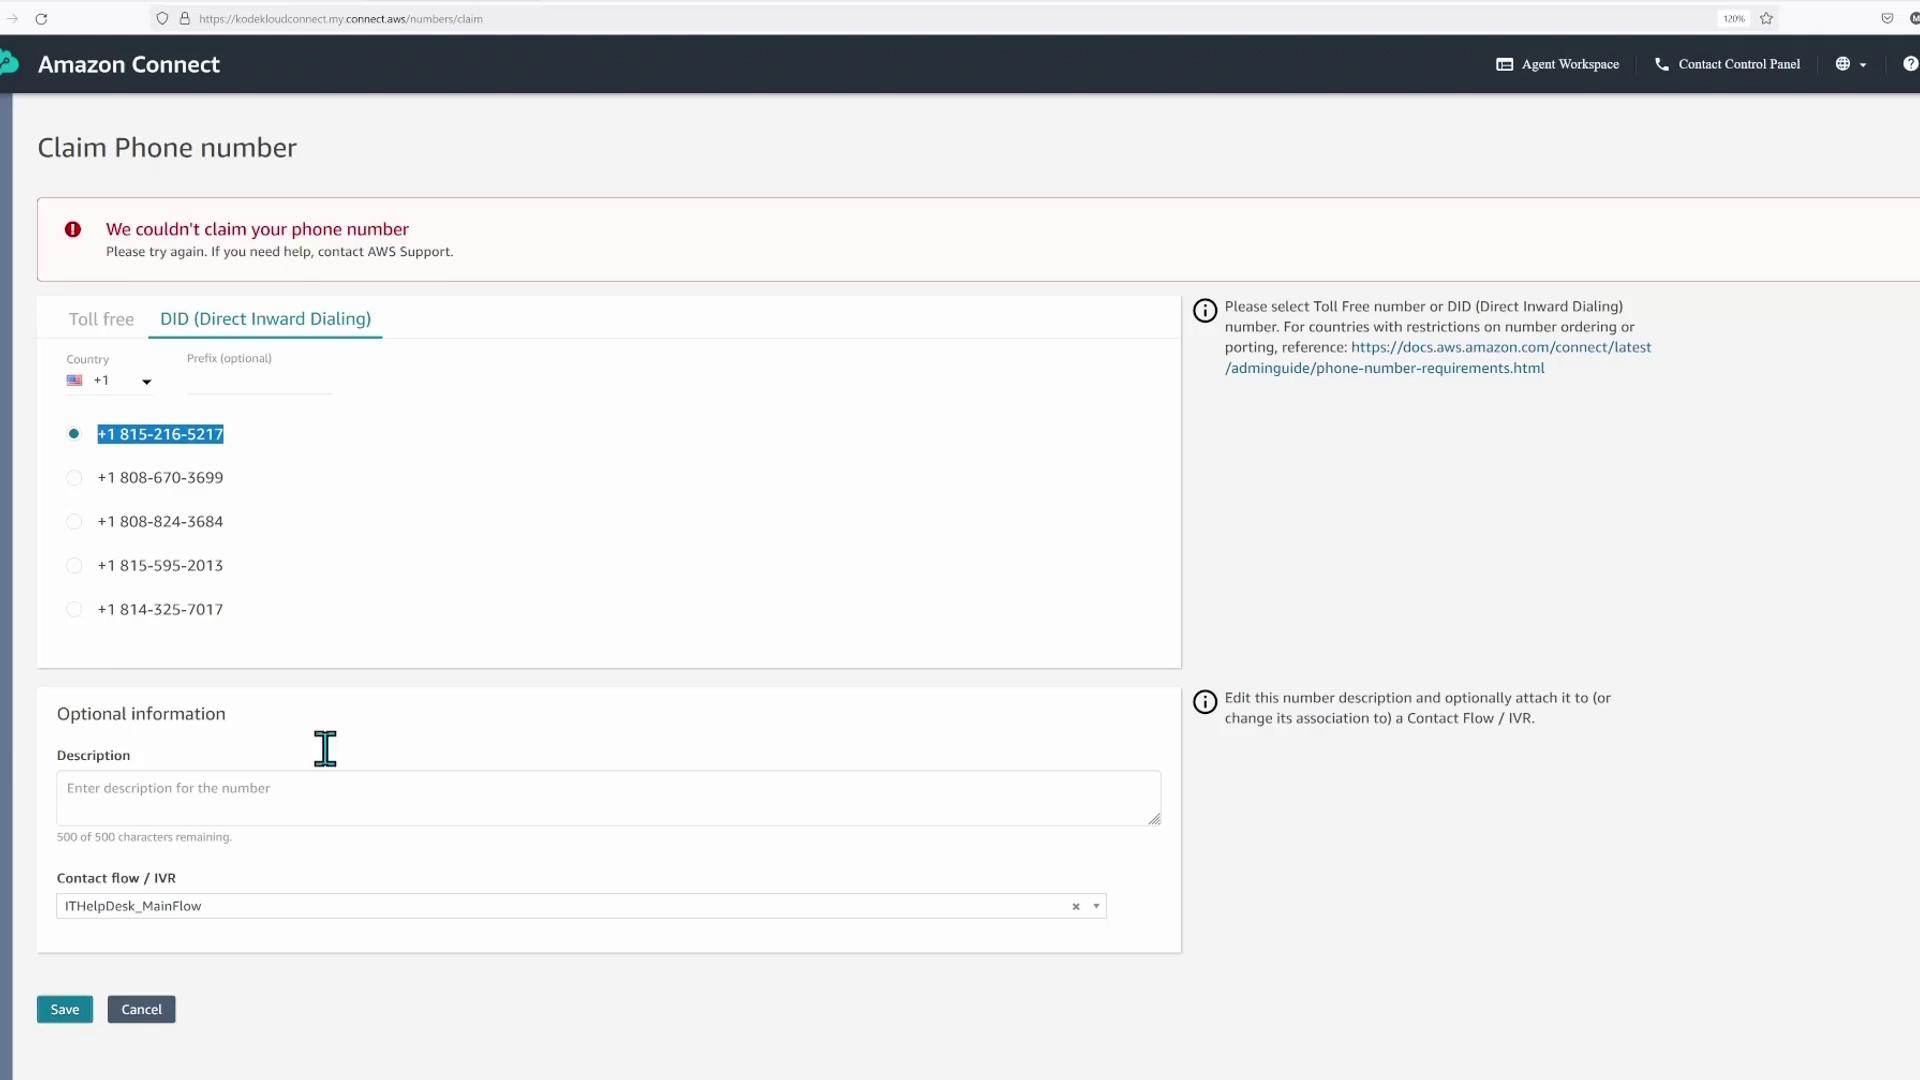
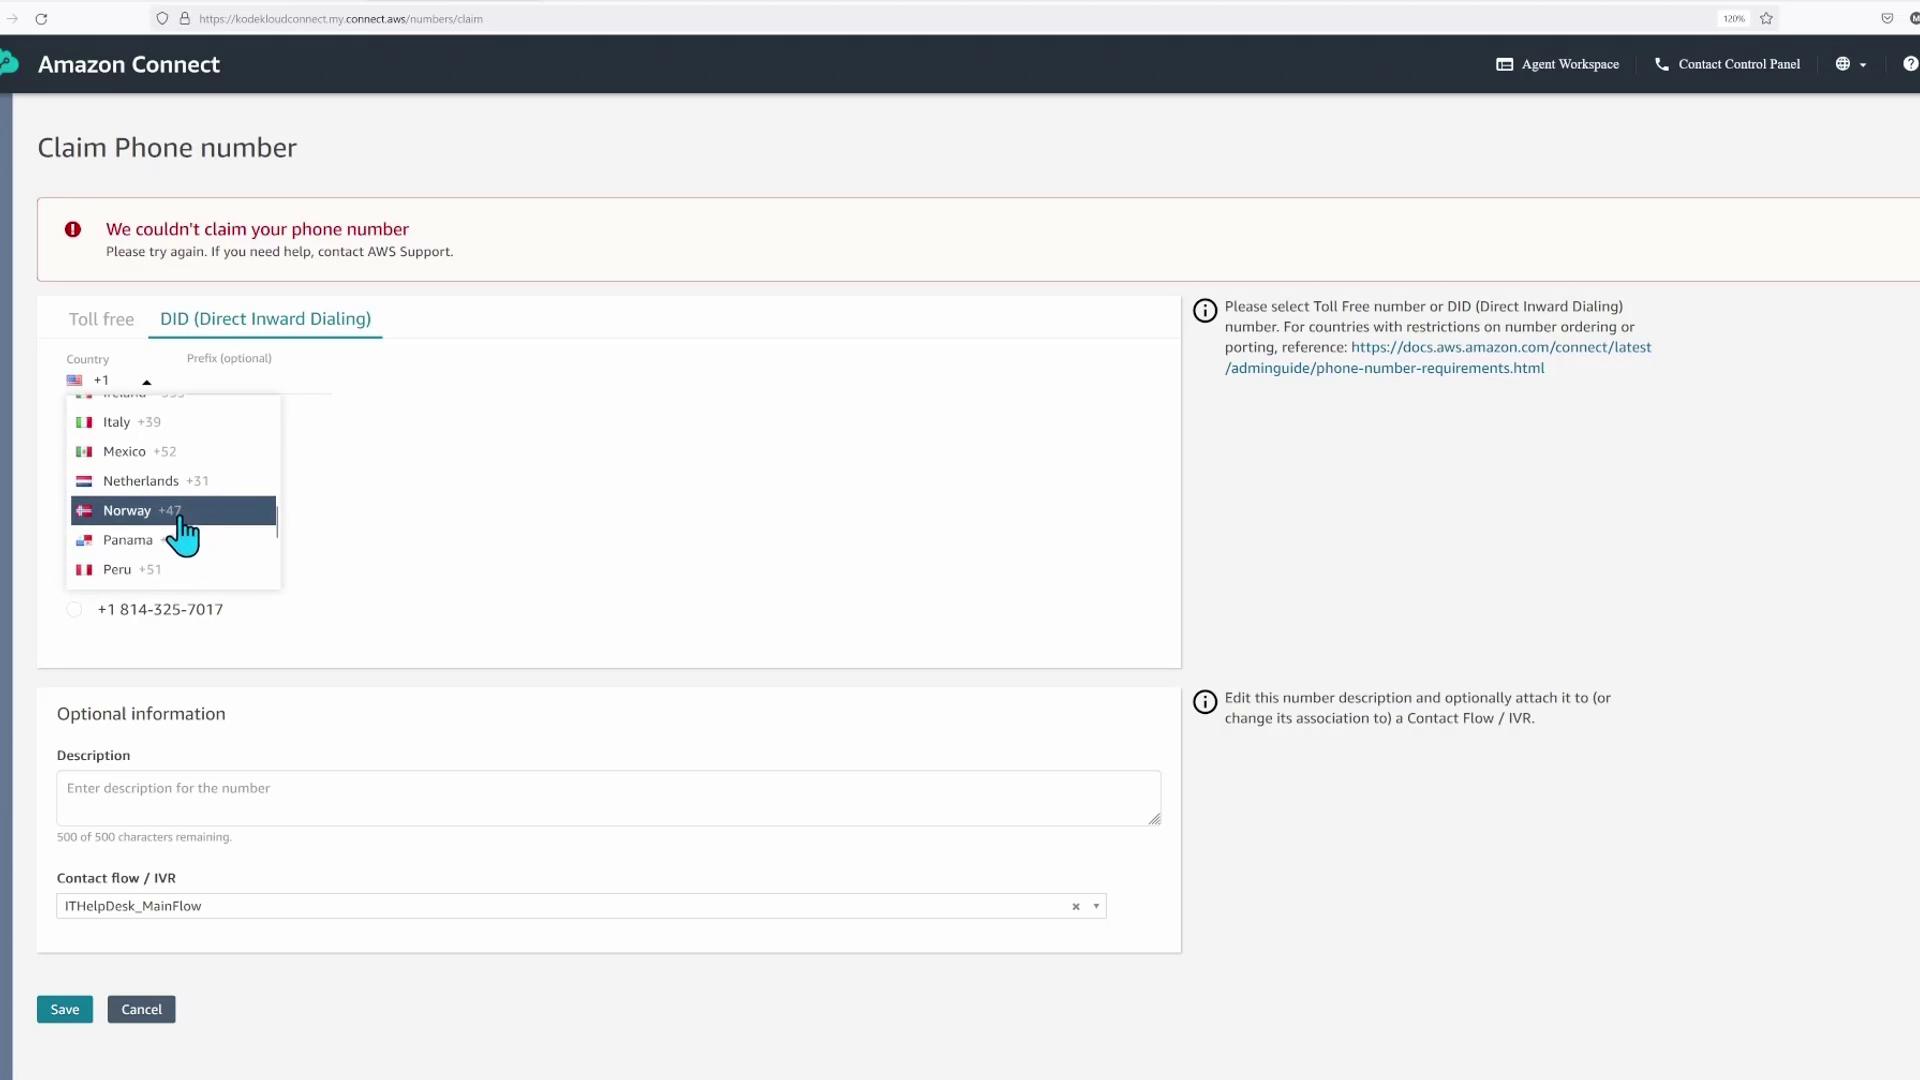
Claiming a Phone Number
To receive inbound calls, you need to claim a phone number for your Amazon Connect instance.- In the navigation menu, select Channels > Claim a phone number.
- Choose the DID (Direct Inward Dial) tab.
- Select the United States (or another country of your choice) and, in the Flow IVR field, select your main contact flow.
- Attempt to claim the number. If you encounter an error (for example, due to country prefix or business address requirements), try selecting another country (such as Mexico) if available.
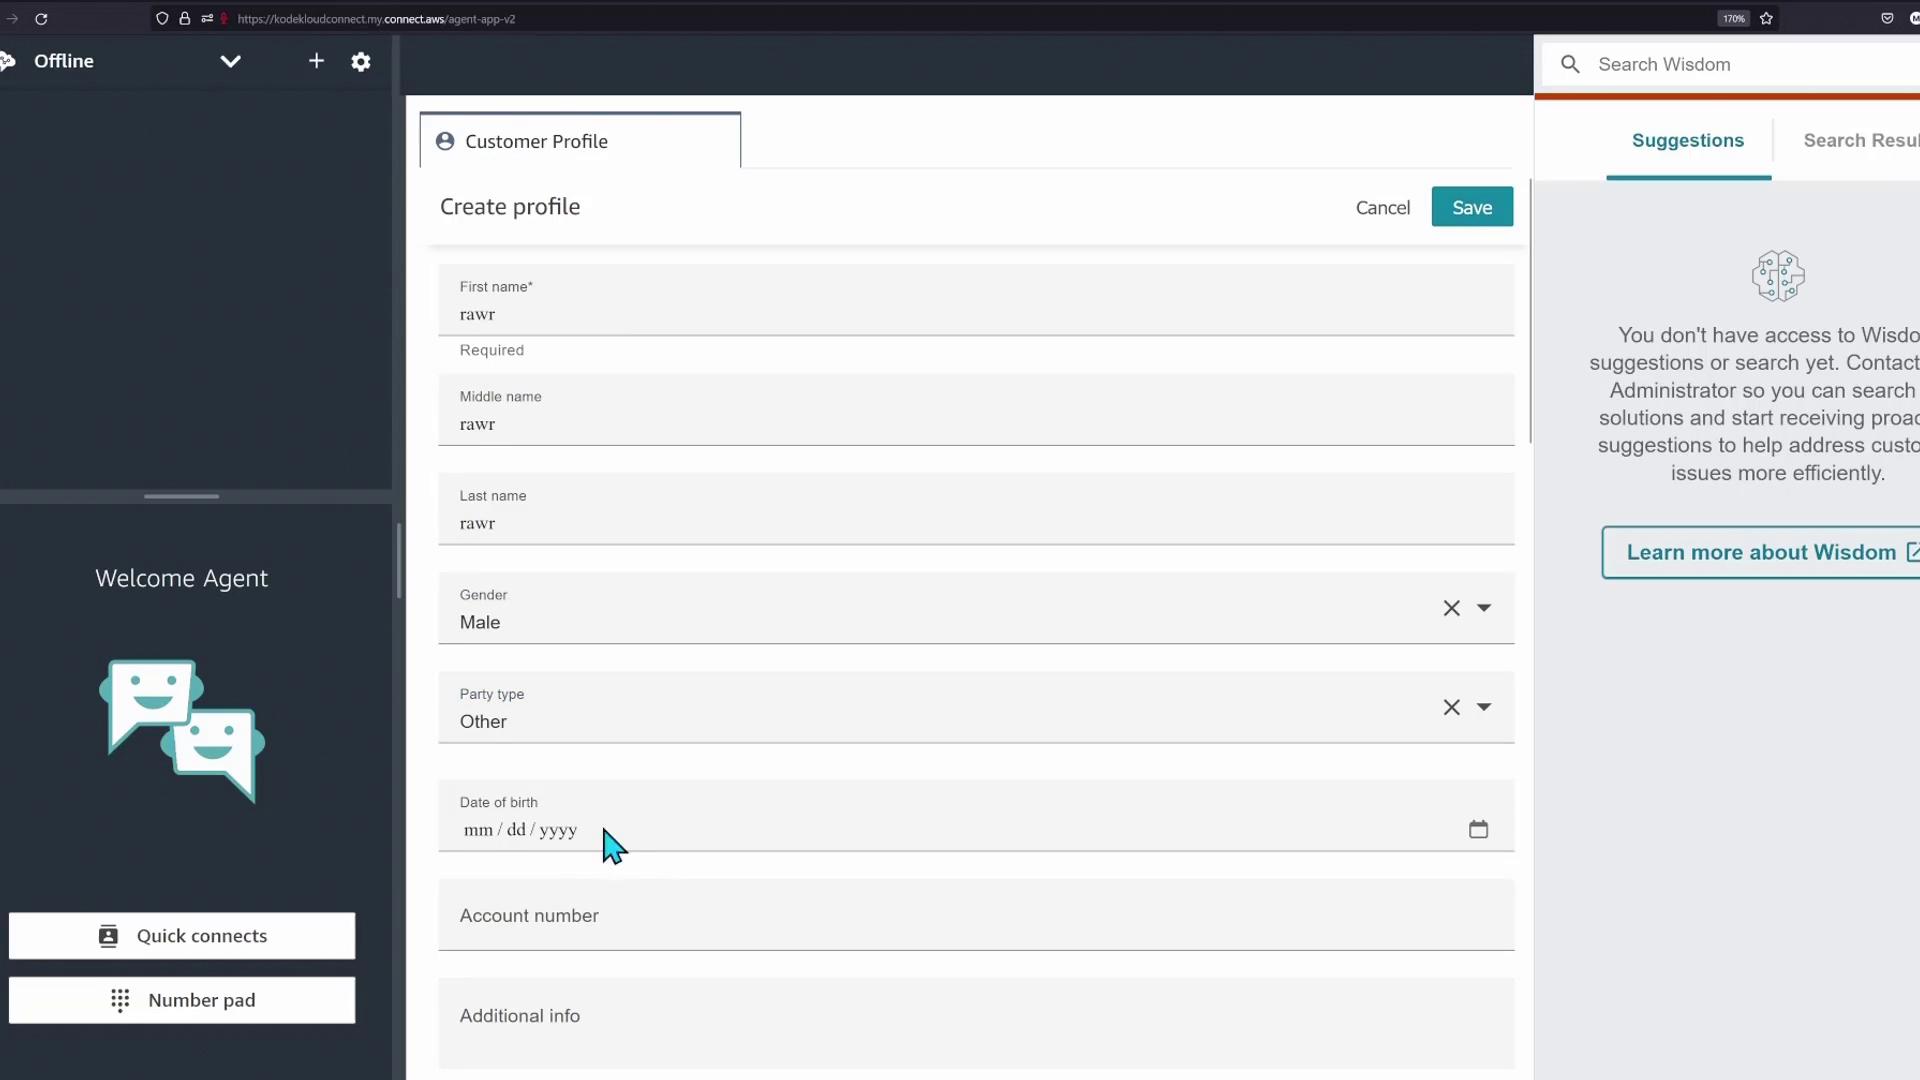
Testing the Configuration
- Open a private browser window and navigate to your instance URL.
- Log in as an agent using the previously created credentials.
- Allow access to your microphone when prompted.
- Create a caller profile by clicking your profile button and entering details such as name, gender, and date of birth, then click Save.
- Use a cell phone to dial the claimed phone number (for example, 5255-9156-9300). If you call outside operating hours (after 5 PM), you should hear a message similar to:
“Welcome to the Flutter Midland IT Help Desk. The help desk is currently closed. Working hours are Monday to Friday from 8 AM…”
This confirms that your hours of operation settings and contact flows are working as configured.
Test both in-hours and out-of-hours scenarios to ensure accurate routing and messaging are in place.
Conclusion
This demo provided an in-depth overview of setting up a basic Amazon Connect virtual contact center. We covered:- Instance creation and telephony configuration
- Establishing hours of operation and creating queues
- Configuring routing profiles and security permissions
- Building and publishing contact flows
- Claiming a phone number and testing the setup