AWS Cloud Practitioner CLF-C02

Technology Part Two

AWS App Integration Demo

Welcome back, Cloud Practitioners. In this demo, we will show you how to integrate AWS Simple Notification Service (SNS) with AWS Simple Queue Service (SQS) to efficiently distribute messages across multiple endpoints.

SNS is ideal for app-to-app and app-to-person messaging, whereas SQS provides a buffer for transactions between distributed systems.

The image shows the Amazon SNS dashboard with a single topic named "AiStory-story-generated" listed under the Topics section.

The image is a webpage for Amazon Simple Notification Service (SNS), highlighting features like A2A and A2P messaging, with one million free requests per month.

SQS acts as a message queue to store messages until your backend system is ready to process them.

The image is a webpage for Amazon Simple Queue Service (SQS), highlighting features like message queuing, free tier benefits, and key service advantages.


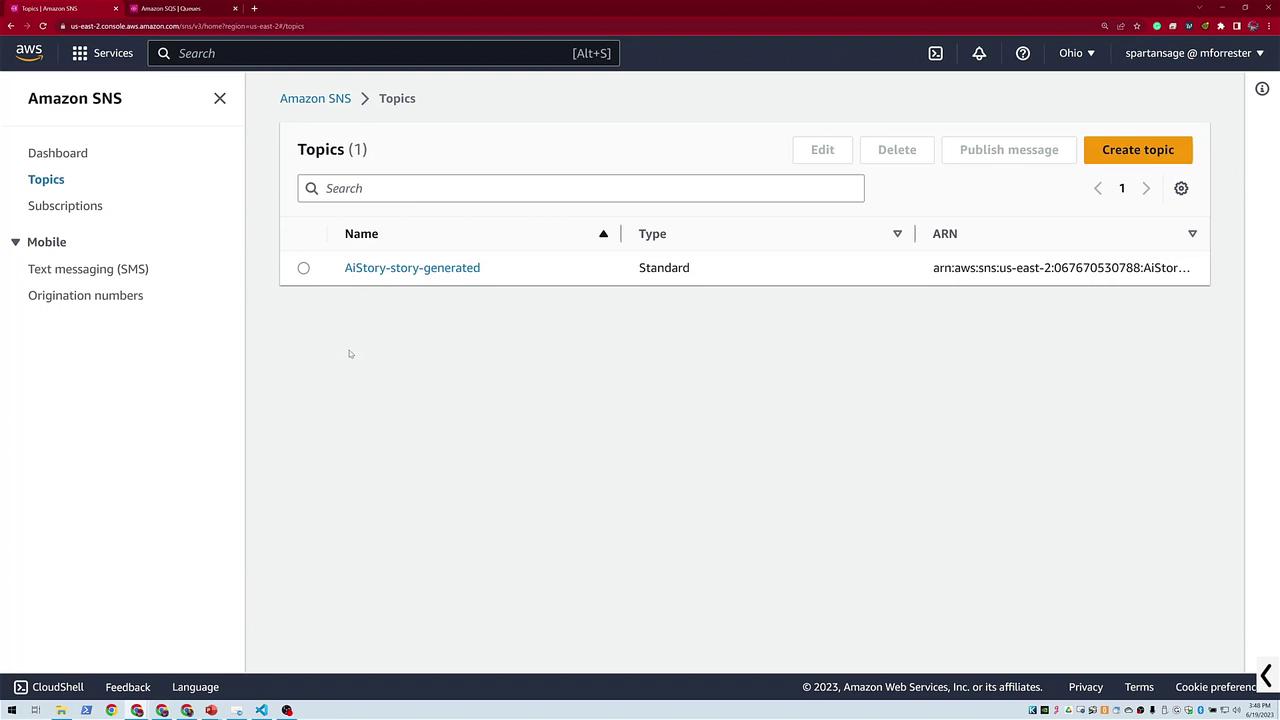
Step 1. Create an SNS Topic

In this demo, we first create an SNS topic. Make sure you are operating in the Ohio region (as indicated in the upper right-hand corner) and notice the existing topic along with three existing subscriptions. Now, click the "Create topic" button to start a new topic setup.

The image shows an Amazon SNS dashboard with details about resources, topics, and subscriptions, along with an overview of application-to-application messaging features.

Select Standard (not FIFO) when prompted. Name the topic "My Demo Topic" and skip the display name customization. Once created, the topic's ARN (Amazon Resource Name) will be displayed, which you will need for later steps.

The image shows an AWS SNS interface for creating a topic, offering FIFO and Standard options, with fields for topic name and optional display name.

After creating "My Demo Topic," verify that it appears as a standard topic with its corresponding ARN.

The image shows an Amazon SNS console page for a topic named "MyDemo," displaying details like ARN, type, and subscription options, with no current subscriptions.


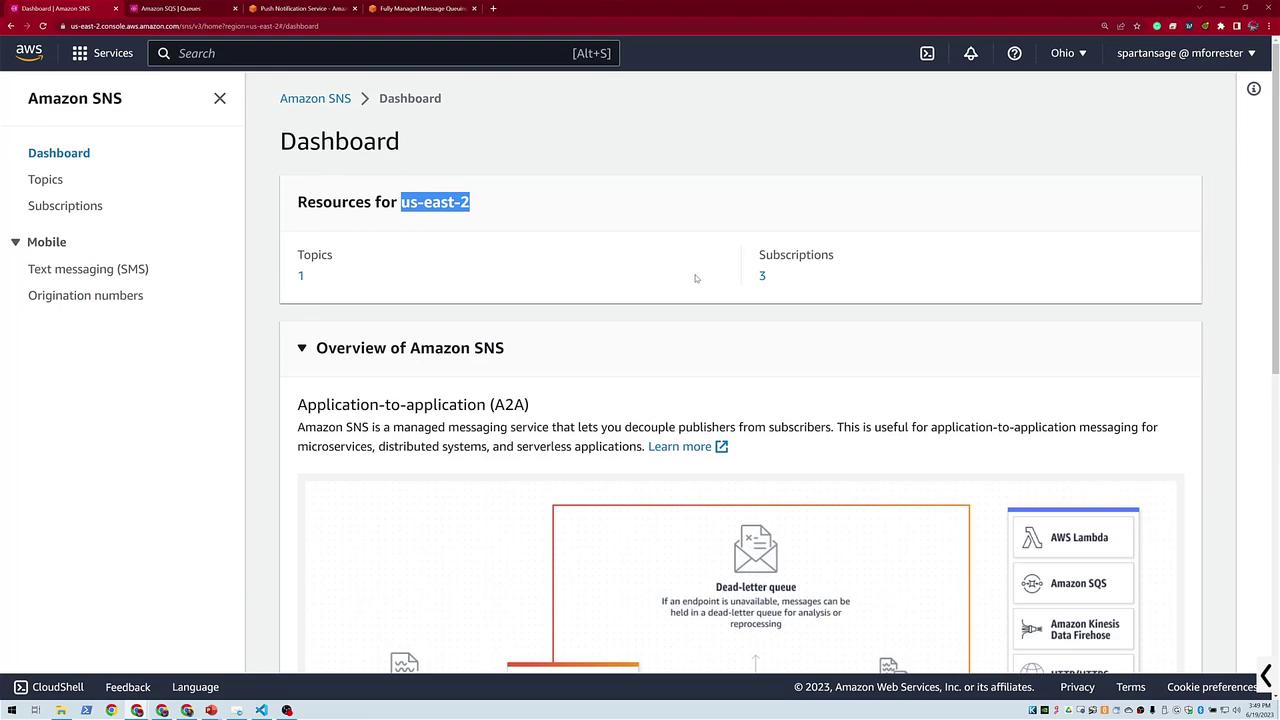
Step 2. Add Subscriptions to Your SNS Topic

Email Subscription

  1. Click on the Subscription button.
  2. Enter your email address (for example, Michael Forrester at KodeKloud.com) and create the subscription.

The image shows an AWS SNS subscription creation page, with fields for Topic ARN, Protocol, and Endpoint, where an email address is entered.

SQS Queue Subscription

Next, subscribe an SQS queue to the SNS topic:

  1. Return to the topic page.
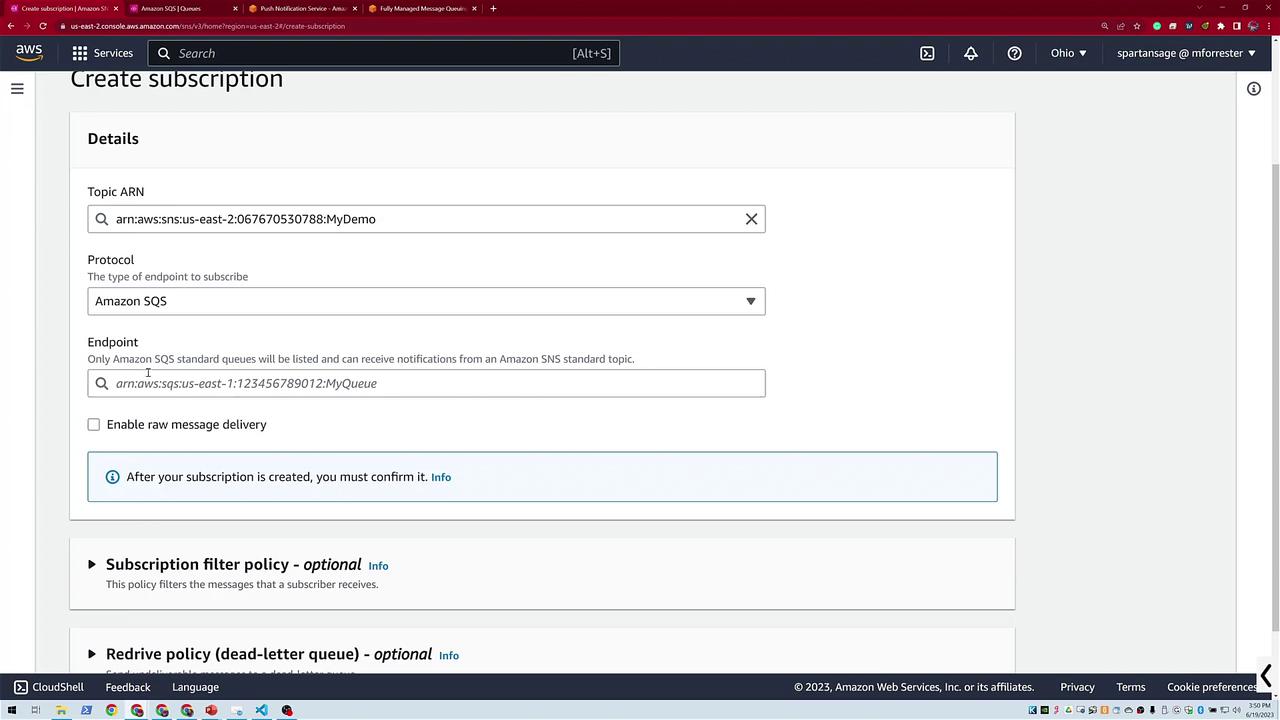
  2. Choose to create another subscription and select Amazon SQS as the endpoint.
  3. When prompted, paste the ARN of your SQS queue.

The image shows an AWS console screen for creating a subscription, detailing Topic ARN, protocol, and endpoint settings for Amazon SQS.

A confirmation message should confirm that the subscription request has been received. Verify the subscription details including the topic name and your account number.

The image shows an AWS Simple Notification Service confirmation page, indicating a successful subscription with an option to unsubscribe.


Step 3. Set Up an SQS Queue and Complete the Integration

Create the SQS Queue

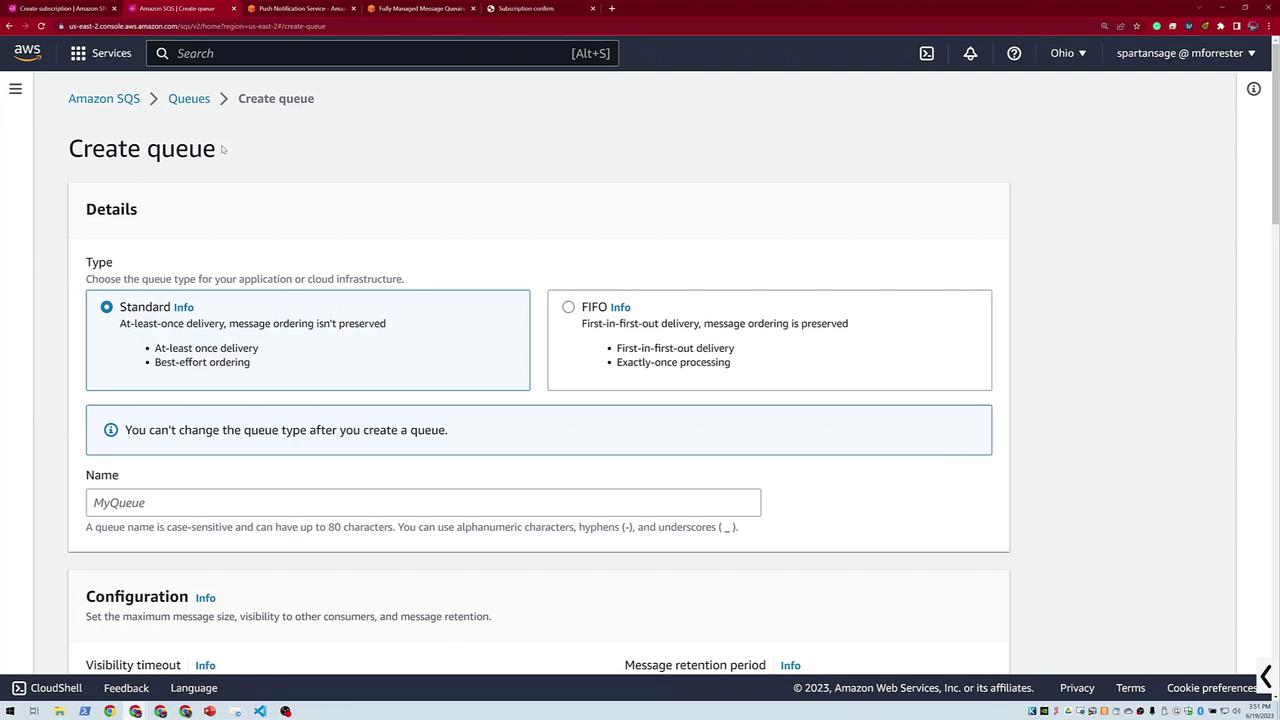
  1. In the SQS console, create a new standard queue named My Simple Queue using default settings. Although options like visibility timeout, delivery delay, and encryption are available, you can leave them as is for this demo.

The image shows the Amazon SQS interface for creating a queue, offering options for Standard or FIFO types, with fields for naming and configuration settings.

  1. Copy the queue's ARN and use it to complete the SNS subscription process.
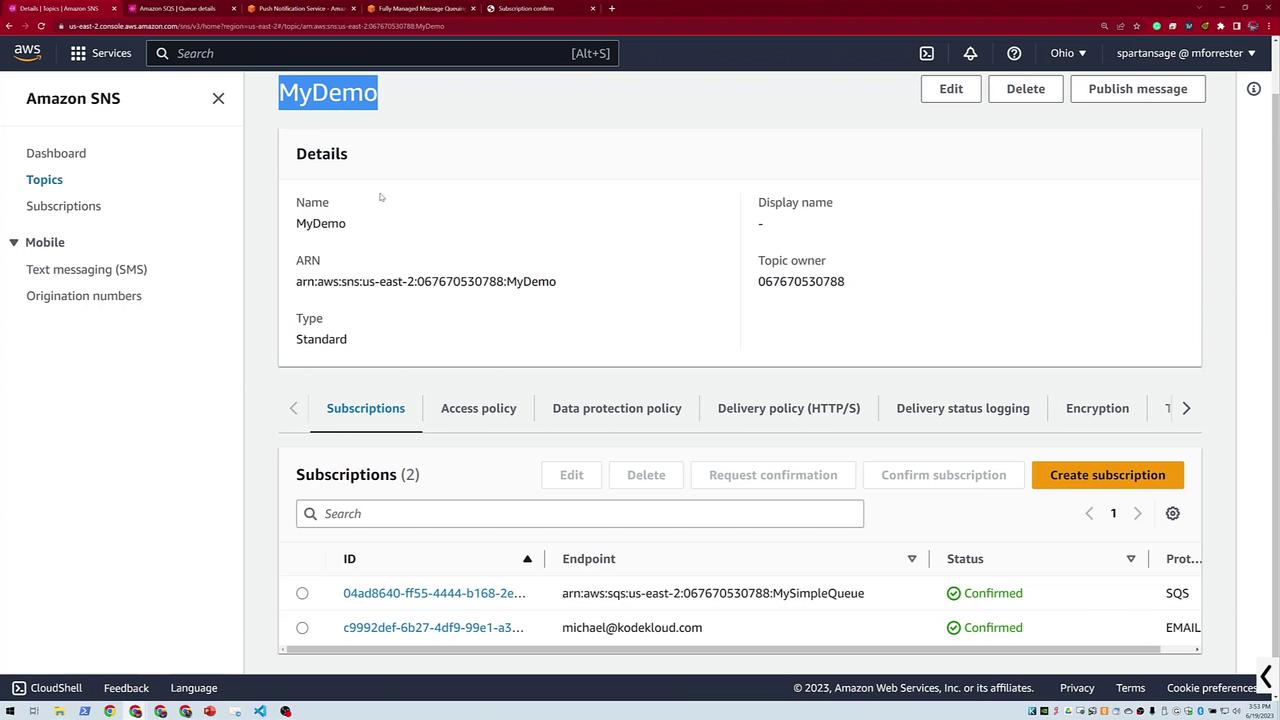
  2. Enable raw message delivery and then click Create Subscription. Now, "My Demo Topic" will have two subscriptions: one for email notifications and one for the SQS queue. When a new message is published to the topic, both endpoints will receive it.

The image shows an Amazon SNS dashboard with details of a topic named "MyDemo," including subscriptions and their statuses.

Update the SQS Queue's Access Policy

Before sending any messages, update the SQS access policy to allow SNS to send messages to your queue.

  1. In the SQS console, locate the Access Policy section.
  2. Replace the default IAM principal with a service declaration for SNS.

The initial policy might look like this:

{
  "Version": "2012-10-17",
  "Id": "_default_policy_ID",
  "Statement": [
    {
      "Sid": "_owner_statement",
      "Effect": "Allow",
      "Principal": {
        "AWS": "arn:aws:iam::067670530788:root"
      },
      "Action": "SQS:*",
      "Resource": "arn:aws:sqs:us-east-2:067670530788:MySimpleQueue"
    }
  ]
}

An incorrect policy modification might resemble the following (do not use this):

{
  "Version": "2012-10-17",
  "Id": "__default_policy_ID",
  "Statement": [
    {
      "Sid": "_owner_statement",
      "Effect": "Allow",
      "Principal": {
        "Service": "arn:aws:sns:us-east-2:867670530788:MyDemo"
      },
      "Action": "SQS:*",
      "Resource": "arn:aws:sqs:us-east-2:867670530788:MySimpleQueue"
    }
  ]
}

NOTE: Correct Policy Configuration
Update the policy to grant SNS exclusive permission using its service principal:
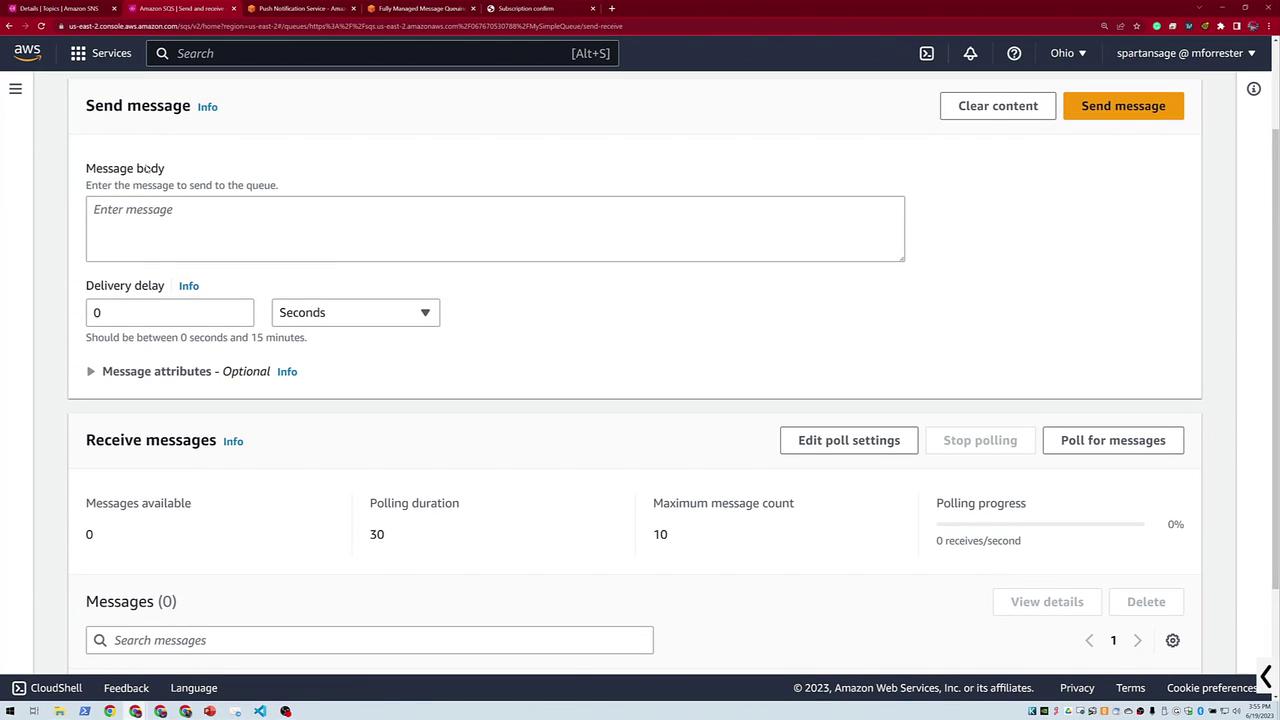
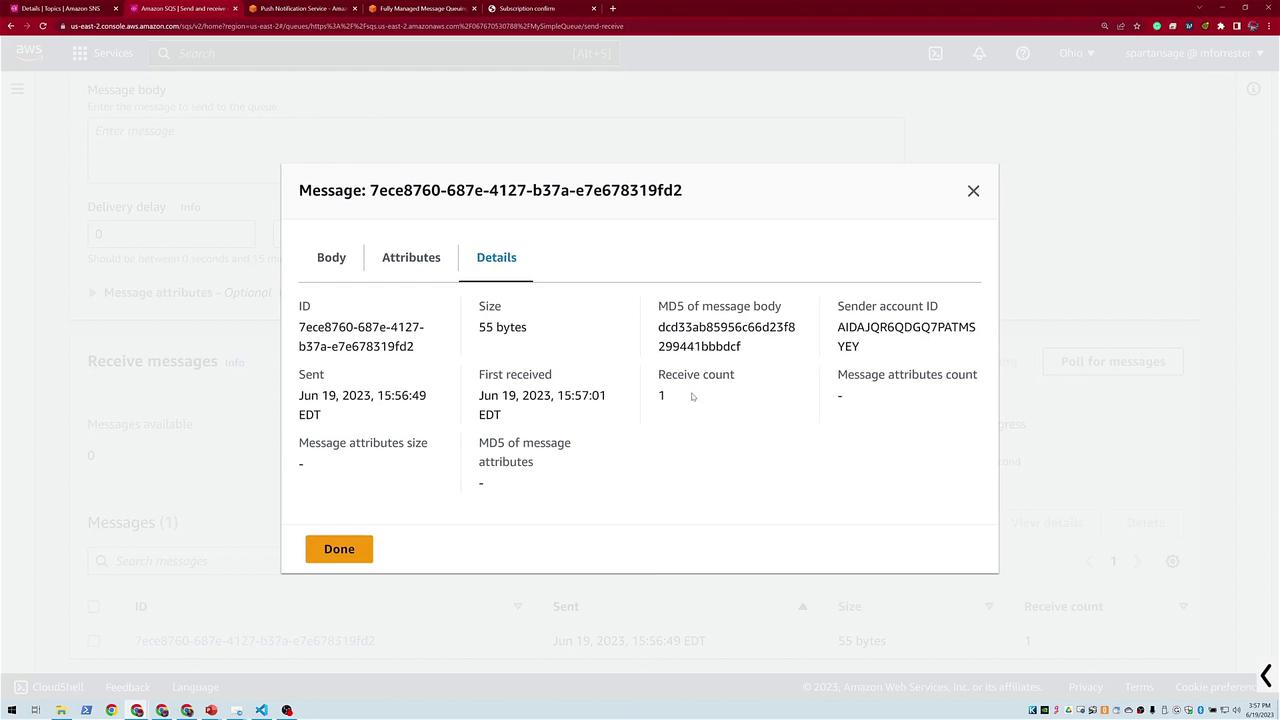
{
  "Version": "2012-10-17",
  "Id": "__default_policy_ID",
  "Statement": [
    {
      "Sid": "__owner_statement",
      "Effect": "Allow",
      "Principal": {
        "Service": "sns.amazonaws.com"
      },
      "Action": "SQS:*",
      "Resource": "arn:aws:sqs:us-east-2:067670530788:MySimpleQueue"
    }
  ]
}

Save the updated policy. With this configuration, SNS is now authorized to send messages to your SQS queue.

  1. Navigate to your SQS queue and use the "Send and receive messages" option to verify that messages are being received. Initially, the queue may show no messages because it uses a sliding mechanism (approximately a 30-second delay) while polling for new messages.

The image shows an Amazon Web Services (AWS) interface for sending and receiving messages, with options for message body, delivery delay, and polling settings.


Step 4. Test the Integration by Publishing a Message

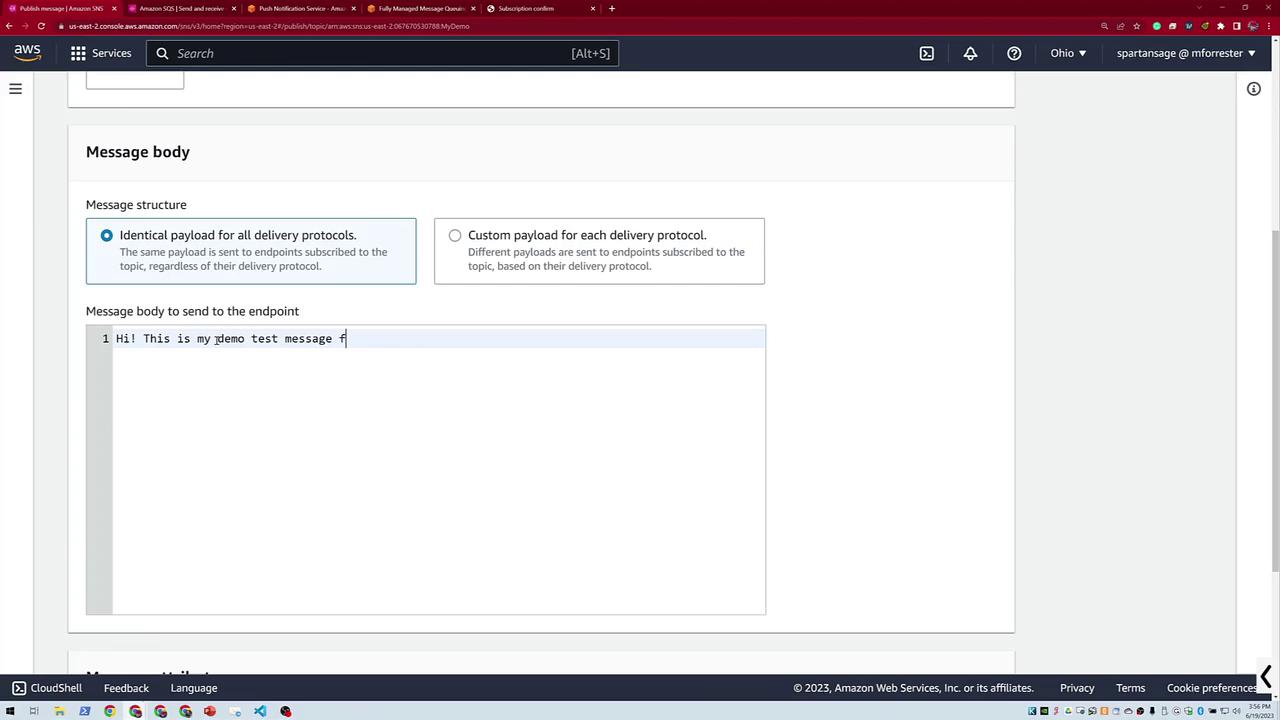
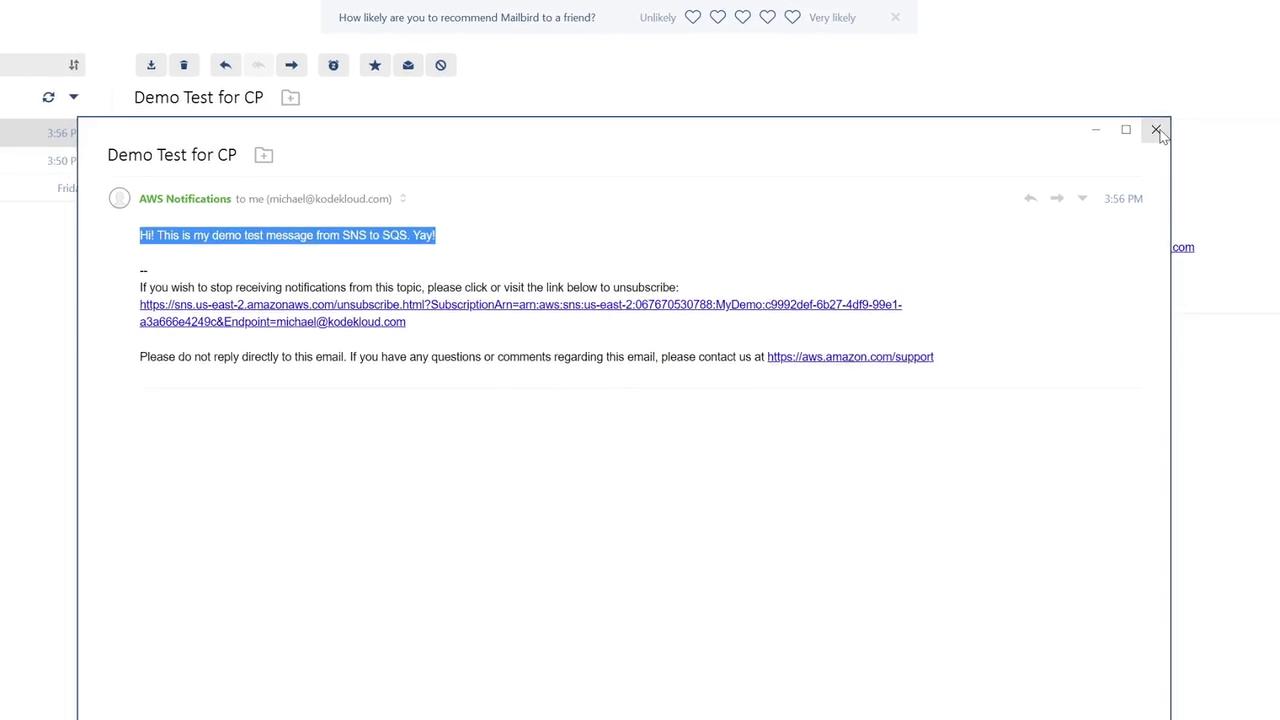
Return to the SNS console where your SQS subscription is linked, then publish a message to the "My Demo Topic" using the following details:

  • Message Title: Demo Test for CP (Cloud Practitioner)
  • Message Body: "Hi, this is my demo test message from SNS to SQS."
  • Payload Option: Select "Identical payloads for all" if prompted.

The image shows an AWS SNS console screen for creating a message with options for identical or custom payloads.

After publishing, SNS will immediately forward the message to both the email and SQS endpoints. Check your email to confirm receipt of the demo test message.

The image shows an email titled "Demo Test for CP" with a message about a test from AWS SNS to SQS, including an unsubscribe link.

Then, review your SQS queue. Although it might initially appear that no messages are visible, refreshing or checking the received messages pane should reveal the demo test message.

Click on the received message to display its details. Even though no additional attributes are provided, the message body should read:

"Hi, this is my demo test message."

The image shows an AWS console displaying details of a message, including its ID, size, sender account ID, and receive count.


Summary

In this demonstration, you have successfully:

  • Created an SNS topic ("My Demo Topic") and added two subscriptions: an email and an SQS queue.
  • Configured an SQS queue ("My Simple Queue") and updated its Access Policy to allow SNS to send messages.
  • Tested the setup by publishing a message which was delivered to both endpoints.

This integration enables seamless distribution of notifications while allowing SQS to act as a buffering mechanism for backend processing.

Happy Cloud Practicing, and see you in the next lesson!

Michael Forrester, catch you on the next lesson.

Watch Video

Watch video content

Previous
Core AWS Services Application Integration