This article provides a demo of AWS CloudFormation, illustrating how to define and provision AWS resources using YAML or JSON templates.
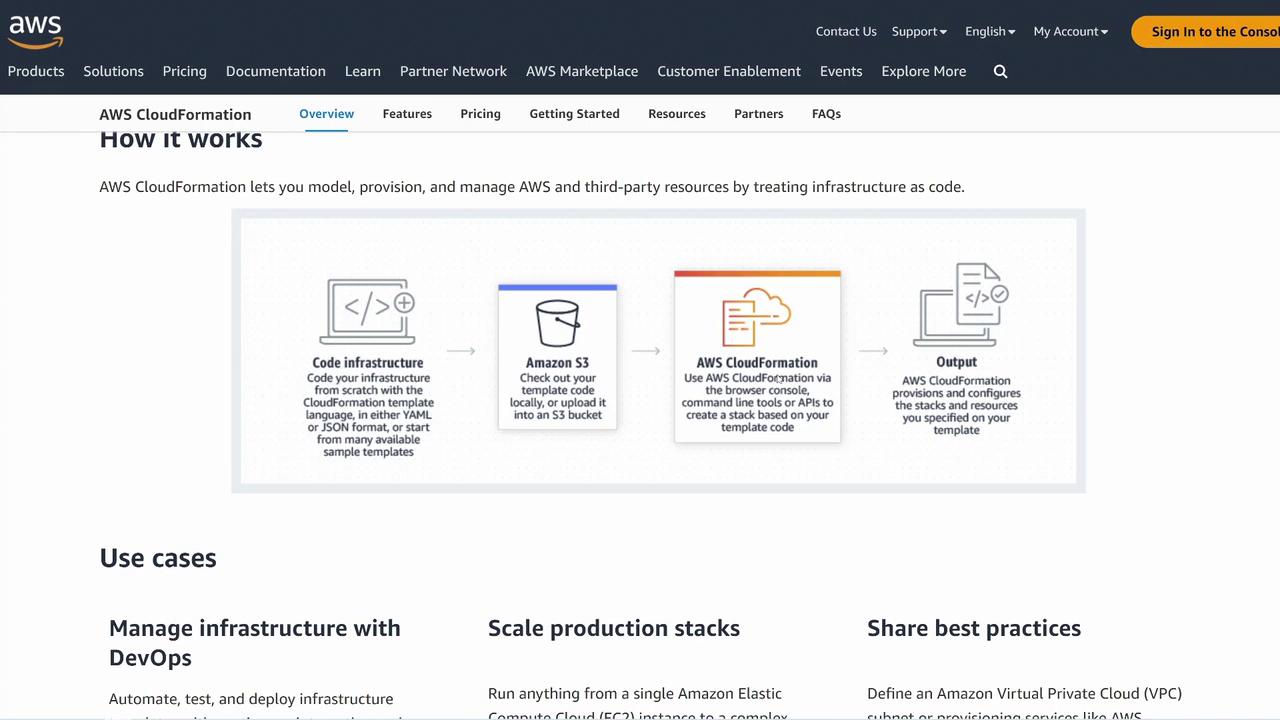
Hi, welcome back Cloud Practitioners!In this lesson, we will walk through a short demo of AWS CloudFormation—a service that accelerates cloud provisioning by defining your infrastructure as code. Essentially, you create a YAML or JSON file that describes the desired AWS resources, and CloudFormation uses that file to automatically provision and configure them.
Consider the following basic CloudFormation template. This file consists solely of a Resources section that defines an S3 bucket by specifying its type and a single property: its bucket name.
The bucket name is arbitrary—you can name it “bucket99” or any valid name. When you run this template in the AWS Management Console, CloudFormation leverages the region defined in your console session to create the bucket.For example, launching the stack might use a YAML snippet like:
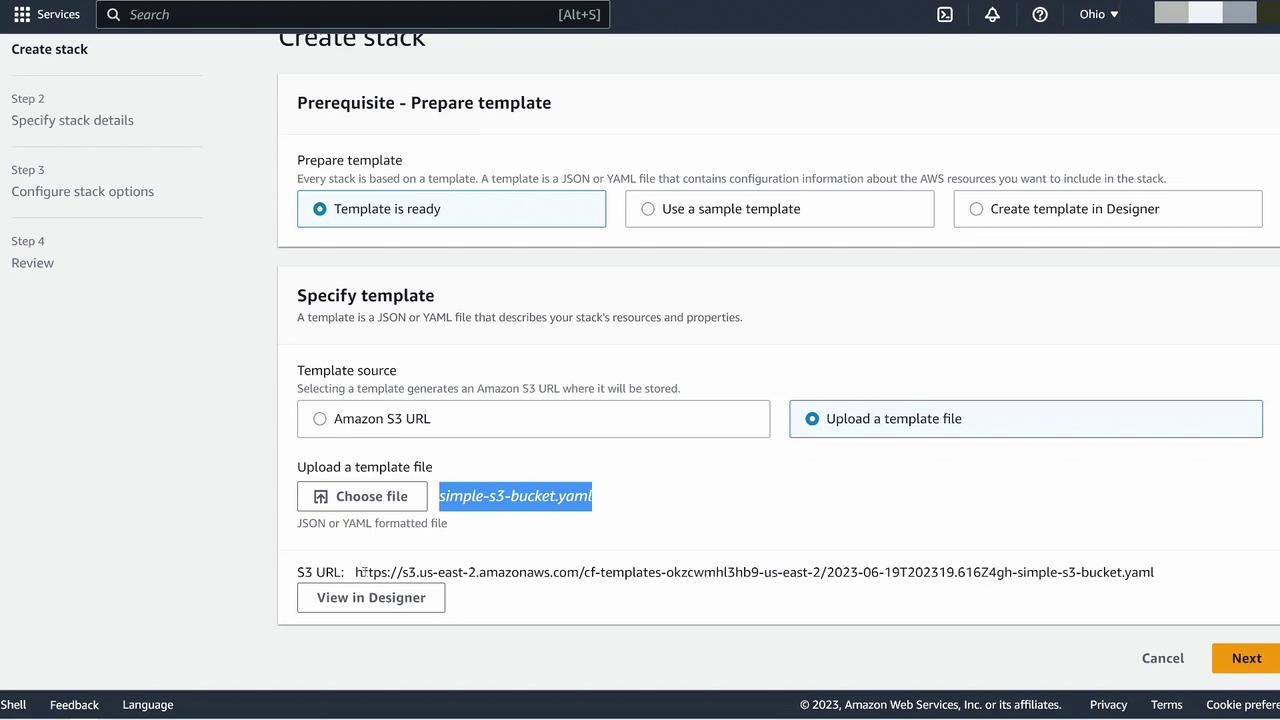
Switch to the AWS Management Console and navigate to the CloudFormation service. CloudFormation is AWS’s native management tool for infrastructure as code. To create your new stack:
Choose “Create Stack” with new resources.
Select “Upload a template file” and click “Choose file” to locate your simple S3 bucket template.
After uploading, click “Next.”
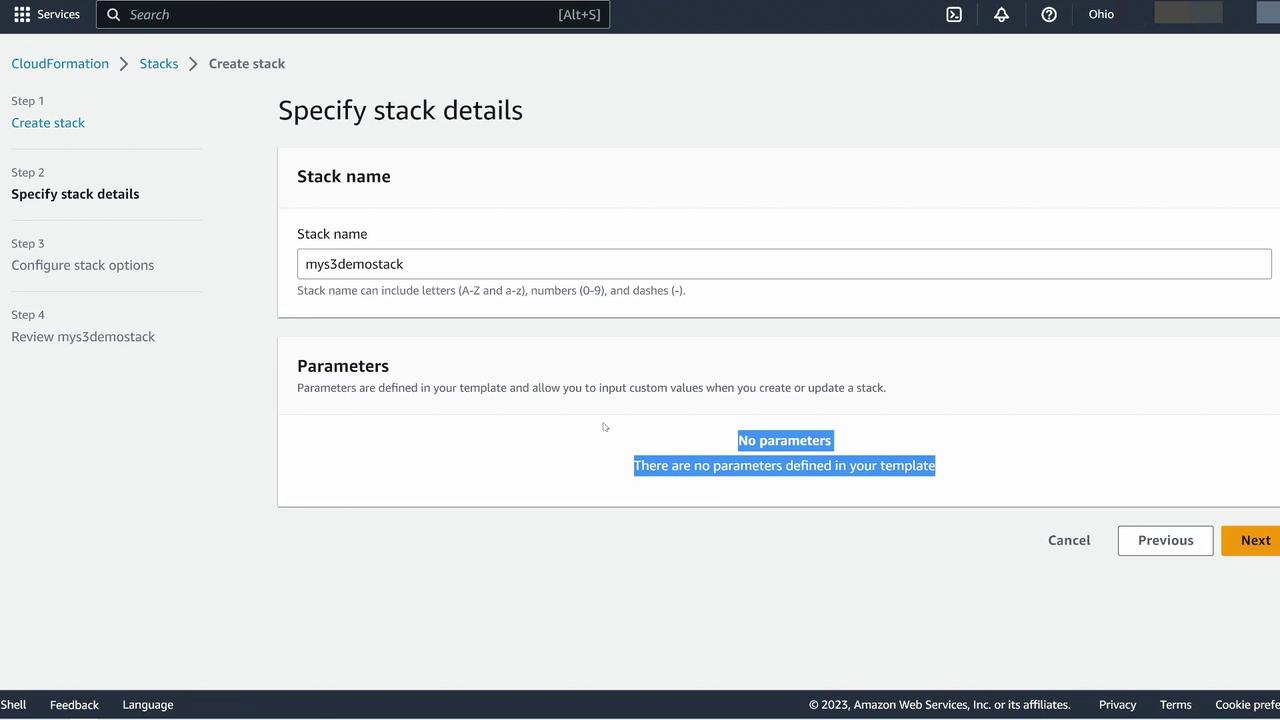
Assign a stack name, such as “mys3demostack.” Since the template contains no parameters, simply click “Next.”
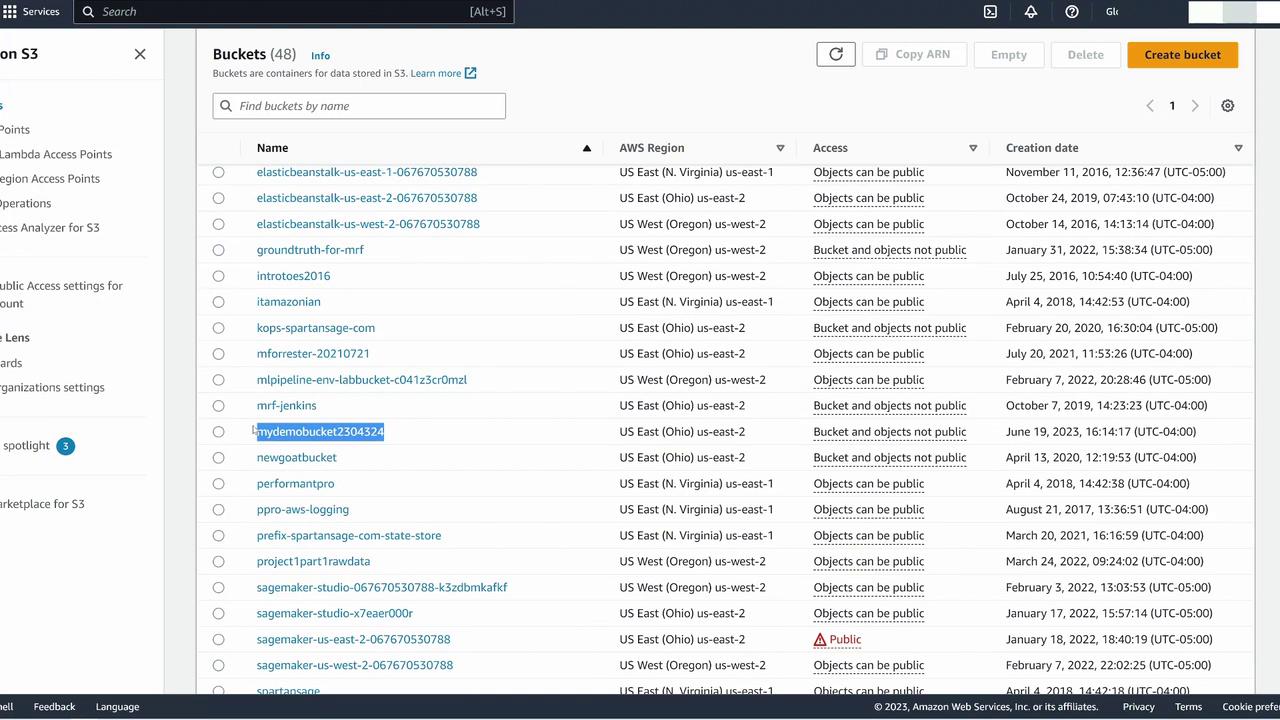
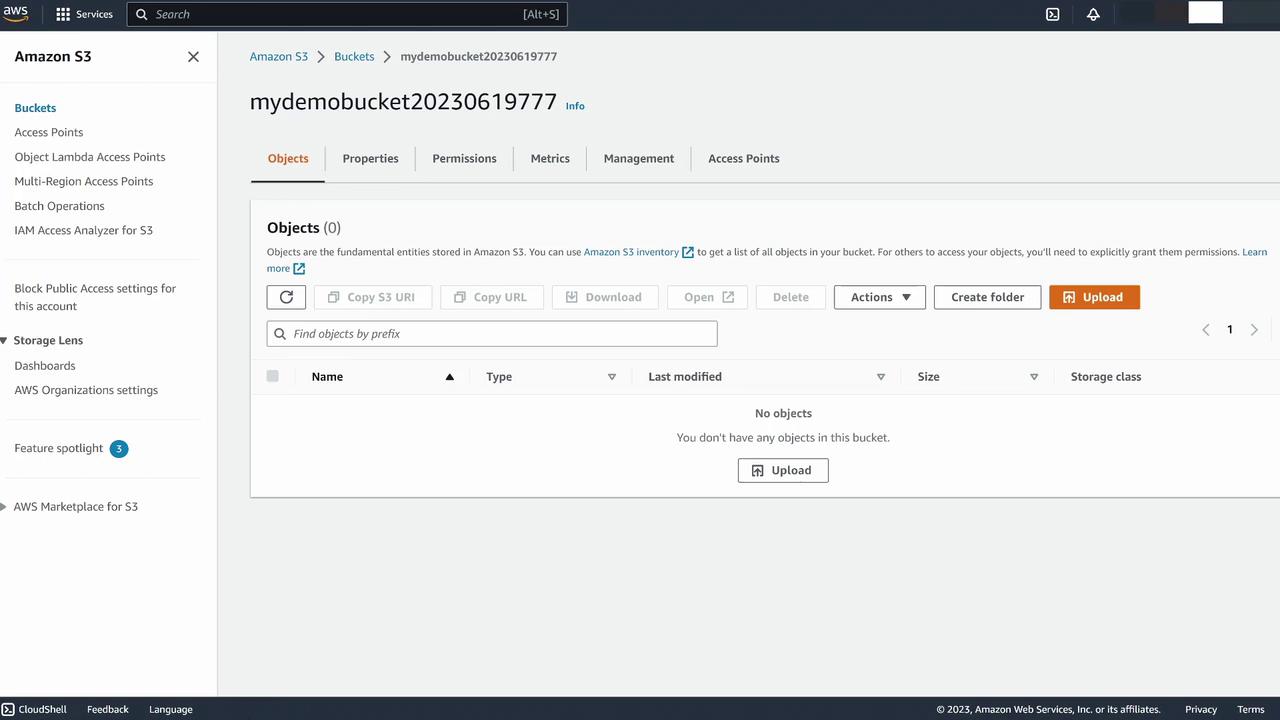
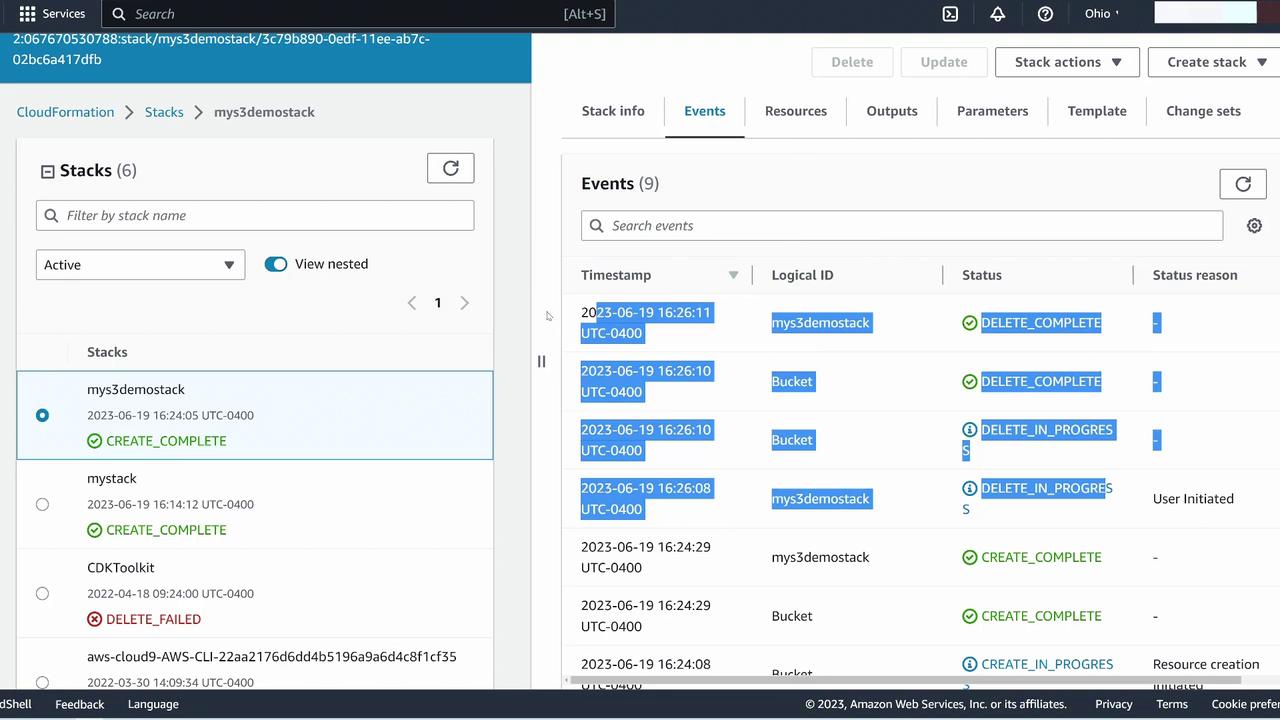
Scroll down, click “Next” again, then confirm your settings and submit your stack creation request. The simple five-line template starts provisioning your defined S3 bucket.You can monitor the progress in the CloudFormation stack’s Events tab, which logs each action during the creation process. In a separate tab, navigate to the Amazon S3 dashboard to verify the presence of your new bucket. Even if there was a previously created demo bucket, the new bucket—named as per your file—should now appear.
After refreshing your CloudFormation stack view, you should see that the bucket creation is complete. To confirm, switch back to the S3 console and refresh the page—your bucket (for example, “2023-06-19-777”) should be visible.
Since no objects have been uploaded to the bucket, its contents appear empty. More advanced CloudFormation templates can include Outputs or even automatically create and manage objects within the bucket, but this simple example clearly illustrates the foundational process.
With just a few lines of YAML, CloudFormation allows you to deploy and manage AWS resources effortlessly.
CloudFormation is capable of much more than simple resource creation. Here’s an example of a more complex template that demonstrates the use of conditions for access control, encryption, custom KMS keys, and outputs for the bucket’s URL and ARN:
This example illustrates how CloudFormation can manage configurations for a variety of AWS services beyond S3, including EC2 and VPCs, by starting with simple constructs and progressively adding complexity.
To remove the resources created by your CloudFormation stack, return to the CloudFormation console, select your stack, and click “Delete.” Confirm the deletion process, and the removal will commence immediately.
If the S3 bucket contains any objects, CloudFormation will prompt you to delete them before the stack can be deleted.
This demo shows that even a straightforward CloudFormation template—merely a few lines of YAML—can effectively manage AWS resources. CloudFormation is a powerful tool for infrastructure as code that scales from simple deployments to complex, multi-resource architectures.Thank you for following along in this lesson. Michael Forrester, I look forward to seeing you in the next article.