AWS CodePipeline (CI/CD Pipeline)

CICD Pipeline with CodeCommit CodeBuild and CodeDeploy

CodeDeploy Demo

Welcome to this AWS CodeDeploy step-by-step tutorial. You’ll learn how to deploy a simple index.html file to a Windows EC2 instance using CodeDeploy. This guide covers:

  • Preparing your application bundle
  • Uploading to Amazon S3
  • Configuring IAM roles
  • Launching a Windows EC2 instance
  • Creating a CodeDeploy application and deployment group
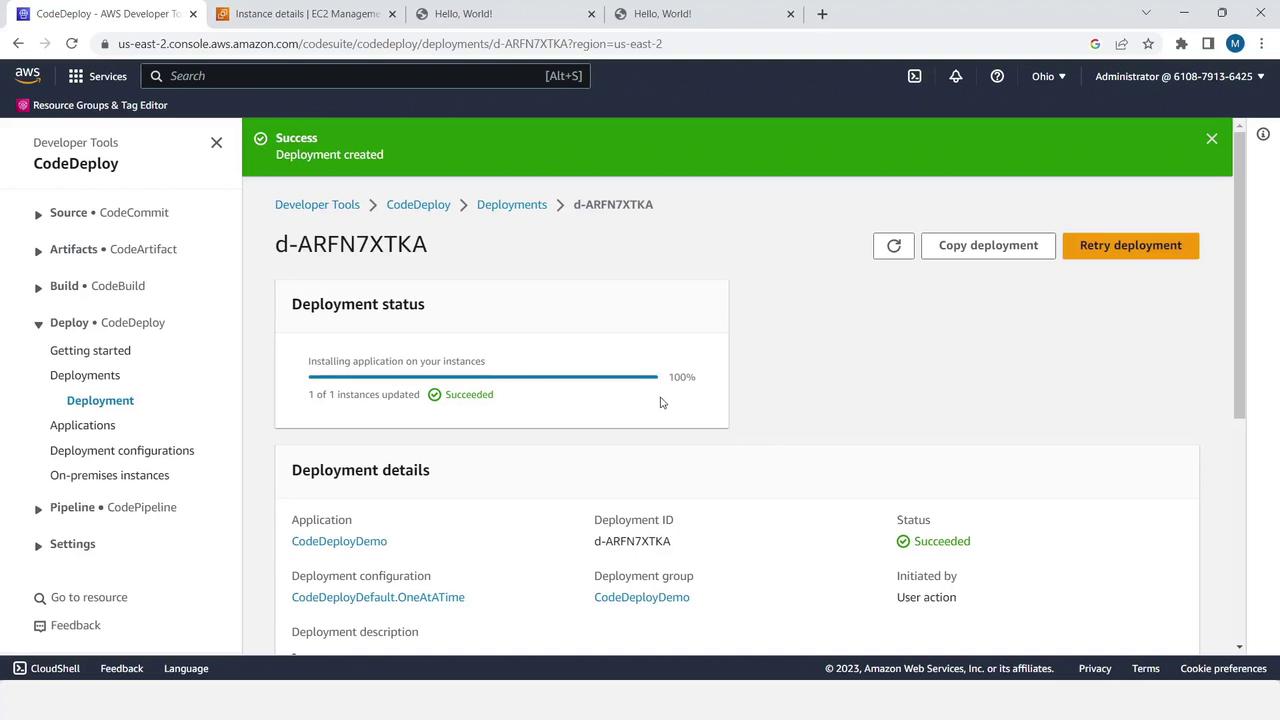
  • Performing an in-place deployment

Note

Be sure to clean up AWS resources when you’re finished to avoid unexpected charges.


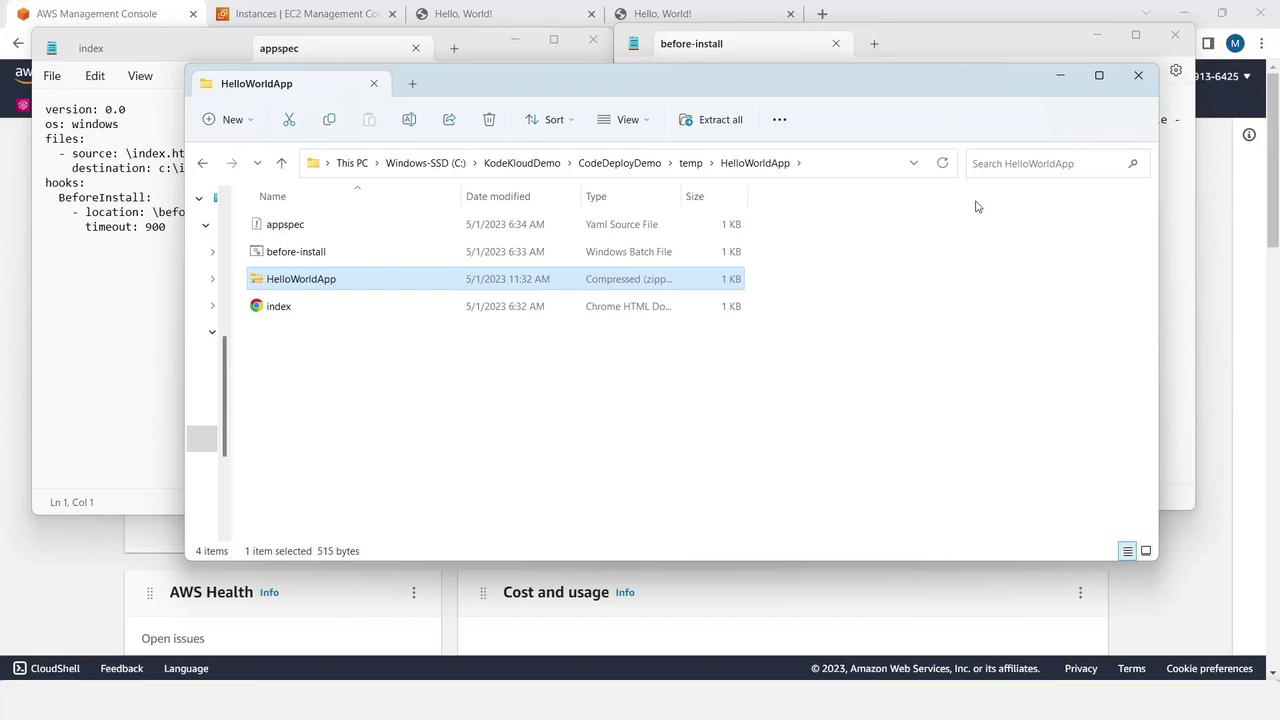
1. Prepare Application Files

Create a folder named HelloWorldApp (or any name you choose) and add these three files:

index.html

<!DOCTYPE html>
<html lang="en">
<head>
  <meta charset="UTF-8">
  <title>Hello, World!</title>
  <style>
    body {
      color: #ffffff;
      background-color: #10188c;
      font-family: Arial, sans-serif;
      font-size: 14px;
    }
    .center { text-align: center; }
  </style>
</head>
<body>
  <div class="center"><h1>Hello, World!</h1></div>
  <div class="center"><h2>You have successfully deployed an application using CodeDeploy</h2></div>
  <div class="center">
    <p>Next steps? See the
      <a href="https://aws.amazon.com/codedeploy">CodeDeploy Documentation</a>.
    </p>
  </div>
</body>
</html>

appspec.yml

version: 0.0
os: windows
files:
  - source: \index.html
    destination: c:\inetpub\wwwroot
hooks:
  BeforeInstall:
    - location: \before-install.bat
      timeout: 900

before-install.bat

REM Install Internet Information Services (IIS)
c:\Windows\Sysnative\WindowsPowerShell\v1.0\powershell.exe -Command Import-Module ServerManager
c:\Windows\Sysnative\WindowsPowerShell\v1.0\powershell.exe -Command Install-WindowsFeature web-server

Compress these files into HelloWorldApp.zip.

The image shows a Windows file explorer window open to a folder named "HelloWorldApp" containing files like "appspec," "before-install," and a compressed file named "HelloWorldApp.zip." In the background, there are browser tabs open with AWS Management Console and other related pages.


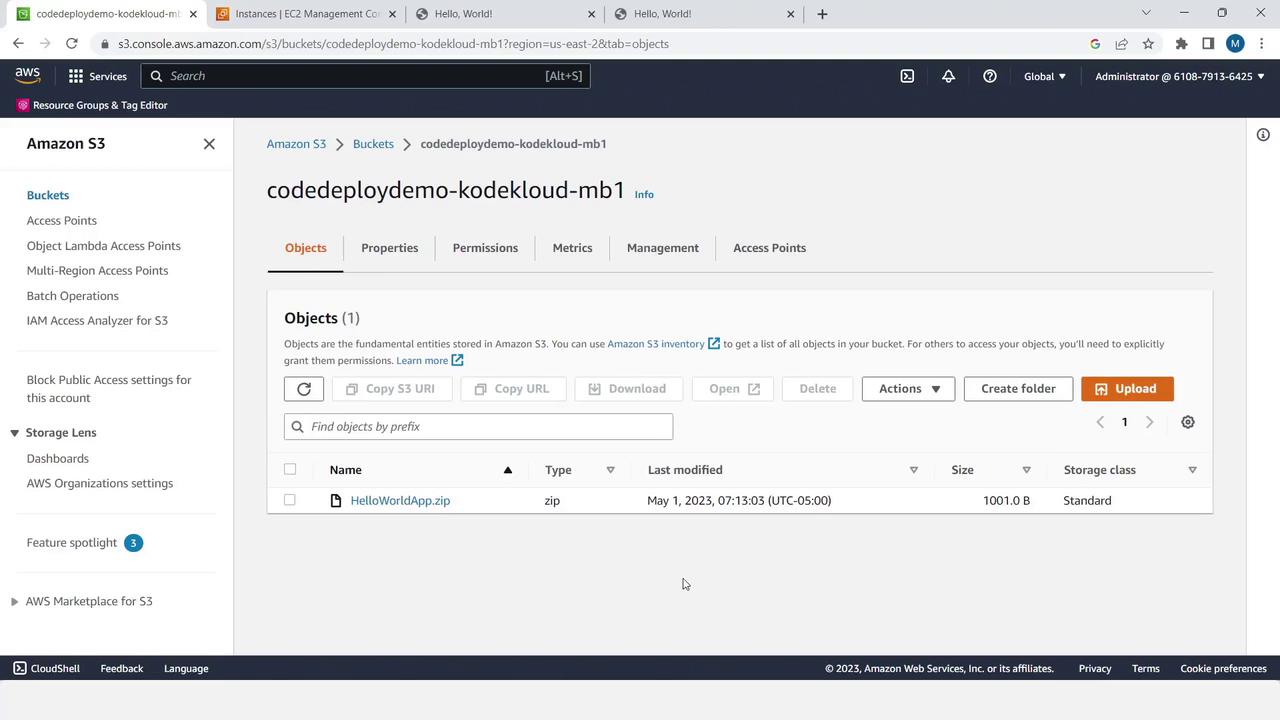
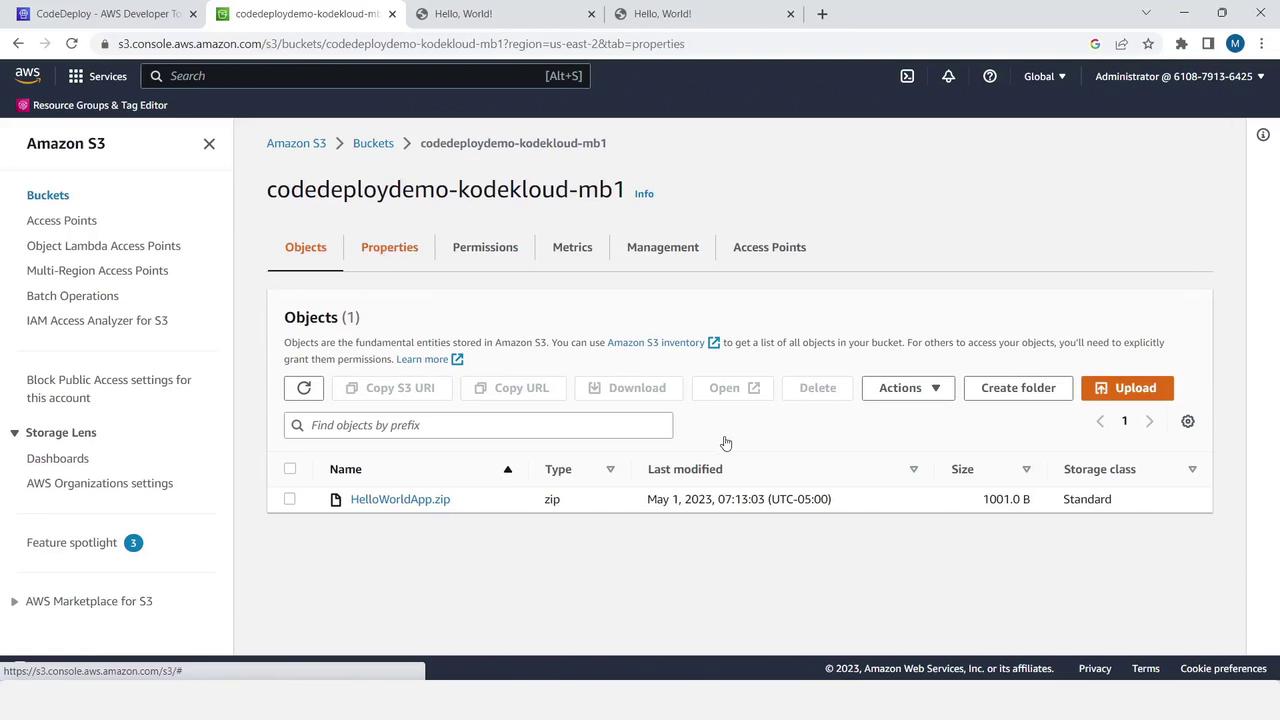
2. Upload the ZIP File to S3

  1. Open the Amazon S3 console.
  2. Create a new bucket or select an existing one.
  3. Upload HelloWorldApp.zip.
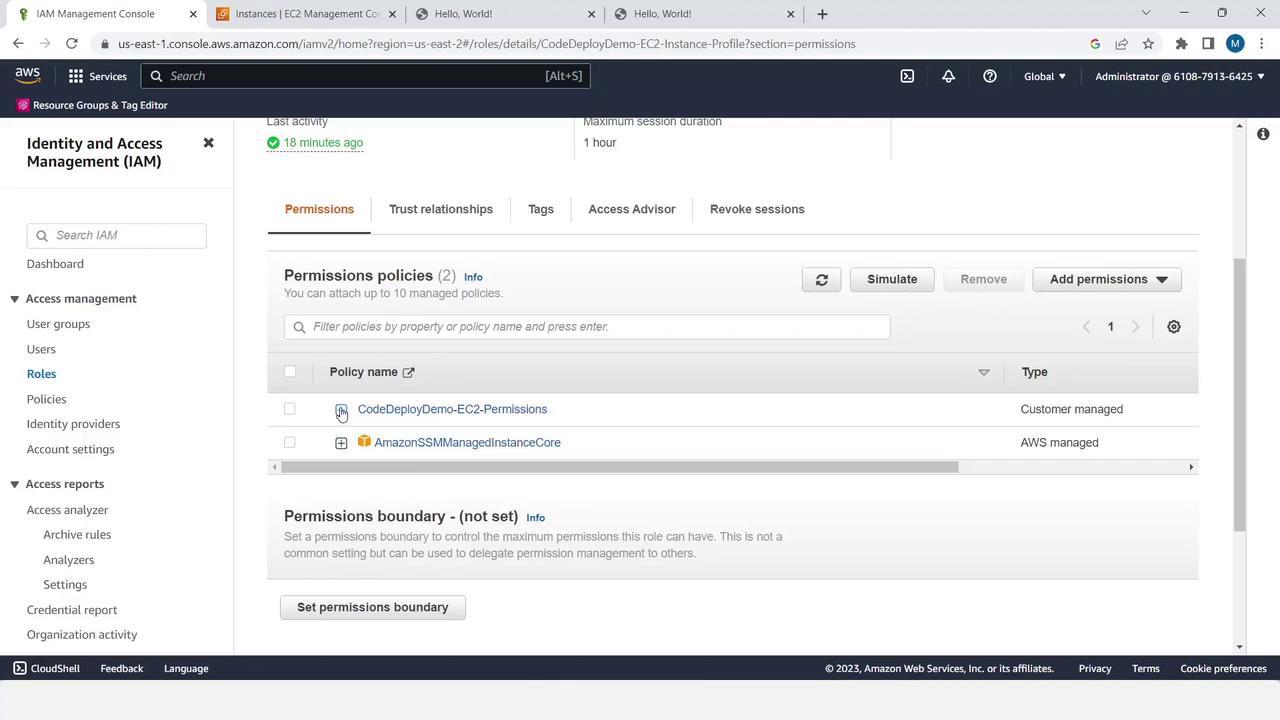
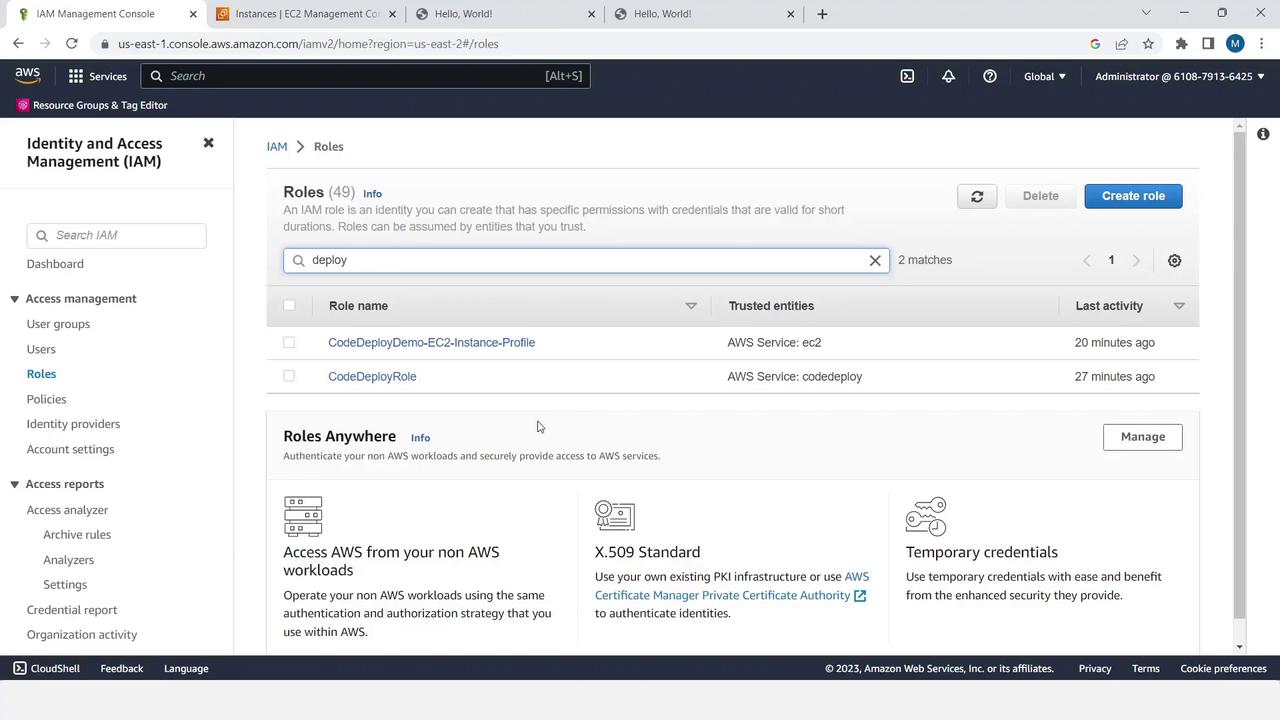
The image shows an Amazon S3 bucket interface on AWS, displaying a single object named "HelloWorld4App.zip" with details like type, size, and last modified date.


3. Create IAM Roles

You need two roles: one for the EC2 instance and one for CodeDeploy.

Role NameUse CaseAttached Policy
CodeDeployDemo-EC2-Instance-ProfileEC2 access & S3 permissionsAmazonSSMManagedInstanceCore<br>Inline S3 allow list/get
CodeDeployDemo-Service-RoleCodeDeploy service accessAWSCodeDeployRole
  1. EC2 Instance Role
    • Create a new role for EC2 with the AmazonSSMManagedInstanceCore managed policy.
    • Add an inline policy to allow S3 read operations:
    {
      "Version": "2012-10-17",
      "Statement": [
        {
          "Effect": "Allow",
          "Action": ["s3:Get*", "s3:List*"],
          "Resource": "*"
        }
      ]
    }
    
  2. CodeDeploy Service Role
    • Create a role for CodeDeploy and attach AWSCodeDeployRole.

The image shows the AWS Identity and Access Management (IAM) console, specifically the "Roles" section, displaying permissions policies for a role named "CodeDeployDemo-EC2-Instance-Profile." Two policies are listed: "CodeDeployDemo-EC2-Permissions" and "AmazonSSMManagedInstanceCore."

The image shows the AWS Identity and Access Management (IAM) console, specifically the "Roles" section, displaying roles related to CodeDeploy with their trusted entities and last activity timestamps.


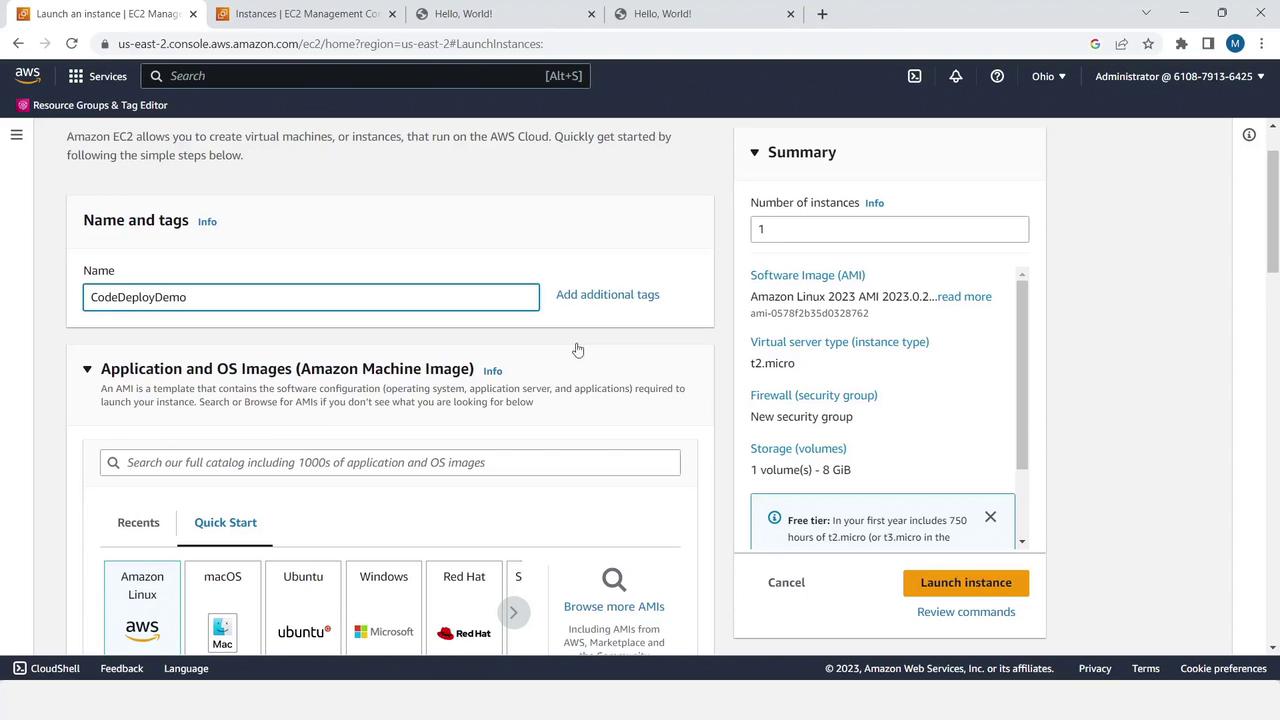
4. Launch a Windows EC2 Instance

  1. Go to the EC2 console and click Launch Instance.
  2. Configure:
    • Name: CodeDeployDemo
    • AMI: Windows Server (latest)
    • Instance type: t2.micro (free tier)
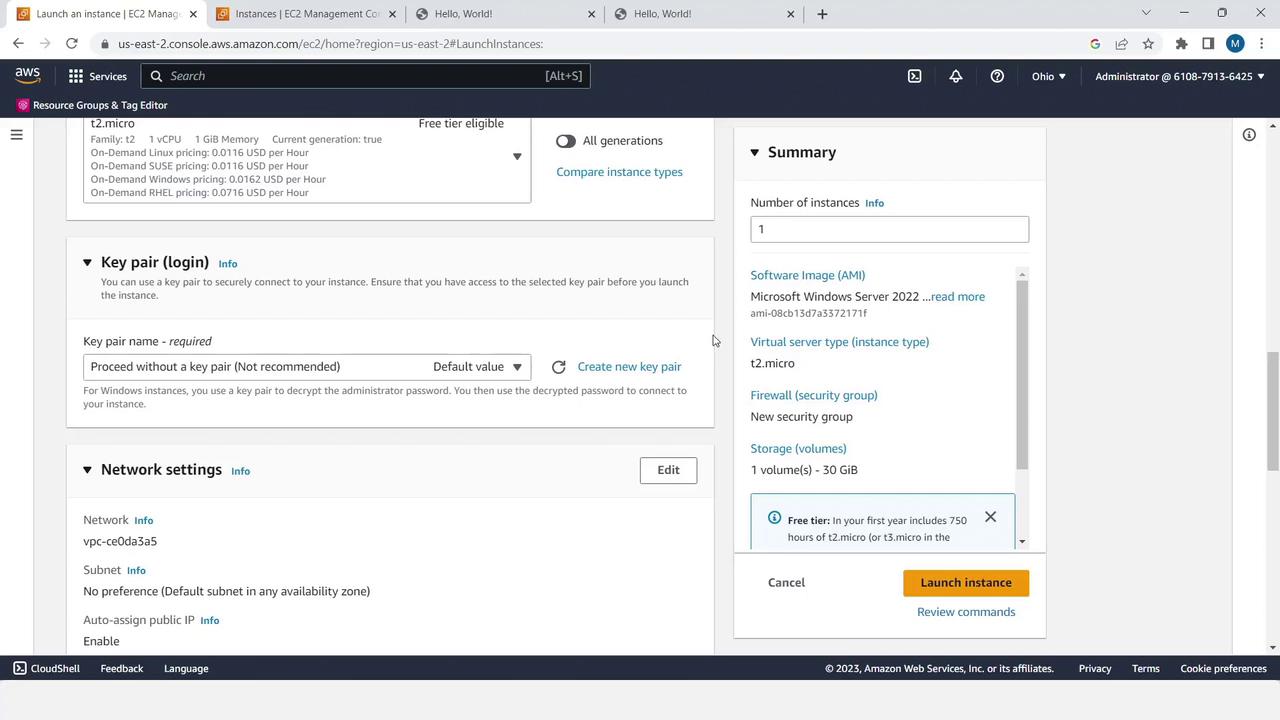
  3. In Network settings, allow HTTP (80) and HTTPS (443).
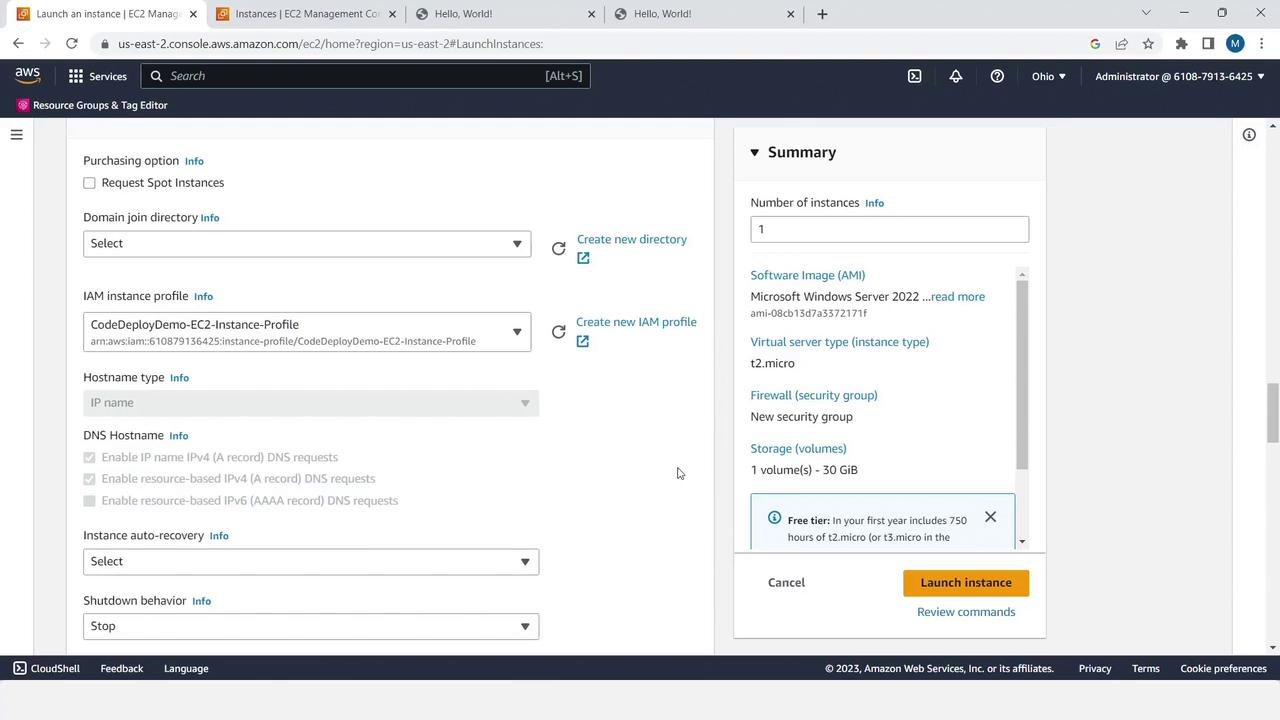
  4. Under Advanced details, select the IAM instance profile
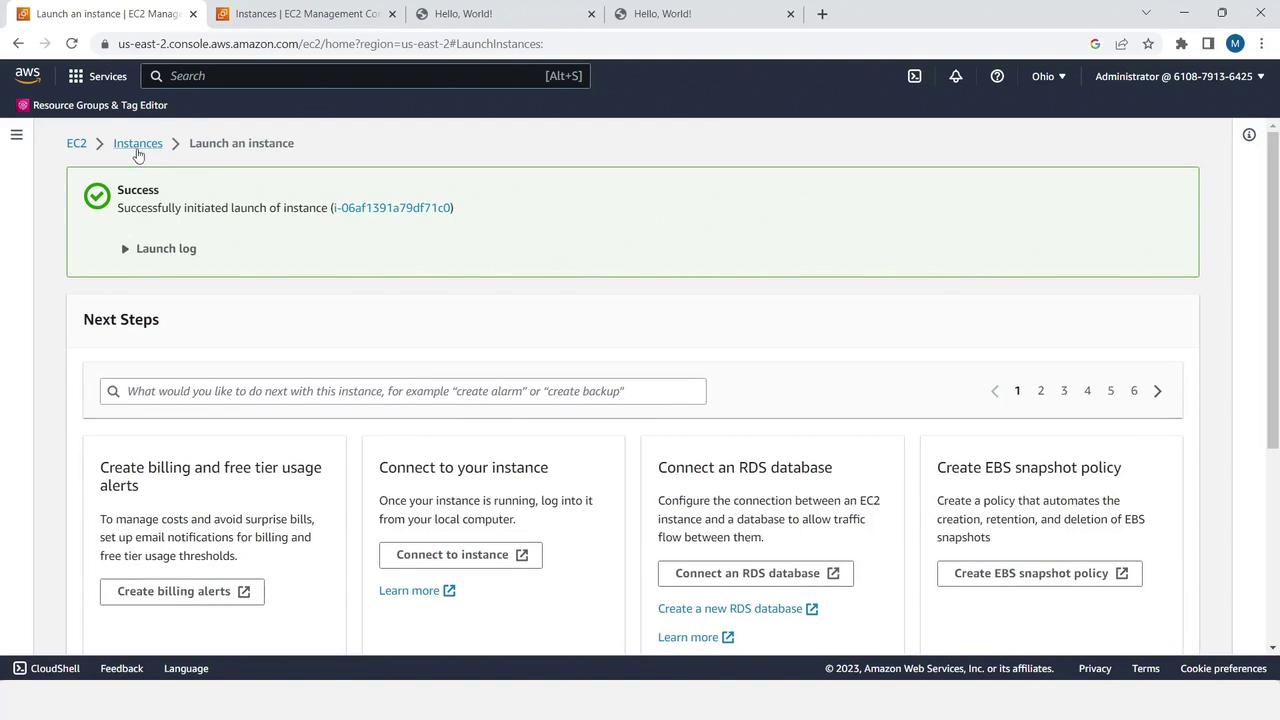
 CodeDeployDemo-EC2-Instance-Profile.
  5. Launch (key pair optional if no RDP needed).

Note

Windows AMIs exclude the CodeDeploy agent by default. Install it after launch via AWS Systems Manager or by running the MSI installer from AWS.

The image shows an AWS EC2 console where a user is setting up a new instance named "CodeDeployDemo" with Amazon Linux as the selected operating system. The summary on the right indicates the instance type is t2.micro with 8 GiB storage.

The image shows an AWS EC2 Management Console screen where a user is configuring settings to launch an instance, including key pair, network settings, and instance summary details.

The image shows an AWS EC2 management console where a user is configuring settings to launch an instance, including options for IAM instance profile, hostname type, and DNS settings. The summary on the right displays details like the software image, instance type, and storage volume.

The image shows an AWS EC2 Management Console screen indicating the successful launch of an instance, with options for next steps like connecting to the instance and creating billing alerts.


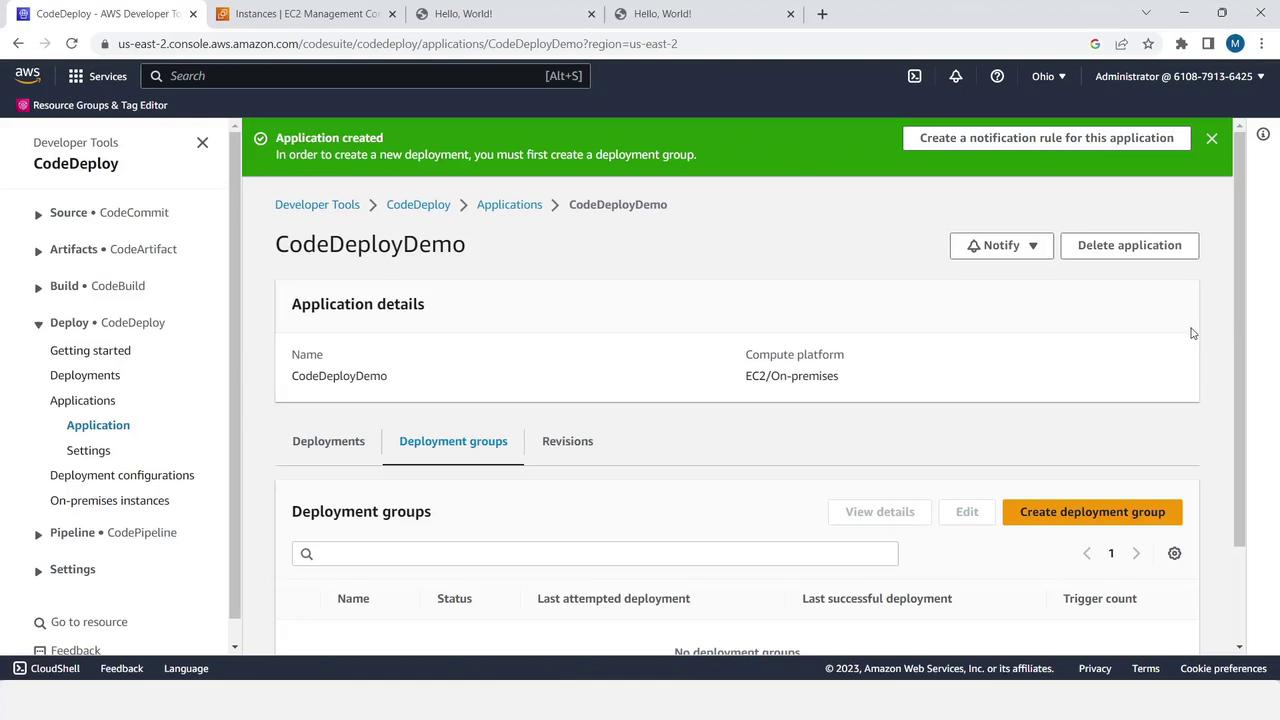
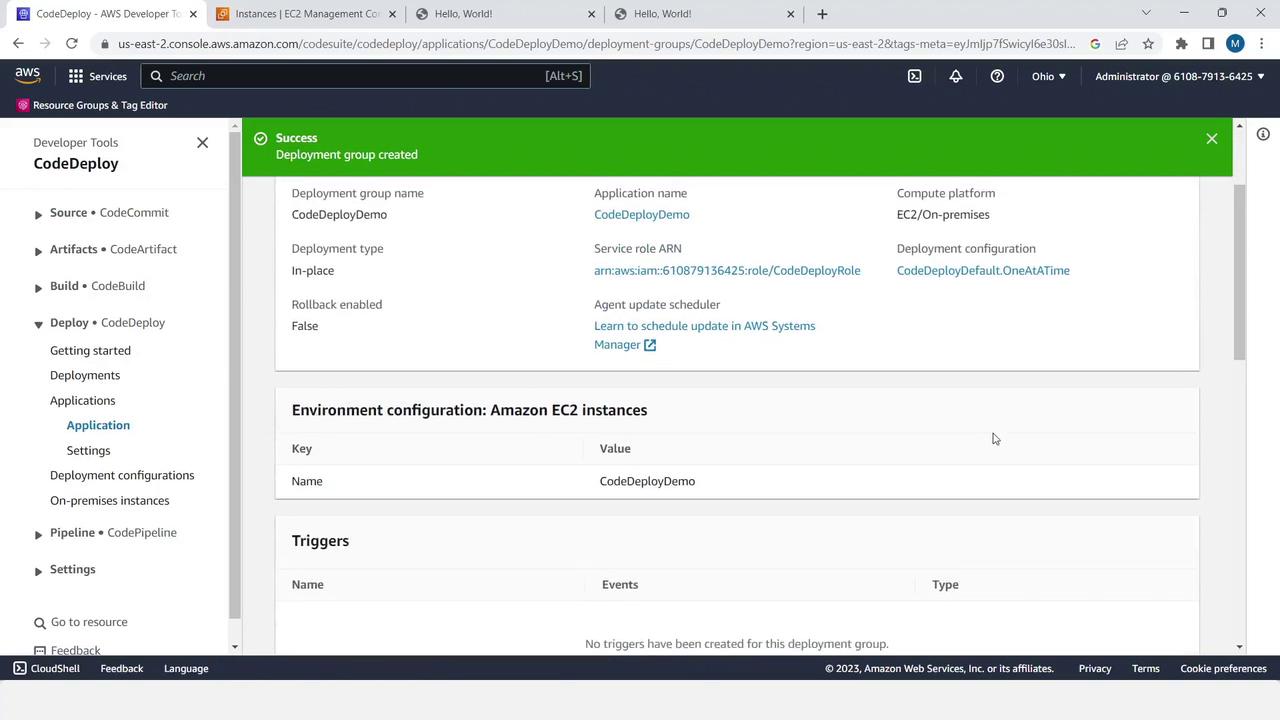
5. Create the CodeDeploy Application & Deployment Group

  1. Open the AWS CodeDeploy console and click Create application.
    • Name: CodeDeployDemo
    • Compute platform: EC2/On-premises
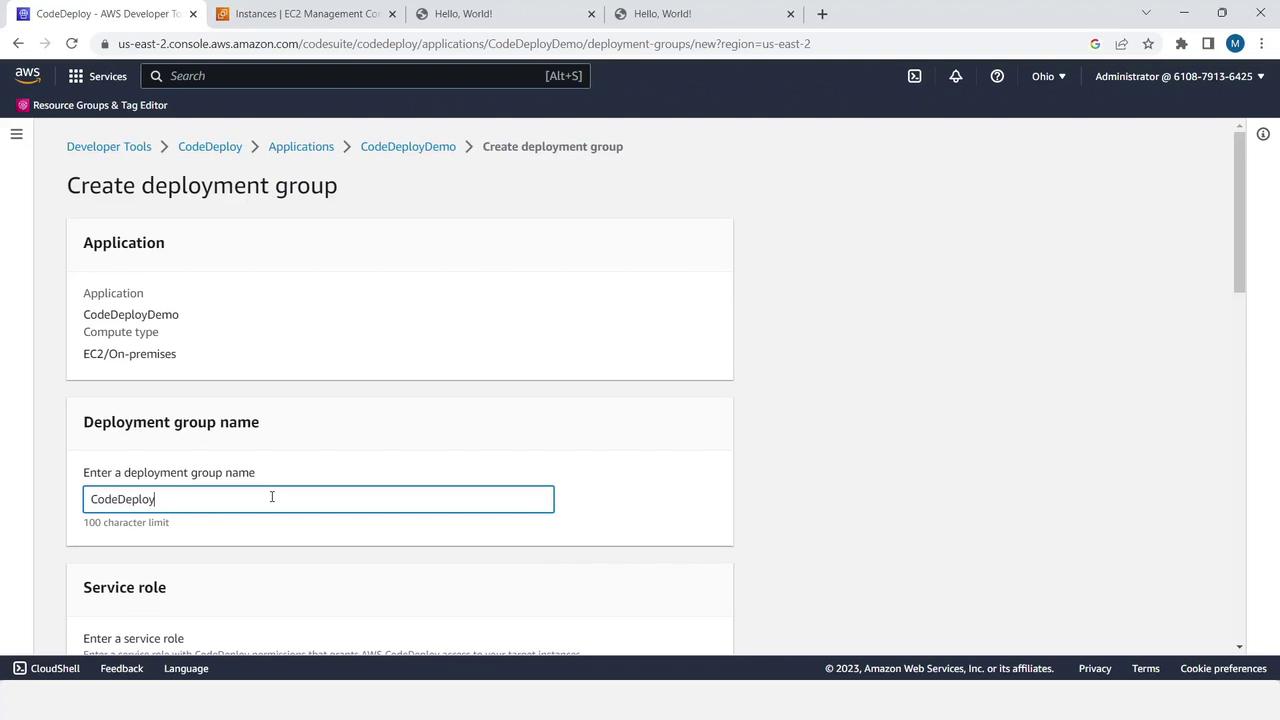
  2. Select the application, then choose Create deployment group.
    • Name: CodeDeployDemo
    • Service role: CodeDeployDemo-Service-Role
    • Deployment type: In-place
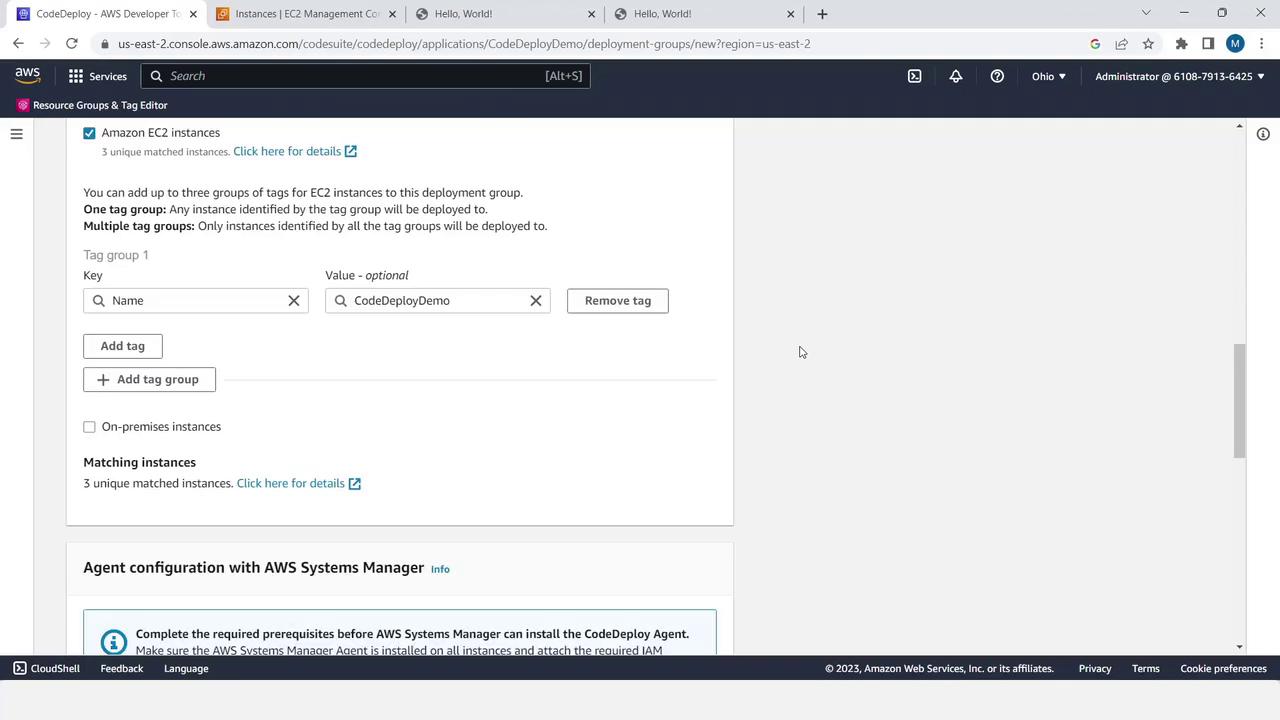
    • Environment configuration:
      • Tag Key: Name
      • Tag Value: CodeDeployDemo
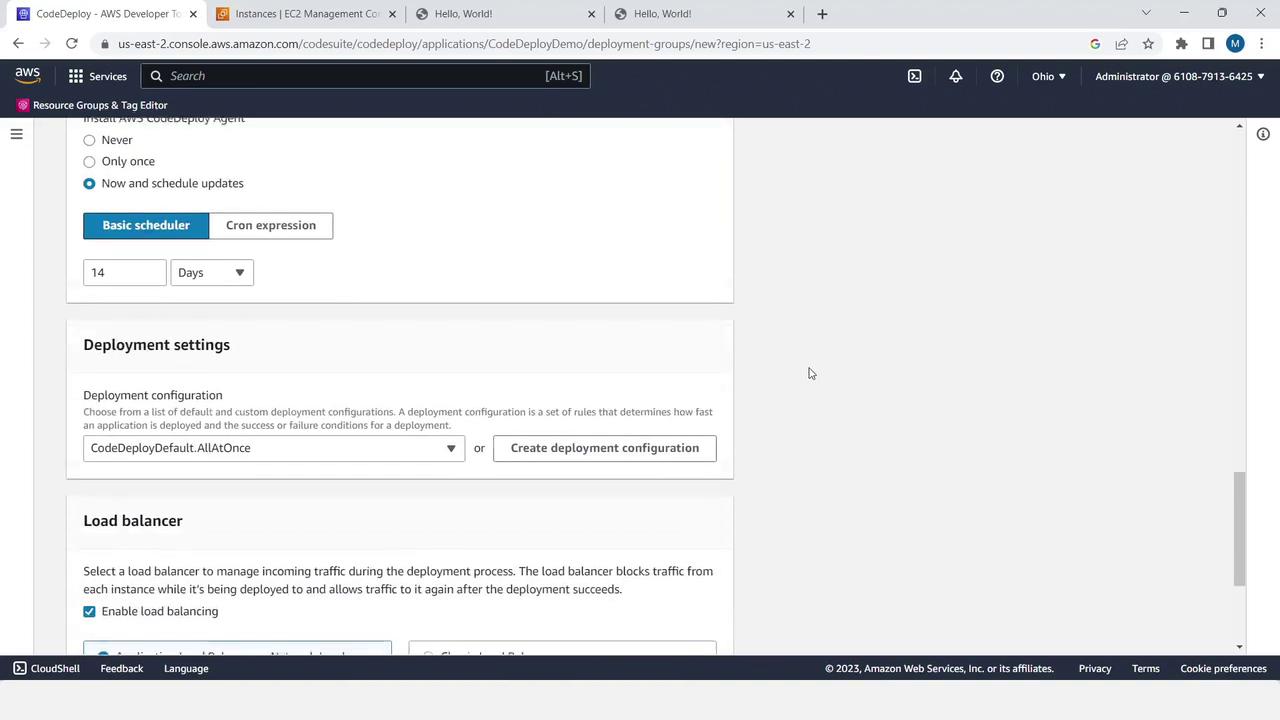
    • Deployment settings: Now, One at a time, no load balancer
  3. Click Create deployment group.

The image shows an AWS CodeDeploy console screen for an application named "CodeDeployDemo," with options to manage deployment groups and application details. The interface includes navigation options for various AWS Developer Tools.

The image shows an AWS CodeDeploy interface where a user is creating a deployment group named "CodeDeploy" for an application called "CodeDeployDemo" with EC2/On-premises as the compute type.

The image shows an AWS CodeDeploy configuration screen where EC2 instances are being tagged for deployment. It includes options for adding tag groups and configuring the AWS Systems Manager Agent.

The image shows an AWS CodeDeploy console screen with deployment settings, including options for scheduling updates, deployment configuration, and load balancing.

The image shows an AWS CodeDeploy console with a success message indicating a deployment group has been created. It includes details about the deployment group, application name, compute platform, and environment configuration for Amazon EC2 instances.


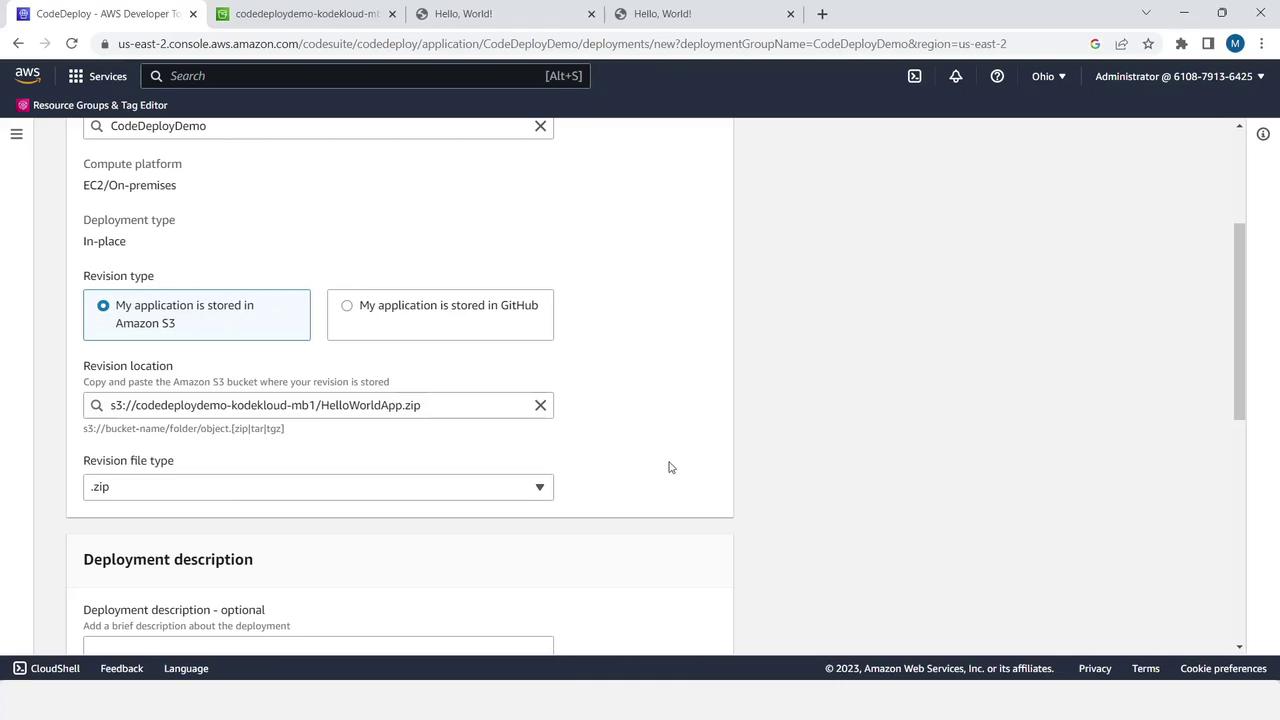
6. Deploy the Application

  1. In the deployment group, select Create deployment.
  2. Revision type: My application is stored in Amazon S3
    • Bucket: your S3 bucket
    • Key: HelloWorldApp.zip
  3. Keep defaults and click Create deployment.

The image shows an Amazon S3 console with a bucket named "codedeploydemo-kodekloud-mb1" containing a single zip file named "HelloWorldApp.zip."

The image shows an AWS CodeDeploy setup screen where a deployment is being configured with an application stored in an Amazon S3 bucket. The revision file type is set to ".zip".

After a few minutes, you’ll see success:

The image shows an AWS CodeDeploy console with a successful deployment status, indicating that an application has been installed on instances. The deployment details are also displayed.


Summary & Next Steps

You’ve just:

  1. Created index.html, appspec.yml, and a setup script.
  2. Bundled and uploaded your app to S3.
  3. Configured IAM roles.
  4. Launched a Windows EC2 instance with the CodeDeploy agent.
  5. Set up an application and deployment group in CodeDeploy.
  6. Deployed your app in-place from S3.

Integrate CodeDeploy into a full CI/CD pipeline next—see the AWS CodePipeline Documentation for details.


Watch Video

Watch video content

Practice Lab

Practice lab

Previous
Introduction to CodeDeploy