AWS Networking Fundamentals

Transit Networks

VPC Peering Demo

In this tutorial, you’ll learn how to establish a VPC peering connection between two AWS VPCs so that their EC2 instances can communicate over the private AWS network:

VPC IdentifierCIDR BlockEC2 InstancePrivate IP
VPC-A10.1.0.0/16server110.1.1.13
VPC-B10.2.0.0/16server210.2.1.139

Prerequisites

Make sure both VPCs have security groups and network ACLs allowing ICMP traffic. You also need IAM permissions to manage VPC peering and route tables.

Since VPCs are isolated by default, pinging from server1 to server2 will initially fail:

[ec2-user@ip-10-1-1-13 ~]$ ping 10.2.1.139
PING 10.2.1.139 (10.2.1.139) 56(84) bytes of data.
^C
--- 10.2.1.139 ping statistics ---
195 packets transmitted, 0 received, 100% packet loss

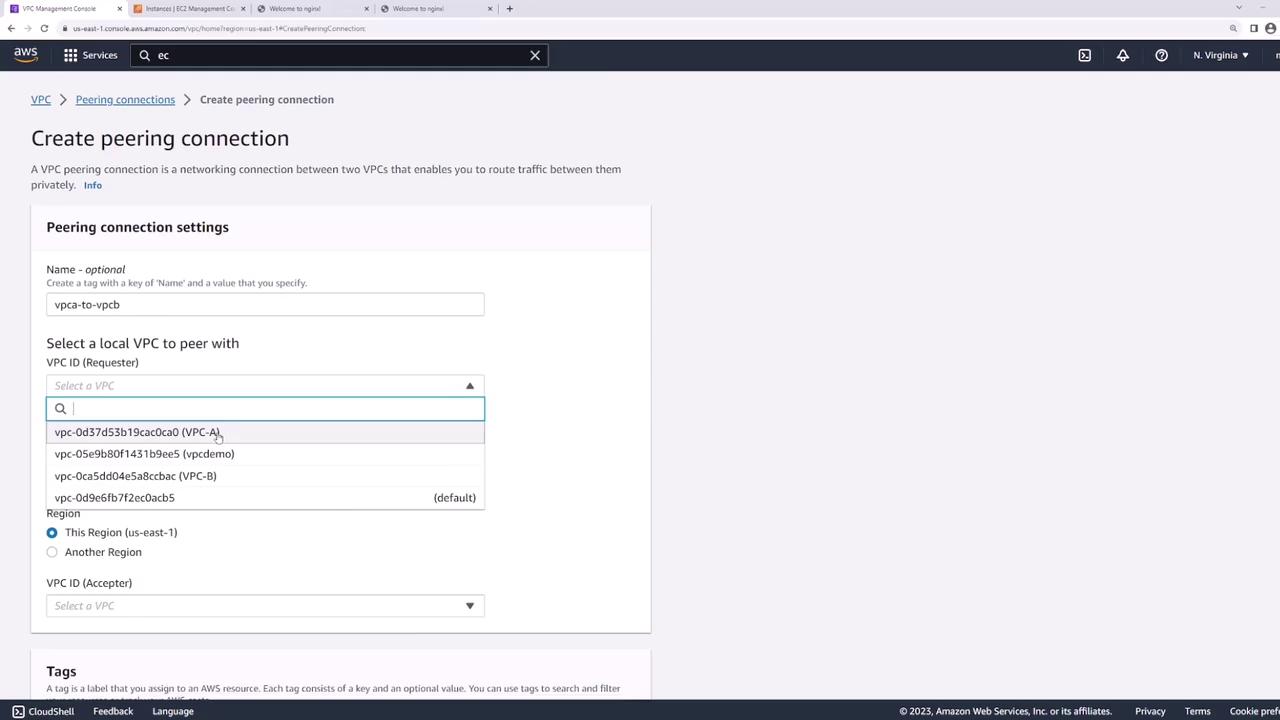
1. Create the VPC Peering Connection

  1. Open the AWS VPC console and select Peering ConnectionsCreate Peering Connection.
  2. Name the connection VPC-A-to-VPC-B.
  3. Under Requester, choose VPC-A.
  4. Under Accepter, select your account and region, then choose VPC-B.
  5. Click Create Peering Connection.

The image shows the AWS VPC Management Console interface for creating a peering connection, with options to select a local VPC and specify regions.

Automation Tip

You can also provision VPC peering using Infrastructure as Code tools like Terraform or AWS CloudFormation.

2. Accept the Peering Request

  1. In Peering Connections, locate the new connection in Pending Acceptance.
  2. Select it, then choose ActionsAccept Request.

The image shows an AWS Management Console screen displaying details of a VPC peering connection request, which is pending acceptance. It includes information such as requester and accepter IDs, VPCs, and regions.

Once accepted, its status changes to Active:

The image shows an AWS VPC dashboard with a peering connection established between two VPCs, indicated by a green status bar and details about the connection.

Important

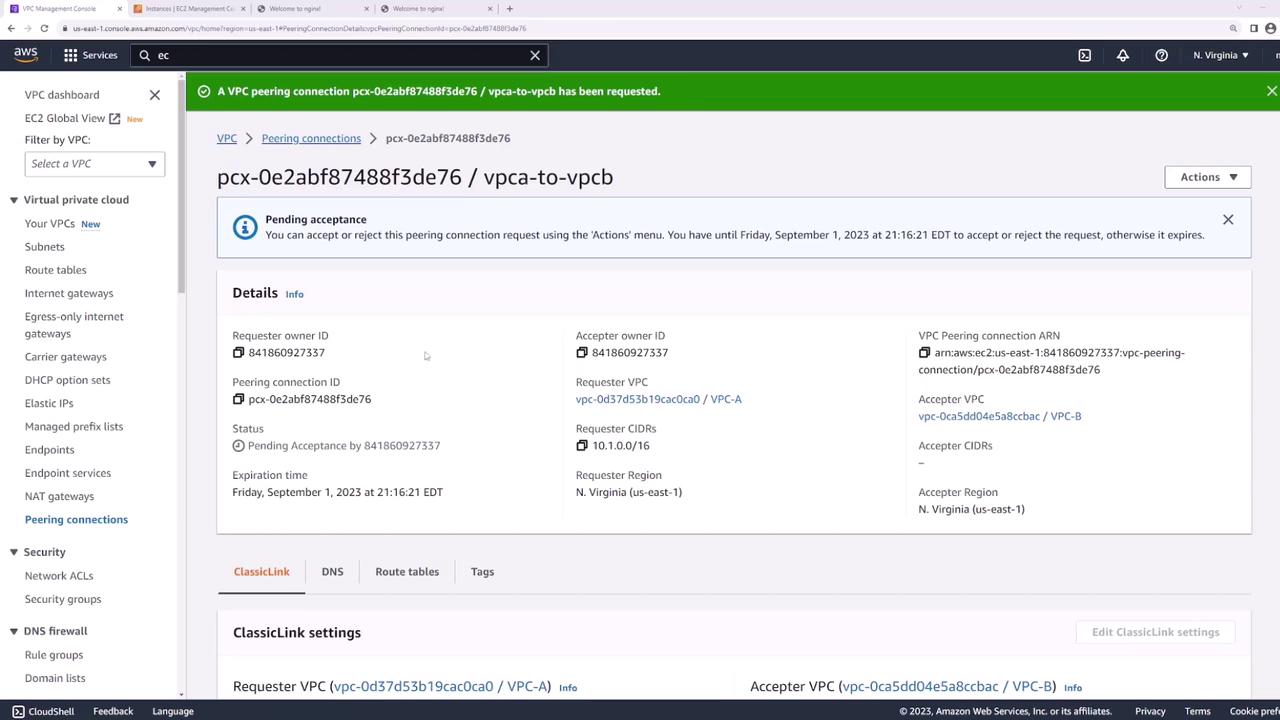
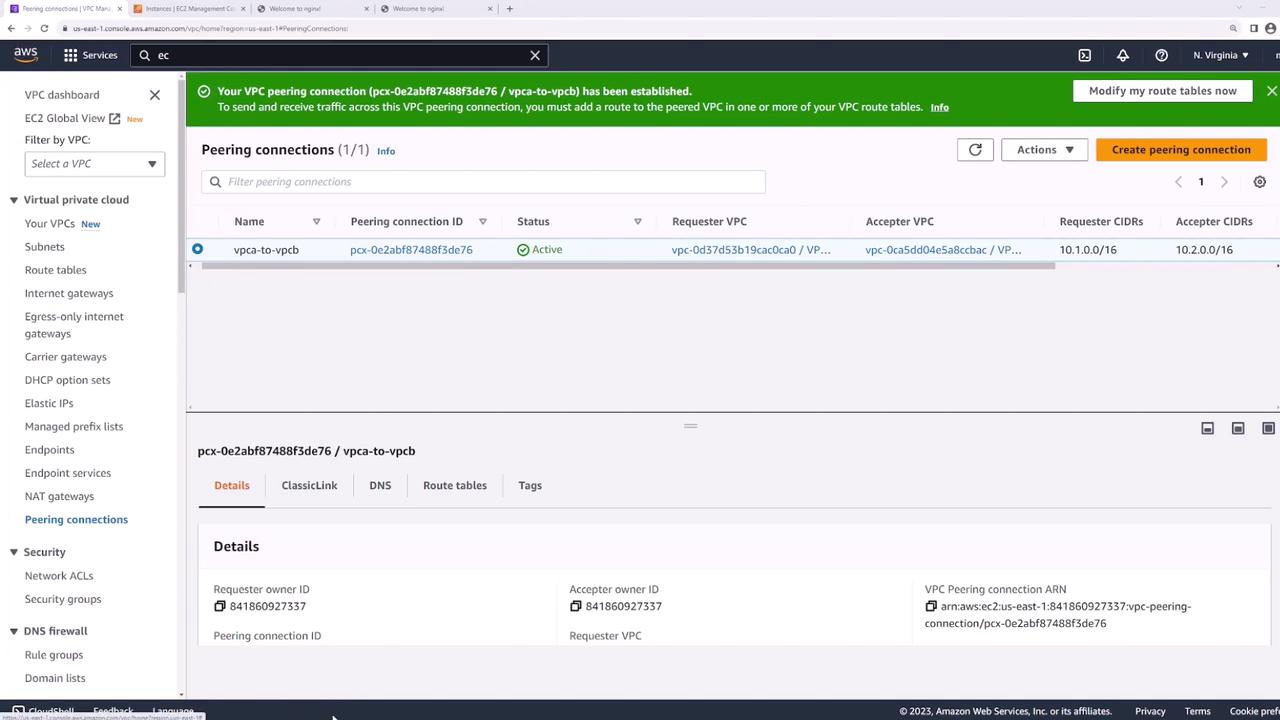
Even after peering is active, traffic won’t flow until you update each VPC’s route tables.

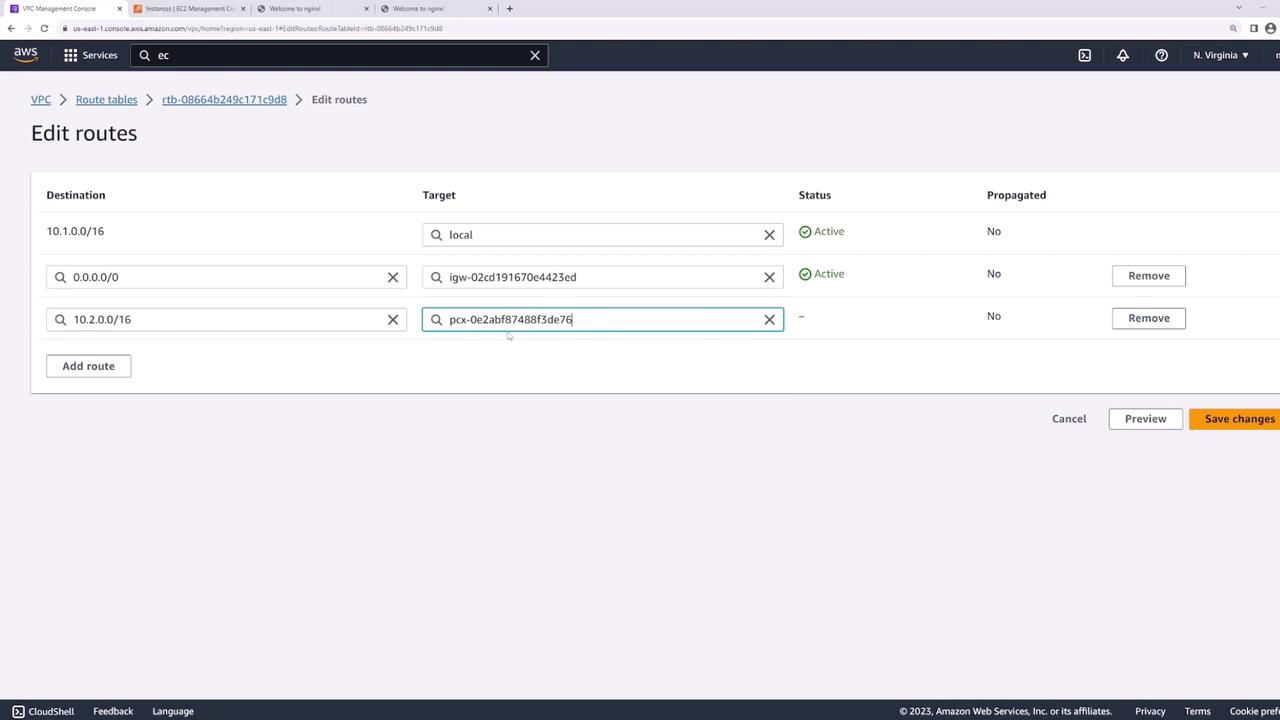
3. Update Route Tables

Each VPC needs a route pointing to the other VPC’s CIDR block through the peering connection:

  1. In the VPC console, go to Route Tables.
  2. Select the route table for VPC-A.
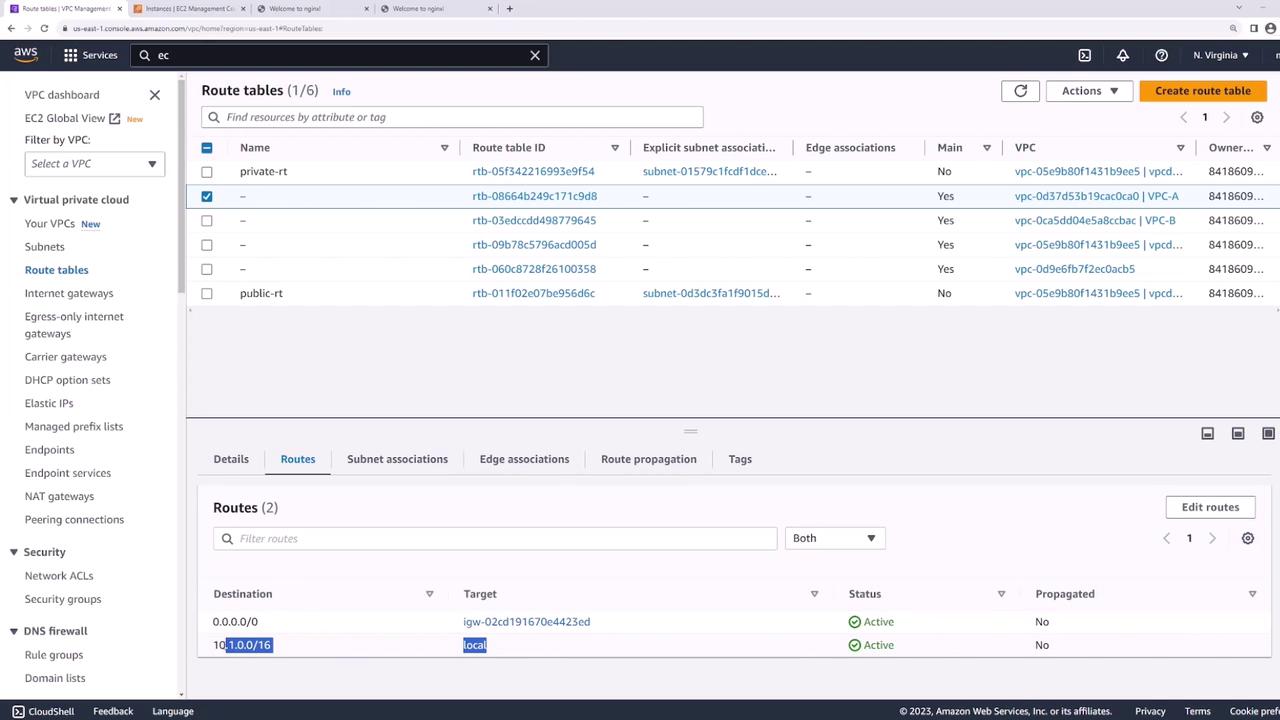
The image shows the AWS management console displaying the route tables for a Virtual Private Cloud (VPC). It lists several route tables with details such as route table ID, subnet associations, and routes with their destinations and targets.

  1. Under Routes, click Edit routesAdd route:
    • Destination: 10.2.0.0/16
    • Target: the peering connection (VPC-A-to-VPC-B)
  2. Save changes.

The image shows the AWS Management Console with a VPC route table being edited, displaying routes with their destinations, targets, and statuses.

  1. Repeat these steps on VPC-B’s route table, adding a route to 10.1.0.0/16 via the same peering connection.

4. Verify Connectivity

Return to server1 and ping server2:

[ec2-user@ip-10-1-1-13 ~]$ ping 10.2.1.139
PING 10.2.1.139 (10.2.1.139) 56(84) bytes of data.
64 bytes from 10.2.1.139: icmp_seq=1 ttl=127 time=1.88 ms
64 bytes from 10.2.1.139: icmp_seq=2 ttl=127 time=1.43 ms
64 bytes from 10.2.1.139: icmp_seq=3 ttl=127 time=1.38 ms
^C
--- 10.2.1.139 ping statistics ---
3 packets transmitted, 3 received, 0% packet loss, time 2002ms
rtt min/avg/max/mdev = 1.382/1.563/1.882/0.187 ms

Your EC2 instances can now communicate across VPCs using the private AWS backbone.

Watch Video

Watch video content

Practice Lab

Practice lab

Previous
VPC Peering