AZ-204: Developing Solutions for Microsoft Azure
Exploring Azure Event Hubs
Discovering Azure Event Hubs
In this article, we explore Azure Event Hubs, compare it with Azure Event Grid, and explain when to use each service for your data streaming and event-driven architecture needs.
Azure Event Grid is optimized for event-driven workflows where lightweight notifications trigger actions—ideal for scenarios like file uploads to storage accounts or database changes. In contrast, Azure Event Hubs is engineered as a big data pipeline for ingesting and processing large volumes of streaming data. This makes it perfect for telemetry collection, IoT device data streams, and real-time analytics.
Overview of Azure Event Hubs
Azure Event Hubs is a unified streaming platform designed to collect, retain, and process data streams in real time. Key benefits include:
- Real-time data ingestion with configurable time retention, allowing you to replay or process data later.
- Decoupling of data producers and consumers so that multiple applications can consume the same data stream simultaneously.
- High scalability that supports millions of events per second, ensuring efficient handling of massive data volumes from IoT devices, applications, or cloud infrastructure.
Key Features of Azure Event Hubs
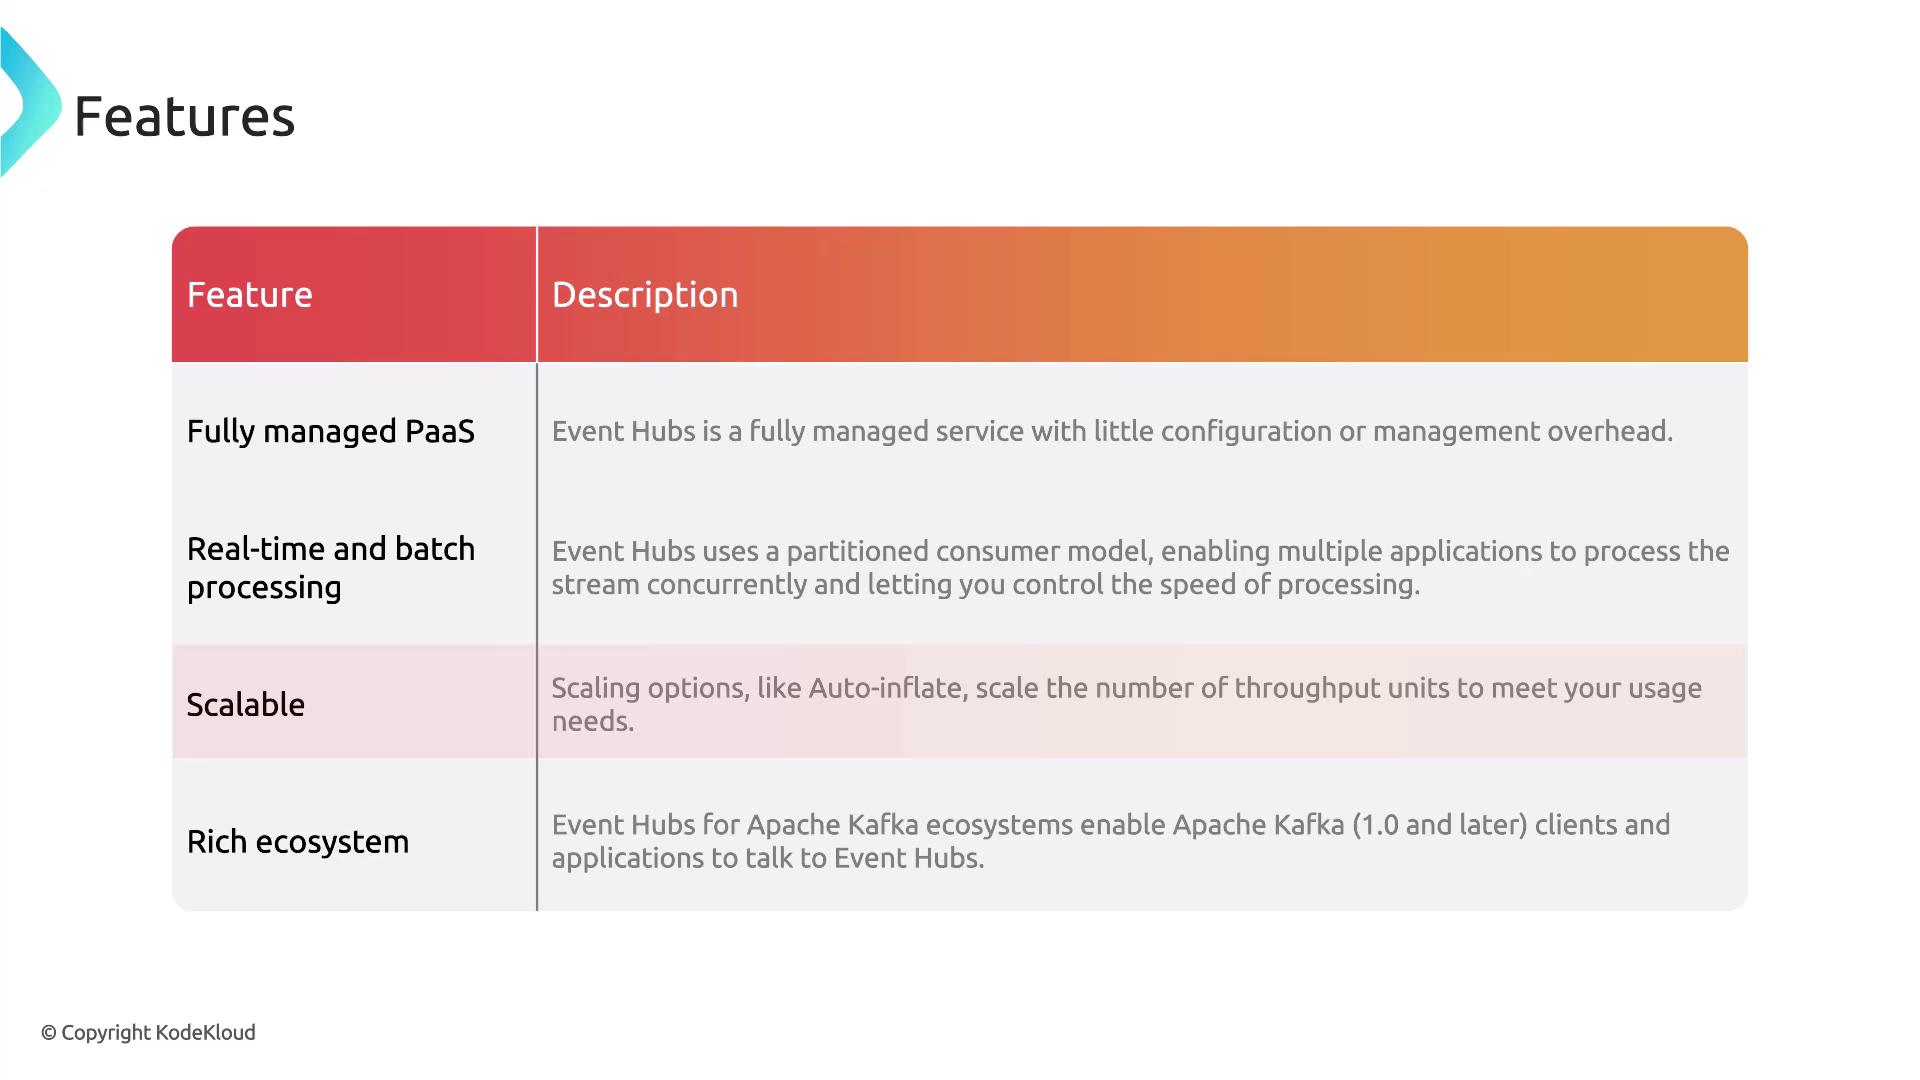
- Fully managed Platform as a Service (PaaS), minimizing configuration overhead.
- Flexibility for both real-time and batch processing.
- Dynamic scaling with features like auto-inflate to meet rising data demands.

Azure Event Hubs also integrates seamlessly with Apache Kafka, allowing you to leverage existing Kafka ecosystems for smooth application integration.
Core Components of Event Hubs
Understanding the main components of Azure Event Hubs is crucial before deployment. These include:
- Event Hub Client: The application interface for connecting and sending data.
- Event Hub Producer: Responsible for publishing events to the Event Hub.
- Consumer: Reads and processes incoming event streams.
- Partition: Organizes data into segments that allow parallel processing.
- Consumer Group: Enables multiple consumers to read from the same partition independently.
- Receivers: Components that retrieve events for further processing or storage.
- Throughput/Processing Units: Define the capacity for handling data, which can be scaled to meet your demand.
Armed with these concepts, you are ready to deploy an Event Hub using the Azure Portal.
Deploying an Event Hub via Azure Portal
Create an Event Hub Namespace:
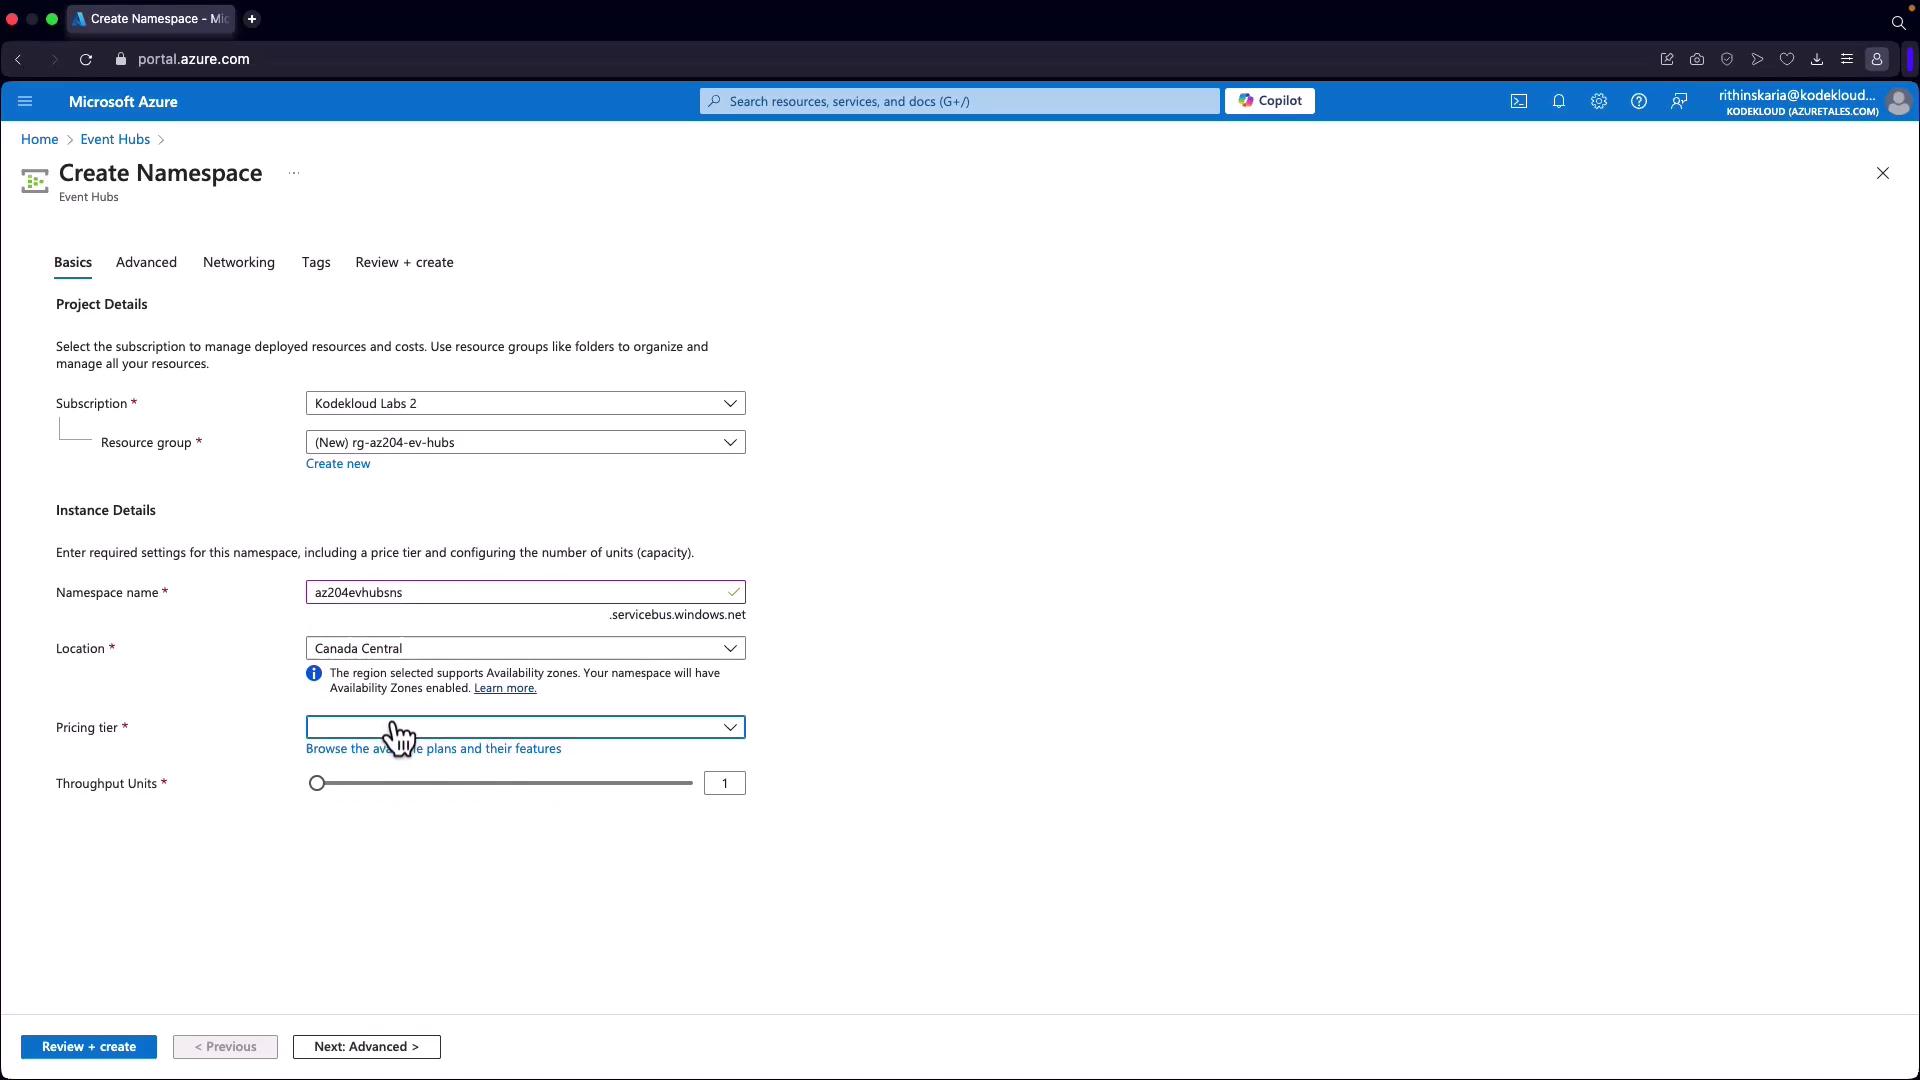
- In the Azure Portal, search for "Event Hub" and create a new namespace within a resource group.
- Ensure that the namespace has a unique name registered under servicebus.windows.net.
- Choose your region and select an appropriate pricing tier based on your required throughput units.

Pricing Tier Options
For demonstration purposes, select the basic pricing tier. It offers a cost-effective option (approximately $11) with the potential to scale throughput. The standard tier includes additional features such as auto-inflate for autoscaling.
Configure Advanced Settings:
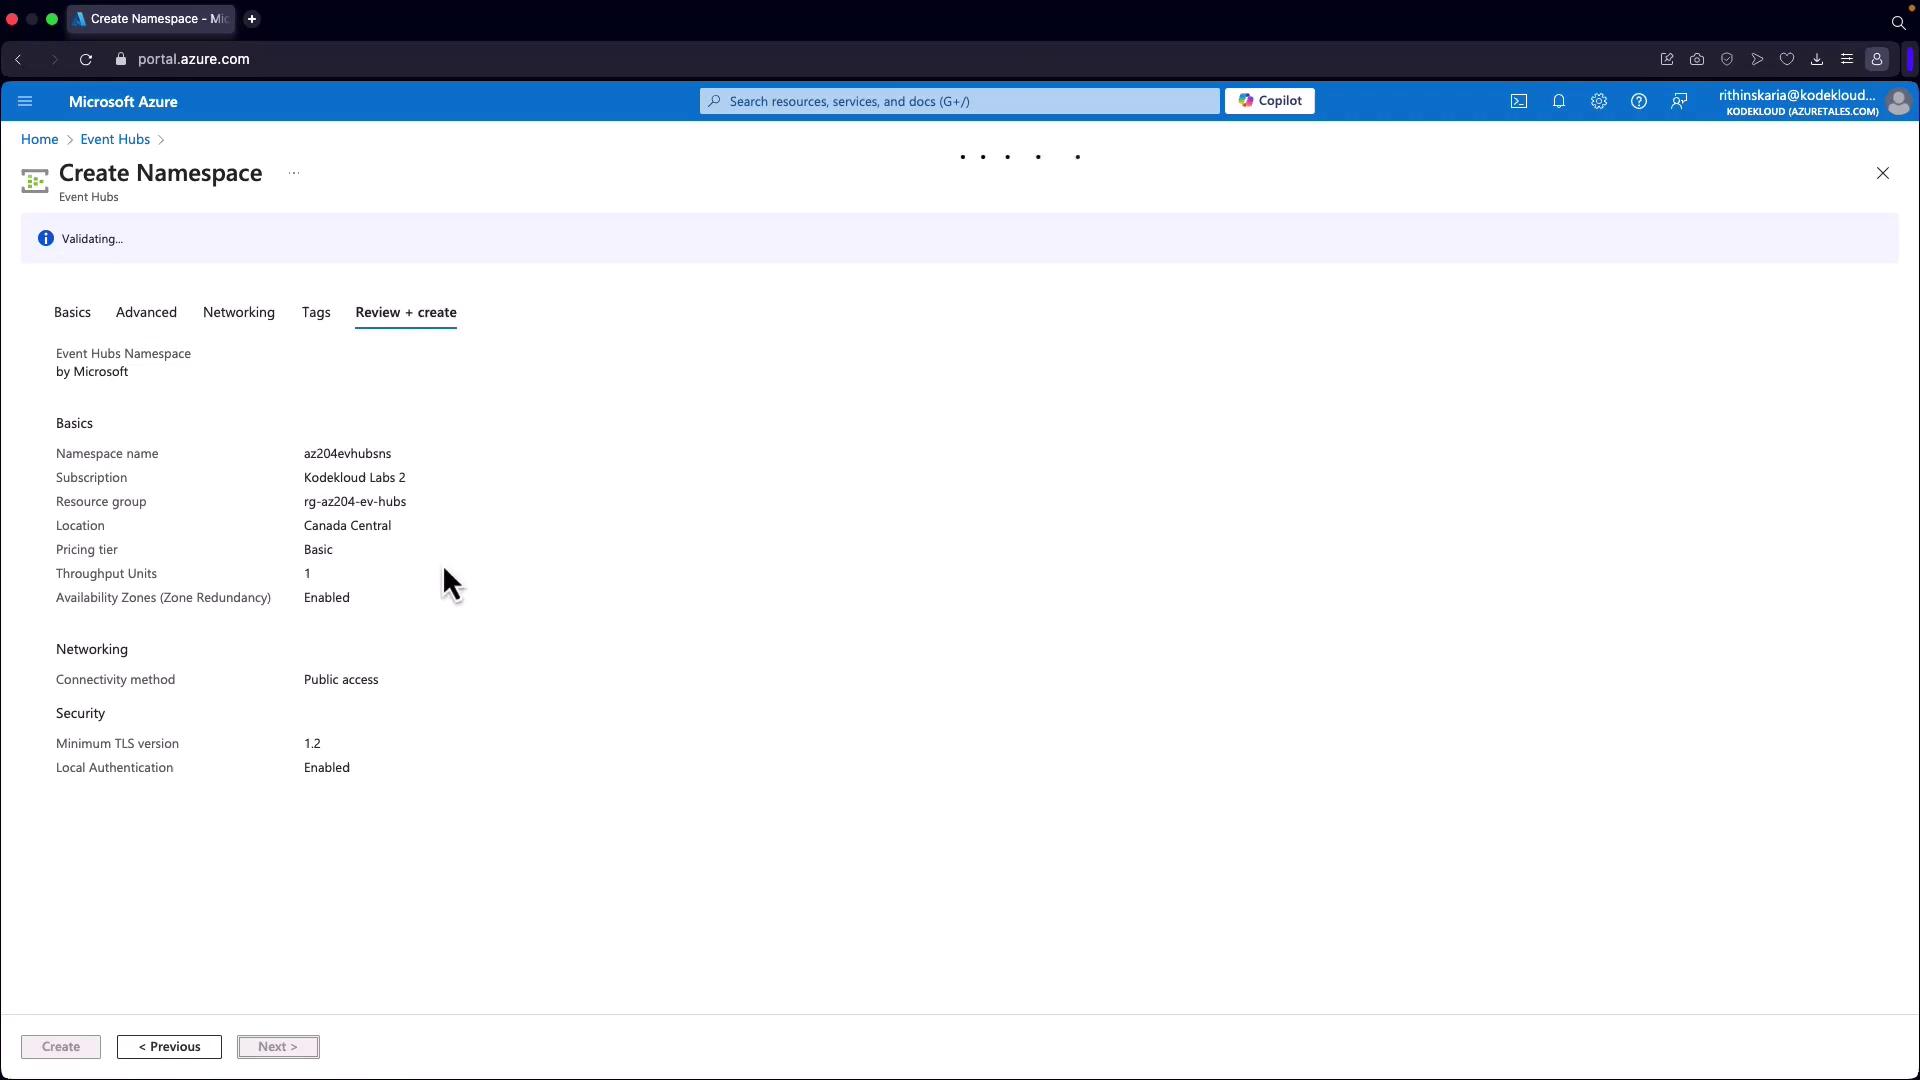
- Specify security settings, including the minimum TLS version and local authentication requirements. You must provide the access key or connection string when posting data.
- Note that public networking is enabled by default. To enable private access, consider upgrading to the standard or premium tier.
Finalize Namespace Creation:
- After running the validation, create your Event Hub namespace.

Create a New Event Hub:
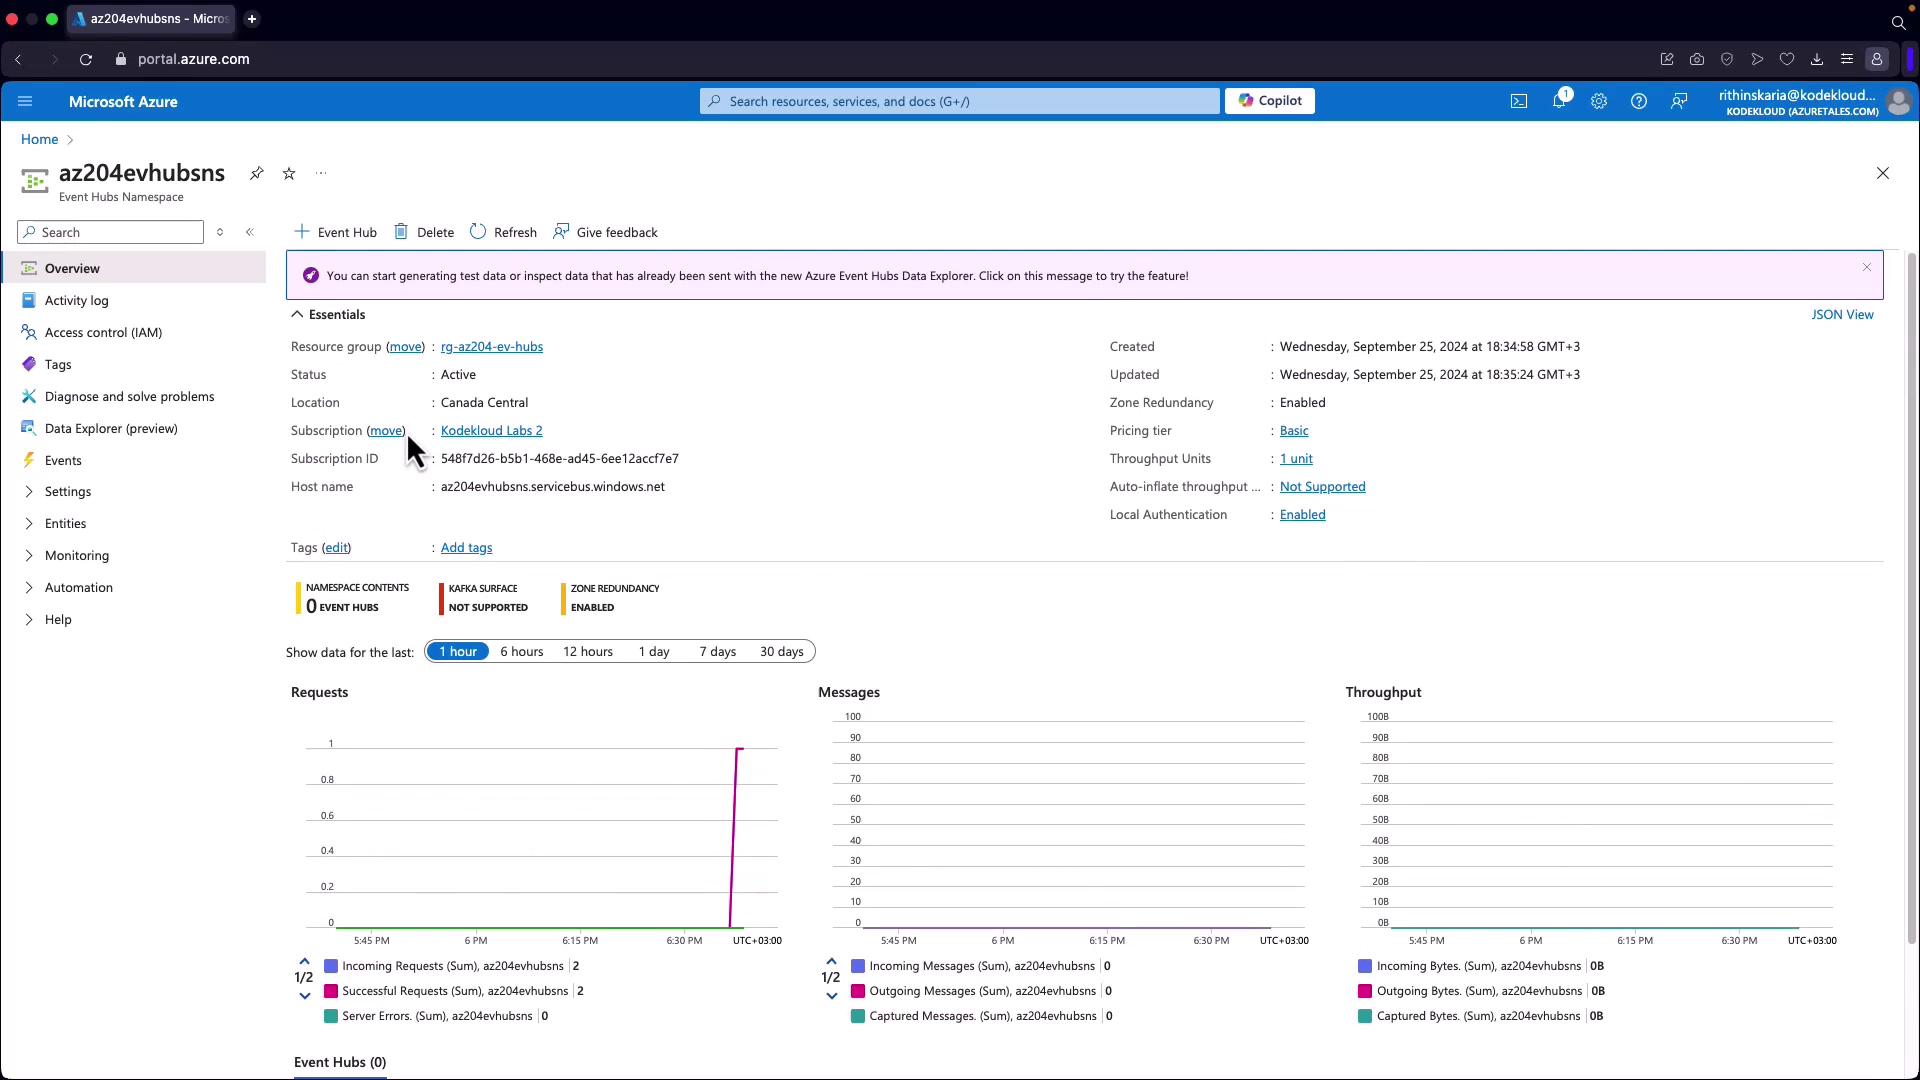
- Once the namespace is deployed, click on "Go to resource" to proceed with creating an individual Event Hub within the namespace.
- Familiarize yourself with additional concepts such as Event Hubs Capture, which is designed for automatic data capture and long-term retention or batch processing.

A namespace serves as a container for multiple Event Hubs. With this in mind, you can now explore the benefits of Event Hubs Capture to automate data retention and facilitate batch processing.
Whether you're processing data from IoT sensors or analyzing application telemetry, Azure Event Hubs provides a robust, scalable solution to manage your high-volume data streams efficiently. For more information, visit the Azure Event Hubs Documentation.
By leveraging these features and components, you can effectively design and implement scalable data streaming solutions using Azure Event Hubs.
Watch Video
Watch video content