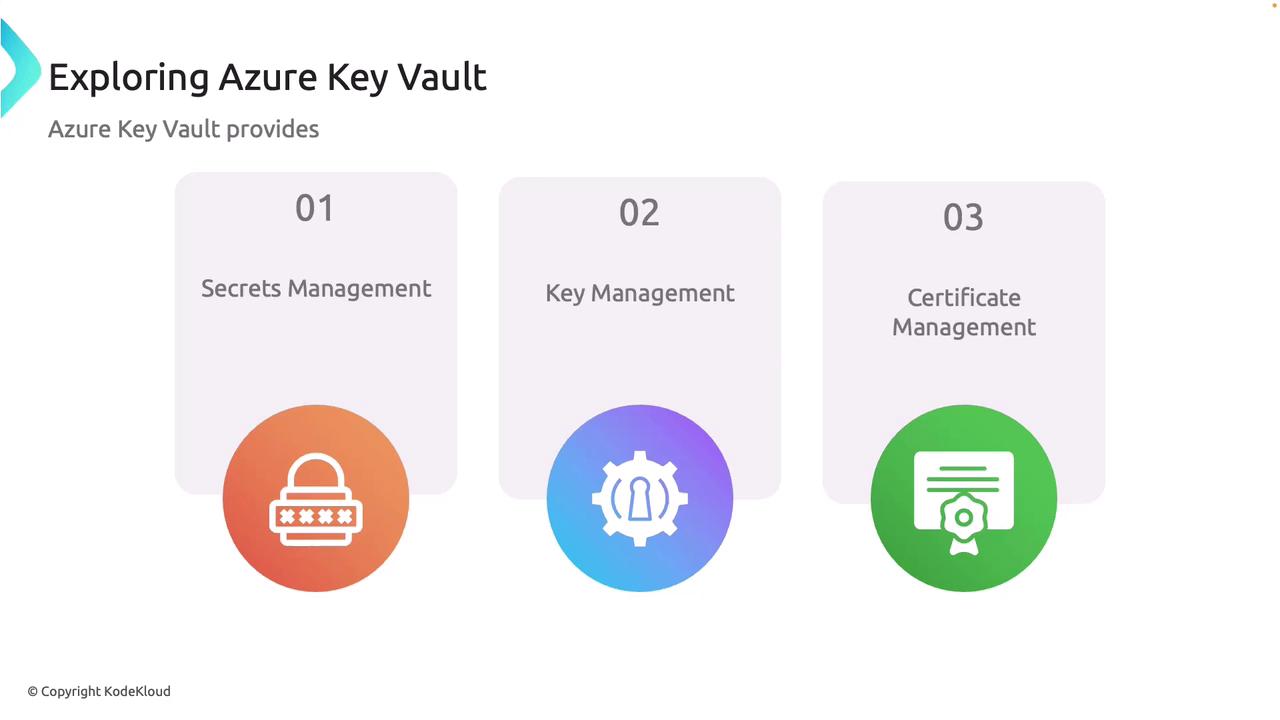
Key Features of Azure Key Vault
Azure Key Vault offers three primary functionalities:-
Secrets Management
Securely store and rigorously control access to sensitive data such as passwords, connection strings, and other confidential application details. -
Key Management
Generate, store, and manage cryptographic keys used for data encryption and decryption. This feature serves as an effective key management solution (KMS). -
Certificate Management
Provision, manage, and deploy both public and private SSL/TLS certificates, which are crucial for secure communications.
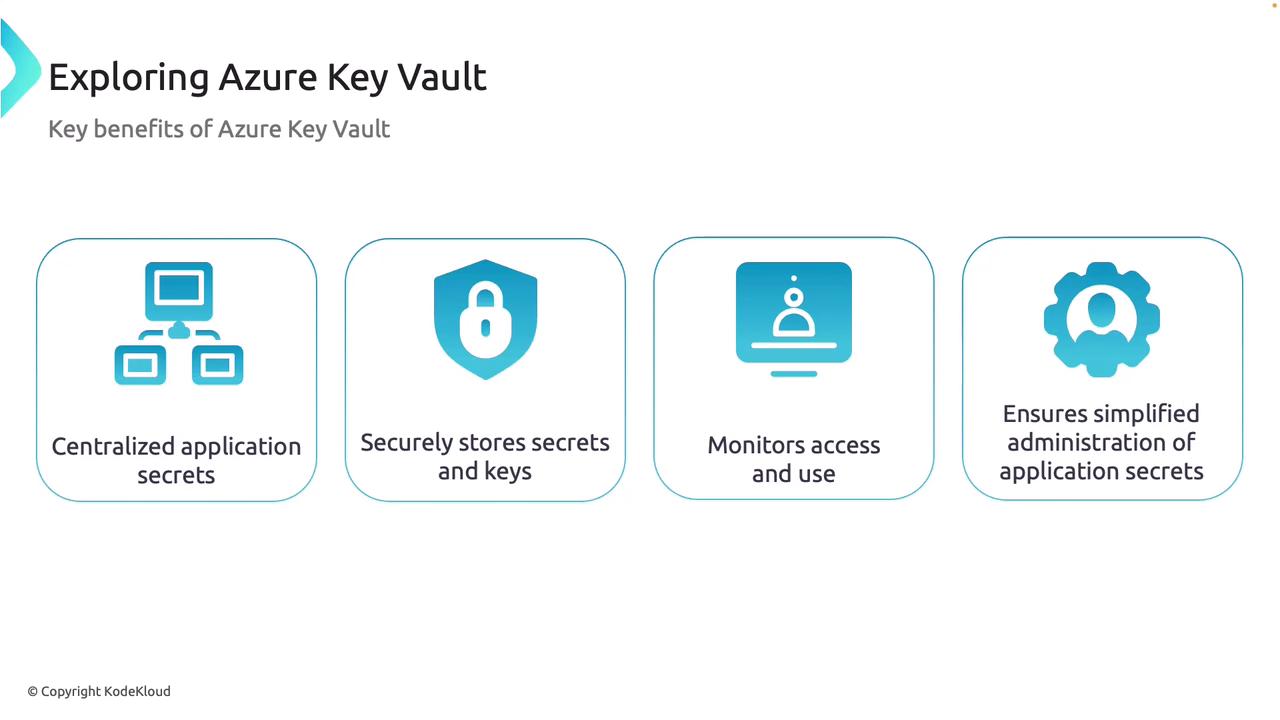
Benefits of Using Azure Key Vault
Azure Key Vault provides significant advantages:-
Centralized Storage
Maintain all of your application secrets in one secure location, enabling centralized control and distribution. -
Enhanced Security
Leverage strict authentication and authorization measures to protect secrets and adhere to compliance standards and industry best practices. -
Activity Monitoring and Auditing
Benefit from detailed logging and auditing, which is essential for tracking access and ensuring security compliance. -
Simplified Administration
Enjoy easier management with features like automatic renewal and high availability, reducing administrative overhead.
Implementing Azure Key Vault enhances the security posture of your applications by ensuring that sensitive assets are centrally managed and rigorously monitored.
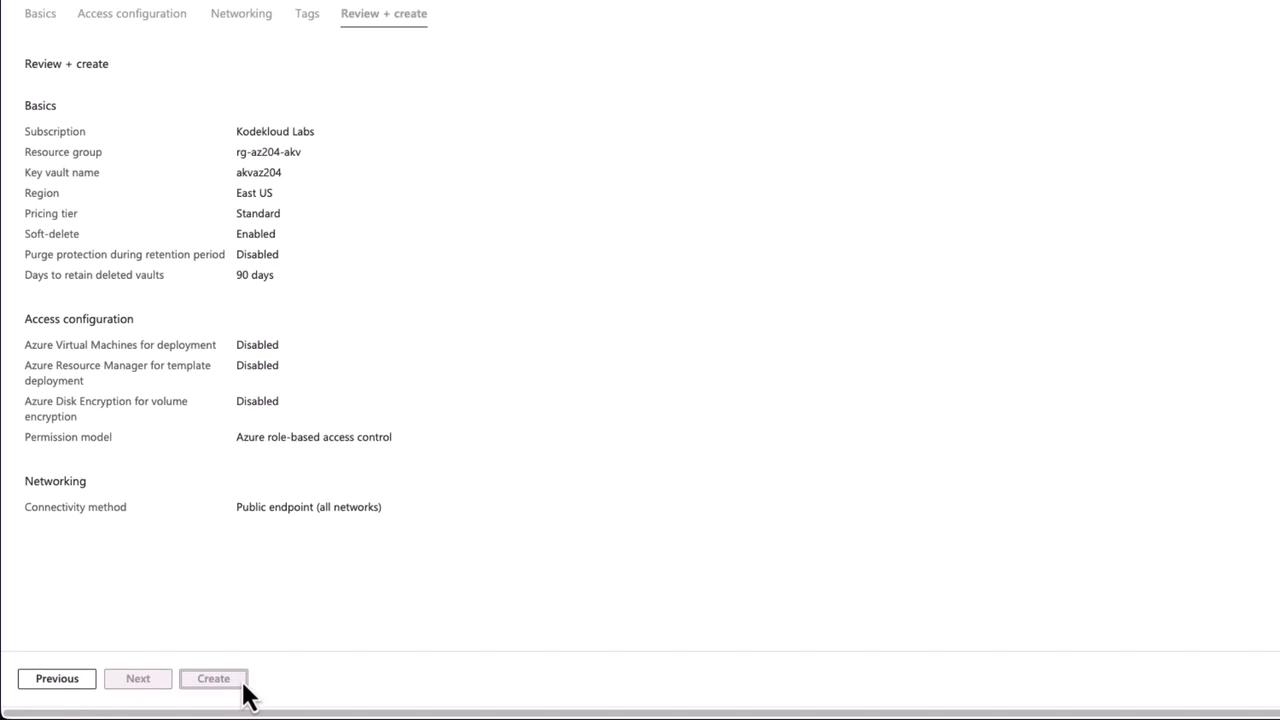
Creating an Azure Key Vault in the Azure Portal
This section outlines the step-by-step process to create a Key Vault using the Azure Portal.Step 1: Launch the Azure Portal
Begin by searching for “Key Vault” within the Azure Portal. Select the option to create a new Key Vault.Step 2: Configure the Key Vault
Carefully configure the following settings:-
Resource Group
Create or select an existing resource group (for example, “AKV”). -
Key Vault Name
Provide a unique name (e.g., “AKVAZ204”) for your Key Vault. The name must be unique across Azure as it forms part of the endpoint (vaults.azure.net). -
Pricing Tier
Choose between:Pricing Tier Description Standard Software-based security Premium Hardware-based security modules, ideal for stringent compliance requirements -
Control Features
Configure additional options such as soft delete, retention period for deleted vaults, and purge protection.
Step 3: Explore the Deployed Key Vault
Once deployment is complete, click “Go to resource” to access your Key Vault. The overview page displays key sections for managing keys, secrets, and certificates, along with the vault URI for retrieving stored objects.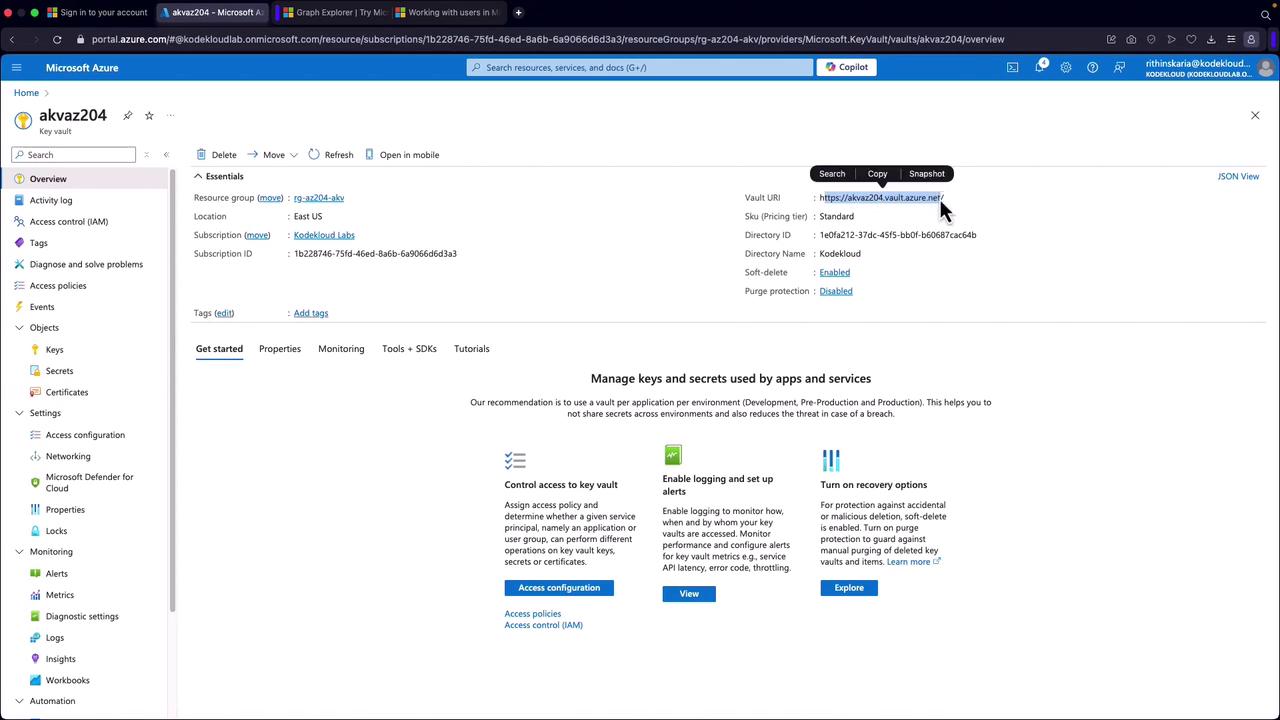
Managing Keys, Secrets, and Certificates
Keys
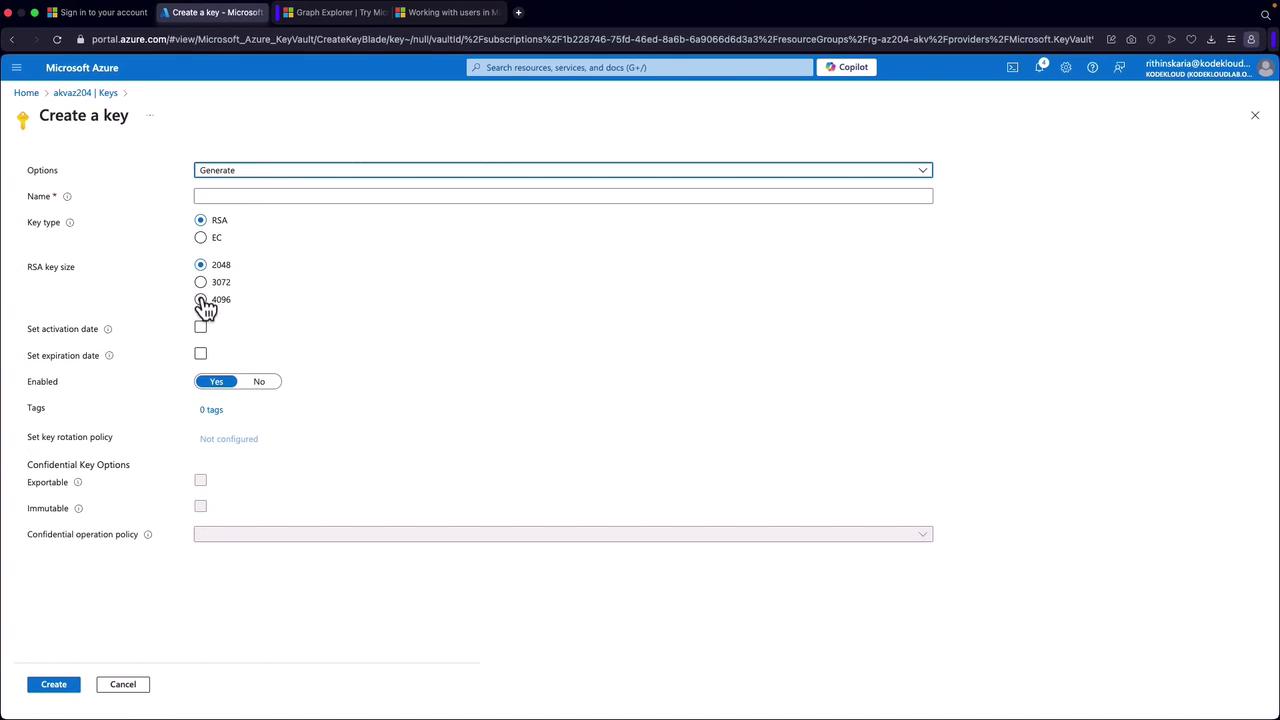
To manage cryptographic keys:- Navigate to the “Keys” section.
- Generate or import keys according to your cryptographic requirements.
- Configure key properties such as key type, size, activation, and expiration dates.
Secrets
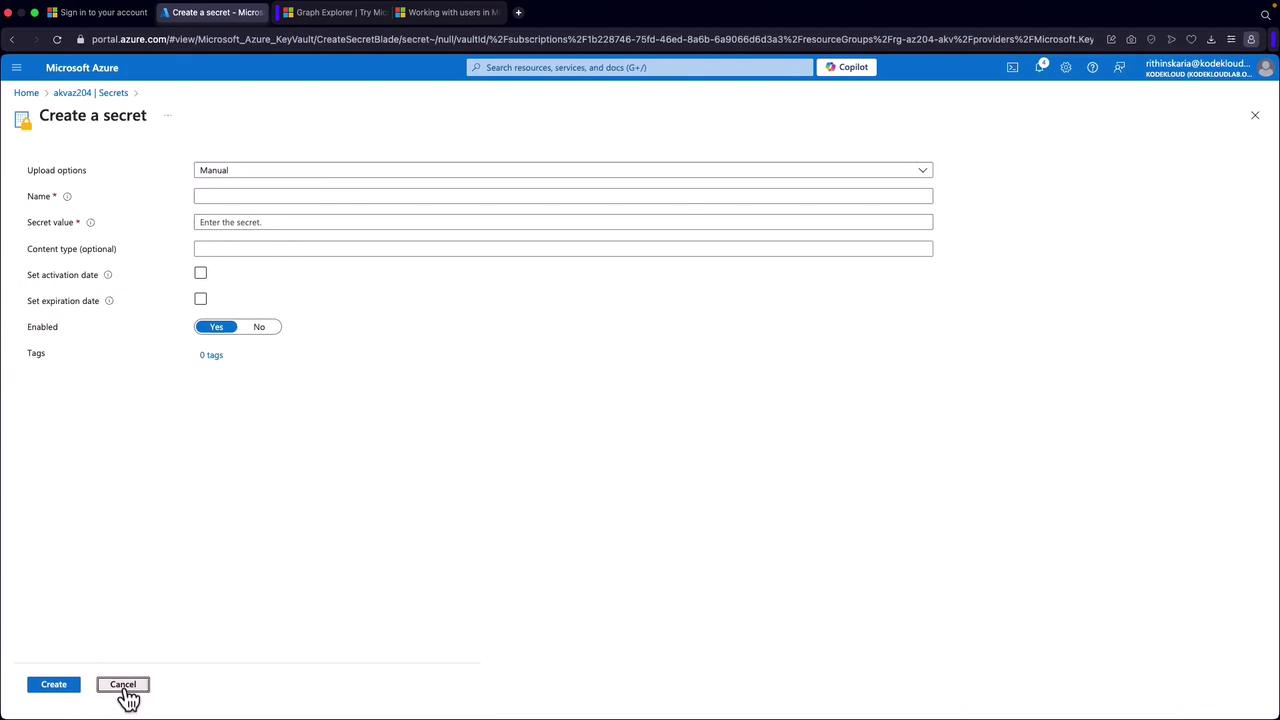
Adding and managing secrets is straightforward:- Go to the “Secrets” section.
- Click on “Generate/Import” to add a new secret.
- Fill in the necessary fields such as the secret name, value, content type, activation/expiration dates, and associated tags.
You may receive a warning regarding insufficient access permissions if your current account does not have the required data plane permissions.
Role-Based Access Control and Data Plane Permissions
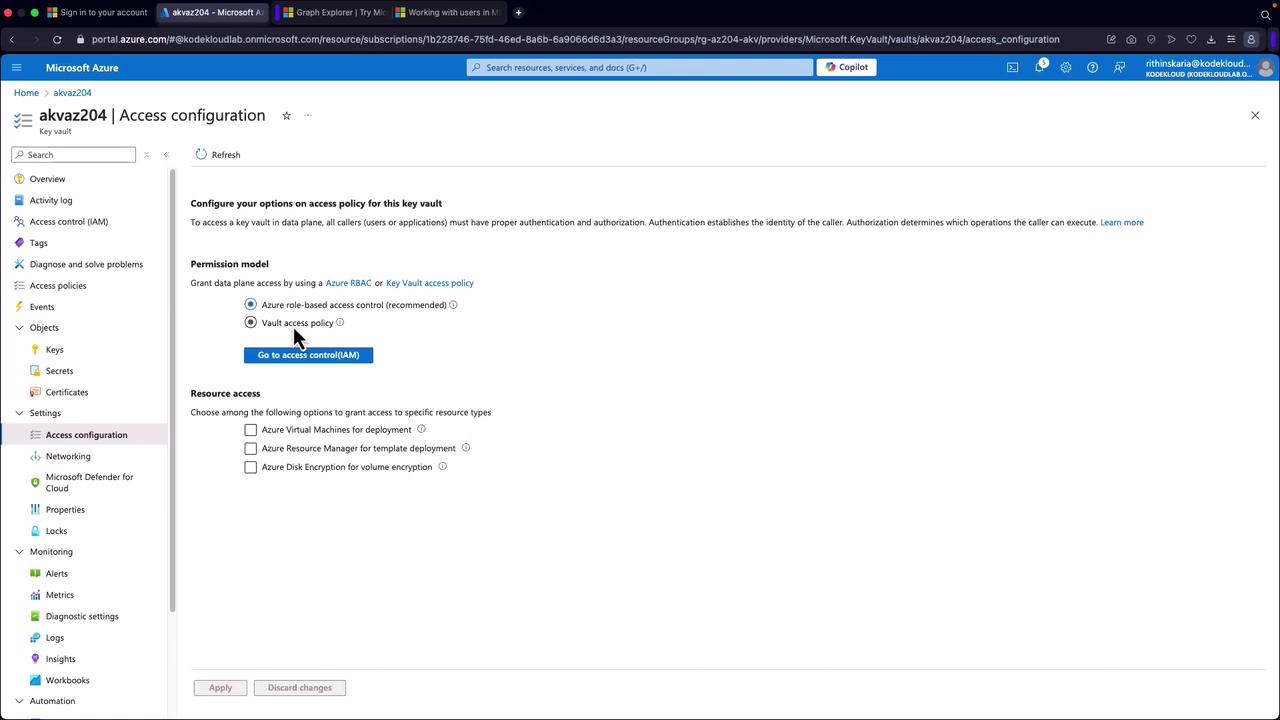
Azure Key Vault enforces role-based access control (RBAC) on its data plane alongside the subscription-level management plane. While owning the subscription provides management plane control, explicit permissions are required for accessing and managing stored secrets, keys, and certificates.-
Access Policies vs. Azure RBAC
Two methods ensure proper access control:- Vault Access Policies: Utilize checkboxes to grant specific permissions.
- Azure Role-Based Access Control (RBAC): Offers more granular access control and is the recommended approach.
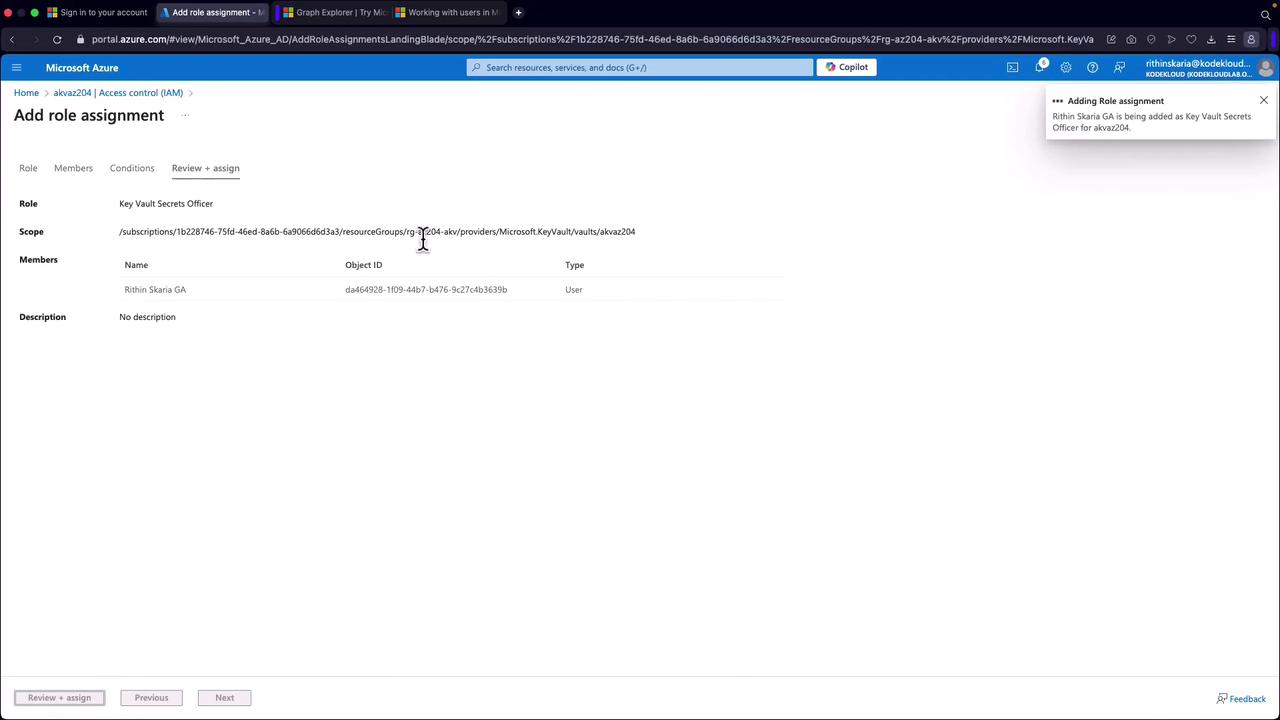
Configuring Role-Based Access Control
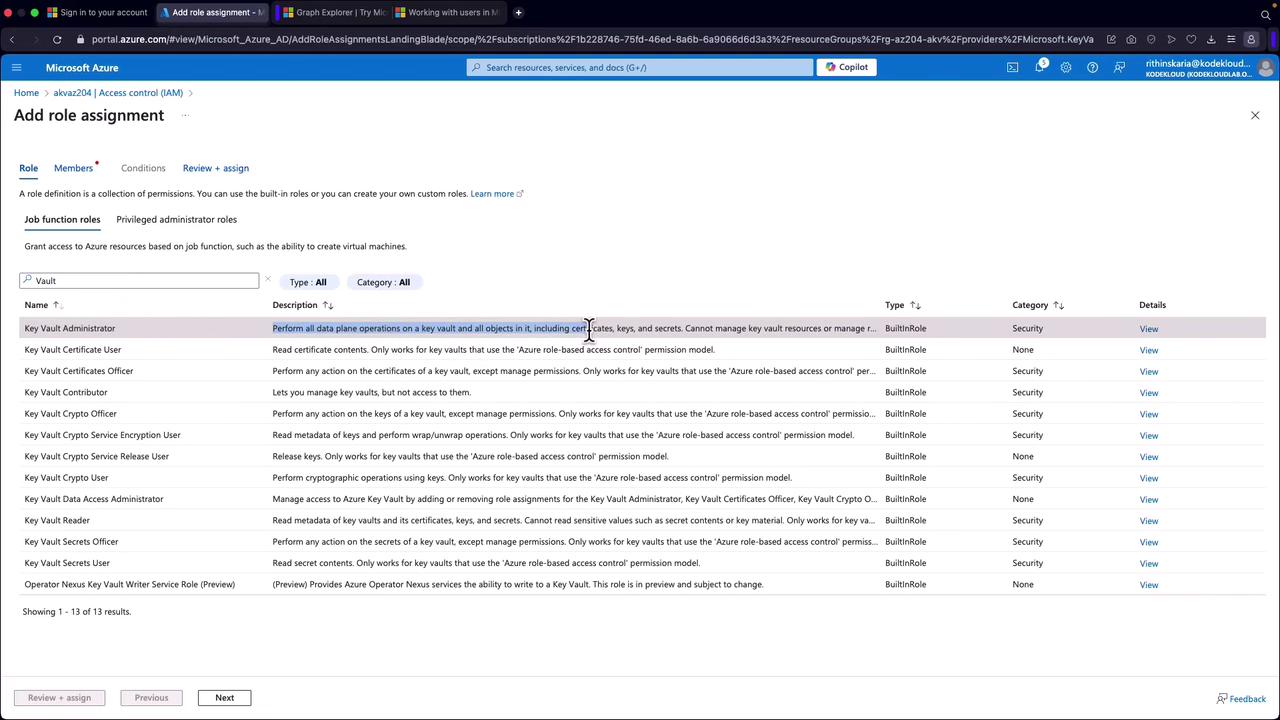
To configure RBAC for secrets management, follow these steps:- Open the “Access Control (IAM)” tab.
- Click to add a role assignment by selecting an appropriate role (e.g., “Key Vault Secrets Officer” for modifying secrets or “Key Vault Secrets User” for read-only access).
- Assign the role to the relevant account or service principal to unlock data plane access.
Example: Storing a SQL Connection String as a Secret
After establishing the required RBAC permissions, you can add secrets to the Key Vault. For instance, to store a SQL connection string, follow these steps:- Navigate to the “Secrets” section.
- Click “Generate/Import” to create a new secret.
- Enter a name for the secret (e.g., “SQLConnectionString”) and provide the connection string value.
- Optionally, specify activation and expiration dates.
Best Practices Recap
- Ensure that applications or service principals have the necessary RBAC permissions before accessing any Key Vault data plane features.
- Follow the principle of least privilege by assigning only the required roles.
- Utilize Azure Key Vault’s logging and monitoring capabilities to audit and track access to sensitive data.