Hot Tier
The Hot tier is optimized for frequently accessed data. It delivers the lowest latency and highest throughput, making it perfect for real-time analytics, web applications, and machine learning models that continuously perform data operations. Due to its premium performance, storing data in this tier is more expensive compared to the others.Cool Tier
The Cool tier is best suited for data that is accessed infrequently but still demands low-latency retrieval. This tier is often used for backups or archived data that is retrieved on a monthly or quarterly basis. While the storage cost is lower than the Hot tier, each data retrieval incurs a higher access cost. It is ideal for workloads with low read and write frequencies.Archive Tier
The Archive tier provides the lowest storage cost, but data retrieval times are significantly longer, taking several hours. This tier is ideal for scenarios with rare access requirements, such as long-term data retention for compliance or regulatory purposes. It offers a cost-effective solution for storing data that does not require immediate access but must be retained for legal or historical reasons.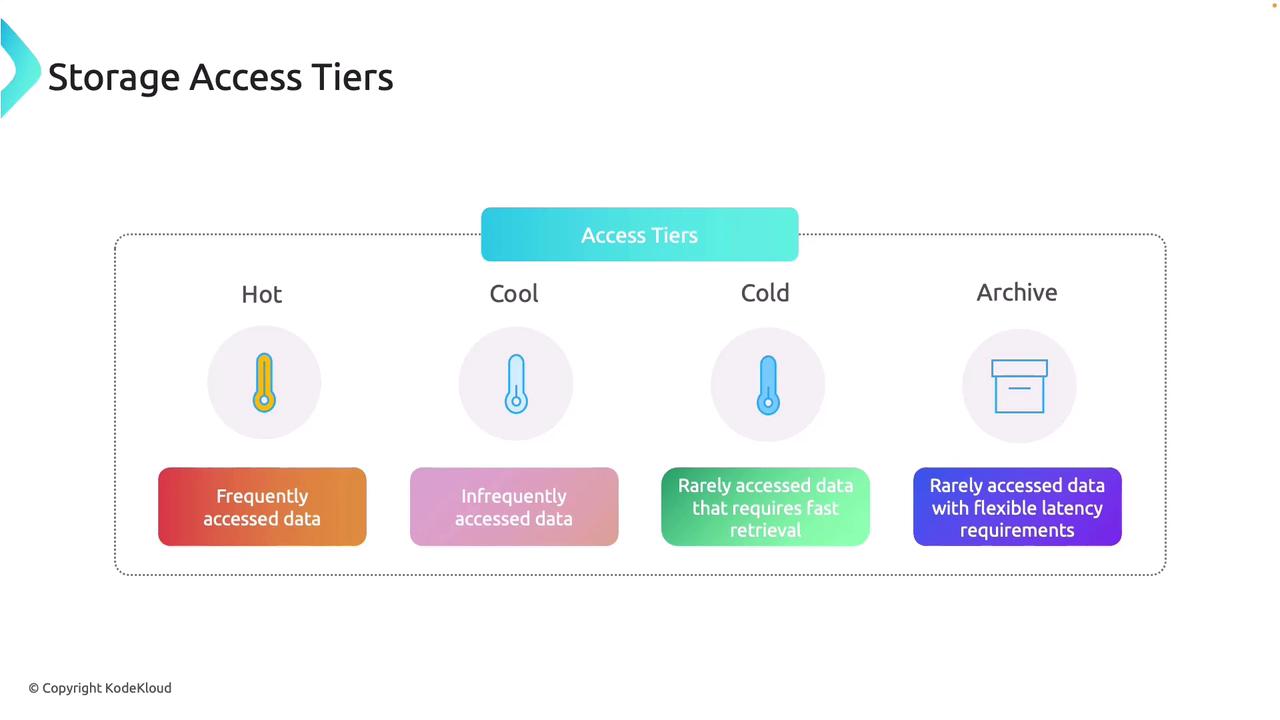
This section guides you through creating a storage account in the Azure portal and configuring its access tiers.
Step 1: Access the Storage Service
- Sign in to the Azure portal.
- Navigate to Storage and click Create to start the process of making a new storage account.
Step 2: Configure the Storage Account
Fill out the necessary details:- Resource Group: Choose an existing resource group or create a new one (e.g.,
az204-storage-rg). - Storage Account Name: Enter a unique name using a combination of letters and numbers. Avoid reserved words like “Azure” to ensure uniqueness.
- Region & Primary Service: Select your desired region and choose your primary service. Options include Azure Blob Storage, ADLS Gen2 for analytic workloads, or Azure Files. This example uses Azure Blob Storage.
- Workload and Performance: Select “other” for the primary workload if you do not require specialized configurations. Choose between Standard (using HDD) and Premium (using SSD) performance tiers.
- Redundancy Options: Select the preferred redundancy option (LRS, GRS, ZRS, or GCRS). For many scenarios, LRS is sufficient, though selecting GRS might automatically set it to RAGRS.

Ensure that you double-check your chosen region and redundancy options, as these can affect both performance and data durability.
Step 3: Additional Configuration Options
Configure further settings such as network access, data protection, and encryption:- Choose between Microsoft Managed Keys and Customer Managed Keys for key management.
- For this lesson, proceed with the default settings and click Create to finalize your storage account.
Step 4: Access the Storage Account and Perform Blob Operations
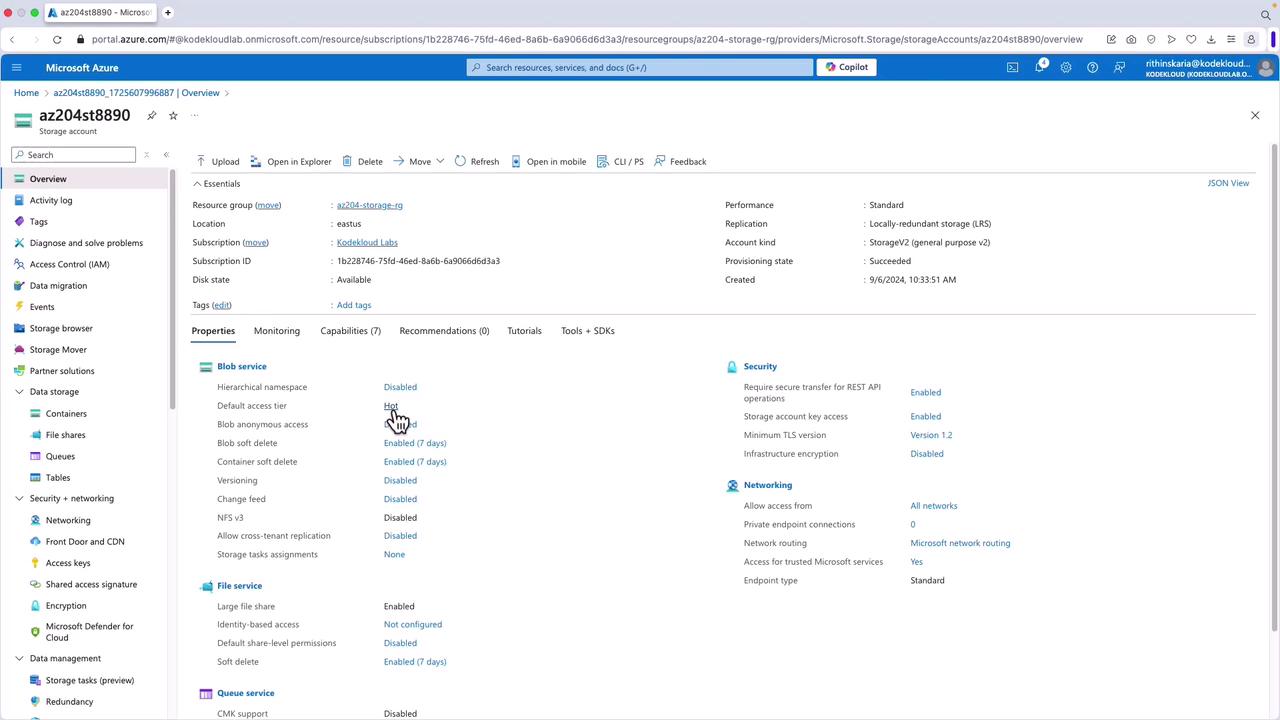
Once your storage account is created:- Click Go to Resource to access its dashboard.
- Notice that the default access tier at the account level is set to Hot. At this level, you can only choose between the Hot and Cool tiers.
Step 5: Create a Container and Upload Files
Follow these steps to create a container and manage blob access tiers:- Navigate to Containers and create a new container (e.g.,
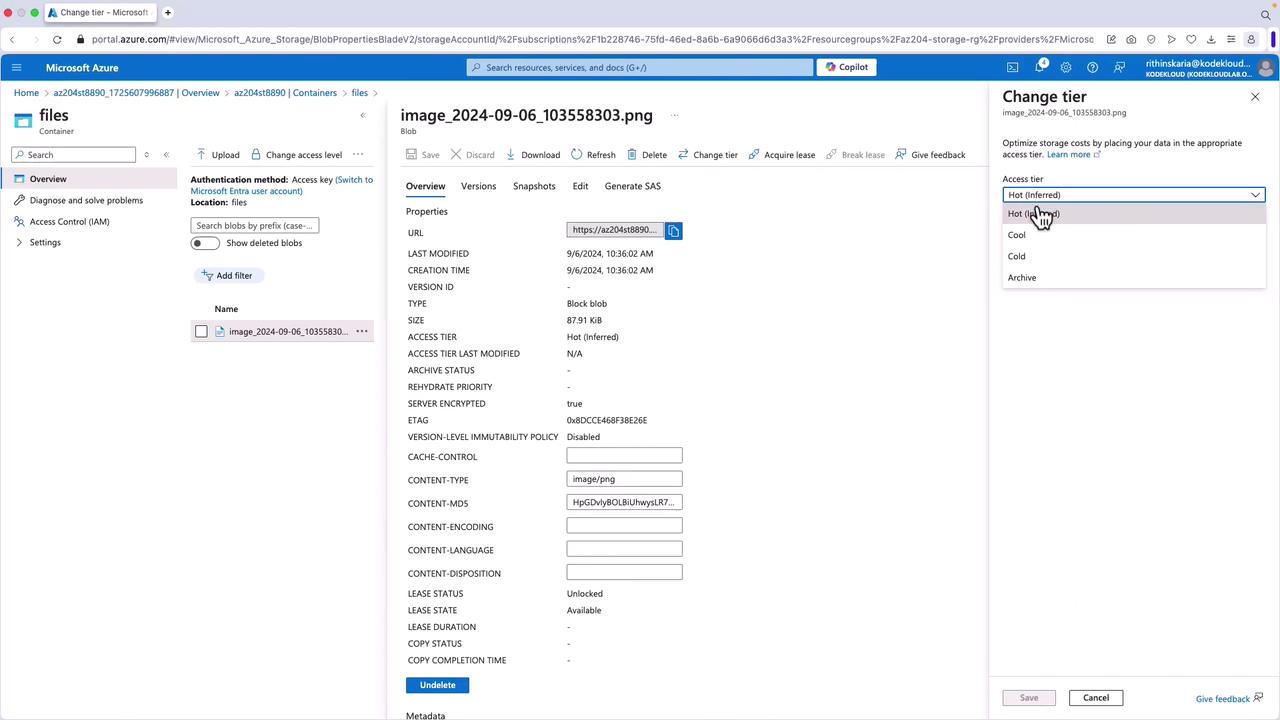
Files). - Open the container and click Upload to add files from your device.
- Once a file is uploaded, select Change Tier to view the dropdown menu offering Hot, Cool, and Archive options.
Step 6: Access Considerations
- The URL of an uploaded blob can be used for direct access.
- However, if the container is set to private, direct public access is restricted.
- For public access, consider converting the blob to a static website as detailed in additional documentation.
Step 7: Alternative Tools for File Uploads
In addition to the Azure portal, you can upload and manage files using the following tools:- Storage Explorer
- AzCopy (command-line tool)
- Azure PowerShell
- Azure CLI
Step 8: Review the Storage Account Overview
Return to the storage account overview to inspect details such as:- Storage type (e.g., General Purpose V2)
- Redundancy (e.g., Locally Redundant Storage)
- Default access tier (Hot)
In this section, we introduce blob lifecycle management policies. These policies enable automated transitions between access tiers based on rules such as data age and usage patterns. They are essential for optimizing costs and maintaining an efficient data management strategy.
With this lesson, you now have a solid understanding of Azure Storage access tiers, creating a storage account, and managing blob access tiers within containers. Use this foundational knowledge to balance costs and performance effectively for your distributed data workloads. For more information on managing your Azure Storage solutions, please refer to the Azure Storage Documentation.