Key Features of Azure Container Instances
Azure Container Instances provides a variety of benefits that can enhance your containerized application deployments:-
Fast Startup Time
With ACI, containers can start in seconds. Since there’s no need to provision or manage VMs, your applications benefit from quick scalability and immediate responsiveness. -
Public IP Connectivity and DNS
ACI assigns containers direct public IP addresses and fully qualified domain names, ensuring that your applications are easily accessible from the internet. -
Hypervisor-Level Security
Containers run with security isolation equivalent to that of virtual machines, which keeps your applications secure even in multi-tenant environments. -
Customizable Resource Sizes
You can specify exact CPU and memory requirements for each container. This feature prevents resource over-provisioning and promotes efficient usage. -
Persistent Storage
By mounting Azure File Shares directly to your containers, ACI provides persistent storage solutions where data remains intact even if containers restart. -
Support for Linux and Windows Containers
Manage both Linux and Windows containers using a single API, simplifying multi-platform application deployments. -
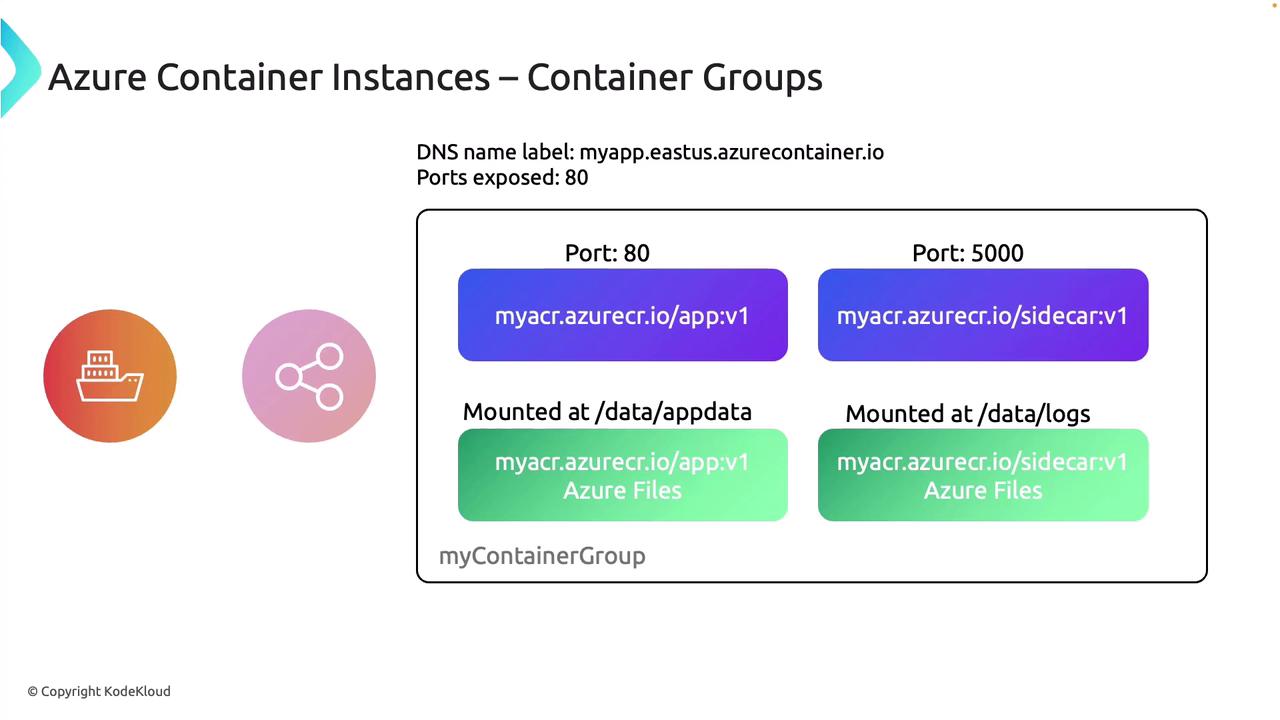
Co-scheduled Container Groups
Container groups allow containers to share lifecycle and resources such as CPU, memory, and local networks. This is particularly useful when pairing an application container with a sidecar container managing supplementary tasks like logging or monitoring. -
Virtual Network Integration
Deploying ACI into an Azure Virtual Network gives you tighter control over network configurations and enhances security by integrating with other Azure services.
Azure Container Instances is ideal for cloud-native development, offering scalability, security, and flexibility in a managed environment.
Understanding Container Groups
Container groups are a fundamental element of Azure Container Instances. They enable you to logically group containers that share resources like CPU, memory, networking, and storage volumes, and that have a synchronized lifecycle. For instance, a typical container group might include:- An application container that exposes a DNS label to the internet.
- A sidecar container that handles internal processes or logging.
Creating an Azure Container Instance via the Azure Portal
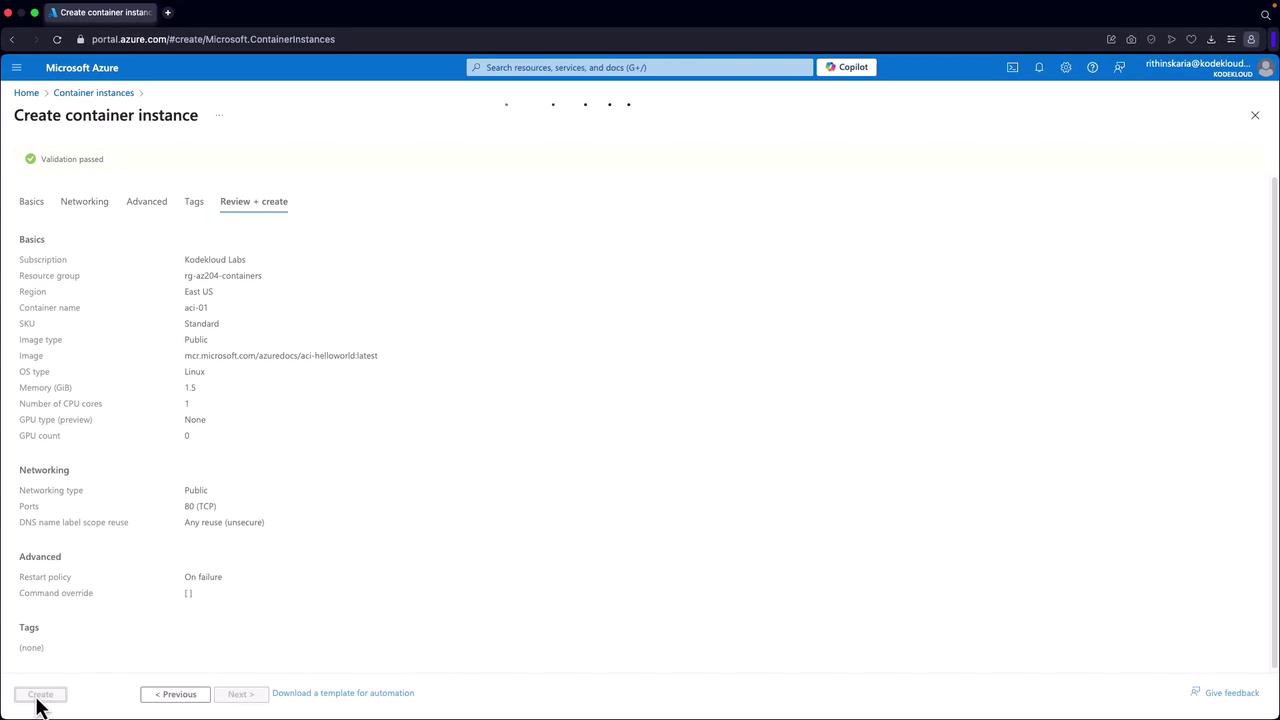
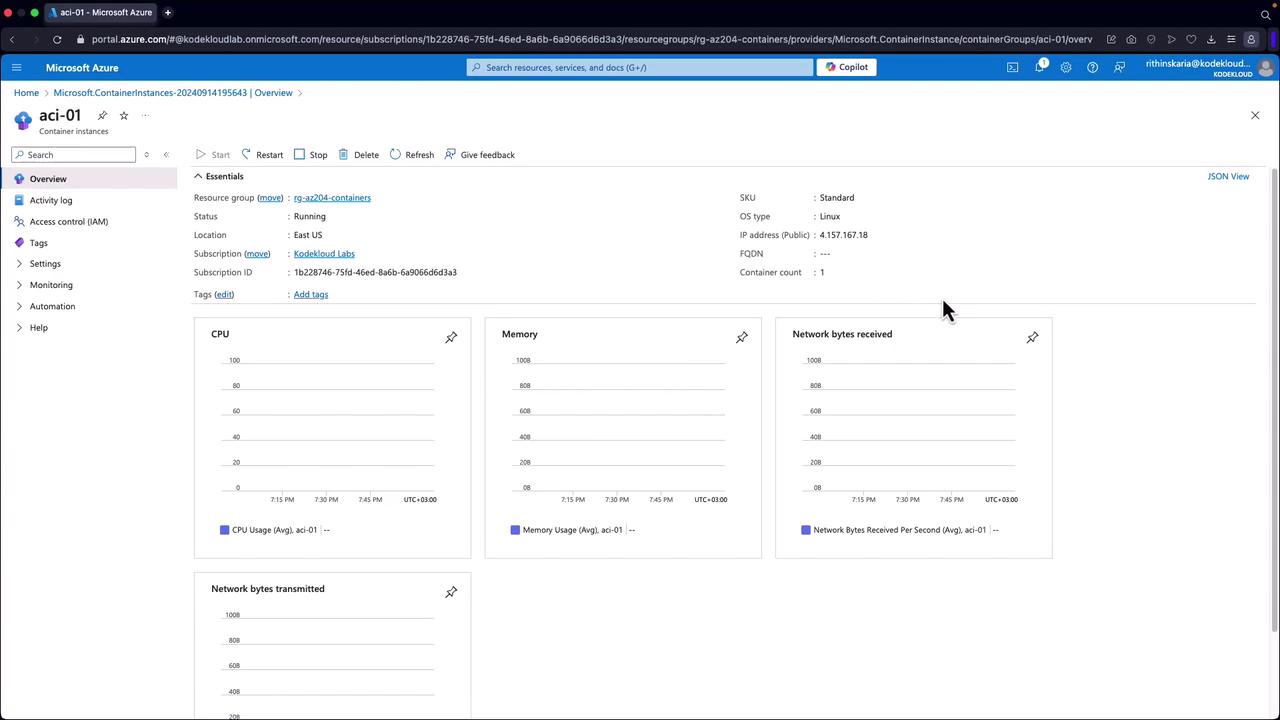
The following steps illustrate how to create an Azure Container Instance using the Azure Portal:- Open the Azure Portal and search for “Container Instances.”
- Click on “Create” to initiate a new container instance.
- Select an existing resource group (e.g., one designated for containers) and provide a unique name for your instance (for example, ACI01) since the DNS label must be unique.
- Choose your desired region (e.g., East US).
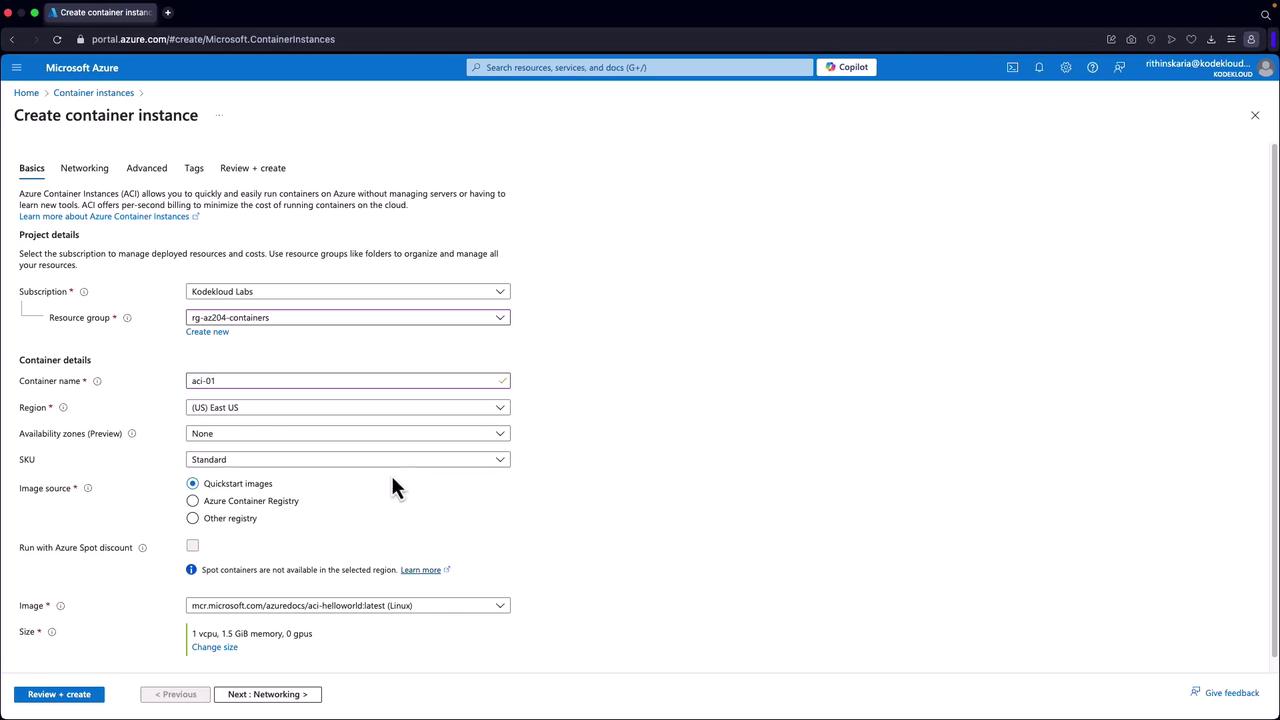
- Optionally, select availability zones if needed and choose a SKU. Options include a standard SKU or configuring for confidential computing, which provides in-memory encryption and hardware-level isolation. For this demonstration, the standard SKU is used.
- Select your image source. You may use a kickstart image like the hello world container, or choose an image from your Container Registry.
- Configure resource sizes, specifying GPU, memory, and CPU cores as required. Using default values is acceptable for a simple demonstration.
- Under the networking section, decide between public or private access. You can also set up a DNS label and specify which ports the container should expose.
- Define the restart policy. By default, ACI is set to restart on failure—a topic that will be discussed in greater depth in a later section.
- Add any necessary environment variables or startup scripts.
- Configure key management by choosing between Microsoft-managed keys and customer-managed keys.
Next Steps: Restart Policies and Environment Variables
In our next section, we will explore how to configure restart policies and environment variables using the Azure CLI. This will include deploying containers with commands that define specific restart behaviors and incorporate startup scripts. This comprehensive guide has provided an understanding of Azure Container Instances’ fundamental features and demonstrated how to deploy them via the Azure Portal. Leveraging these techniques enables rapid development and deployment of containerized applications in the cloud, empowering your cloud-native projects. For additional resources, consider exploring:- Azure Container Instances Documentation
- Azure Virtual Network Overview
- Infrastructure as Code with ARM Templates