AZ-305: Microsoft Azure Solutions Architect Expert

Design a data integration solution

Design for Azure Data Factory

Azure Data Factory (ADF) is a cloud-based ETL and data integration service that enables seamless data ingestion, transformation, and movement across a variety of sources. In this lesson, we explore the fundamental steps of a data-driven workflow and review the overall architecture of ADF.

Overview of a Data-Driven Workflow

A typical data-driven workflow in ADF involves the following steps:

  1. Ingestion:
    Connect to various data sources to collect raw data, which is then stored in a centralized location—such as a Storage Blob—for subsequent processing.

  2. Transformation:
    Enrich and transform the ingested data using analytics tools like Azure Databricks or Azure HDInsight. This step ensures the data is formatted correctly prior to publishing.

  3. Publishing:
    Leveraging CI/CD integration, the transformed data is incrementally delivered to version control systems such as GitHub or Azure DevOps and ultimately published to an analytics engine.

  4. Monitoring:
    Continuous monitoring of pipelines is essential when processing large data volumes. Tools like Azure Monitor and Azure Alerts help track pipeline performance and alert you to any failures.

Once these processes are complete, the data is ready for analysis and visualization.

Data-Driven Workflow Architecture

Azure Data Factory acts as the orchestration engine that manages data ingestion, transformation, and movement between services. The architecture supports connections to multiple data sources—including relational databases (SQL Server), on-premises networks, Blob Storage, external services, and both structured and unstructured data.

After ingesting data into ADF and storing it in a Storage Blob, the data can be moved to platforms such as Azure Synapse Analytics (formerly known as Data Warehouse), analyzed with Azure Analysis Services, and visualized using Power BI.

The image is a diagram illustrating data-driven workflows, showing the flow from data sources through orchestration (ingestion and data storage) to analysis and visualization using tools like SQL Server, Storage Blob, Synapse, Analysis Service, and Power BI.

The diagram above provides an overview of a typical data-driven workflow. It demonstrates how data is collected from multiple sources, ingested into a Storage Blob, and then processed and transformed using Azure Synapse Analytics and Analysis Services, with the final output visualized in Power BI.

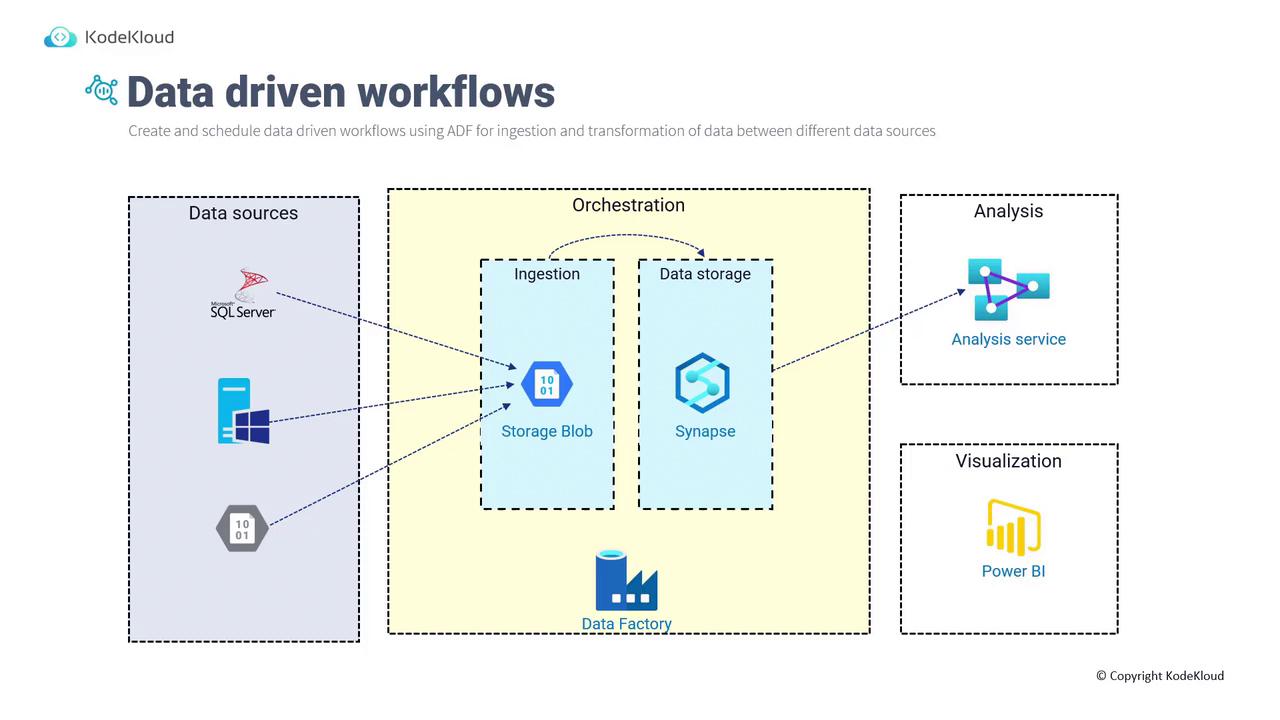
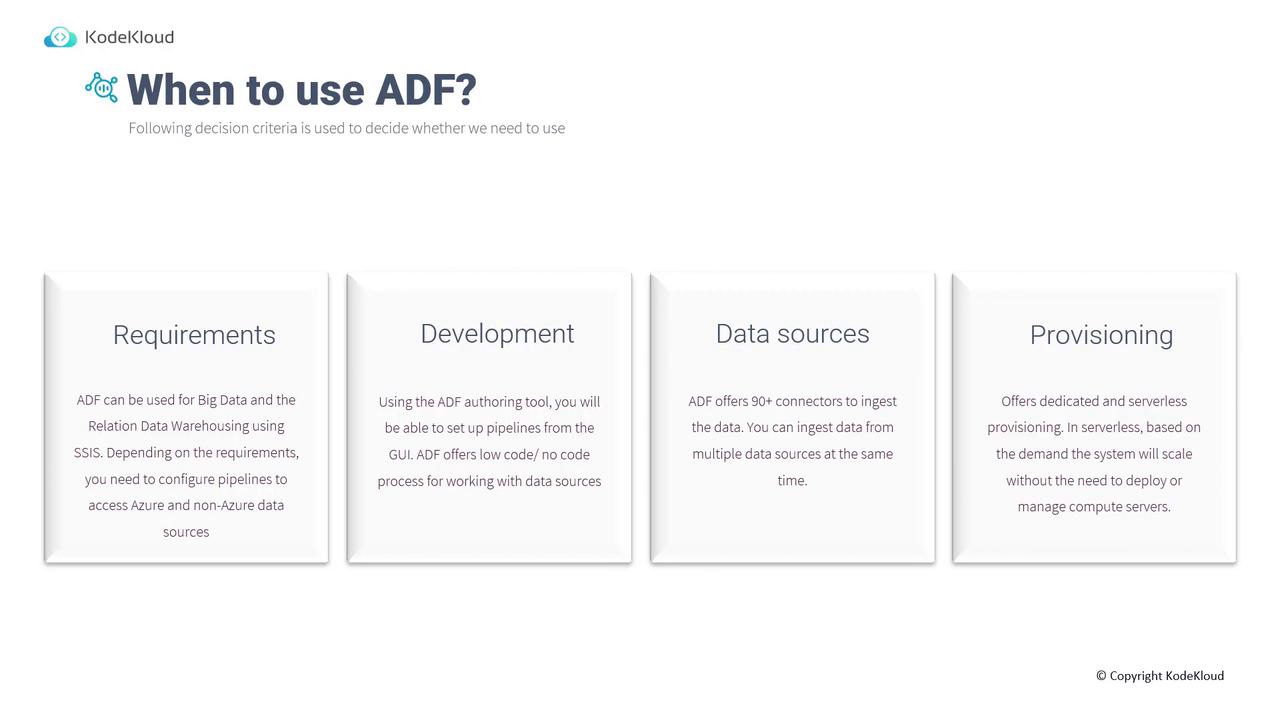
When to Use Azure Data Factory

ADF is a clear choice for various data integration scenarios. Consider the following key decision criteria:

  • Requirements:
    ADF is ideal for big data scenarios, relational data warehousing, and integration with SQL Server Integration Services (SSIS). It allows you to create pipelines that connect to diverse Azure data sources as needed.

  • Development:
    With its intuitive graphical user interface, ADF offers a low-code/no-code approach to creating pipelines. Similar to Logic Apps, its visual connectors enable you to build data ingestion, transformation, and movement tasks quickly.

  • Data Sources:
    ADF supports over 90 connectors, permitting simultaneous ingestion from multiple data sources. This capability lets you integrate data from a cloud database along with on-premises systems to develop comprehensive analytics solutions.

  • Provisioning:
    ADF supports both dedicated and serverless provisioning modes. Serverless provisioning allows scaling automatically based on demand without manual compute node management.

The image is an infographic from KodeKloud titled "When to use ADF?" It outlines decision criteria for using Azure Data Factory, focusing on requirements, development, data sources, and provisioning.

The infographic clearly summarizes the essential factors for determining whether Azure Data Factory meets your data integration needs.

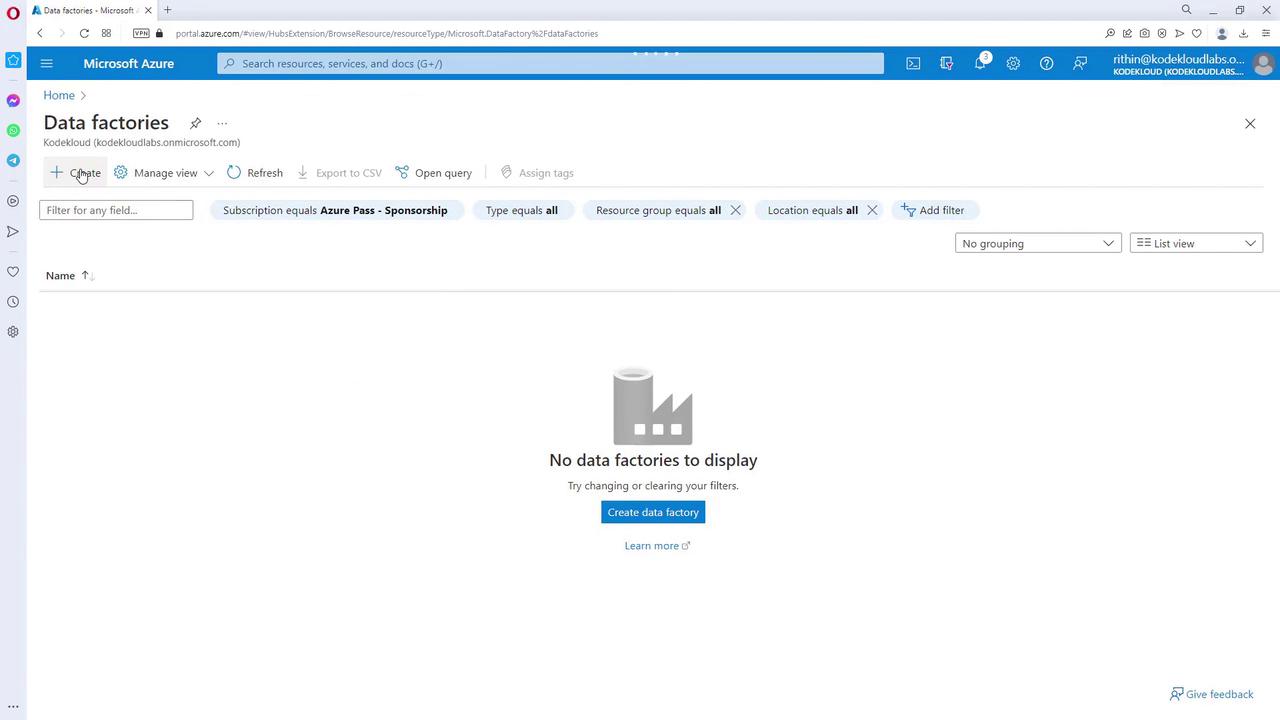
Creating an Azure Data Factory Instance

Creating an Azure Data Factory instance is a straightforward process via the Azure Portal. Follow these steps:

  1. Access the Data Factory Resource:
    Open the Azure Portal and search for "Data Factory". If no data factories exist, you will see a message indicating that none are present.

    The image shows a Microsoft Azure portal page for "Data factories," indicating that there are no data factories to display. There is an option to create a new data factory.

  2. Create a New Resource:
    Start by creating a new resource group with a unique name, then proceed to create the Data Factory instance.

    The image shows a Microsoft Azure portal page for creating a Data Factory, with fields for subscription, resource group, and instance details. An error message indicates that the chosen Data Factory name is already taken.

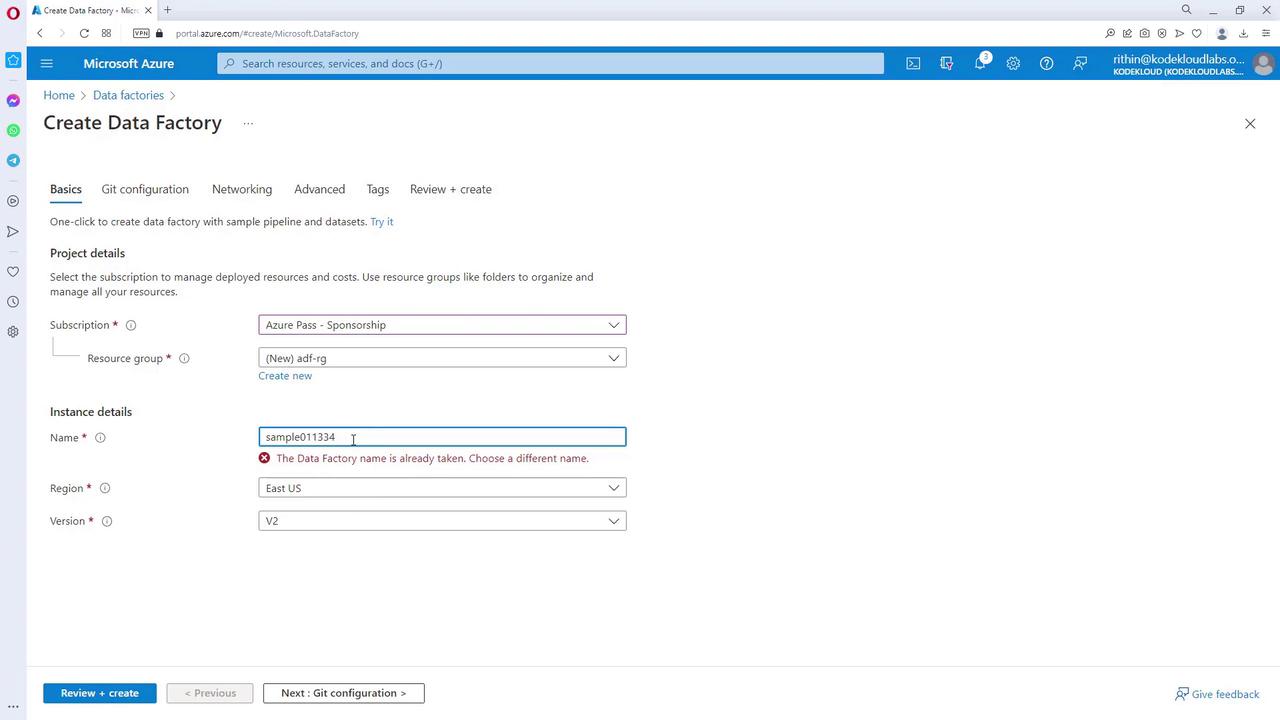
  3. Configure the Instance Details:
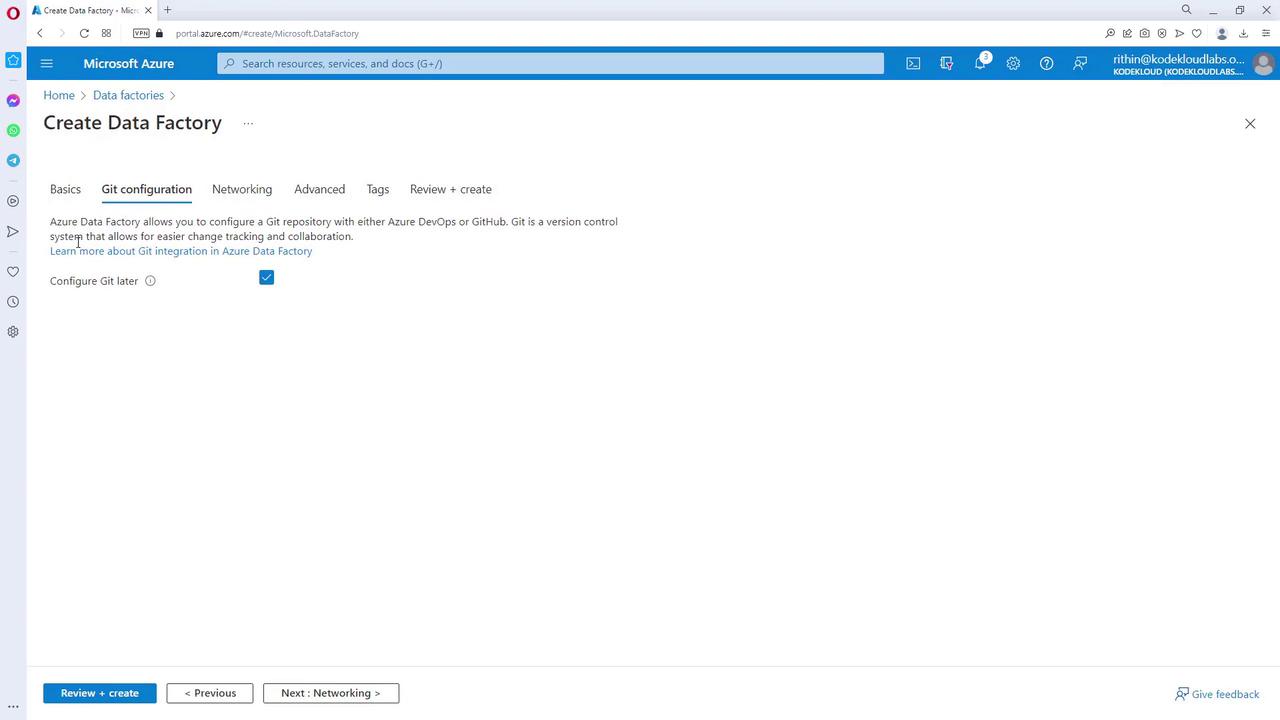
    Choose a region (for example, East US) and select the appropriate version, typically V2. Git configuration and networking options (public or private endpoints) can be set up later.
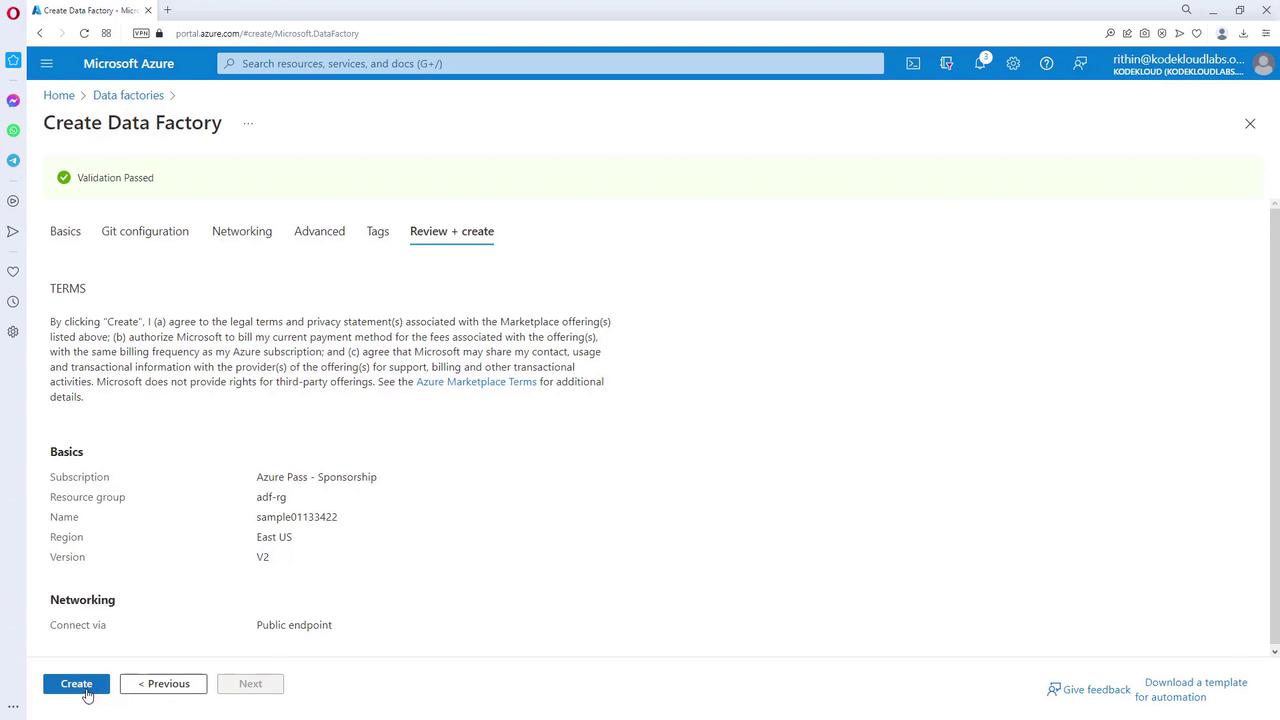
    The image shows a Microsoft Azure portal page for creating a Data Factory, specifically on the "Git configuration" tab, with options to configure a Git repository.

  4. Review and Create:
    After reviewing your settings, navigate to the "Review + create" tab and click on the "Create" button.

    The image shows a Microsoft Azure portal page for creating a Data Factory, with options to review and create the setup. The user is on the "Review + create" tab, and a "Create" button is highlighted.

Once the instance is created, click "Go to resource" to view your new Data Factory. A kickstart guide will be available to help you begin working with ADF.

The image shows the Azure Data Factory Studio interface, displaying an overview of a data factory with options to launch the studio, access tutorials, and view monitoring details.

Note

After creating your Azure Data Factory instance, use the kickstart guide to familiarize yourself with its features and best practices for managing data workflows.

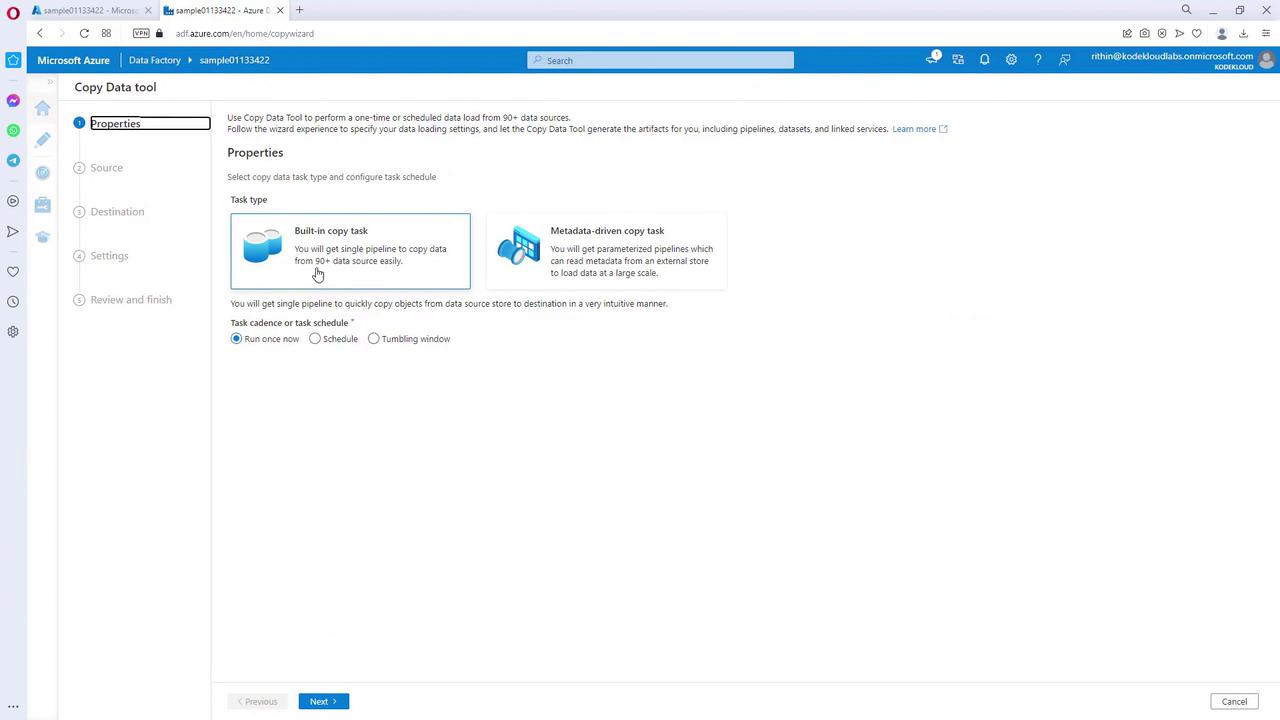
Using the Azure Data Factory Studio

The Azure Data Factory Studio is the dedicated environment for managing and building your data-driven workflows. Here’s how to get started:

  1. Click on the "Launch Studio" button to access ADF’s dedicated interface at ADF.azure.com.
  2. Within the studio, you can set up and manage workflows that handle data ingestion, orchestration, and transformation.

For example, accessing the "Ingestion" module allows you to create tasks that schedule data copying. You can choose to run these tasks on a daily basis or as one-time executions.

The image shows the Microsoft Azure Data Factory interface, specifically the "Copy Data Tool" section, where users can select task types and configure task schedules for data copying.

When you select a source such as Blob Storage, the interface will prompt you to establish a new connection by providing the necessary connection string. The platform presents all available connectors, enabling you to build customized workflows seamlessly.

Next Steps: Azure Data Lake Storage

Now that you've gained an understanding of Azure Data Factory's core functionalities—its architecture, optimal use cases, and how to create and manage an instance using both the Azure Portal and ADF Studio—the next logical step is to explore Azure Data Lake Storage. Discover how it integrates with ADF to facilitate large-scale data storage and processing.

This concludes the lesson on Azure Data Factory. Armed with these insights, you are well-equipped to leverage ADF for powerful data integration and analytics across your organization.

Watch Video

Watch video content

Previous
Section Introduction