Scenario Overview
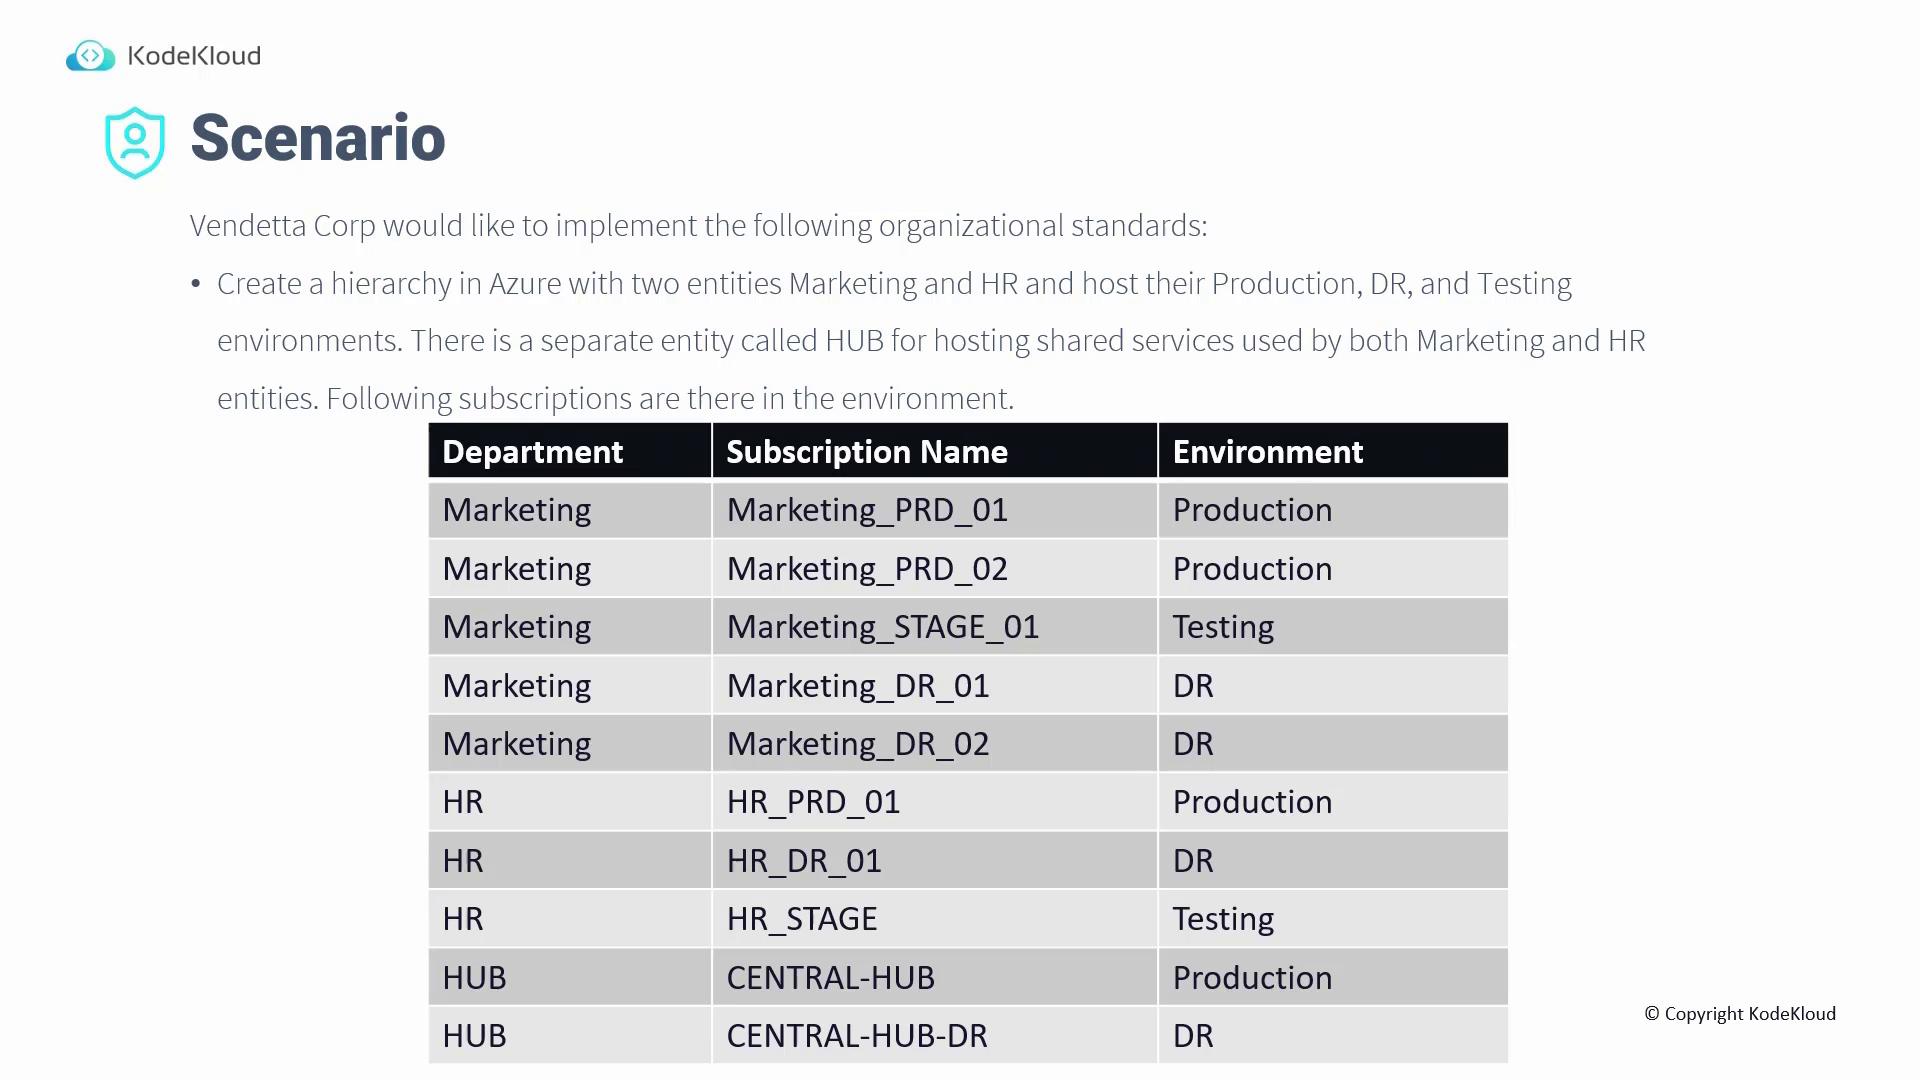
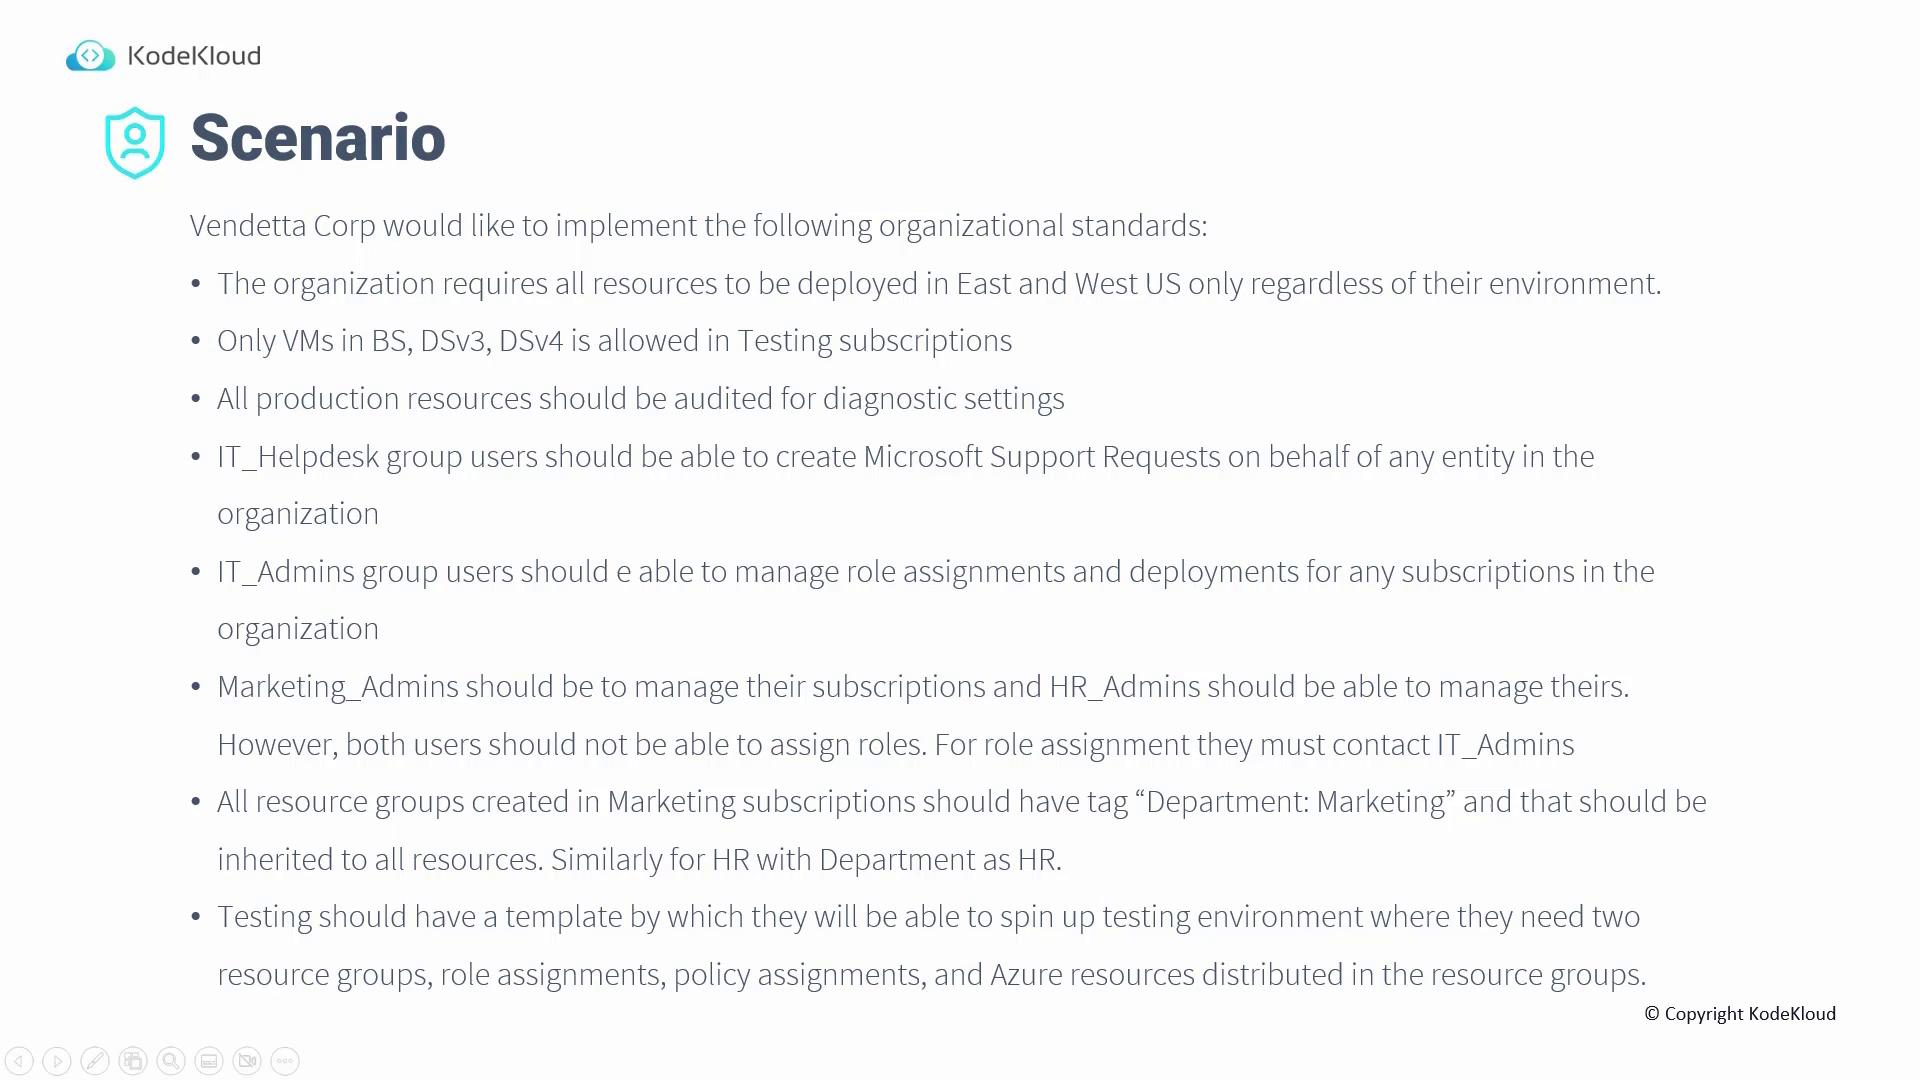
The customer’s scenario requires an Azure hierarchy composed of: • Two entities: Marketing and HR• Production, DR, and testing environments for each entity
• A separate HUB for shared services The diagram below illustrates the scenario:
Creating the Management Group Hierarchy
The solution involves creating management groups under the tenant root. In this example, three top-level management groups are created: Marketing, HR, and HUB. Under each, additional management groups for production, testing, and DR subscriptions can be organized.Setting Up in the Azure Portal
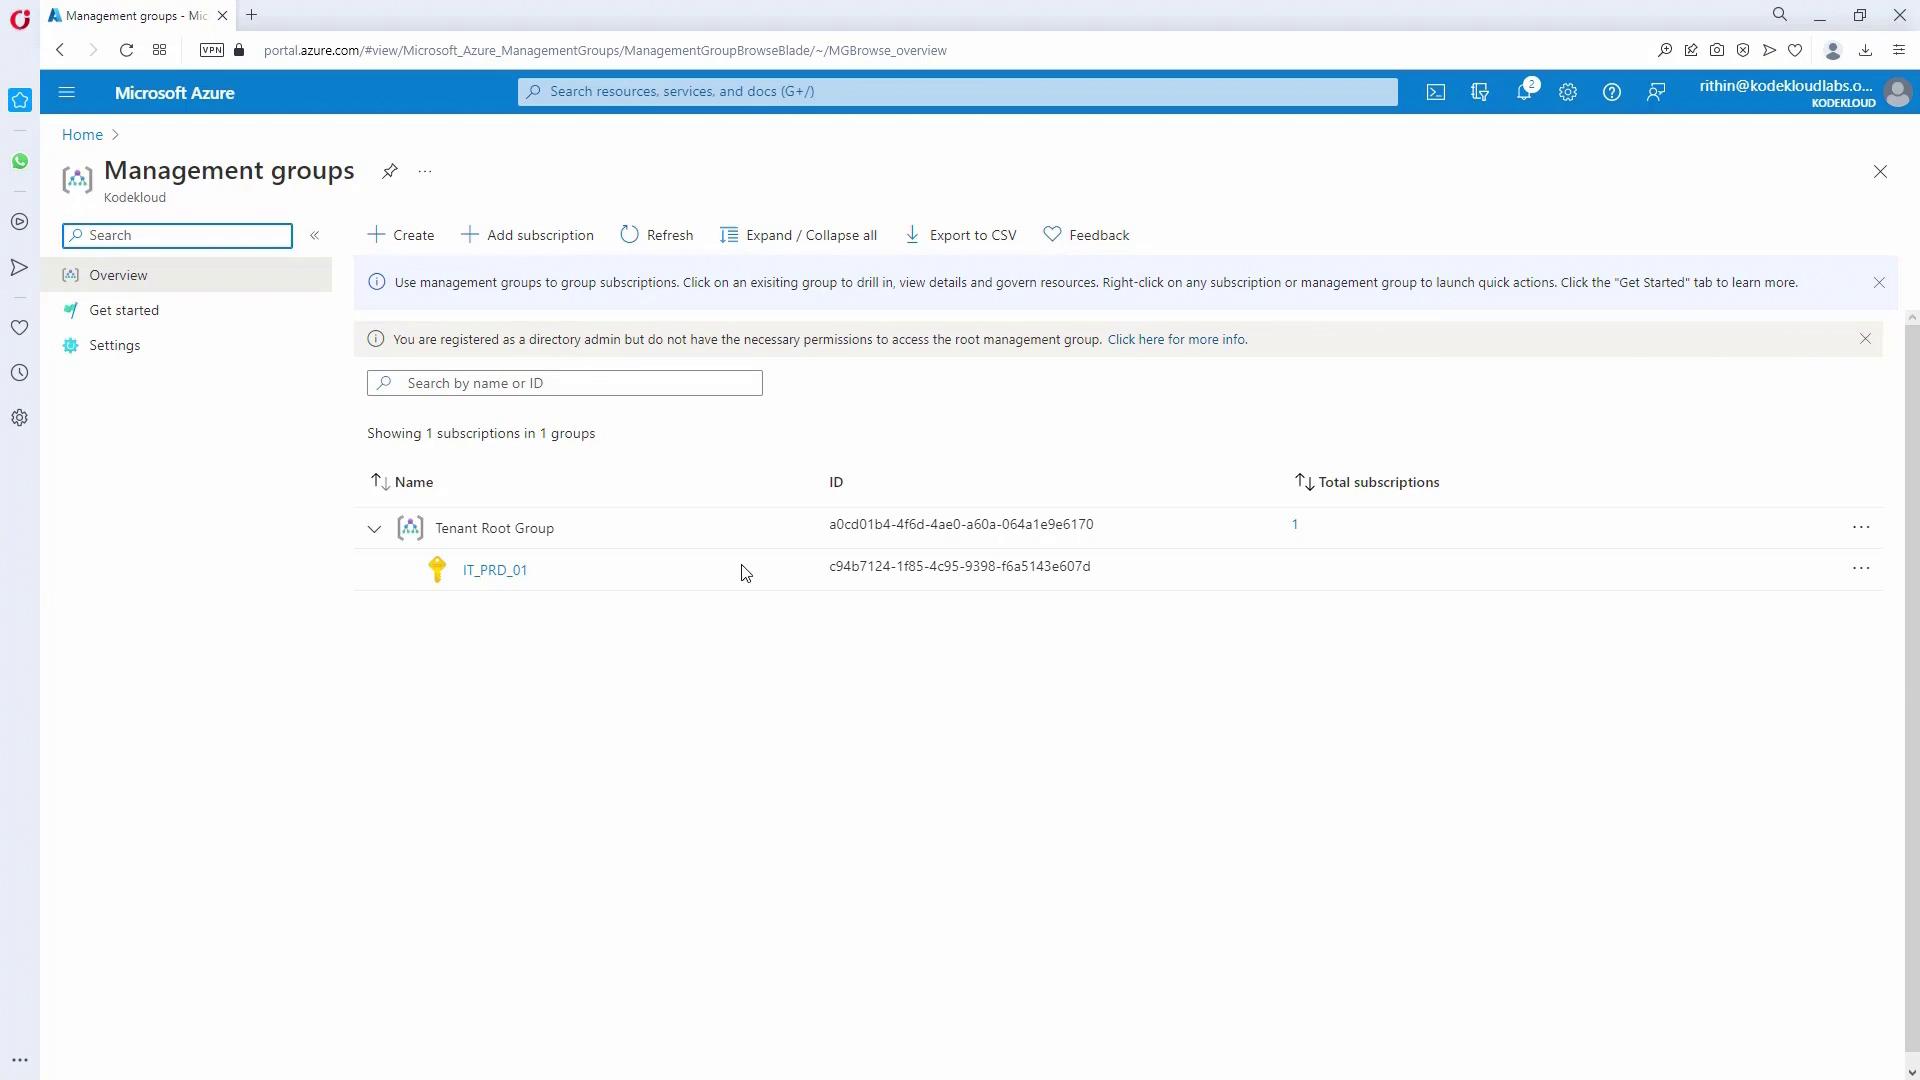
- Access Management Groups:
Open the Azure portal and search for “Management Groups”.- First-time users see a prompt labeled “Start using Management Groups,” which automatically moves your subscription to the tenant root group.
- Returning users will already see the tenant root group.
-
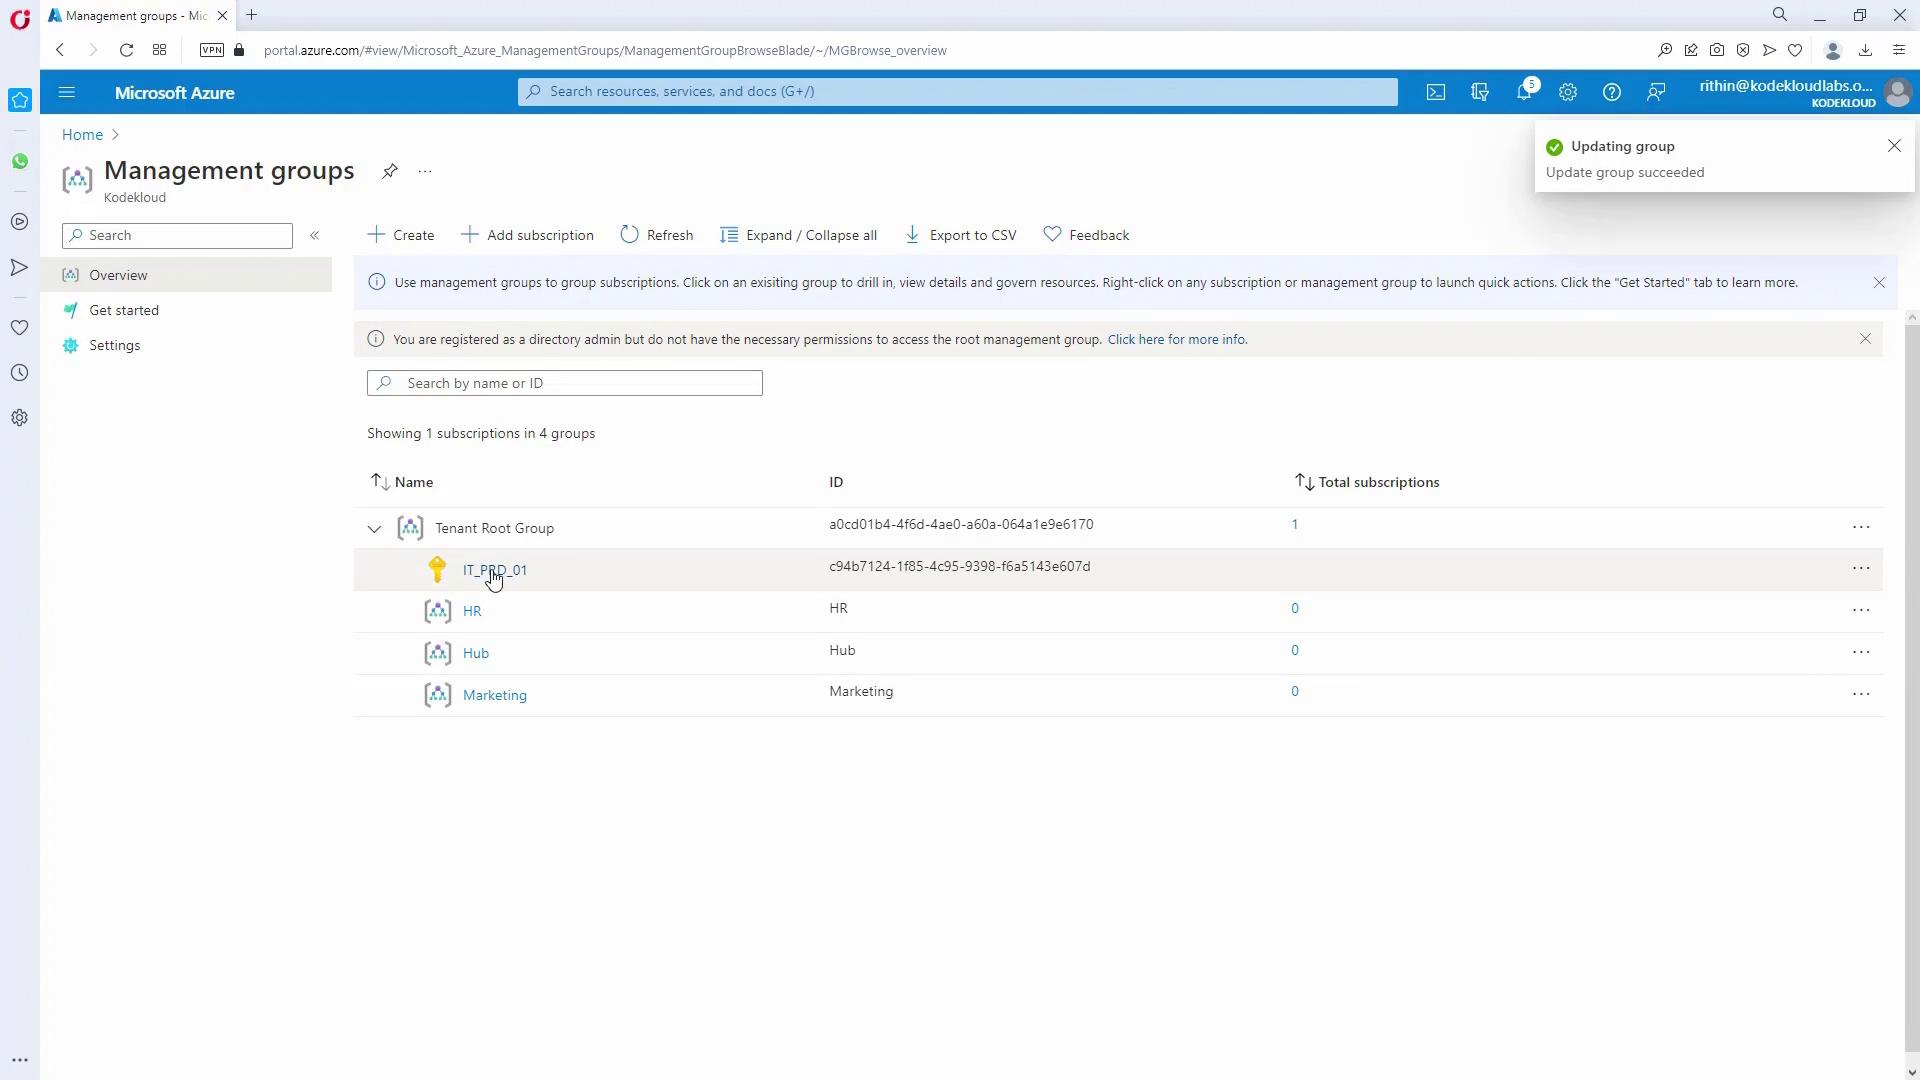
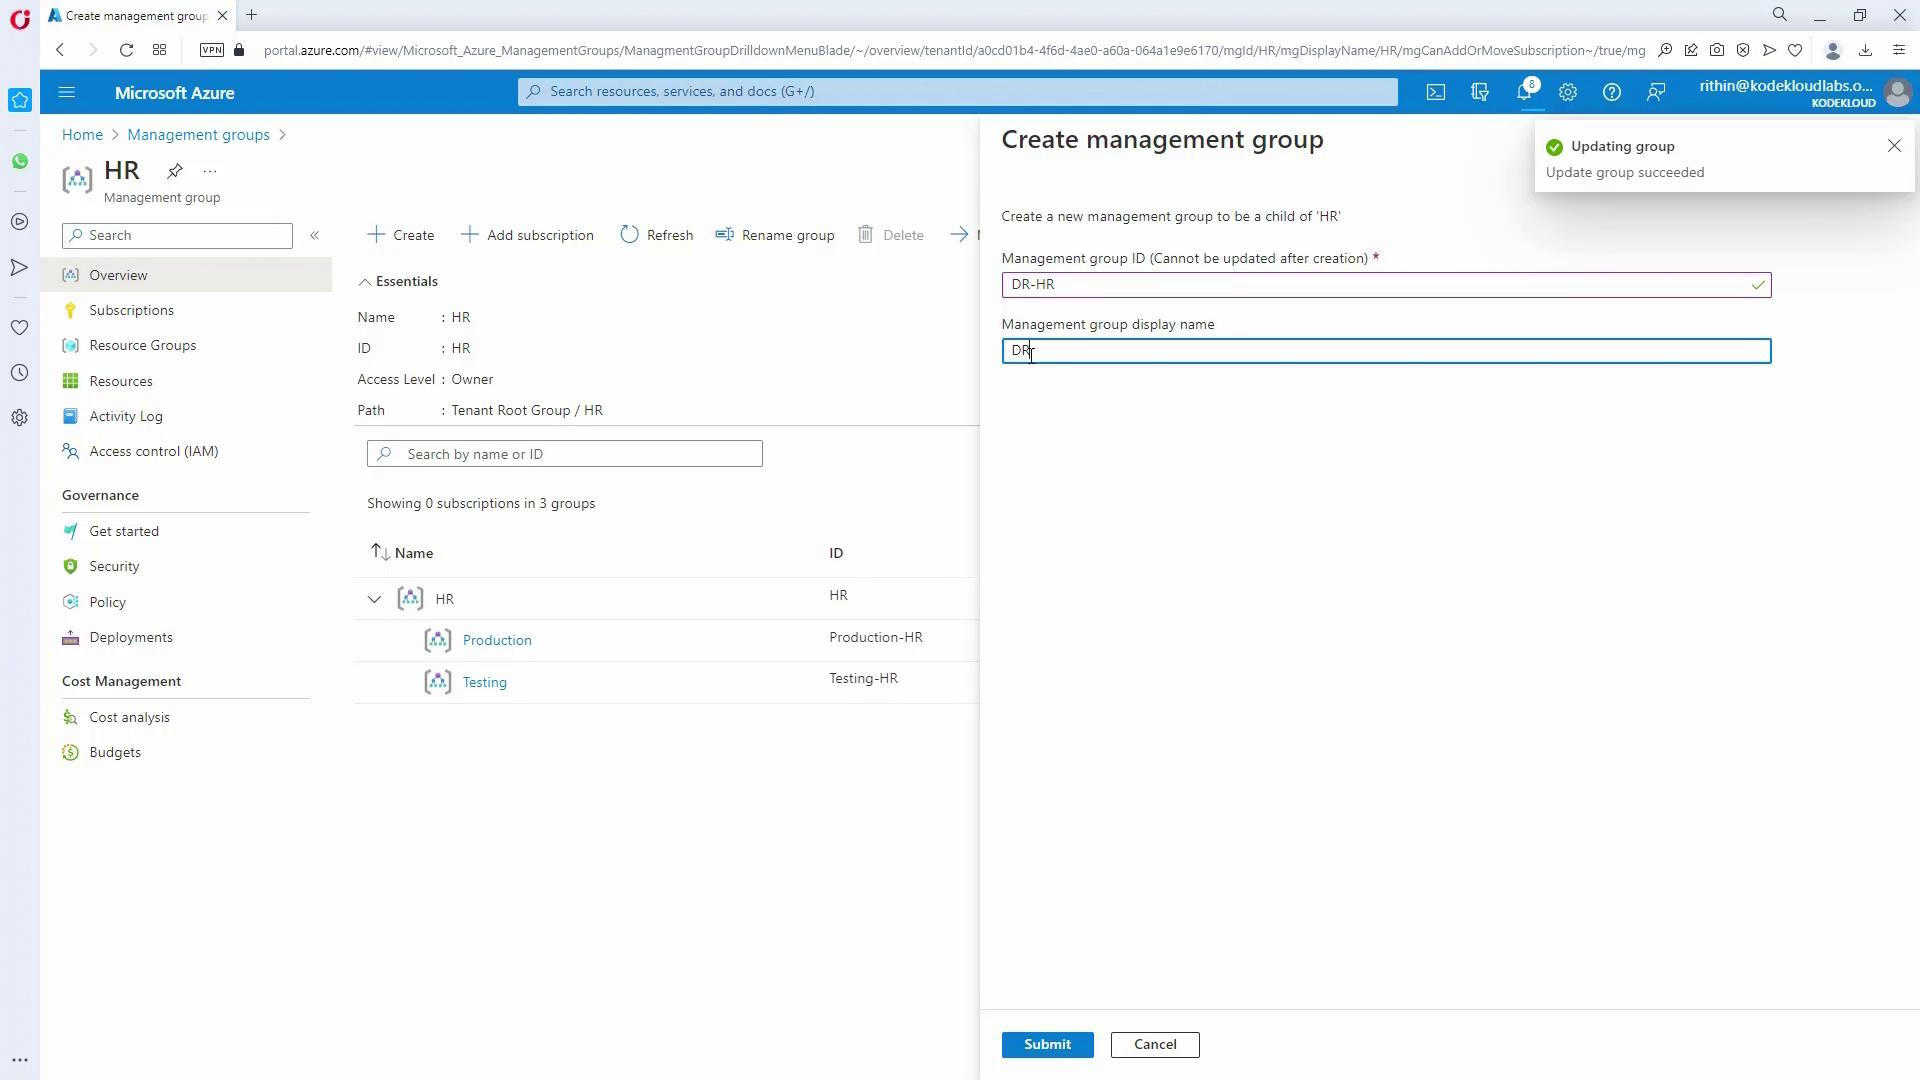
Create Parent Management Groups:
Create three management groups named Marketing, HR, and HUB. When creating a group, provide a display name and a management group ID (note that the ID cannot be changed later as it is used in REST API or CLI calls). -
Move Subscriptions:
After the HUB is created, move subscriptions from the tenant root group to HUB:- Click on the HUB, then under Subscriptions, select “Add Subscription.”
- Refresh the view to confirm that the subscription now appears under HUB.
-
Create Child Management Groups:
For example, under the HR entity, create three child management groups:- Production HR
- Testing HR
- DR HR
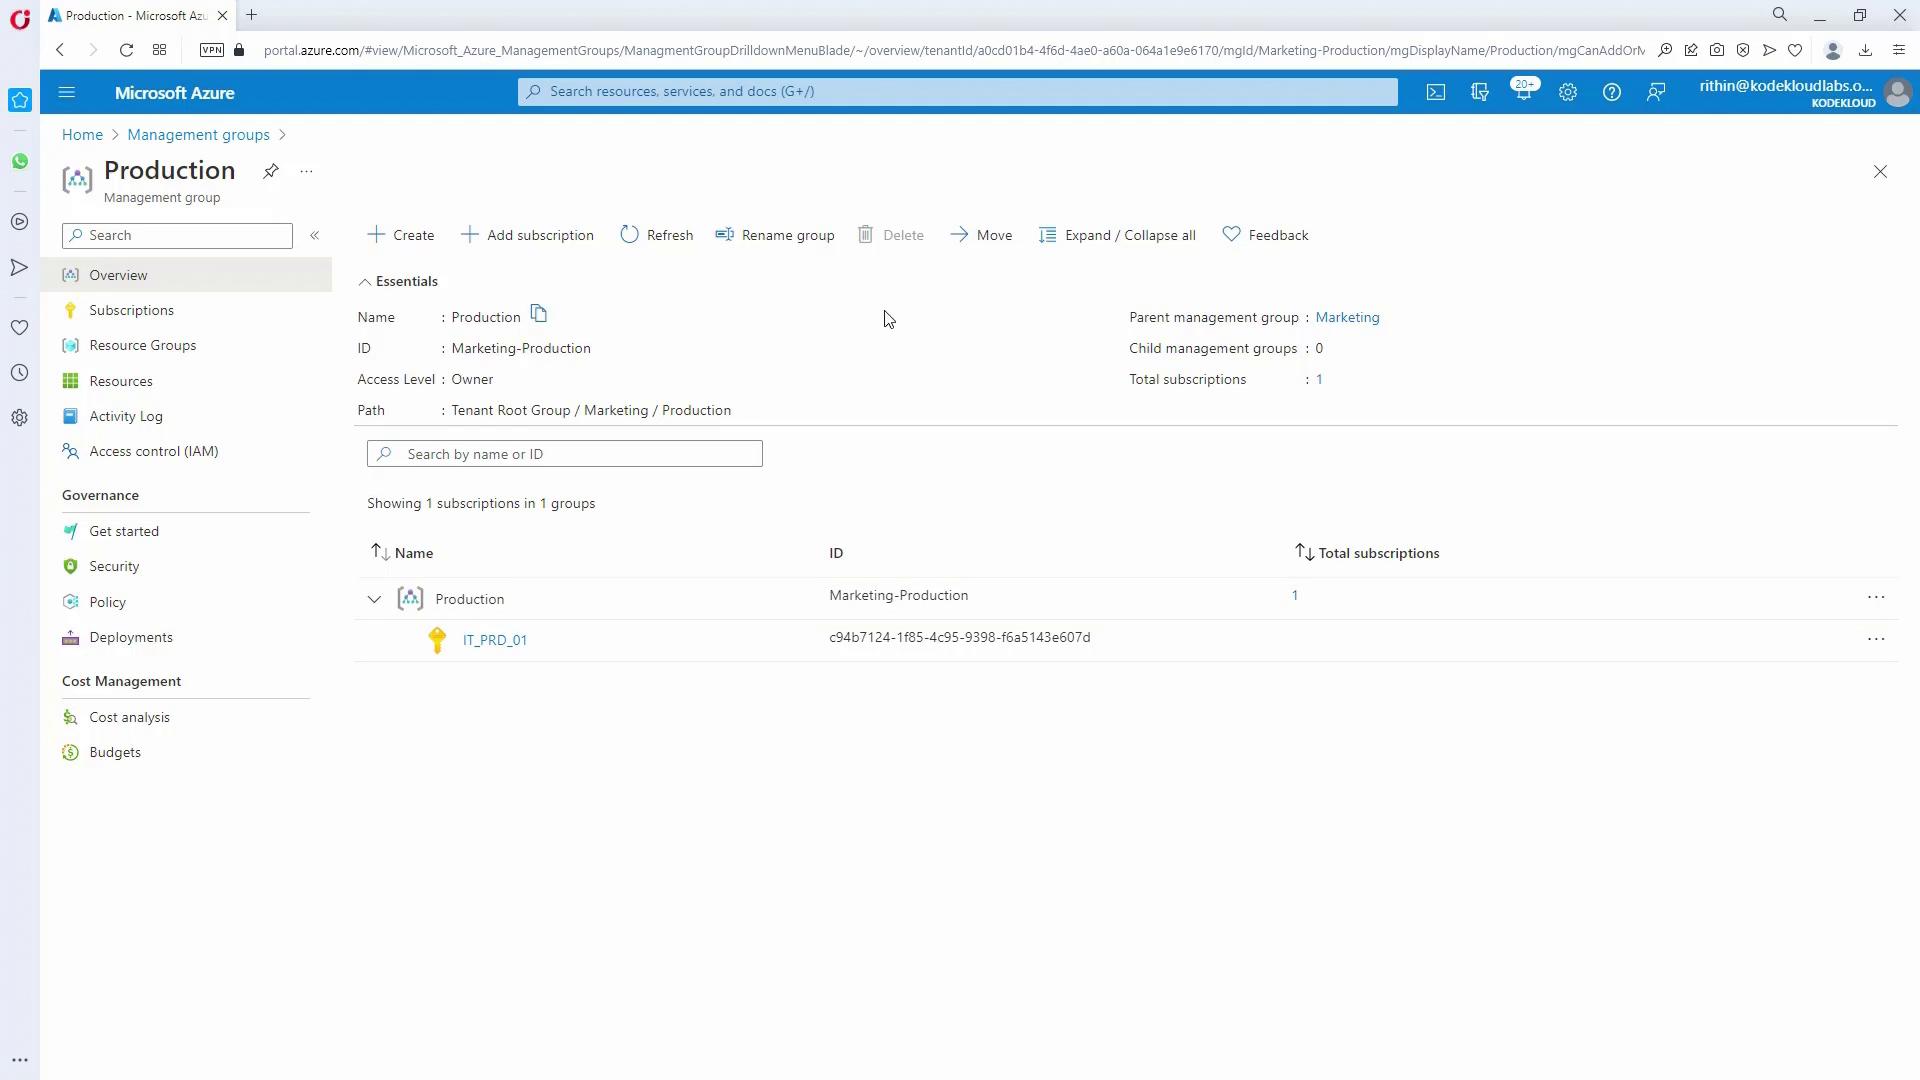
- Verify the Hierarchy:
Expand the management groups in the portal to ensure that subscriptions and subgroups are nested as intended.
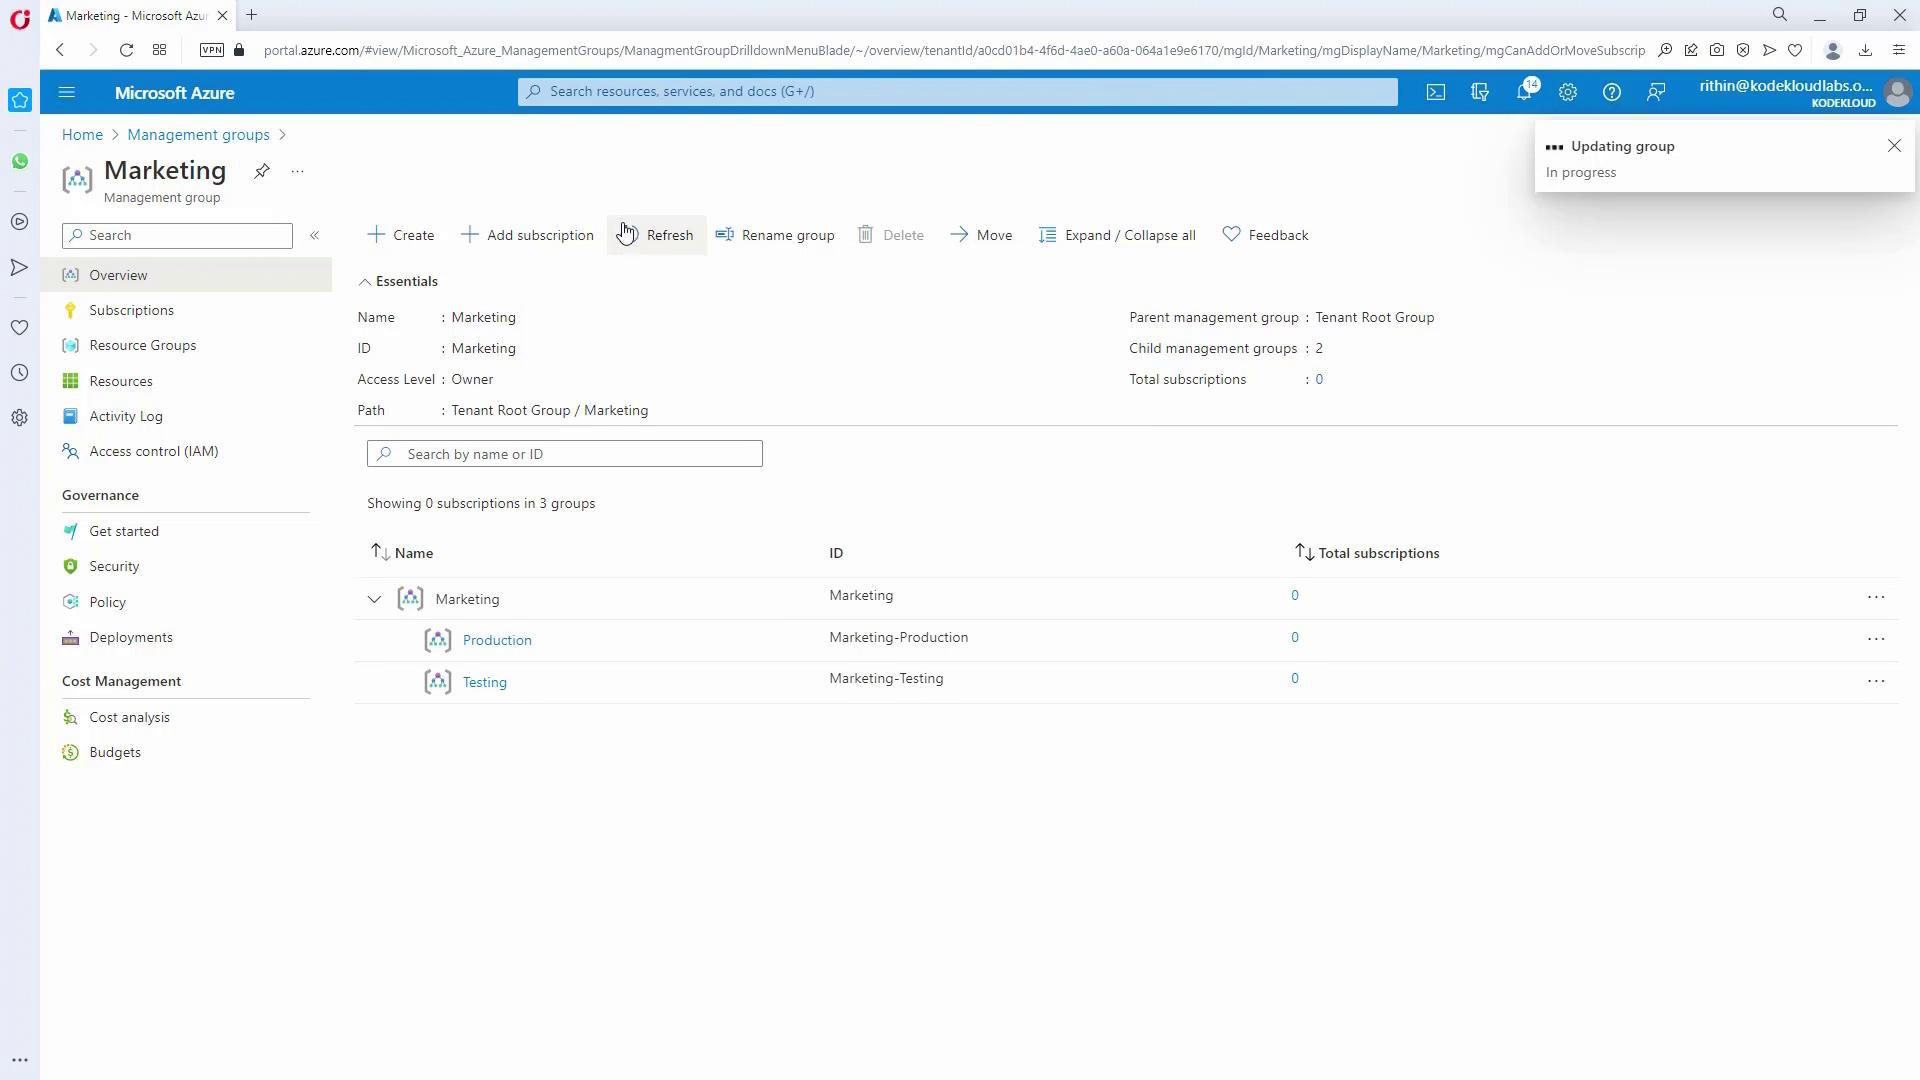
- Map Subscriptions:
Finally, move individual subscriptions to the appropriate management groups (e.g., production subscriptions under HR production, testing under HR testing, etc.) to finalize the hierarchy.

Implementing Policy Constraints
Restricting Deployment Locations
The organization mandates that all resources be deployed only in East US and West US. This requirement is enforced by applying a policy at the tenant root level.-
Enable Root Group Access:
The tenant root group’s permissions are restricted by default. A global administrator must:- Navigate to the tenant root group’s properties.
- Enable access by selecting “Yes” and saving the changes.
- Note that it may take two to three minutes for the changes to propagate.
-
Assign the Allowed Locations Policy:
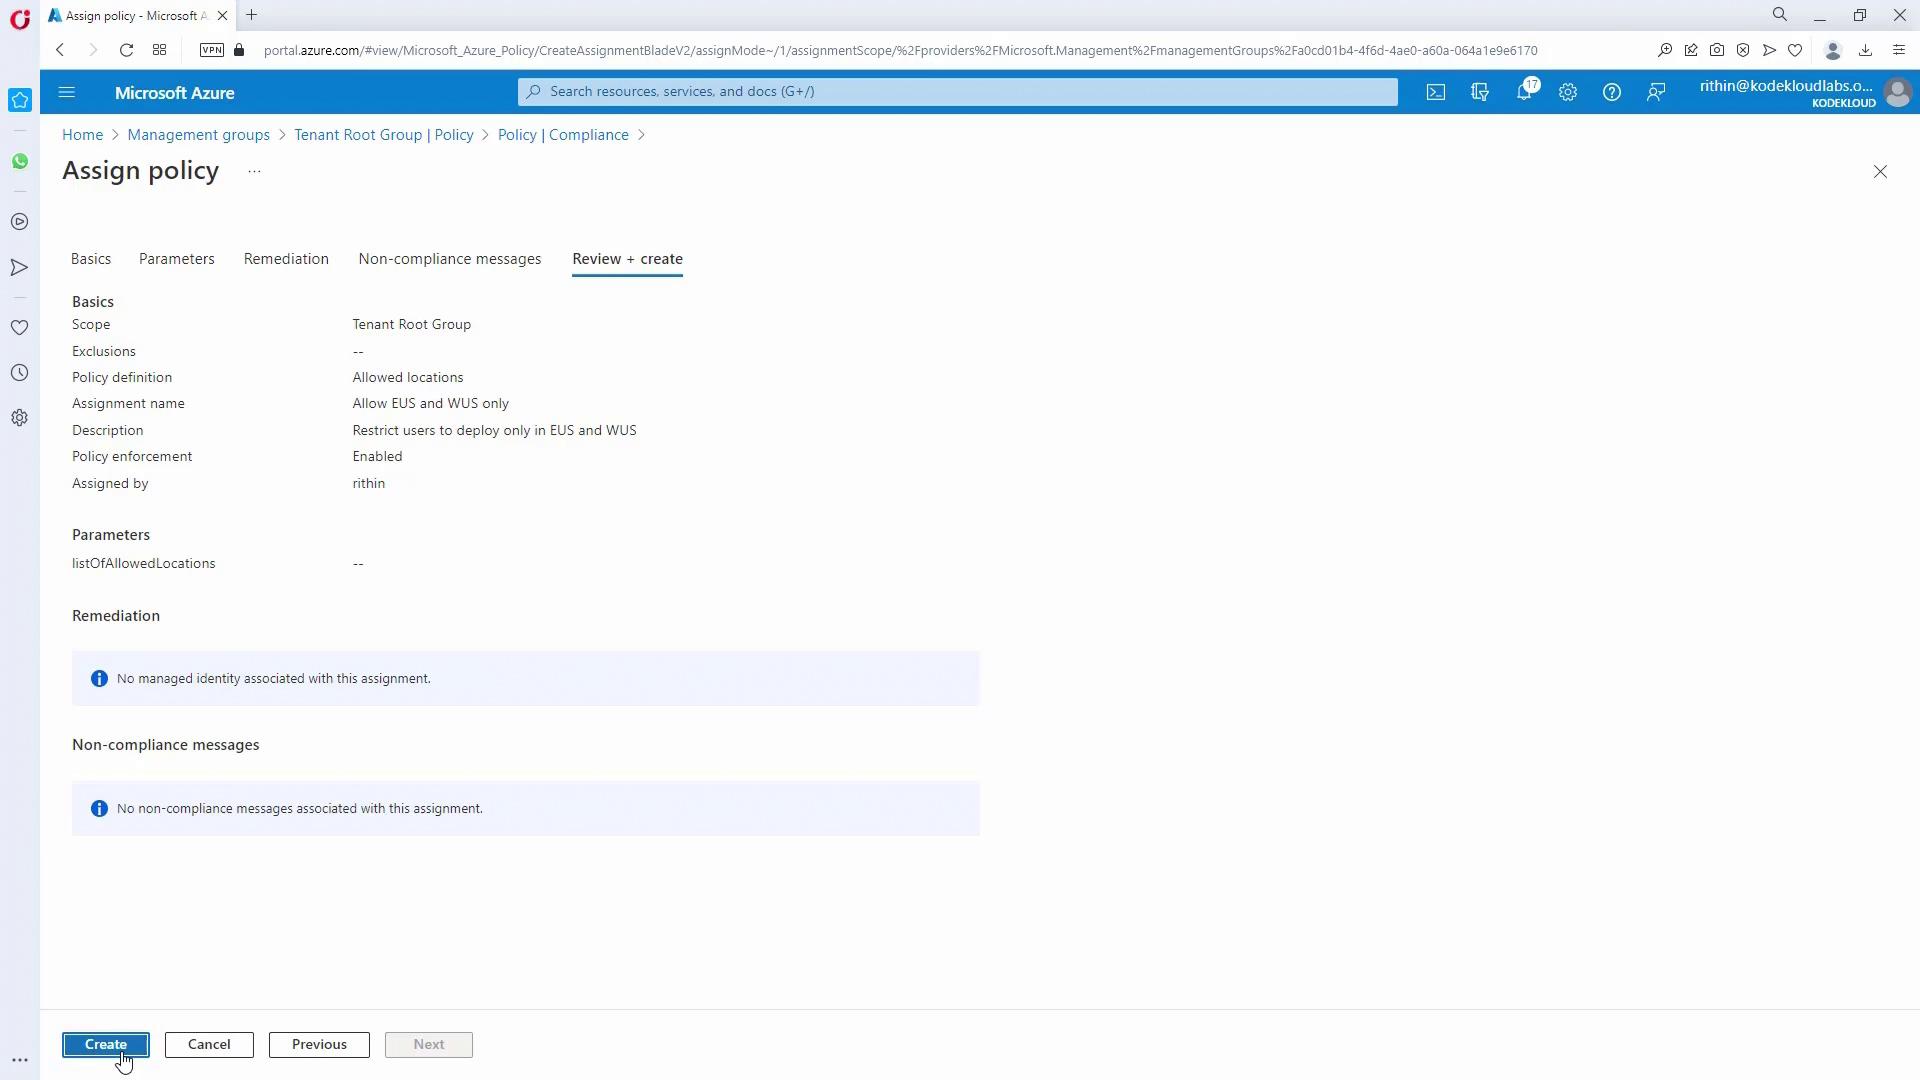
- In the Azure portal, navigate to the Policy section and select “Assign Policy” at the tenant root group.
- Choose the policy definition named “Allowed Locations”.
- Customize the assignment name (e.g., “Allow EUS and WUS Only”) and add an optional description stating that deployments are limited to East US and West US.
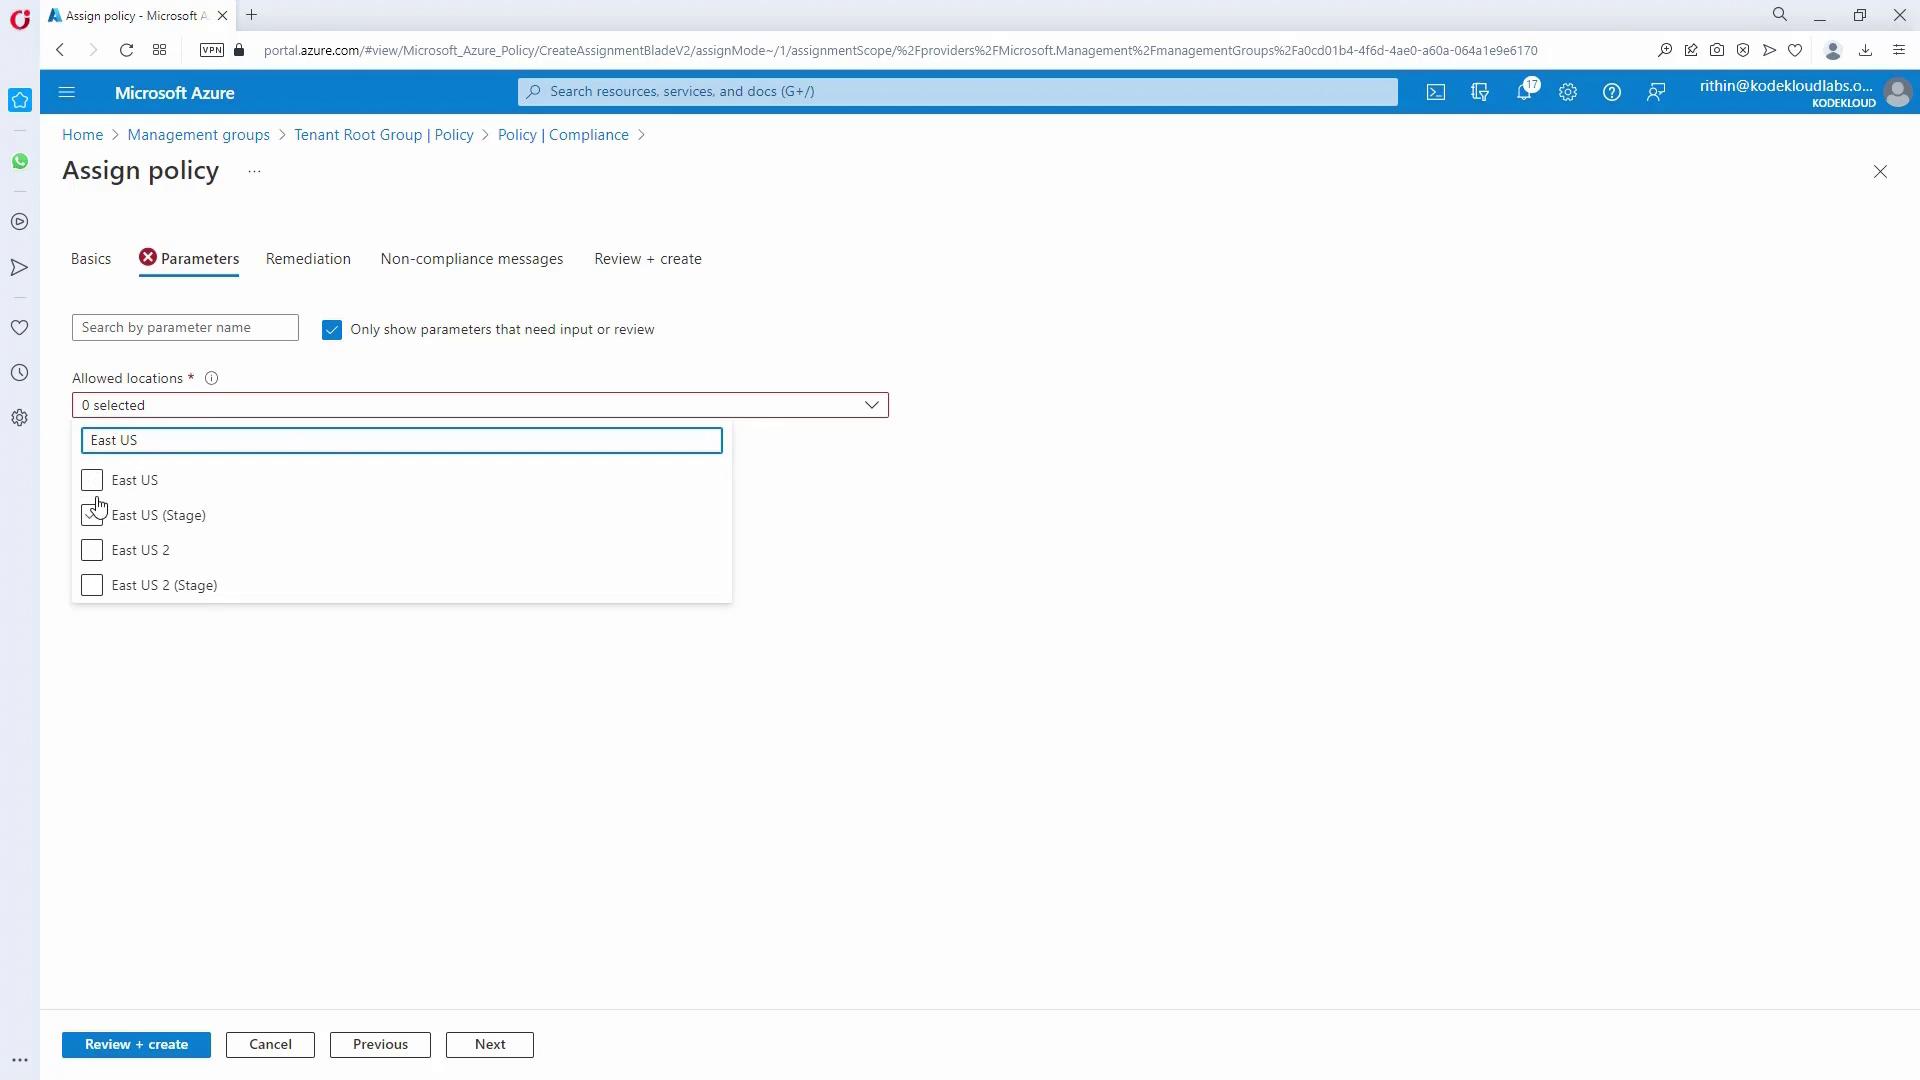
- In the policy parameters, select East US and West US.
- Click “Create” to finalize the policy assignment.
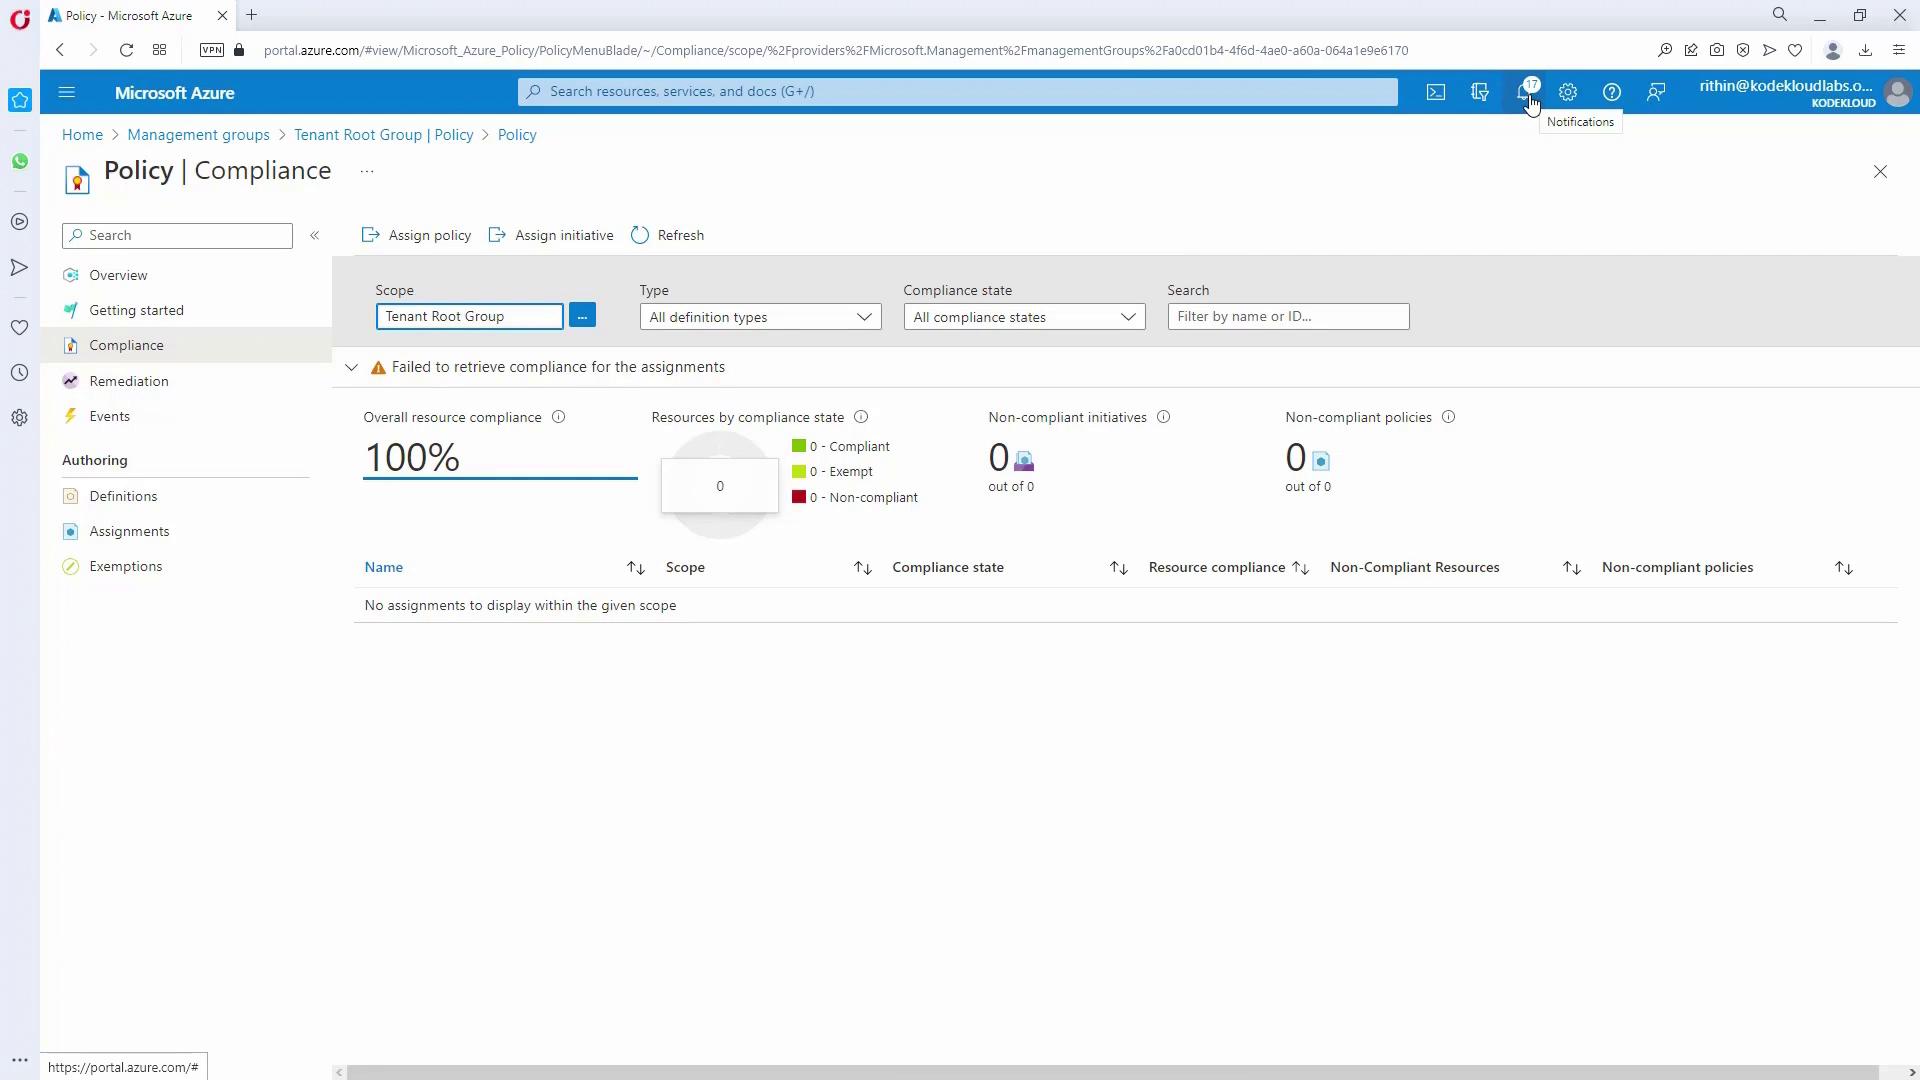
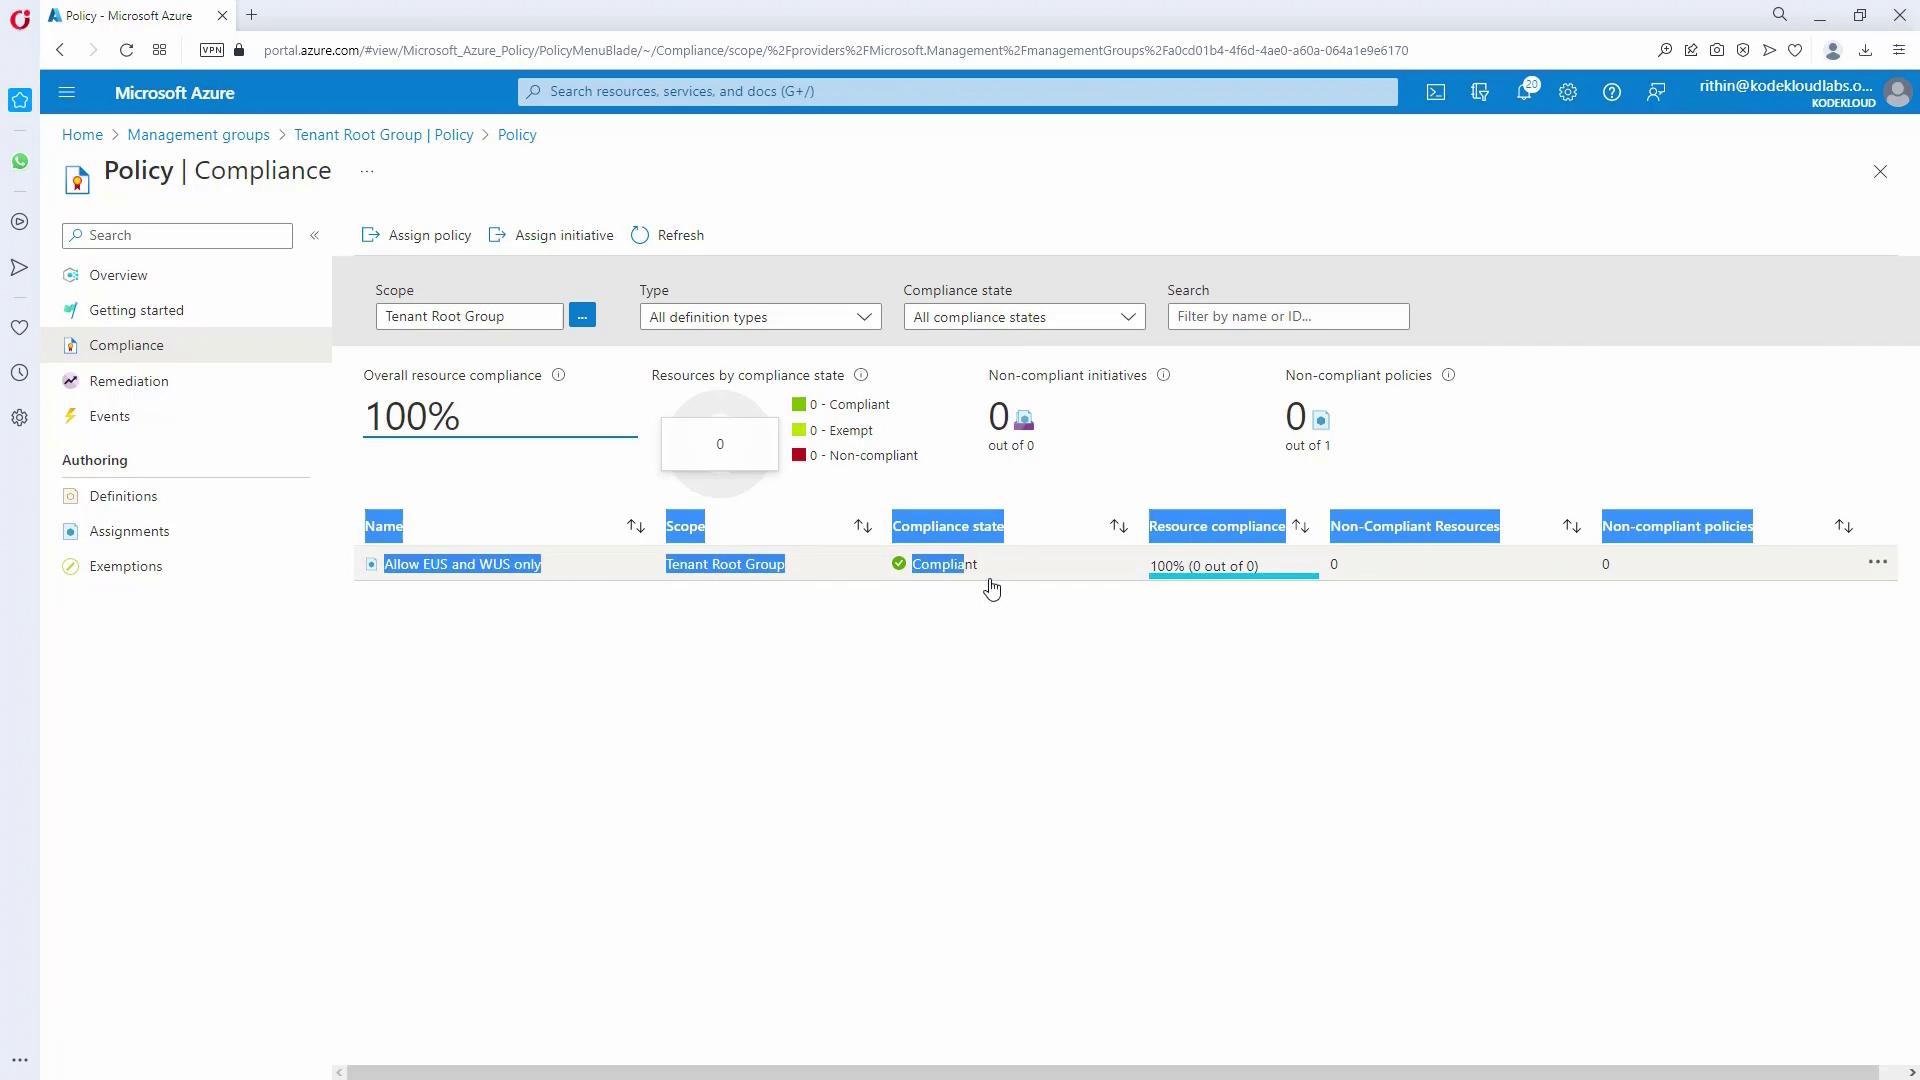
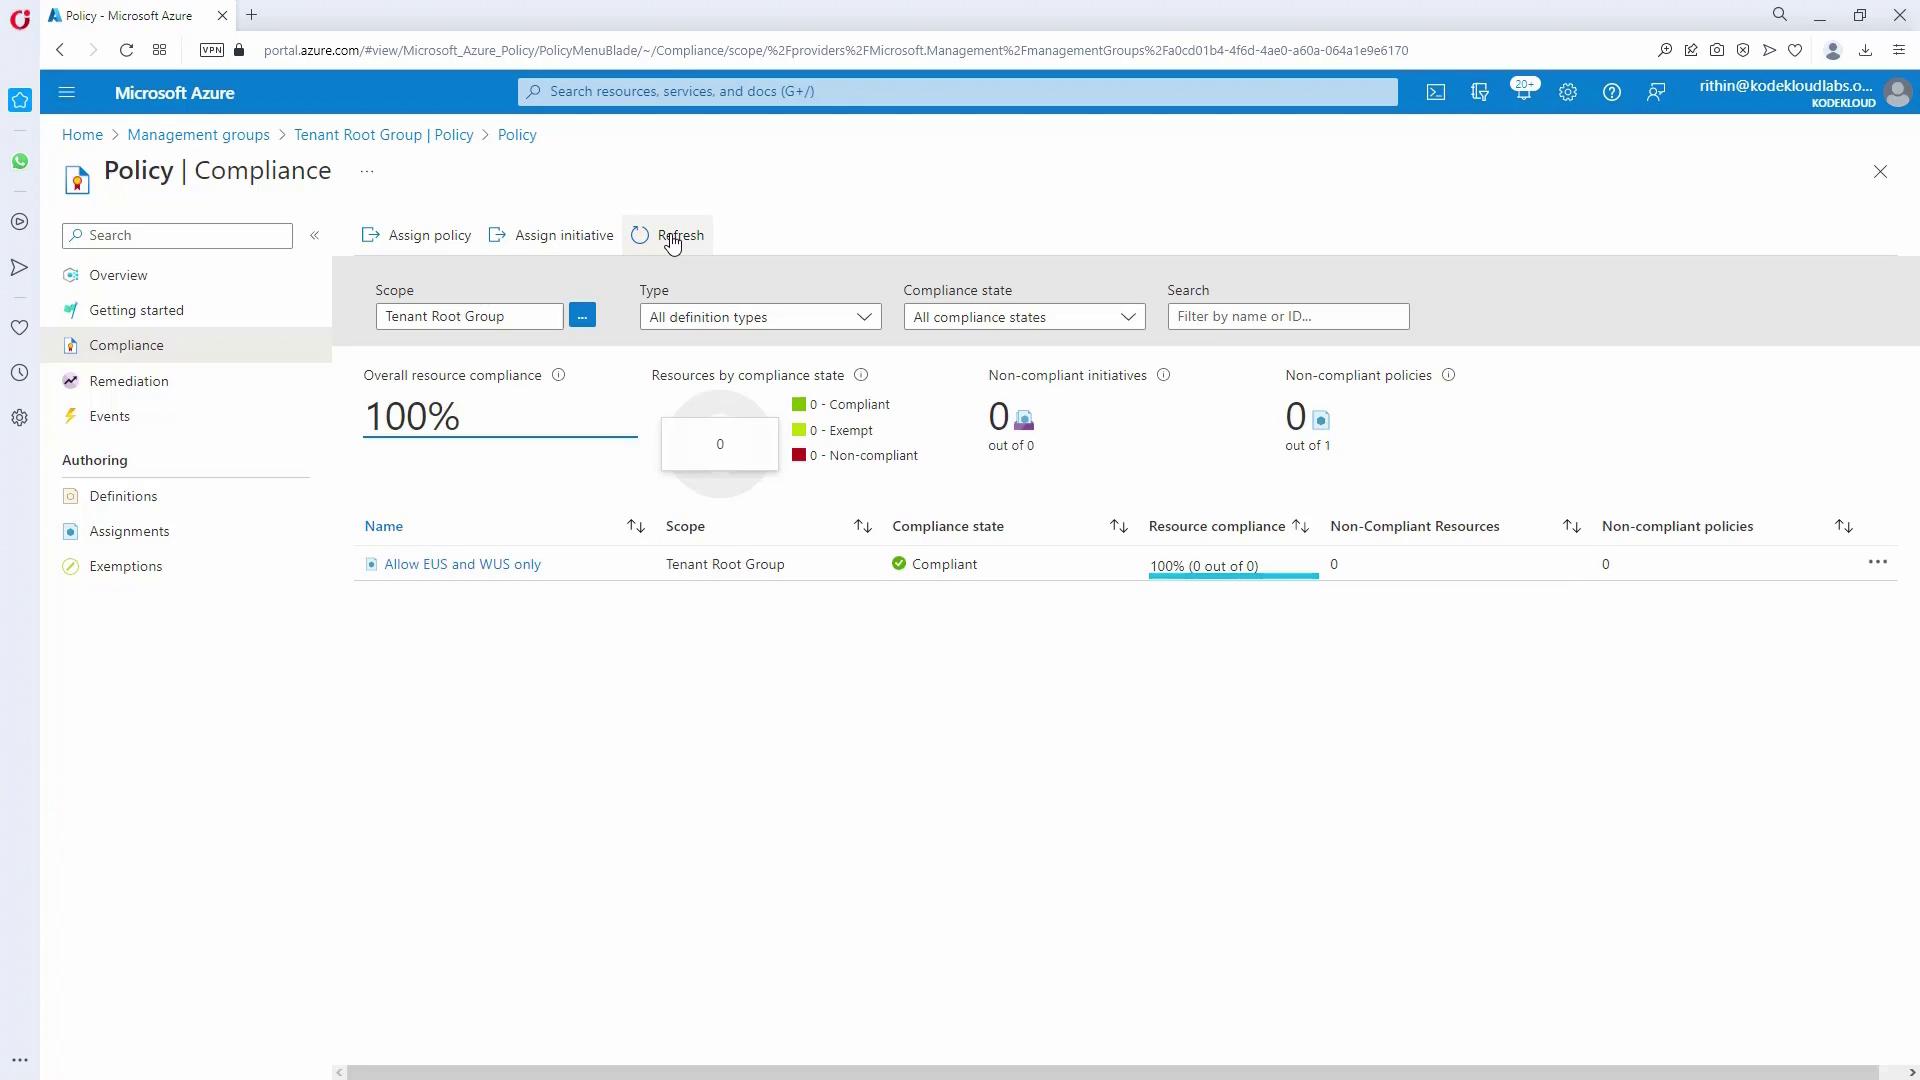
- Wait for Evaluation:
Policy evaluation usually takes between 15–30 minutes (or longer for a large number of resources). Monitor progress on the Policy Compliance Dashboard.
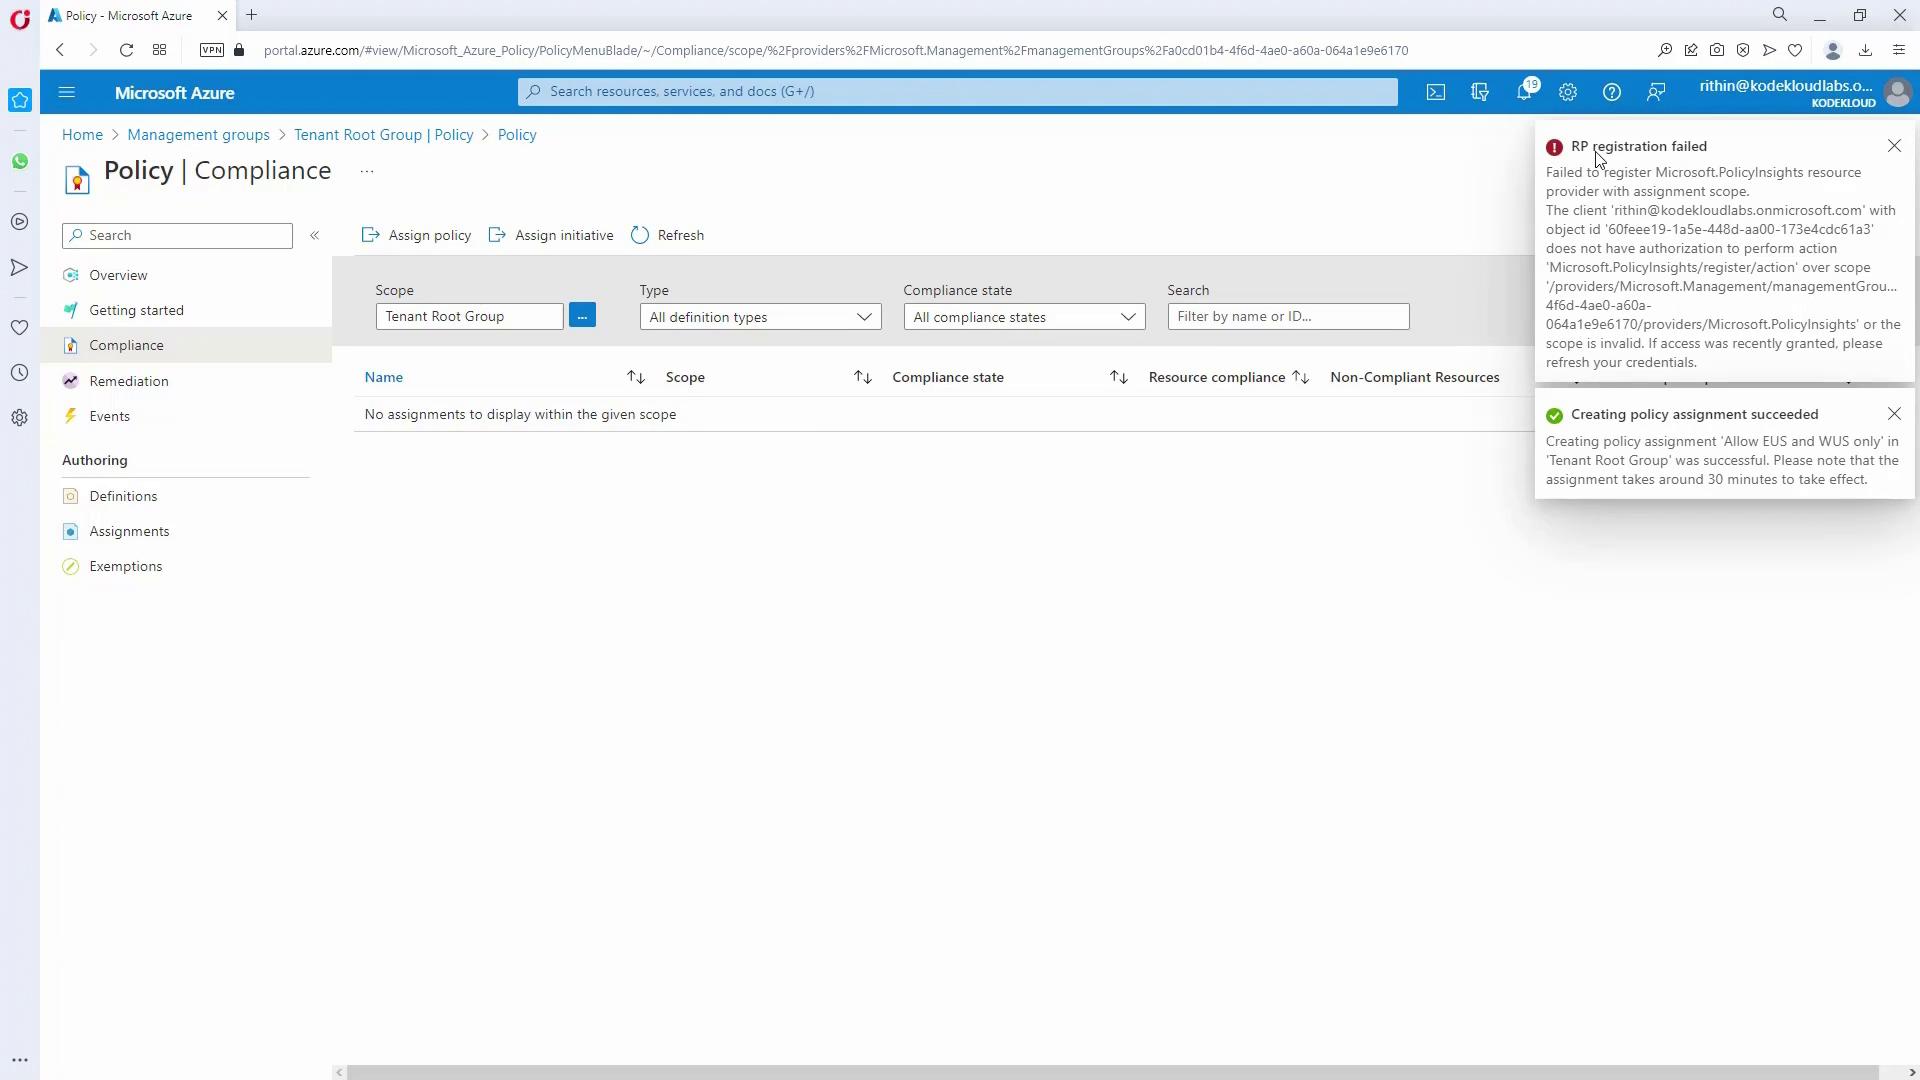
If you have limited permissions (e.g., User Access Administrator), ensure you upgrade your privileges to assign policies correctly.
Troubleshooting Permissions
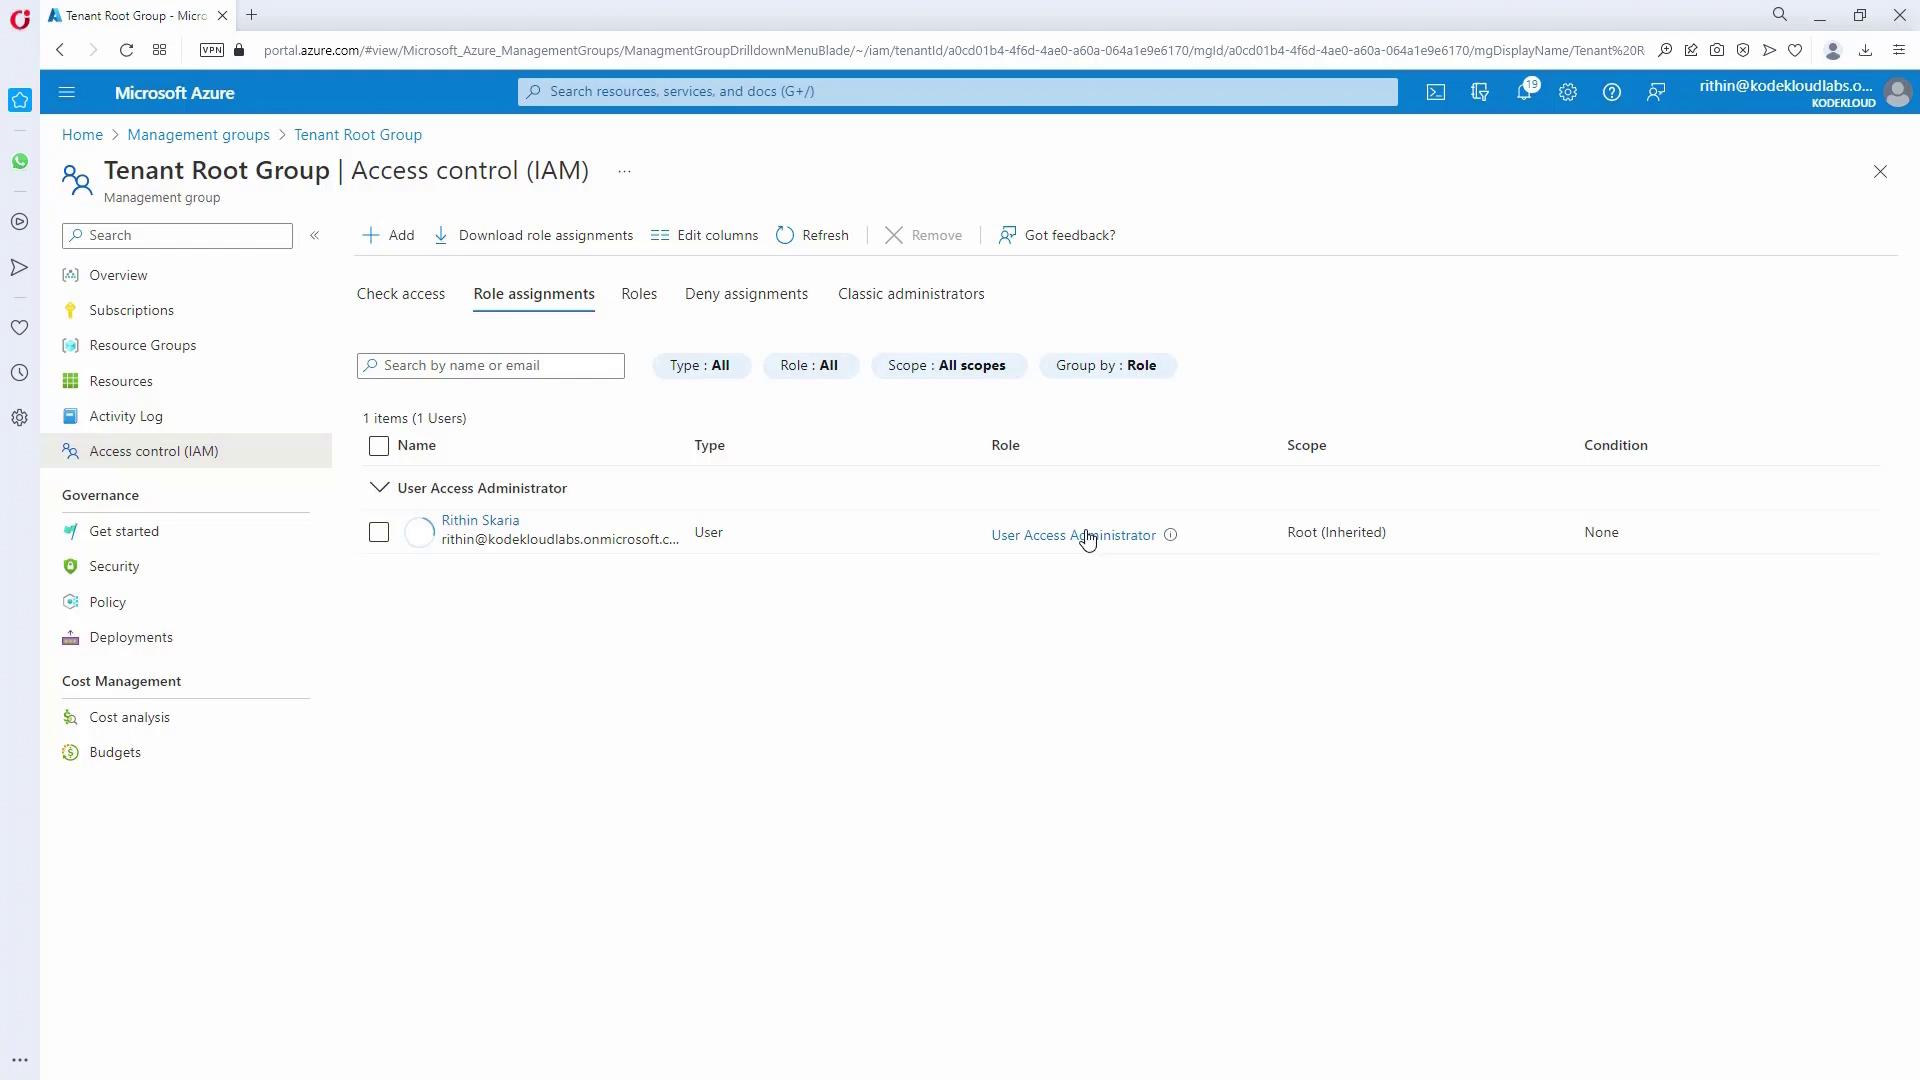
If you cannot assign policies or manage settings due to limited permissions, assign yourself (or the appropriate user) the Owner role at the tenant root group:- In the tenant root group, navigate to “Access Control (IAM)” and review current role assignments.
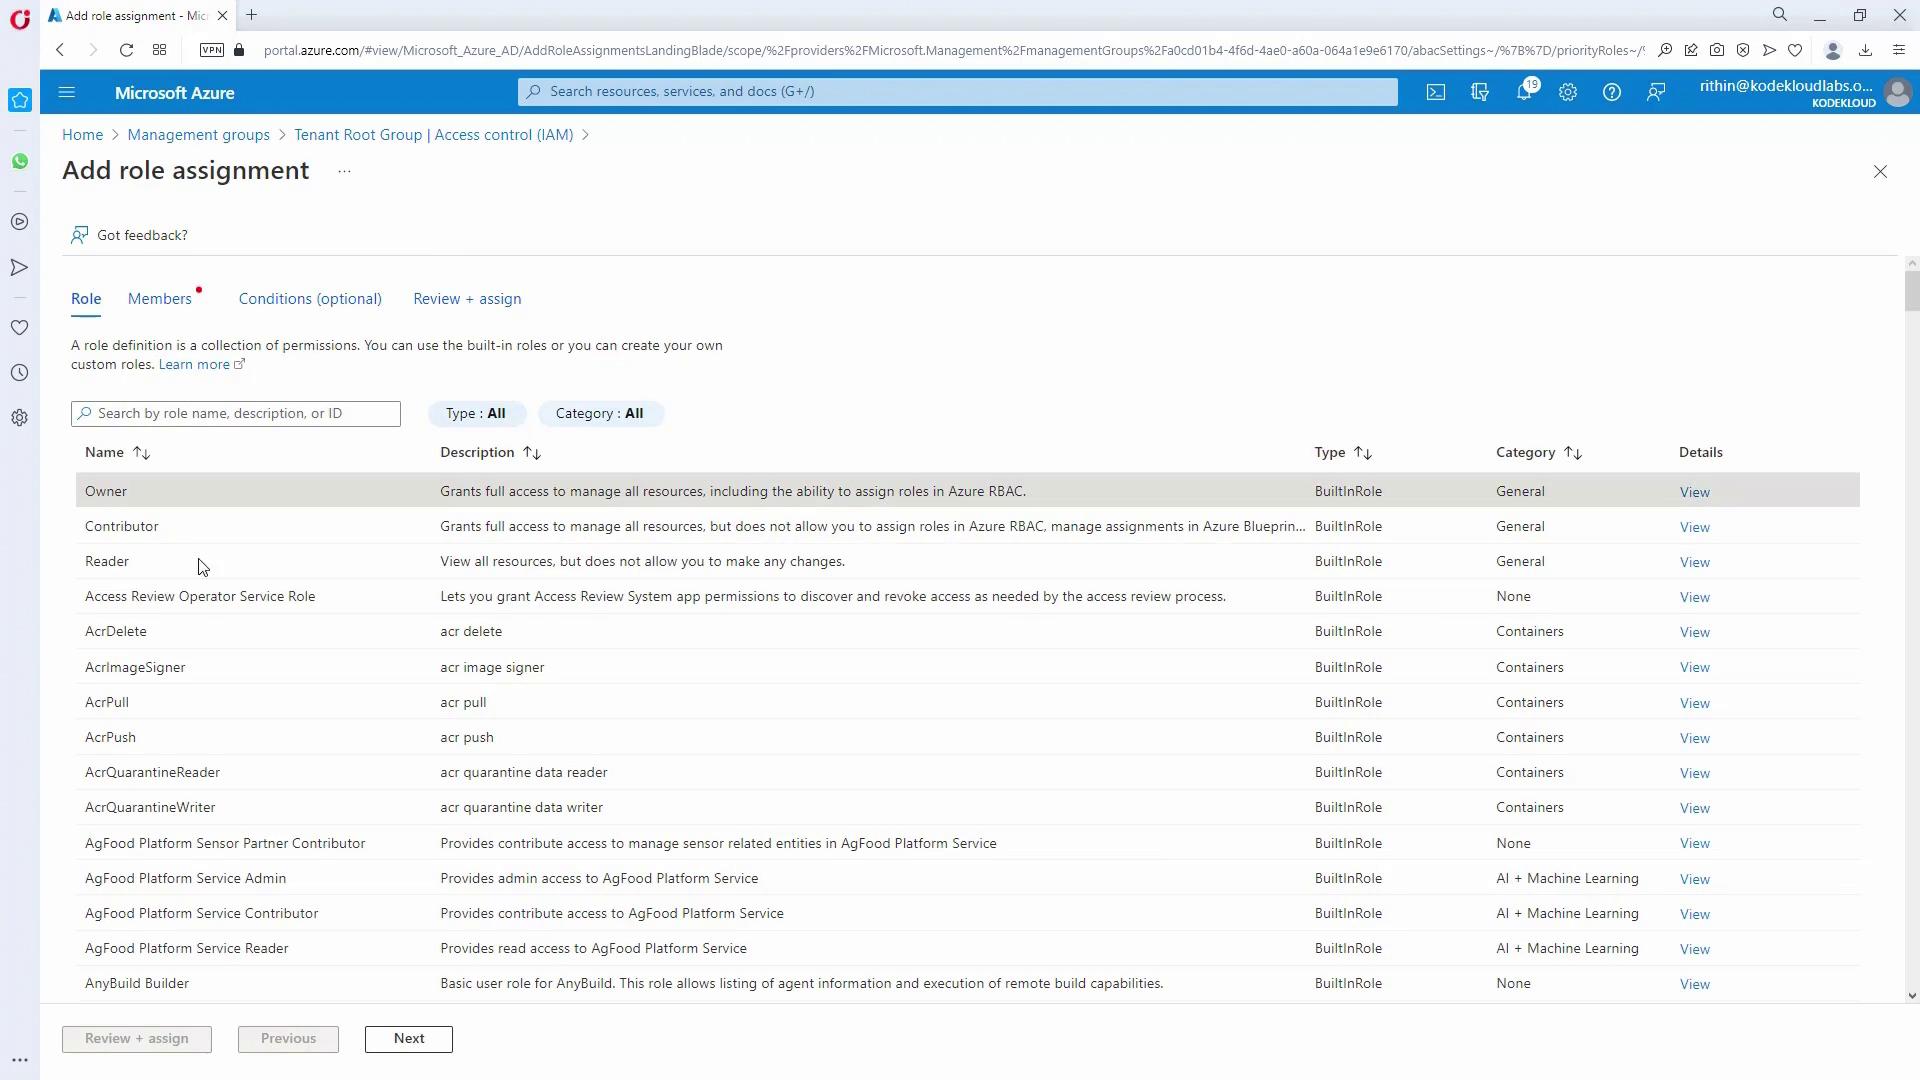
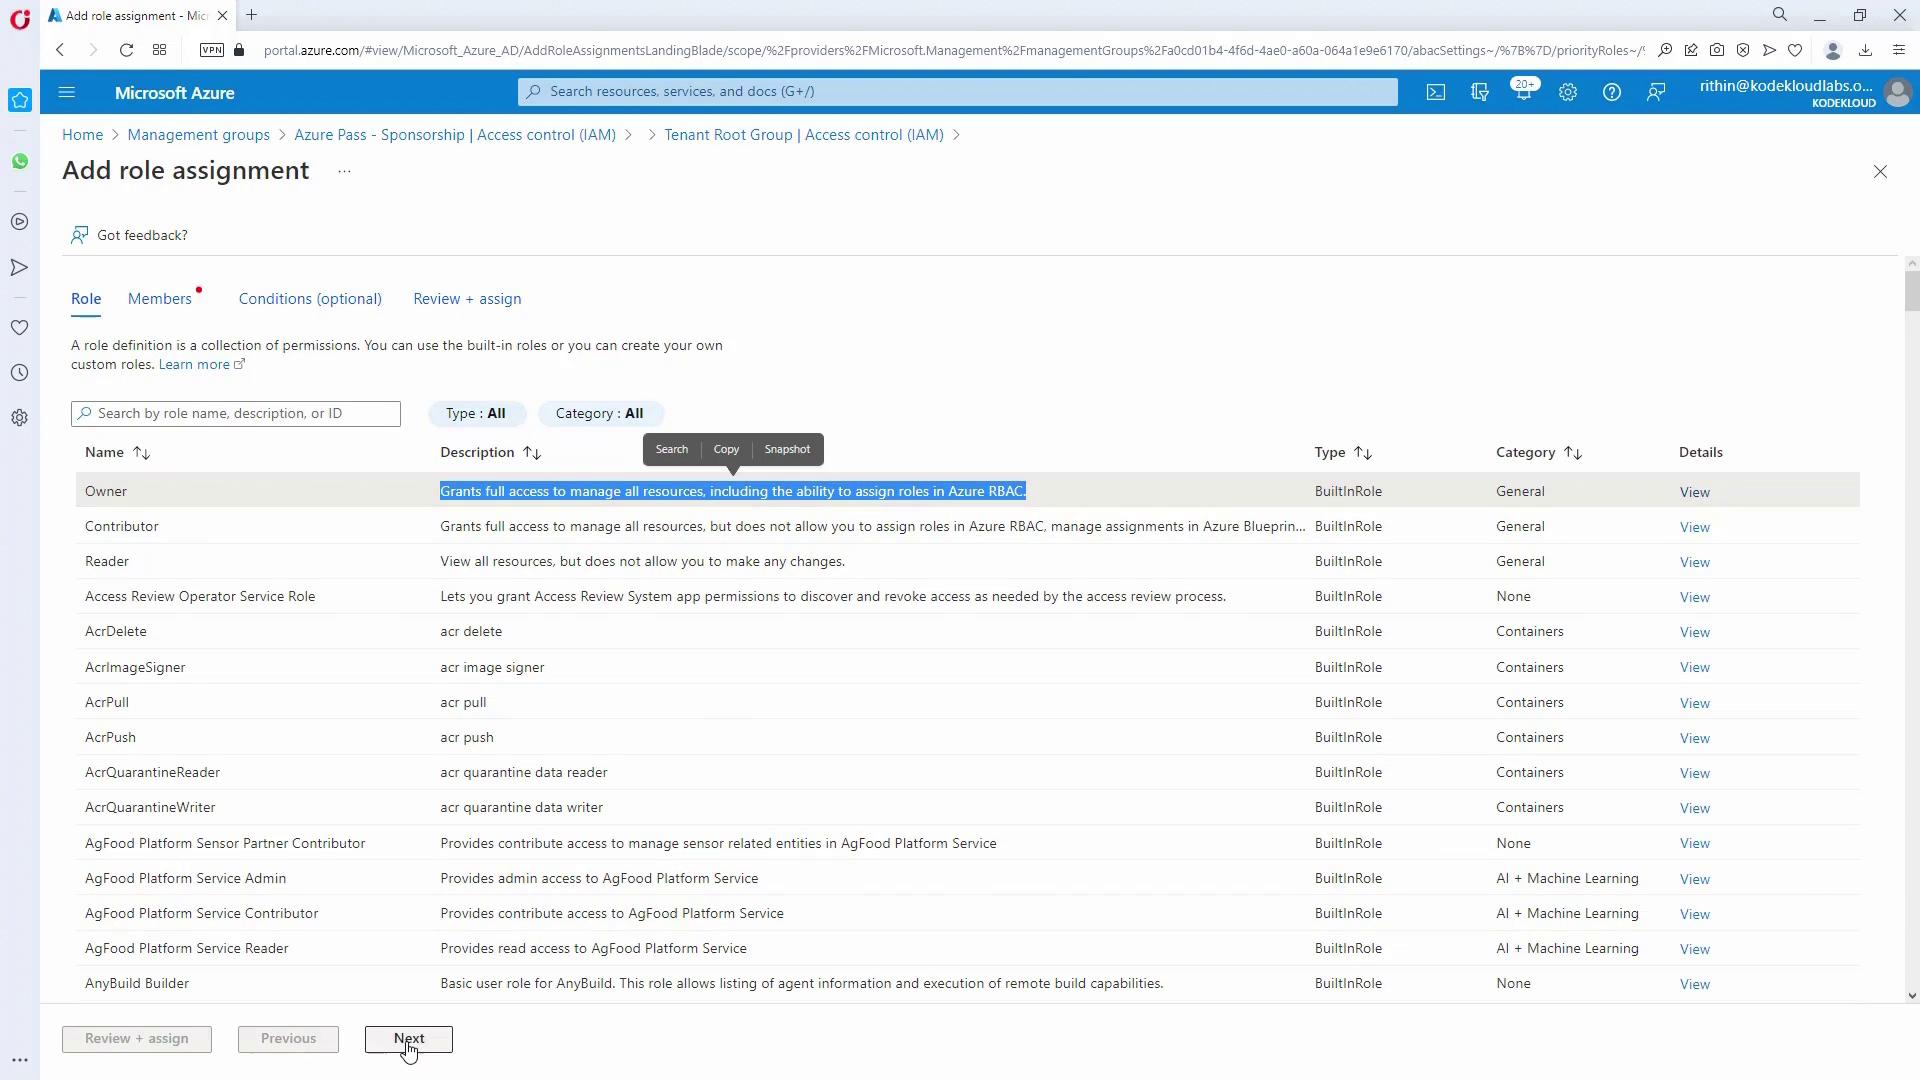
- Add a new role assignment:
- Select the Owner role.
- Choose your account.
- Review and confirm the role assignment.
- Once you have the Owner role, reassign policies if needed and verify the update under the updated role assignments.
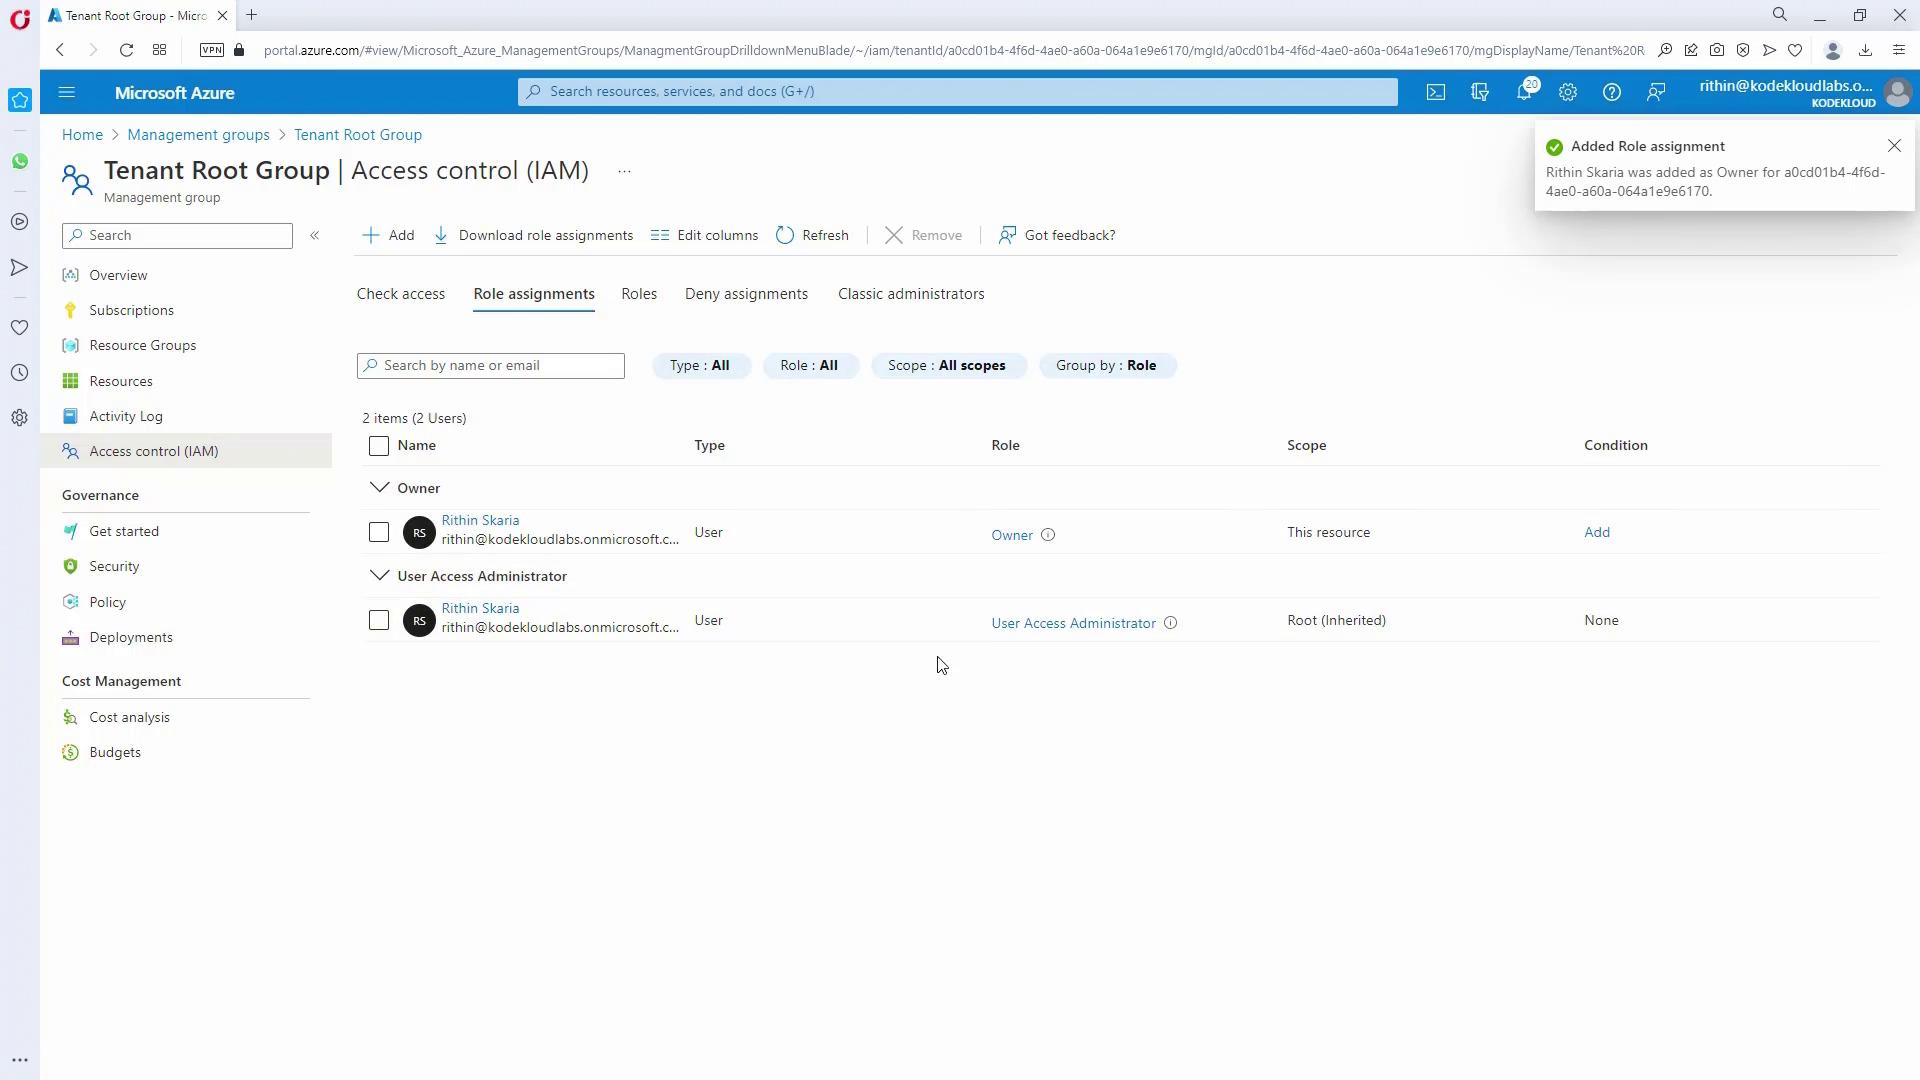
- Confirm that the allowed locations policy now shows as compliant:
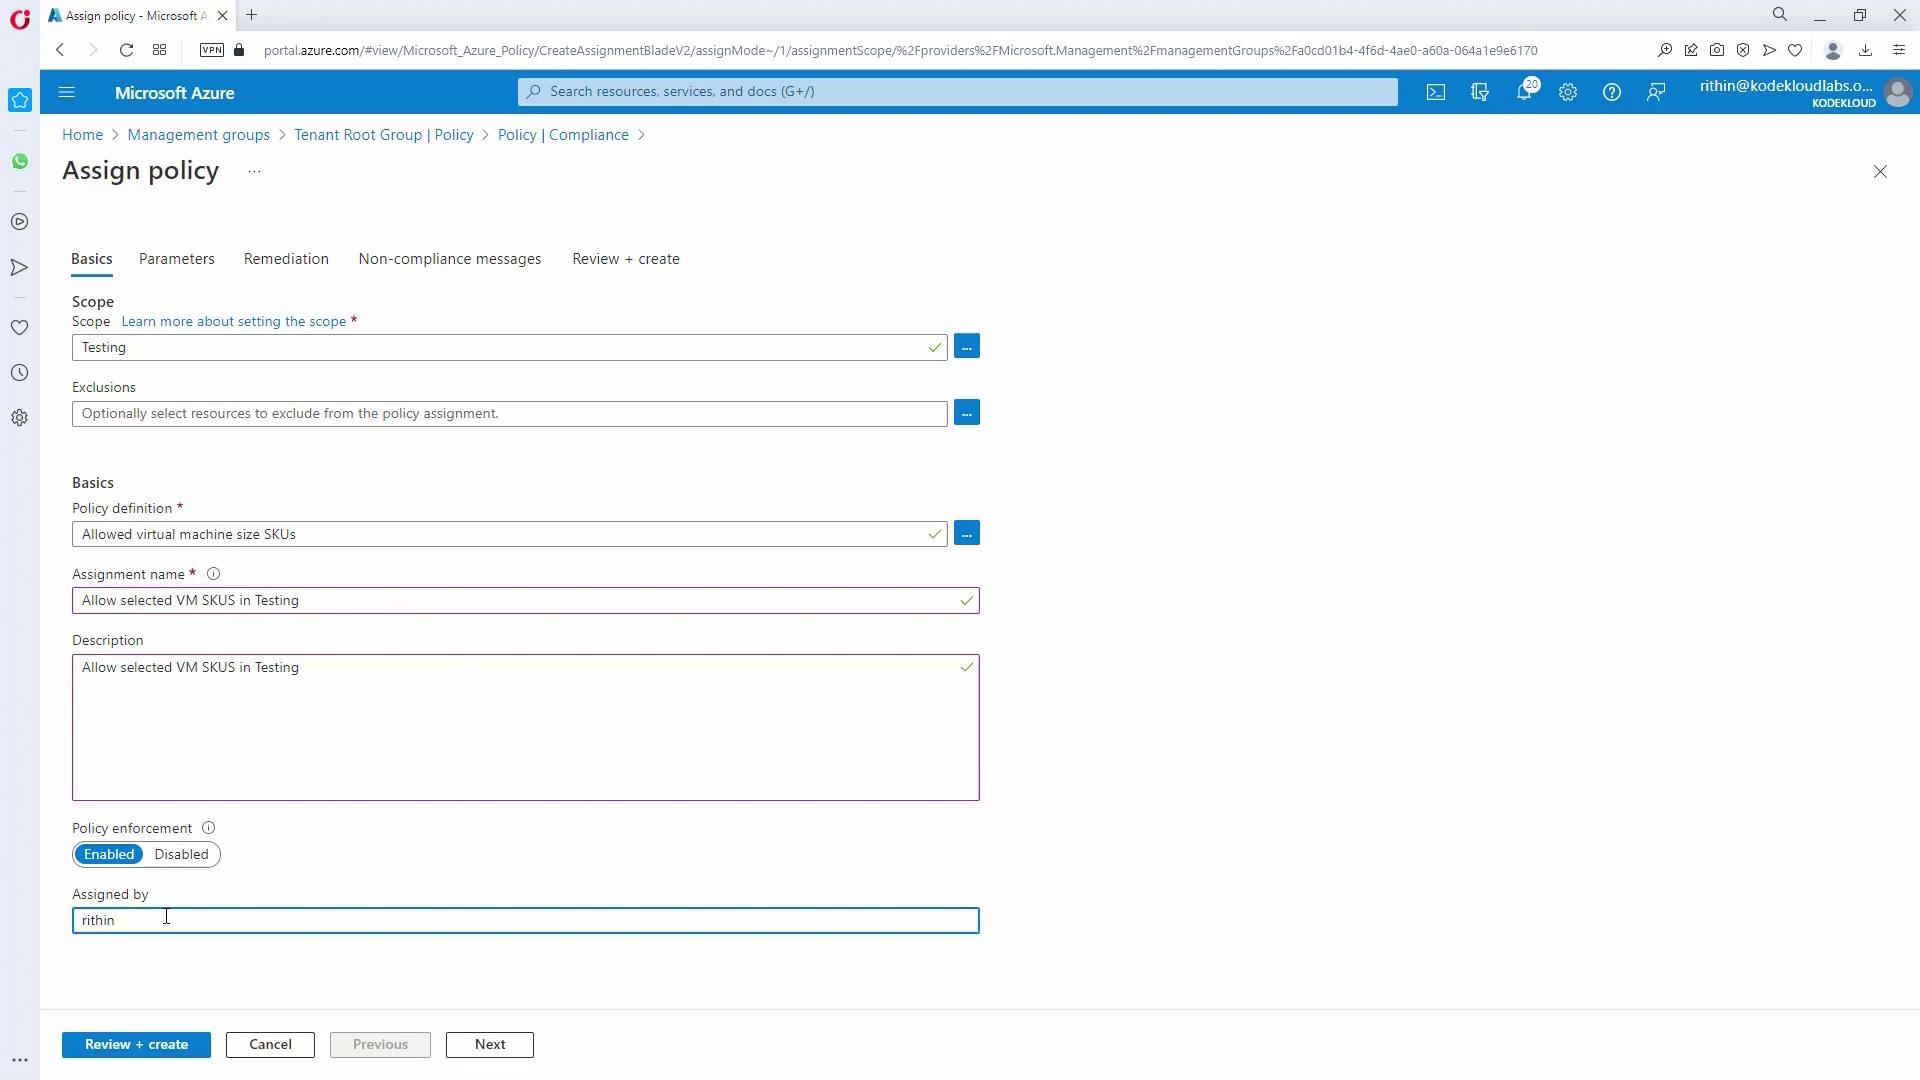
Enforcing VM Size Restrictions in Testing Environments
The second requirement is to restrict testing subscriptions to allow only specific Virtual Machine (VM) sizes (for example, DS, DSV3, DSV4). You have two options: • Create the policy assignment at the testing management group level.• Create the policy at the tenant root group and exclude all other management groups. For HR testing, follow these steps:
- Navigate to the HR testing management group in the Azure portal.
- Click “Assign Policy” and select the appropriate policy definition (e.g., “Allowed VM Size Queues”).
- Rename the assignment as “Allow Selected VM Sizes in Testing” and provide a description.
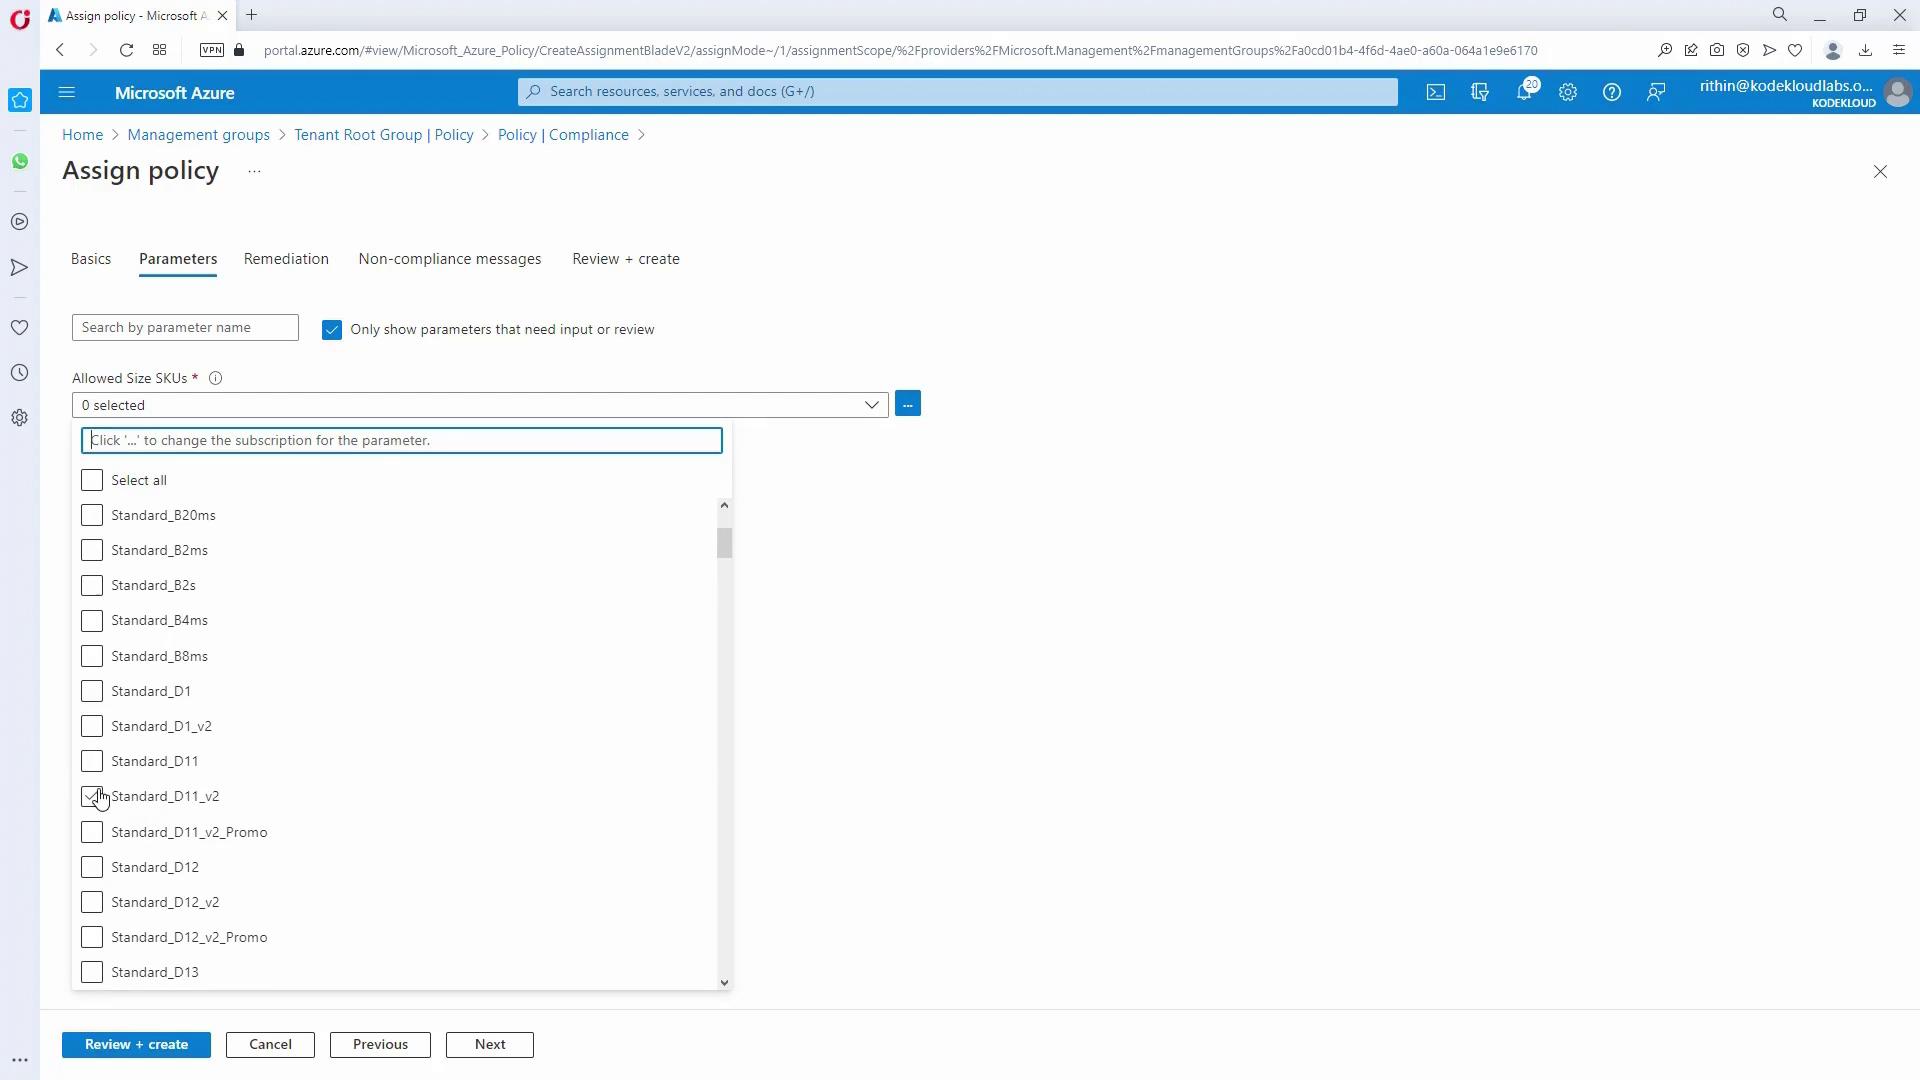
- In the Parameters section, select the allowed VM size SKUs.
- Optionally, include a custom non-compliance message.
- Click “Create” to finish the policy assignment.
Role-Based Access Control (RBAC) and Group Management
Creating Support Request Permissions for IT Help Desk
The customer requires that IT help desk users can create Microsoft support requests on behalf of any entity. To achieve this:-
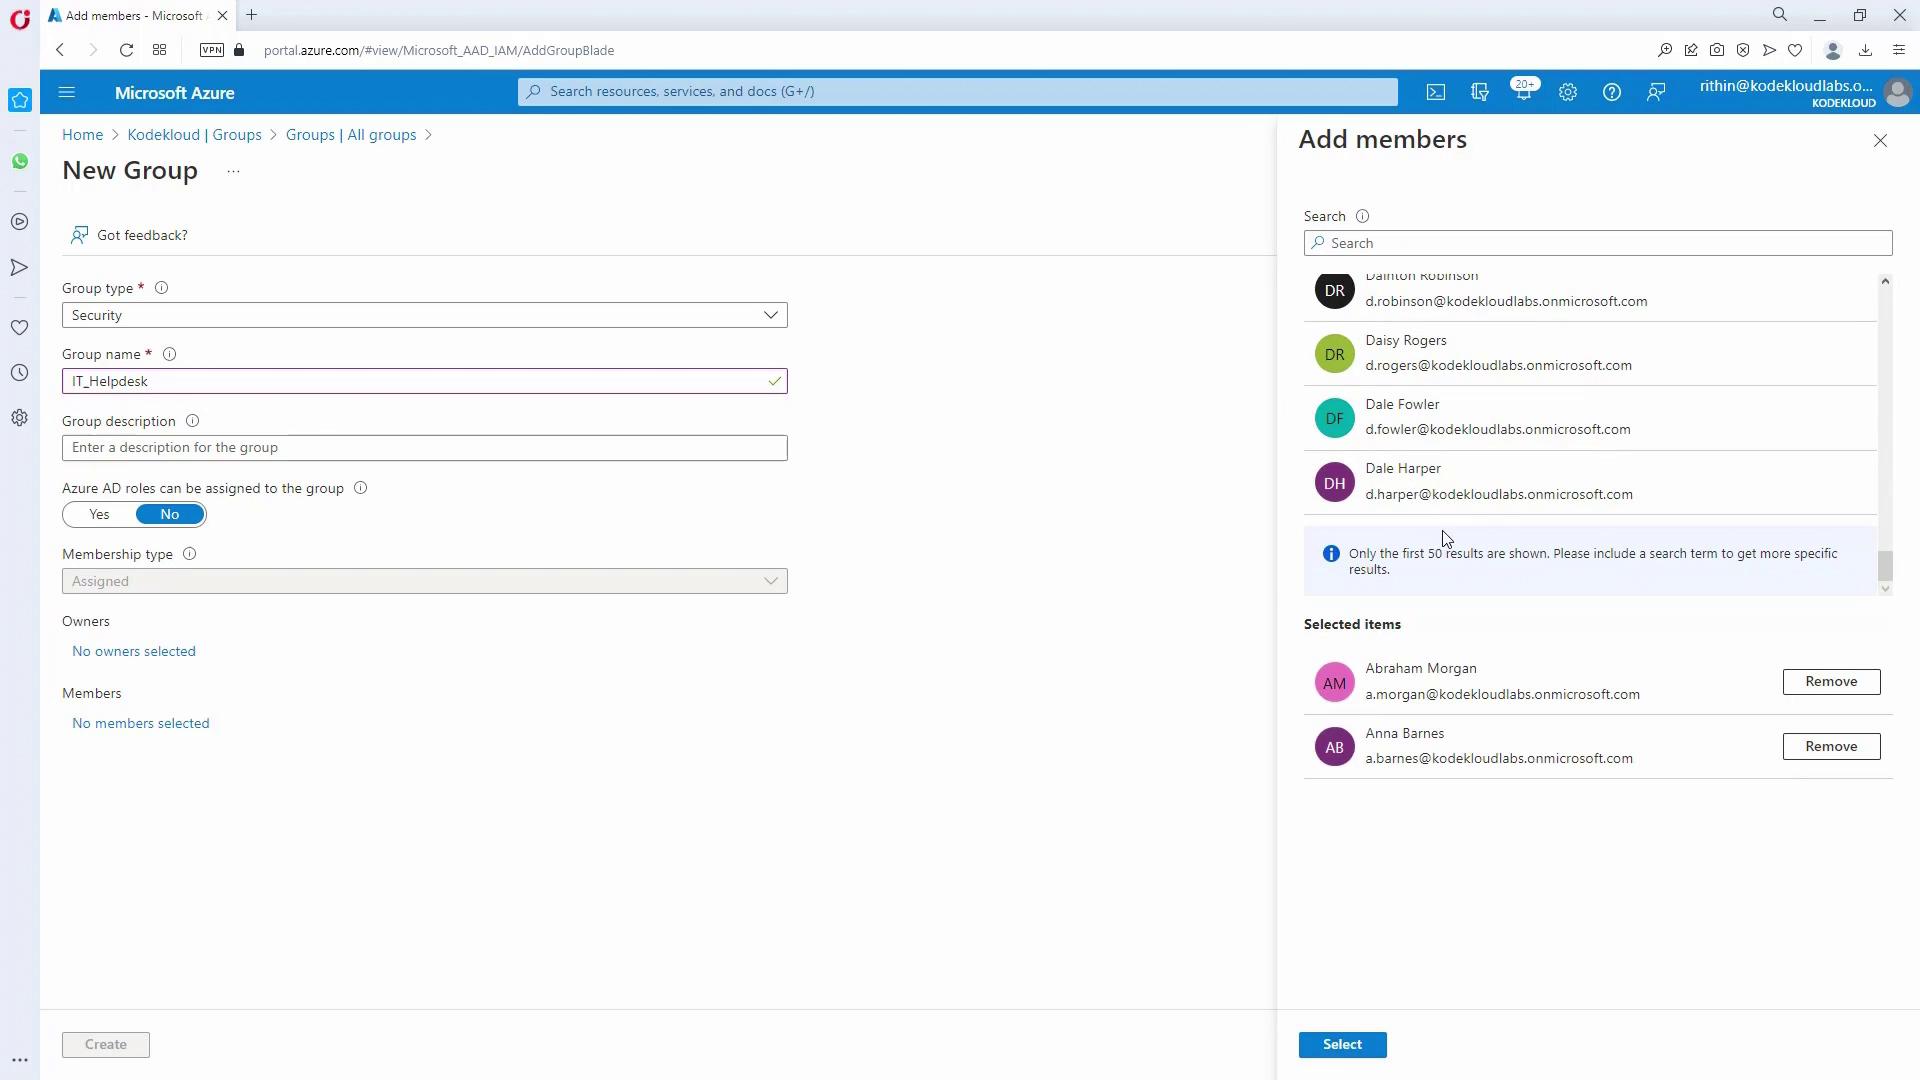
Create IT Groups:
In Azure Active Directory, create groups such as:- IT_admins
- IT_Helpdesk
- Marketing_admins
- HR_admins
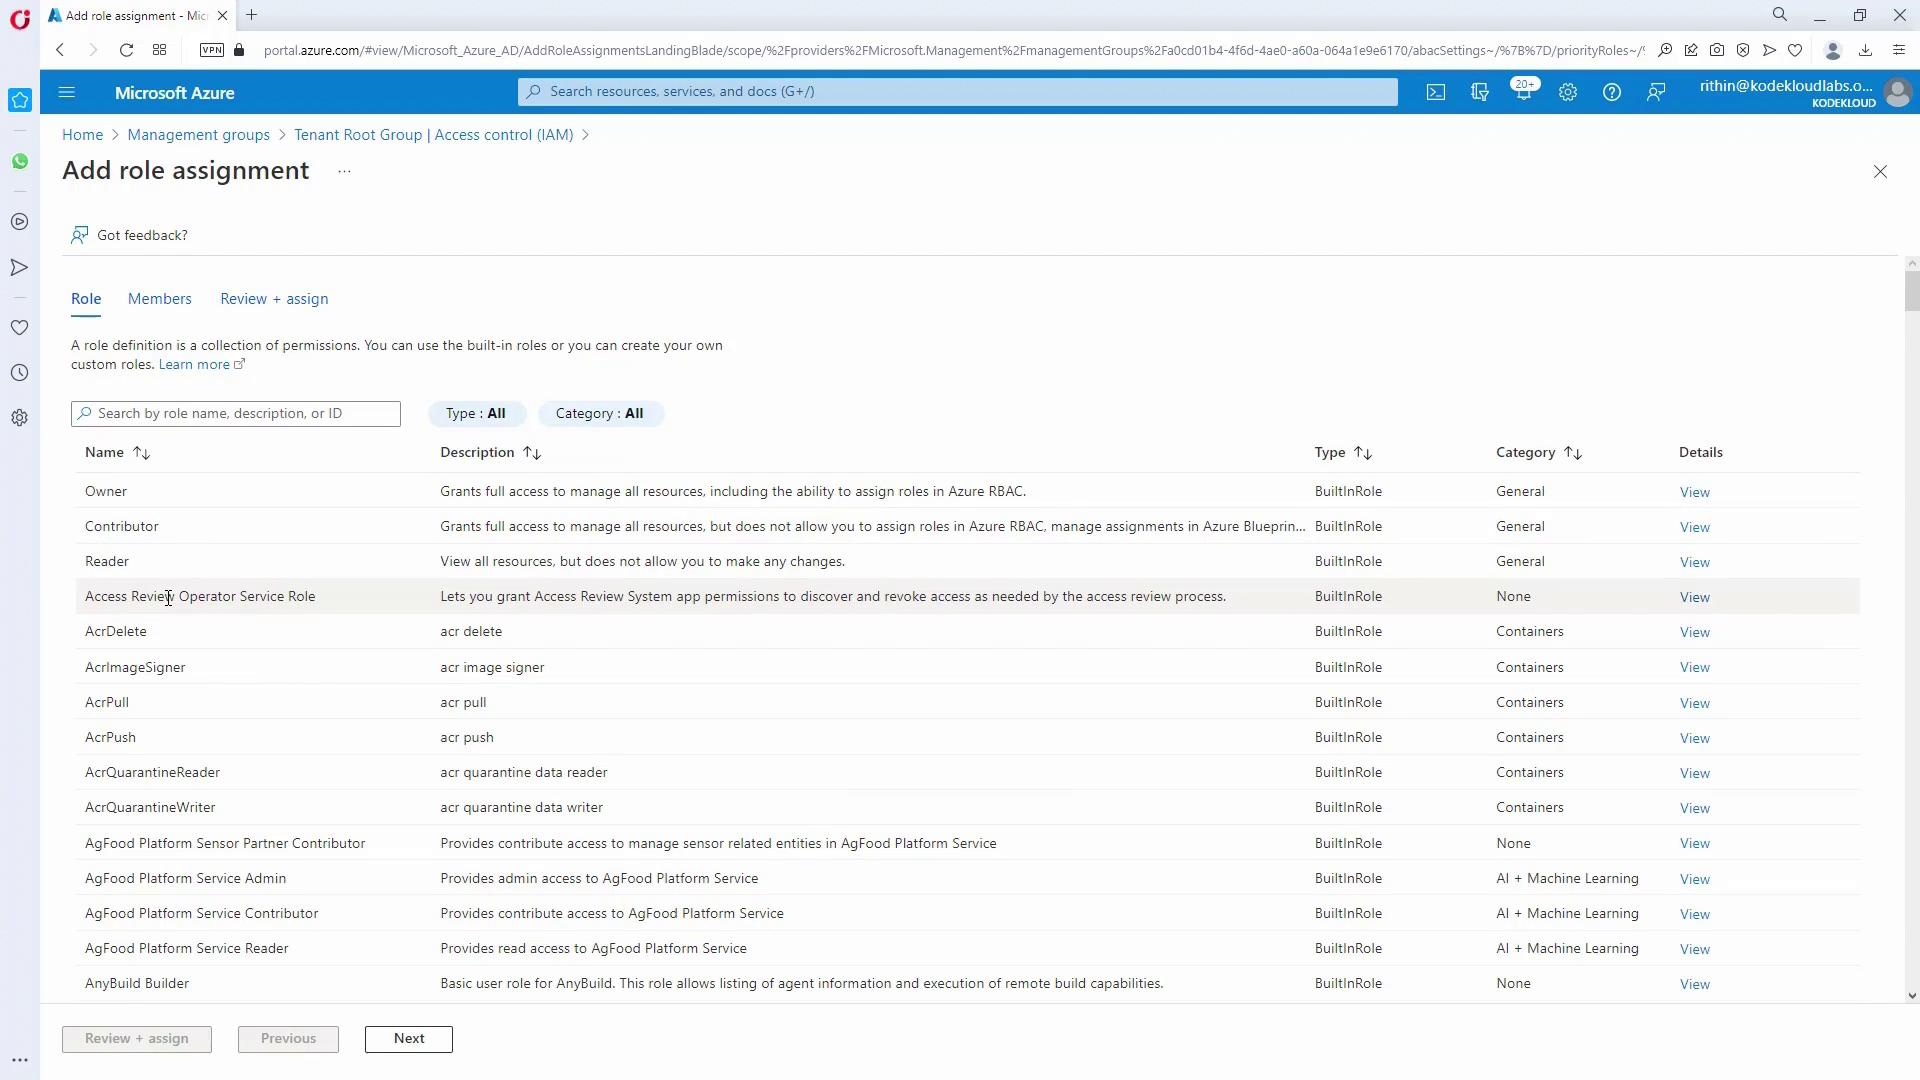
- Assign the Support Request Contributor Role:
- Navigate to the tenant root group’s IAM.
- Click “Add role assignment,” select the role “Support Request Contributor” (this enables users to create and manage support requests), and assign it to the IT_Helpdesk group.
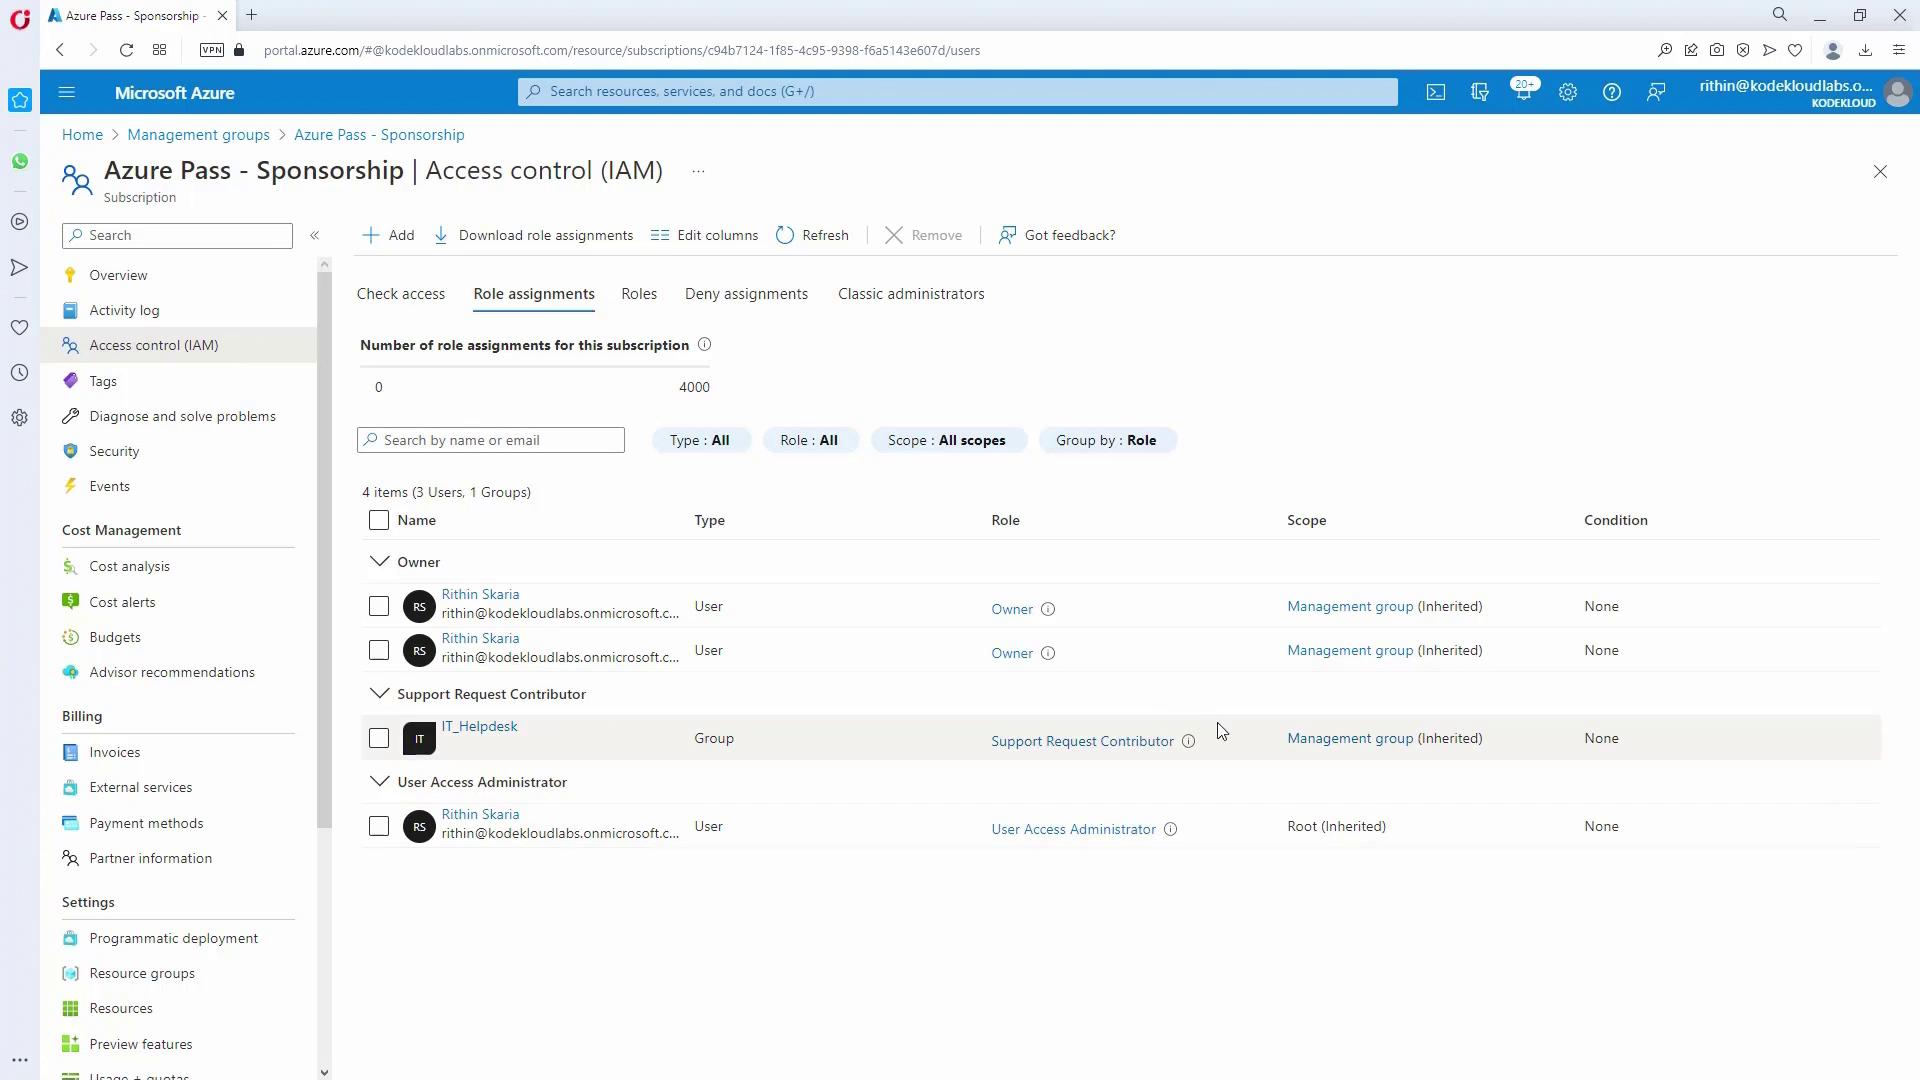
- Confirm Inheritance:
Verify a production subscription to ensure that IT_Helpdesk inherits the Support Request Contributor role.
Granting IT Admin Full Management Capabilities
IT admins require full management across subscriptions. To enable this:- Assign the Owner role (which includes full RBAC management permissions) at the management group level to the IT_admins group.
- Confirm by reviewing the updated access control settings.
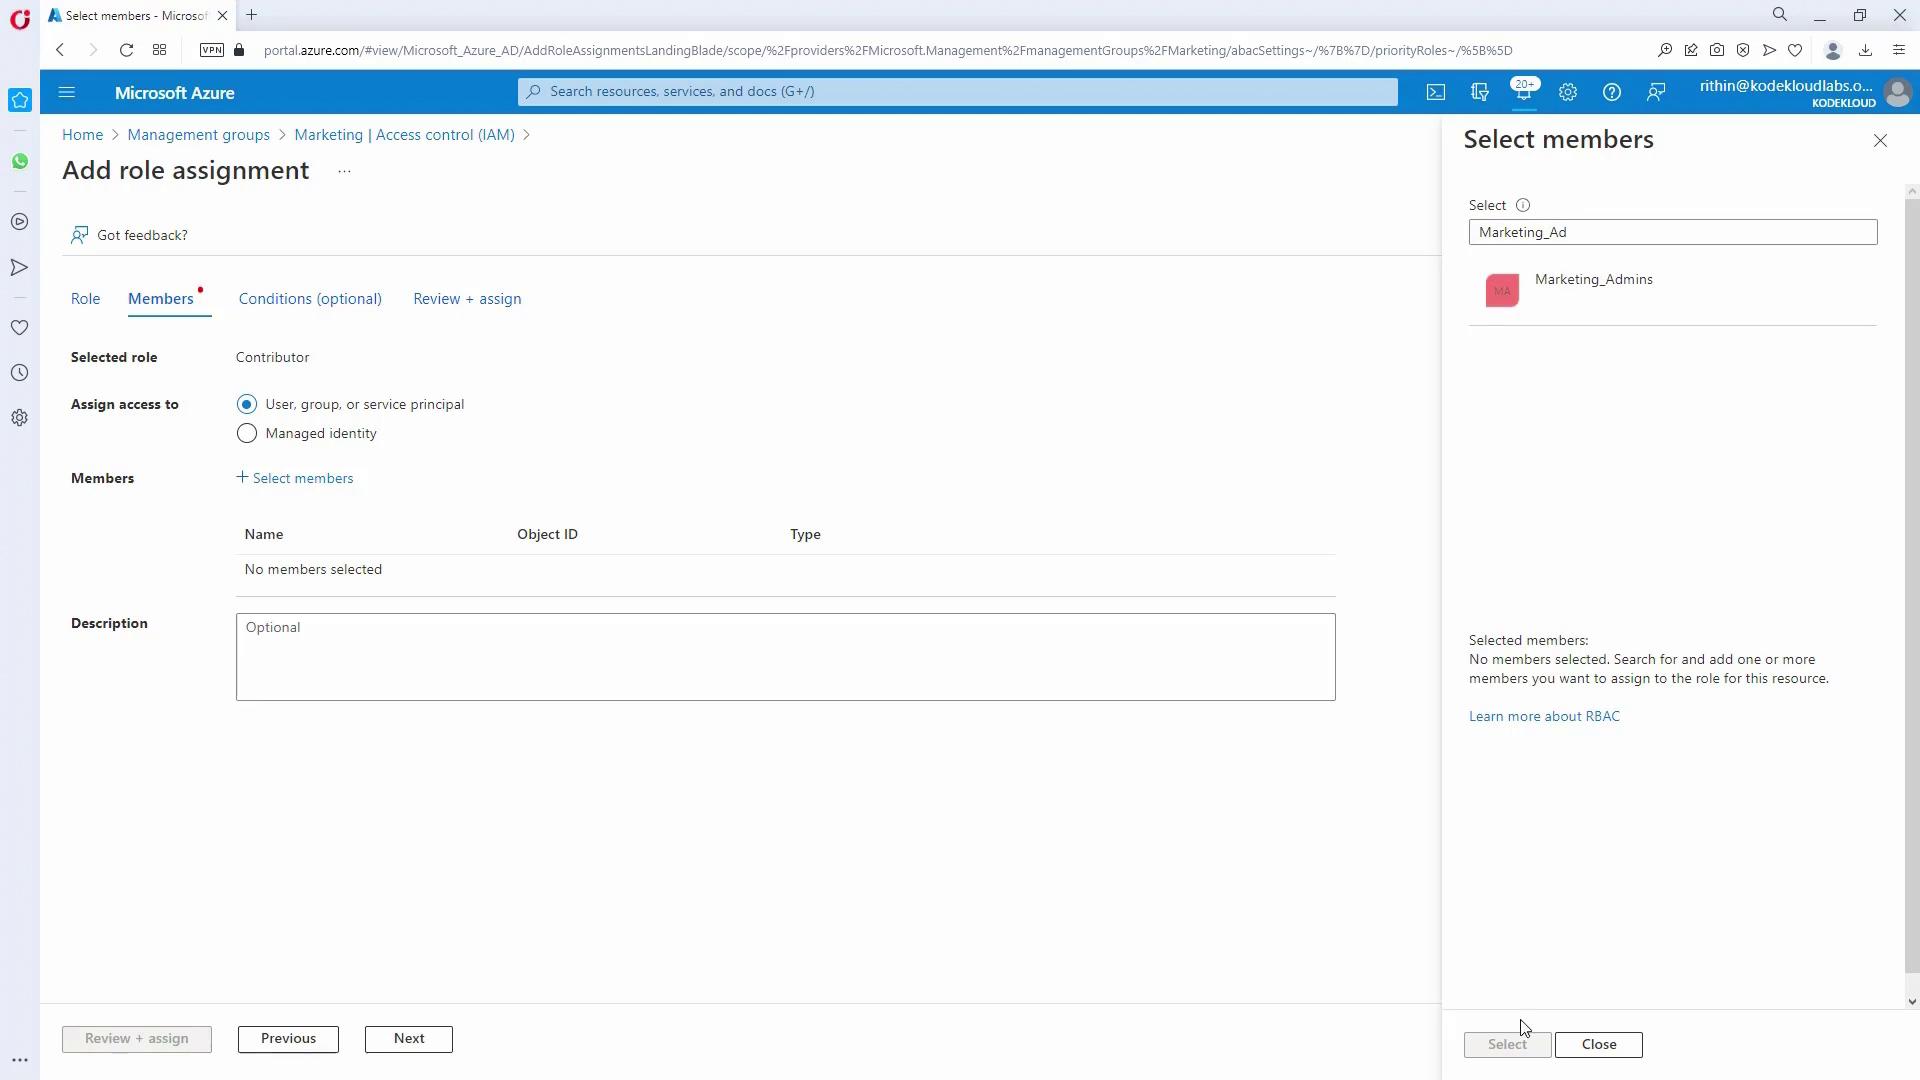
- For Marketing and HR admins managing their respective subscriptions, assign the Contributor role (following the principle of least privilege):
- In the HR management group, add the Contributor role to the HR_admins group.
- Repeat the process for Marketing.

Tagging and Policy for Resource Groups
The customer requires that every resource group in Marketing and HR subscriptions has a tag identifying the department (e.g., “department: marketing” or “department: HR”) and that this tag is inherited by all resources in the group.- Assign a Tag Enforcement Policy (Marketing):
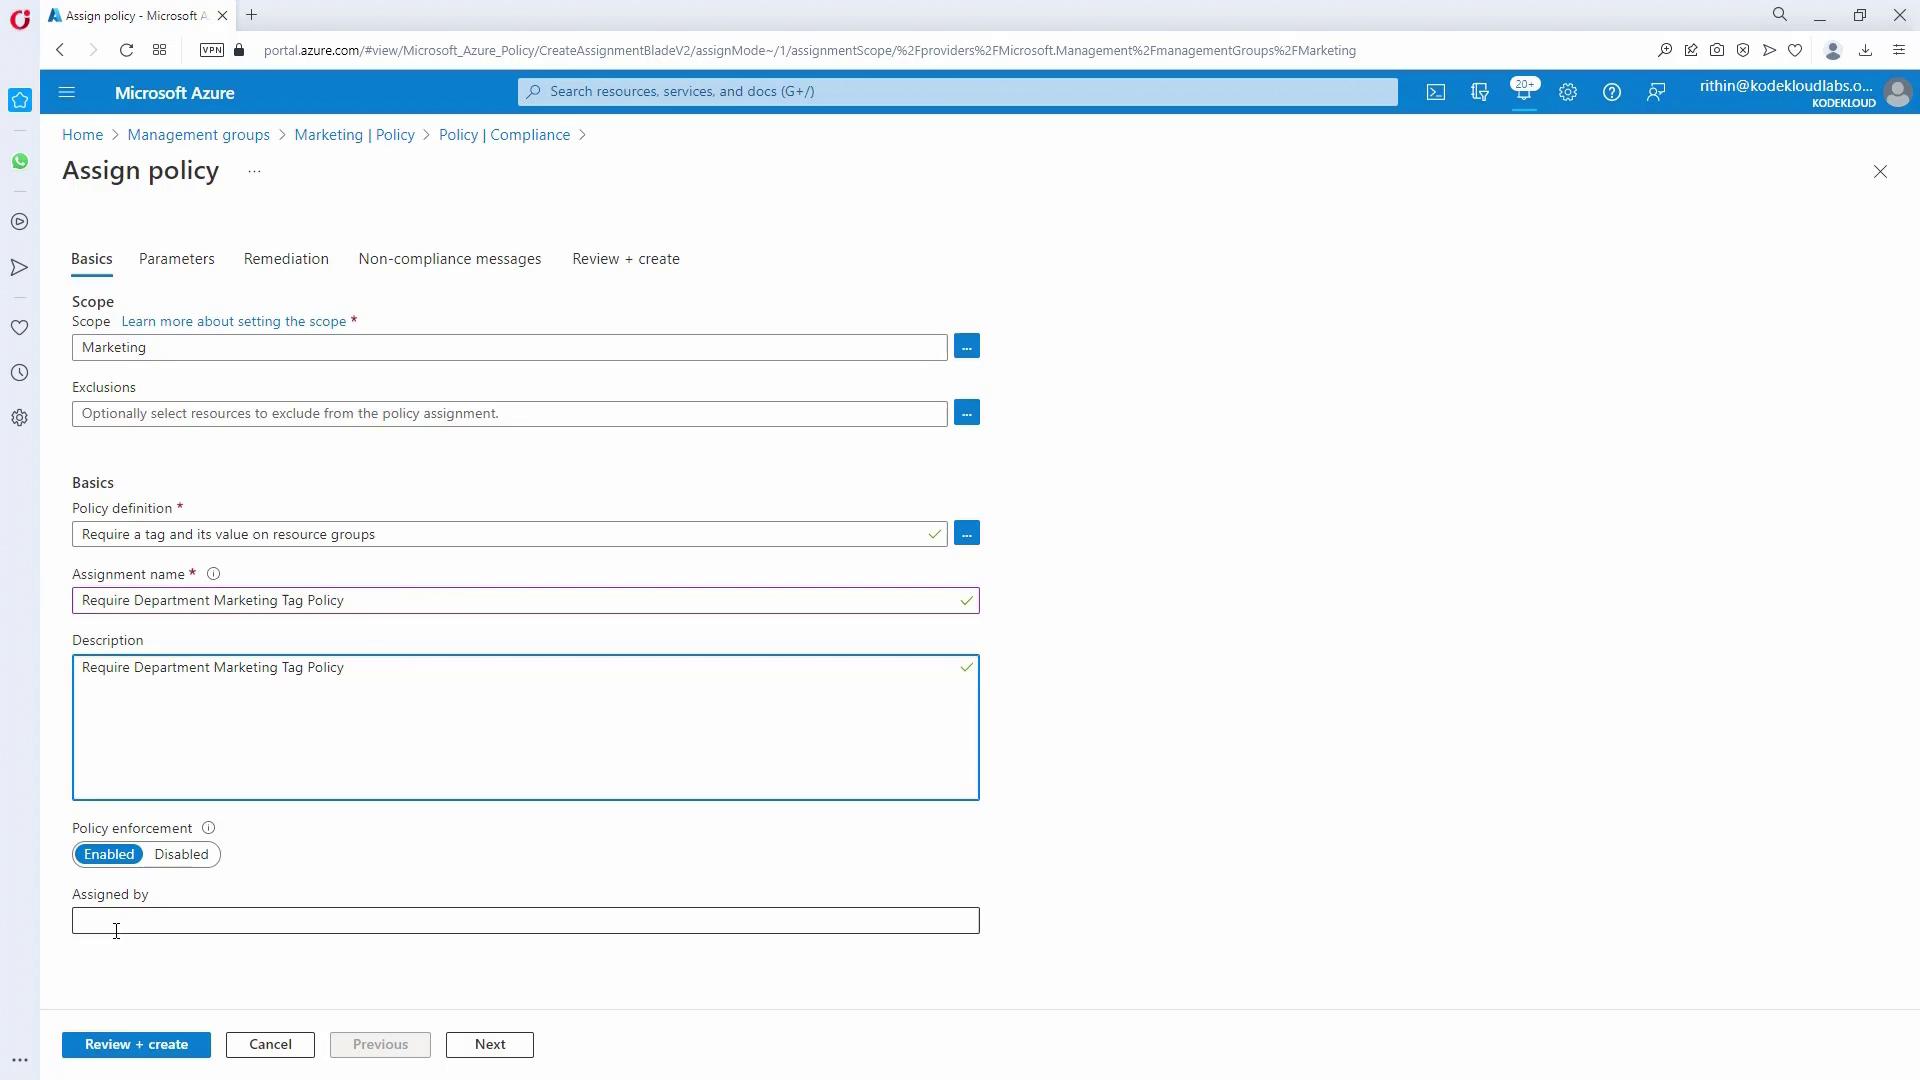
- Navigate to the Marketing management group.
- Use the “Assign Policy” option and select the policy that requires a tag with a specific value on Resource Groups.
- Enter the tag name as “department” and value as “marketing”.
- Create the policy assignment.
- Enforce Tag Inheritance:
Since tag inheritance is not automatic, assign an additional policy (for example, “inherit tag from resource group”) that ensures every resource deployed in a resource group inherits the “department” tag.

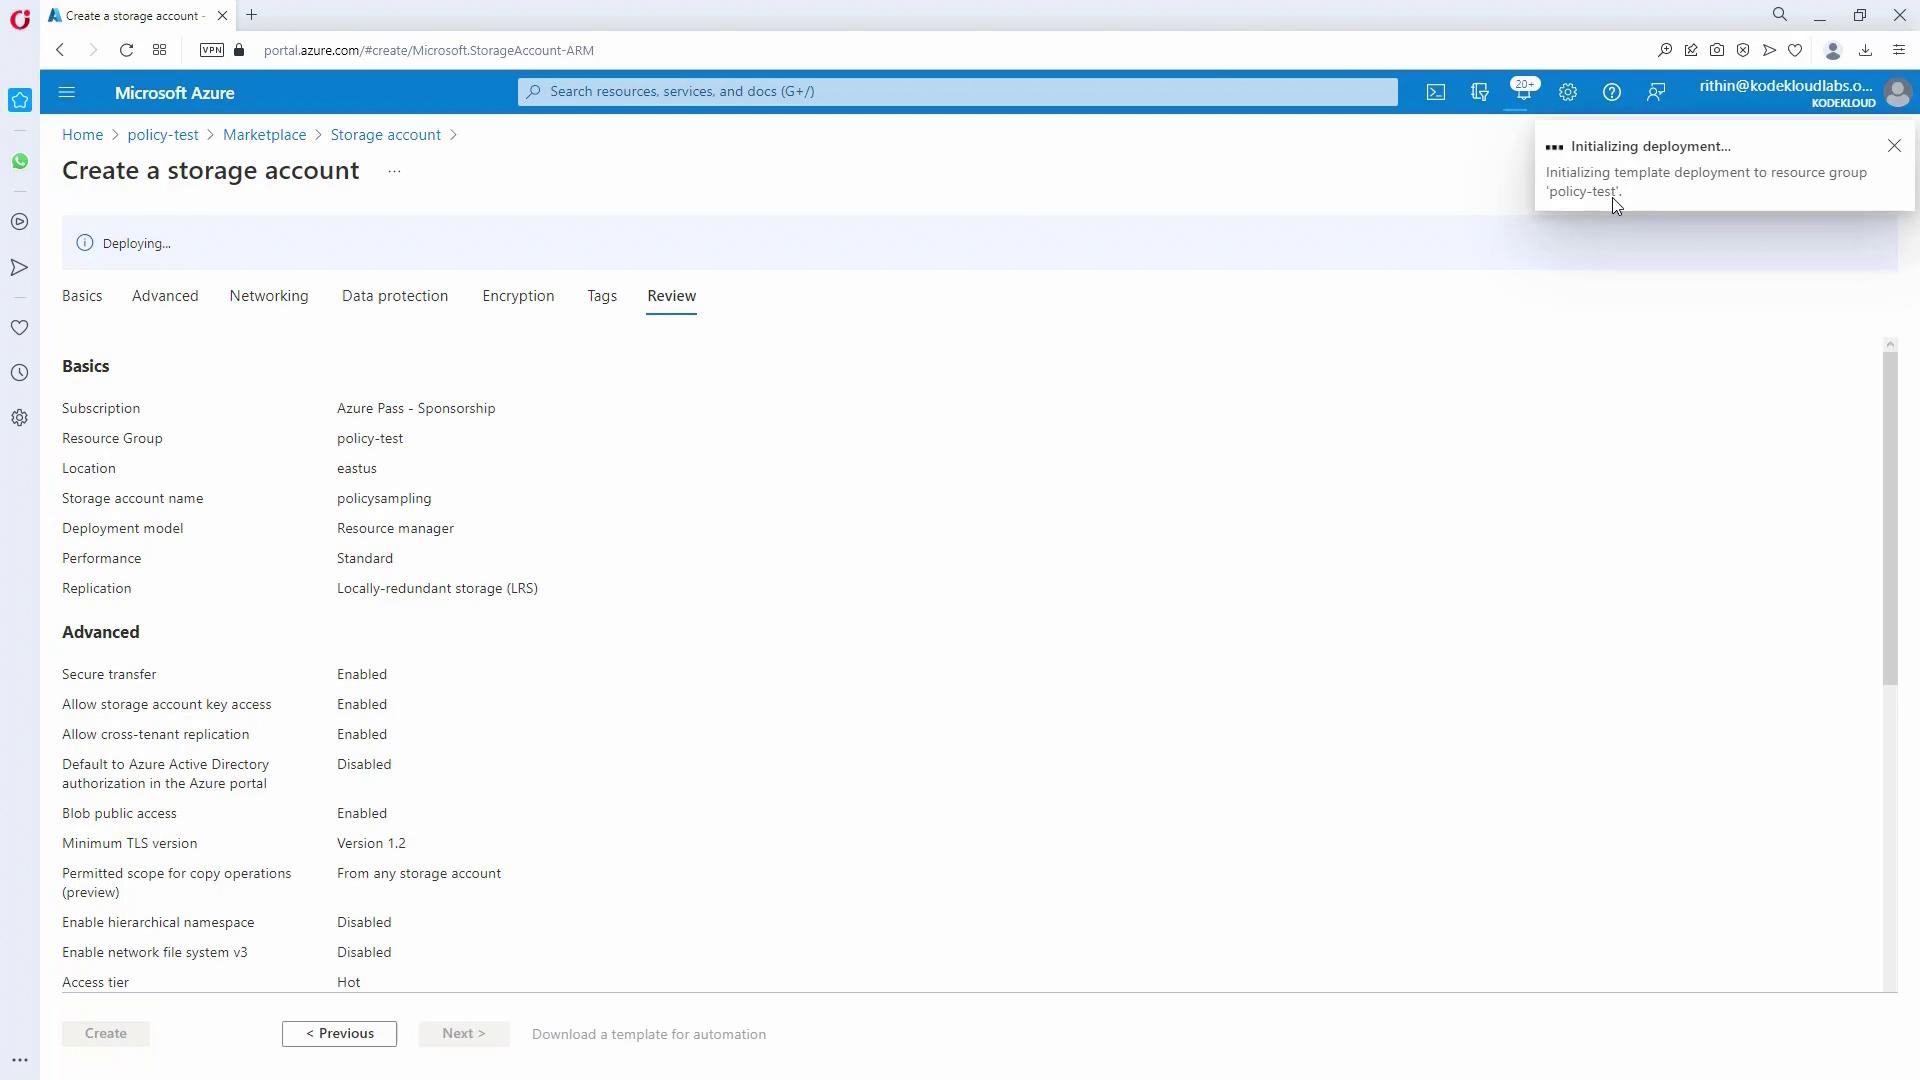
- Test the Tag Policy:
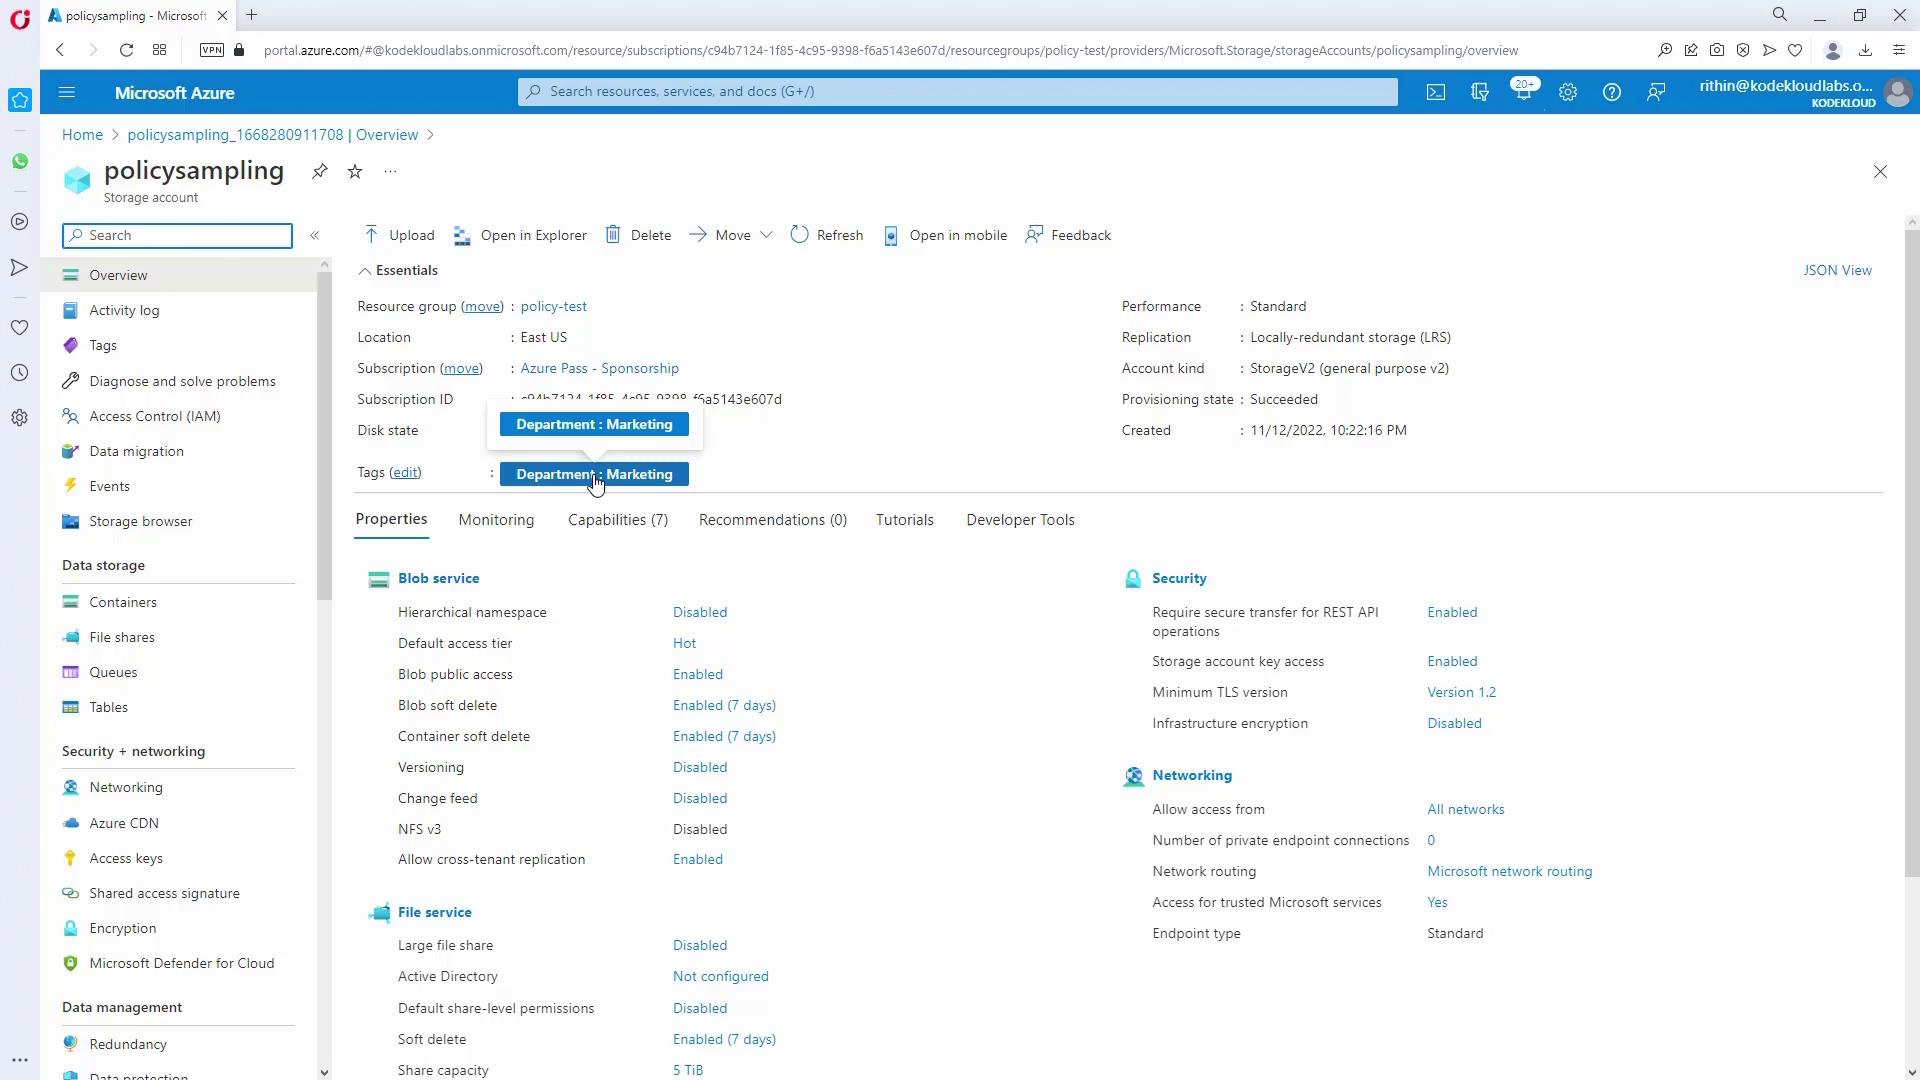
- Move a subscription under Marketing, create a test resource group, and try creating a storage account without the “department” tag.
- The resource group creation validation will enforce the correct tag and the storage account should automatically inherit it.
Implementing Test Environment Blueprints
The final requirement is to provide a standardized template for testing environments. This blueprint should allow testing subscriptions to spin up resource groups, role assignments, policy assignments, and various Azure resources.- Create a Blueprint:
- Navigate to the Blueprints section in the Azure portal.
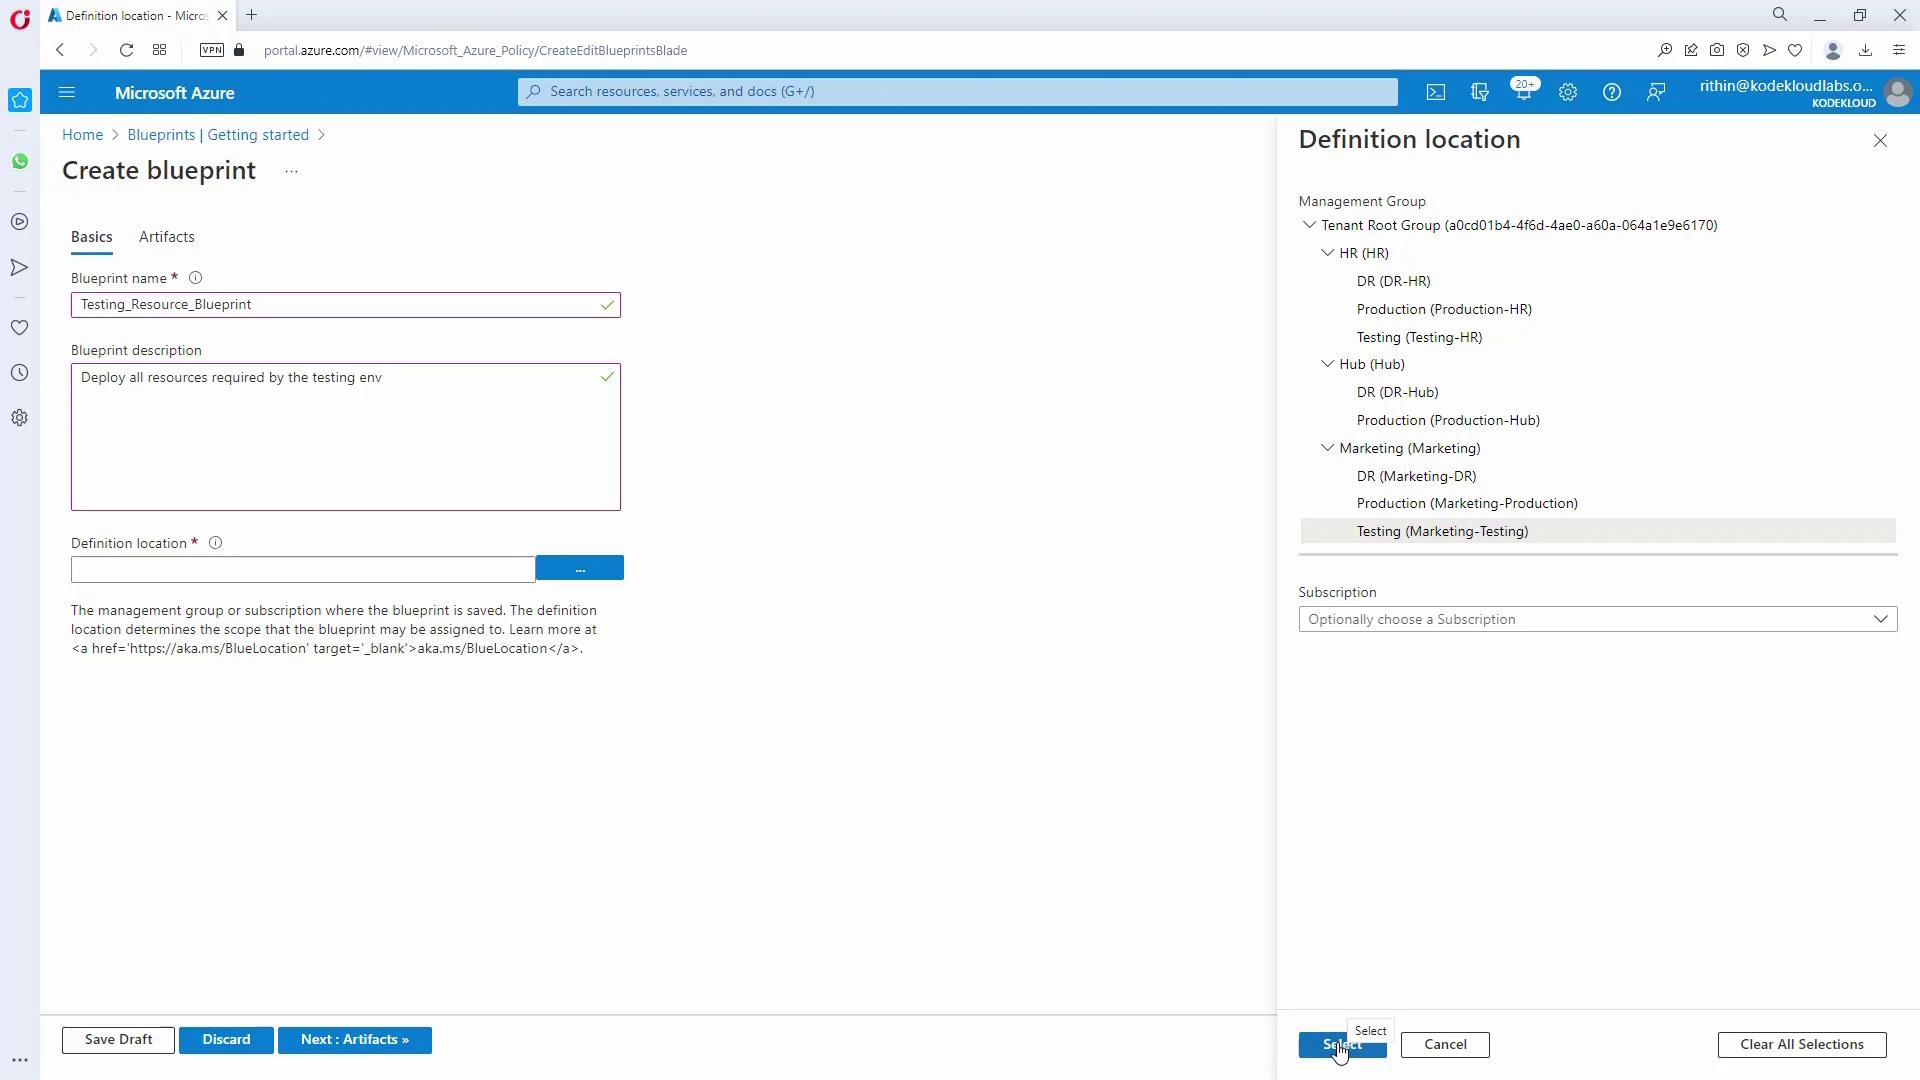
- Create a new blueprint (e.g., “testing_resource_blueprint”)—note that blueprint names cannot have spaces; use underscores as needed.
- Define its purpose in the description (e.g., “Deploys all resources required by the testing environment”).
- Choose a location where it will be available (this could be assigned to either testing HR or testing Marketing).
-
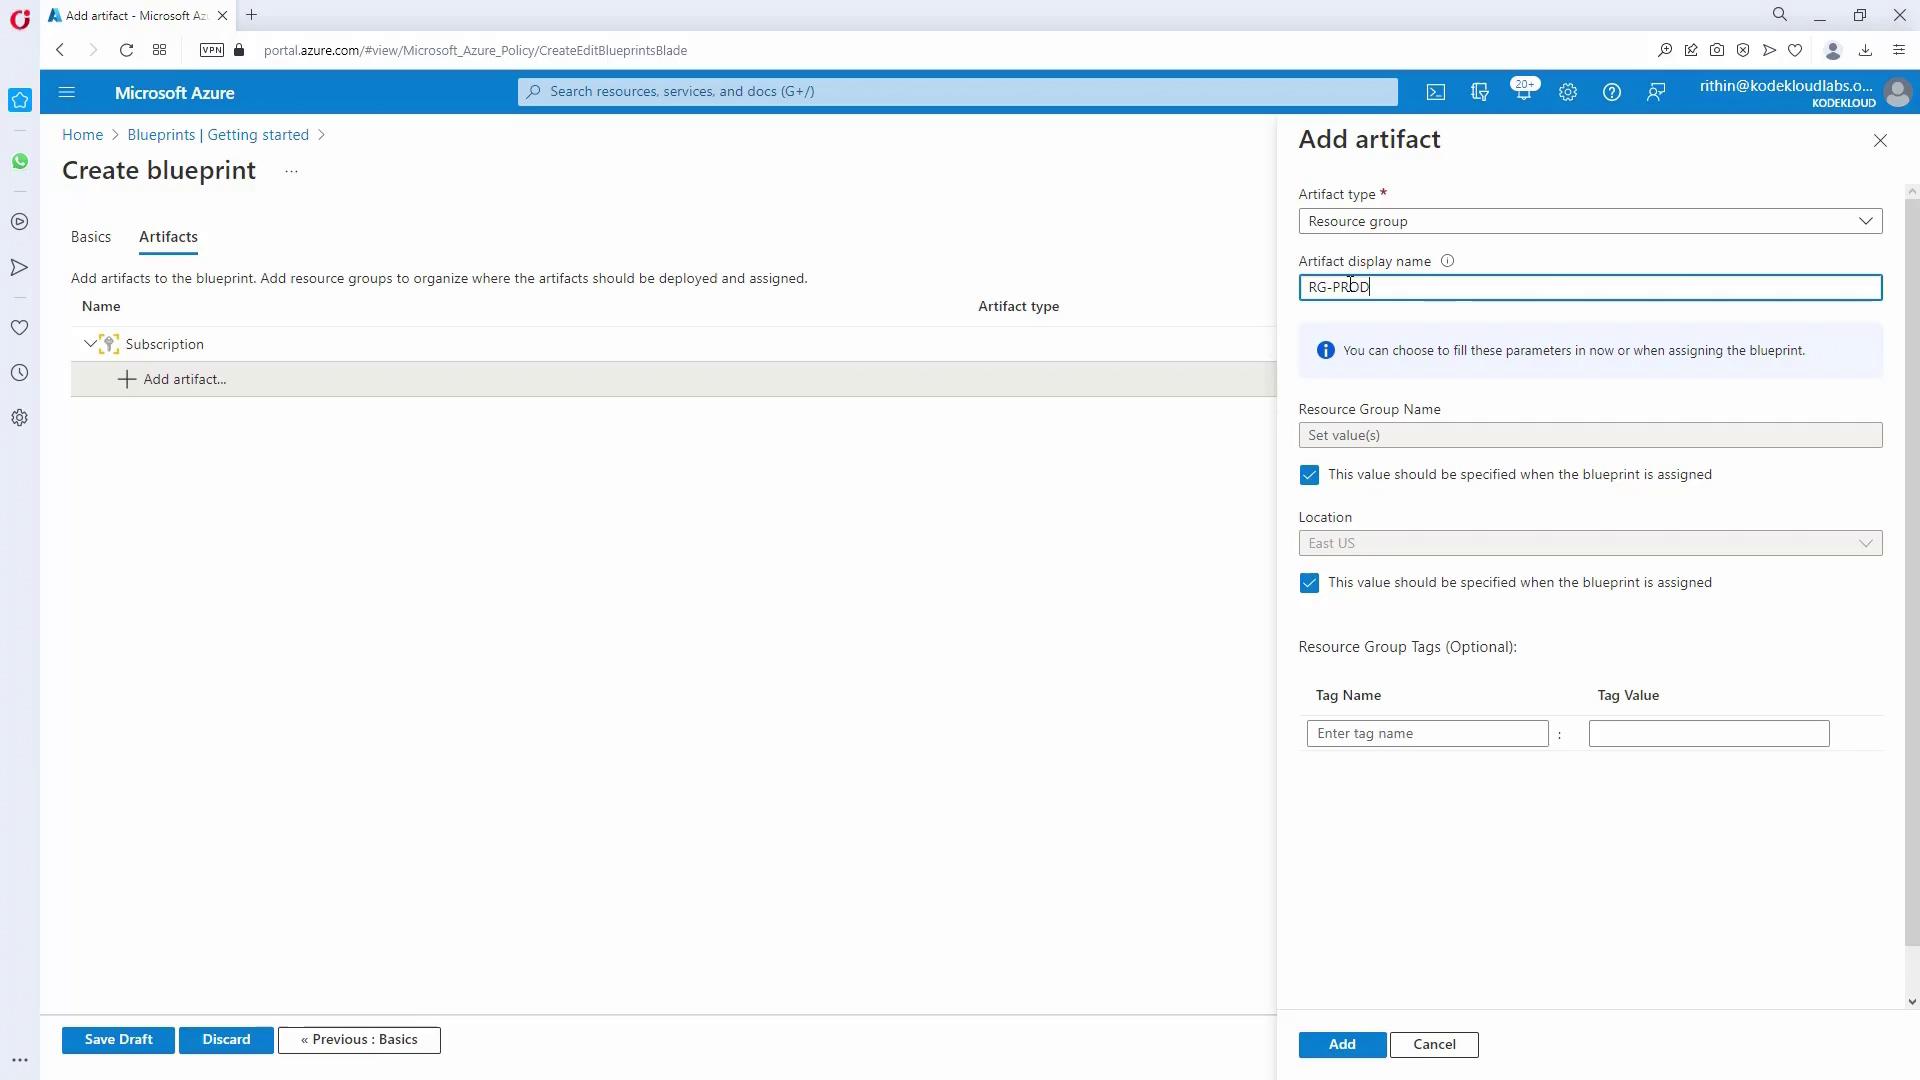
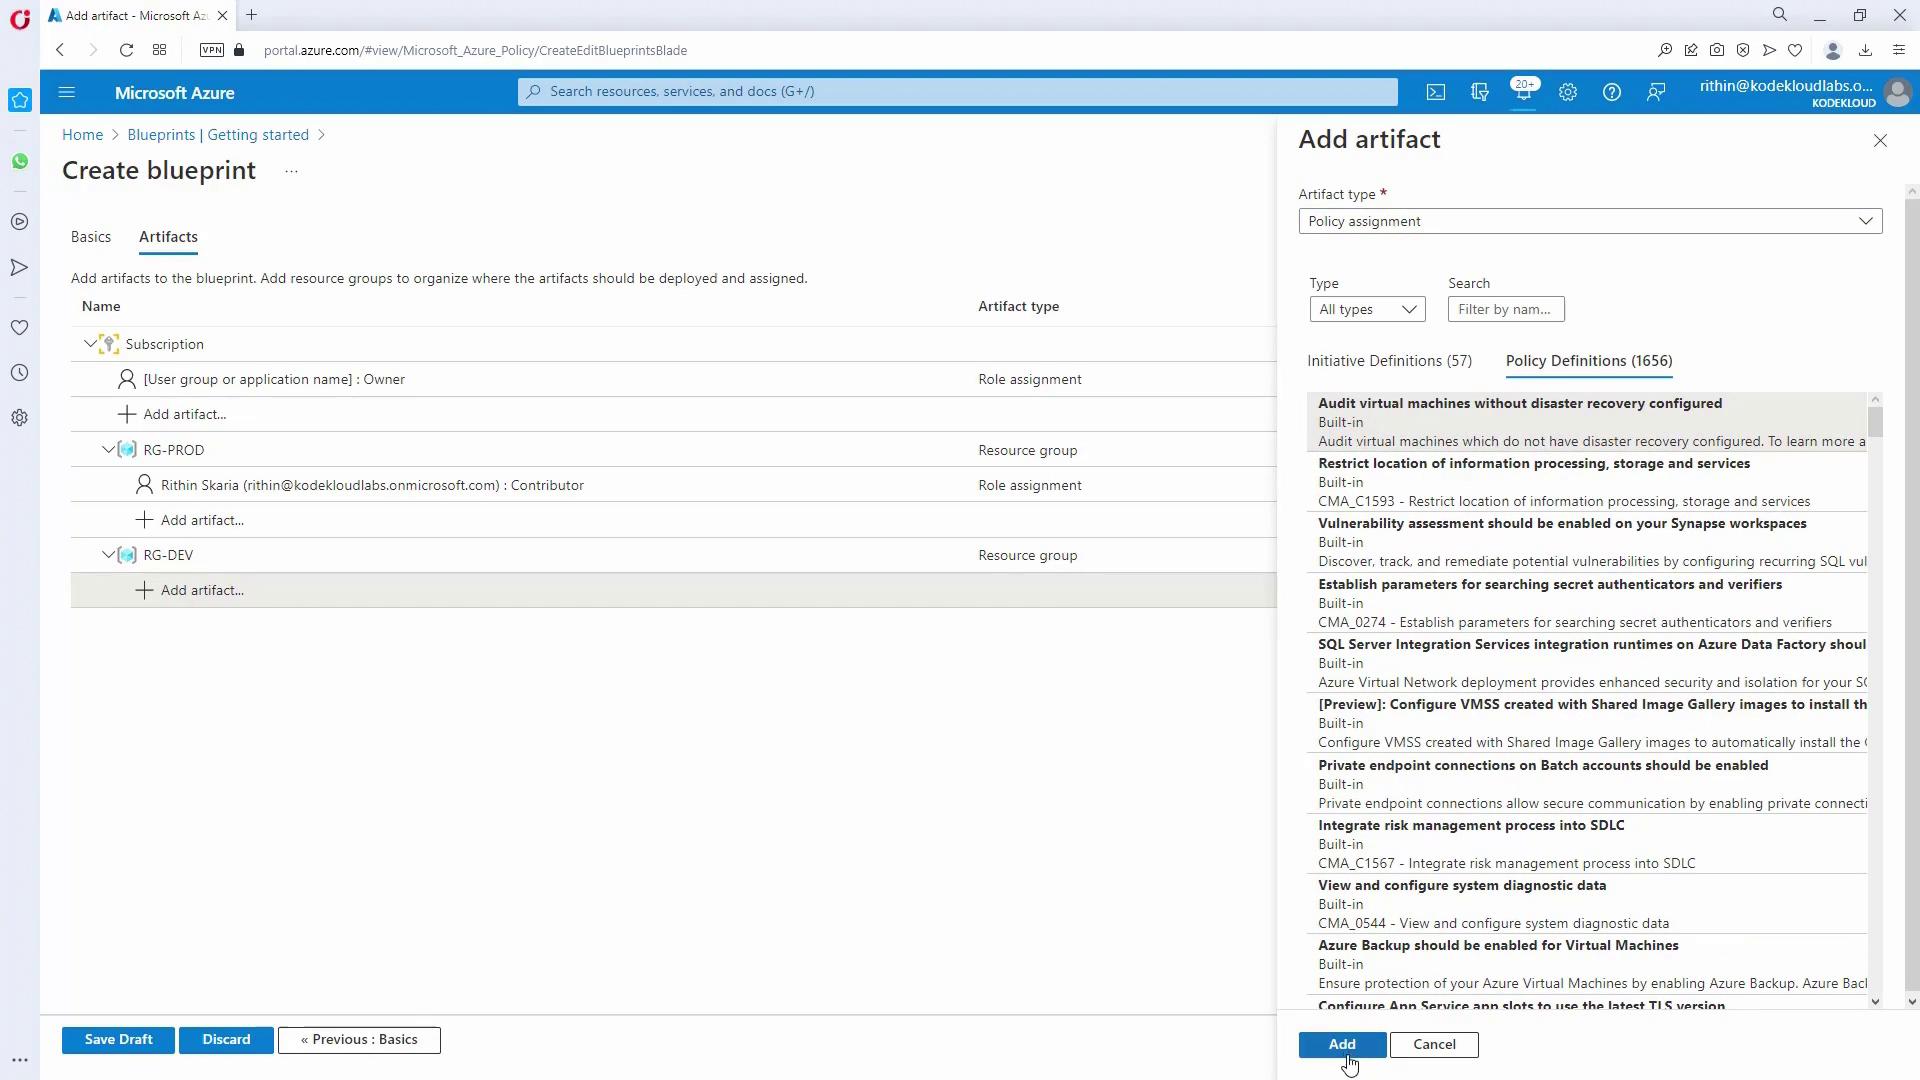
Add Artifacts to the Blueprint:
Within the blueprint, add necessary artifacts such as Resource Groups and Role Assignments. For example:Optionally, include ARM templates if further resources are needed.Artifact Type Description Example Artifact Resource Group Create a resource group with a parameter for its name RG_prod, RG_dev Role Assignment Assign roles (e.g., Contributor) to designated users/groups Contributor for Testing Policy Assignment Include policies if additional resources must be deployed Tag enforcement policy
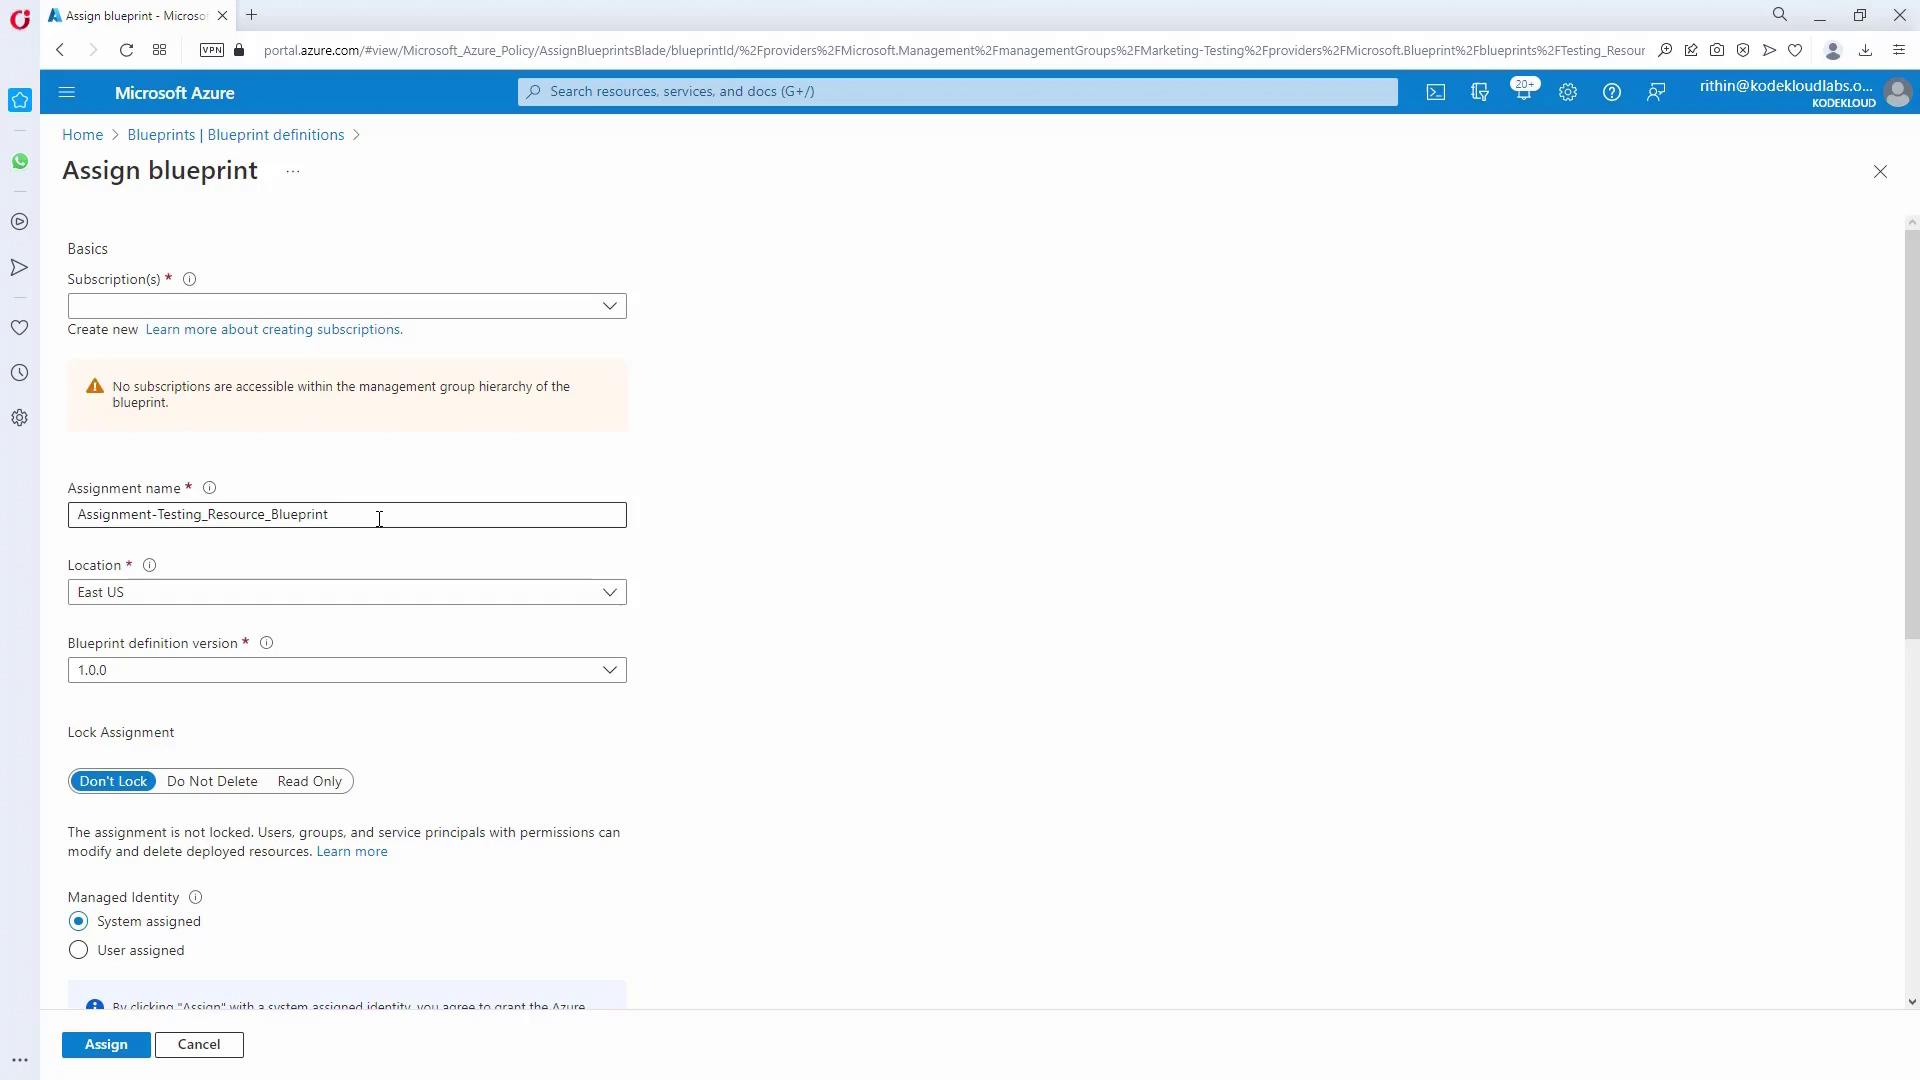
- Publish and Assign the Blueprint:
Save the blueprint as a draft, then publish it by setting a version number (e.g., 1.0.0).
Assign the published blueprint to the targeted subscription. During assignment, provide dynamic parameters like resource group names, locations, and user details.
Final Validation and Testing
After completing all configurations:- Validate that resource groups in Marketing automatically inherit the “department: marketing” tag.
- Create a sample storage account to confirm that the allowed locations policy is enforced (e.g., deployments in East US are allowed while others are blocked or require correction).
- Verify that the blueprint assignment for testing environments deploys all defined artifacts correctly.
- Ensure that all role assignments for IT helpdesk, IT admins, Marketing admins, and HR admins reflect the intended permissions with proper inheritance.