Overview of Azure Files Structure
Azure Files is organized hierarchically, starting with a storage account. Within this account, you can create multiple file shares (e.g., A, B, C). Each file share contains directories (or folders) where individual files are stored.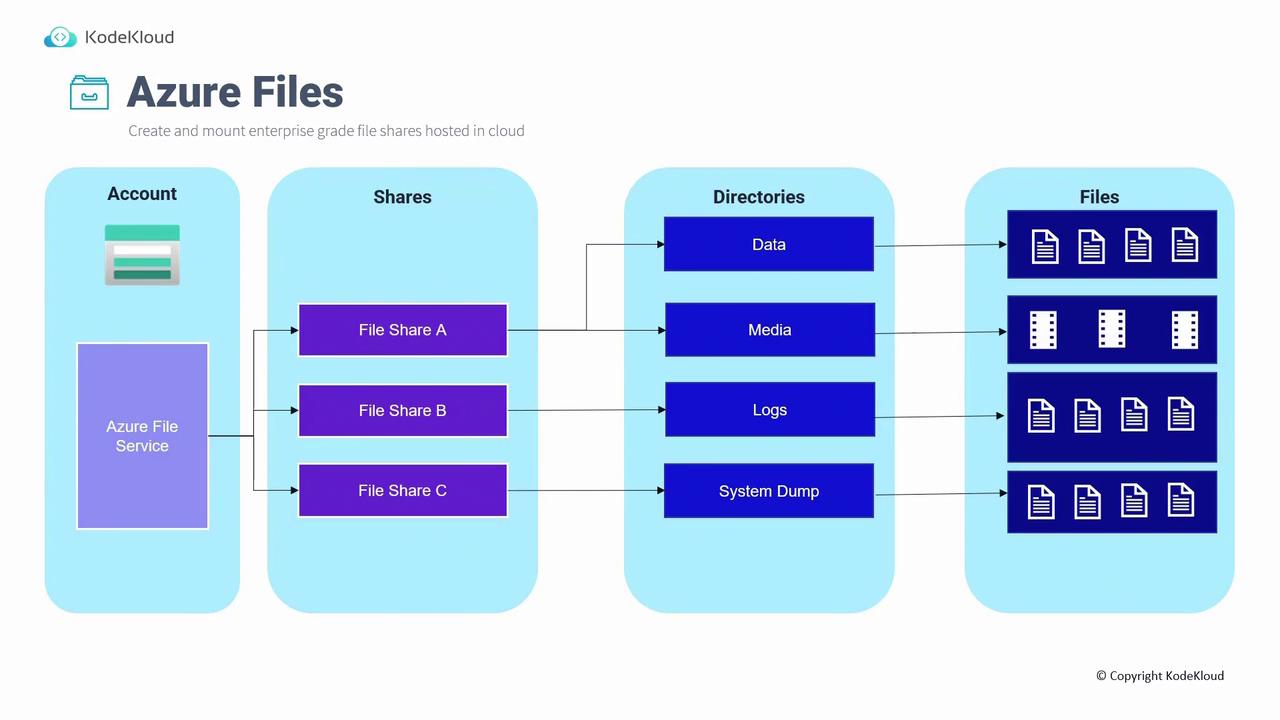
Azure Files is designed for easy and scalable file storage in the cloud, providing seamless integration with different operating systems.
Accessing File Shares
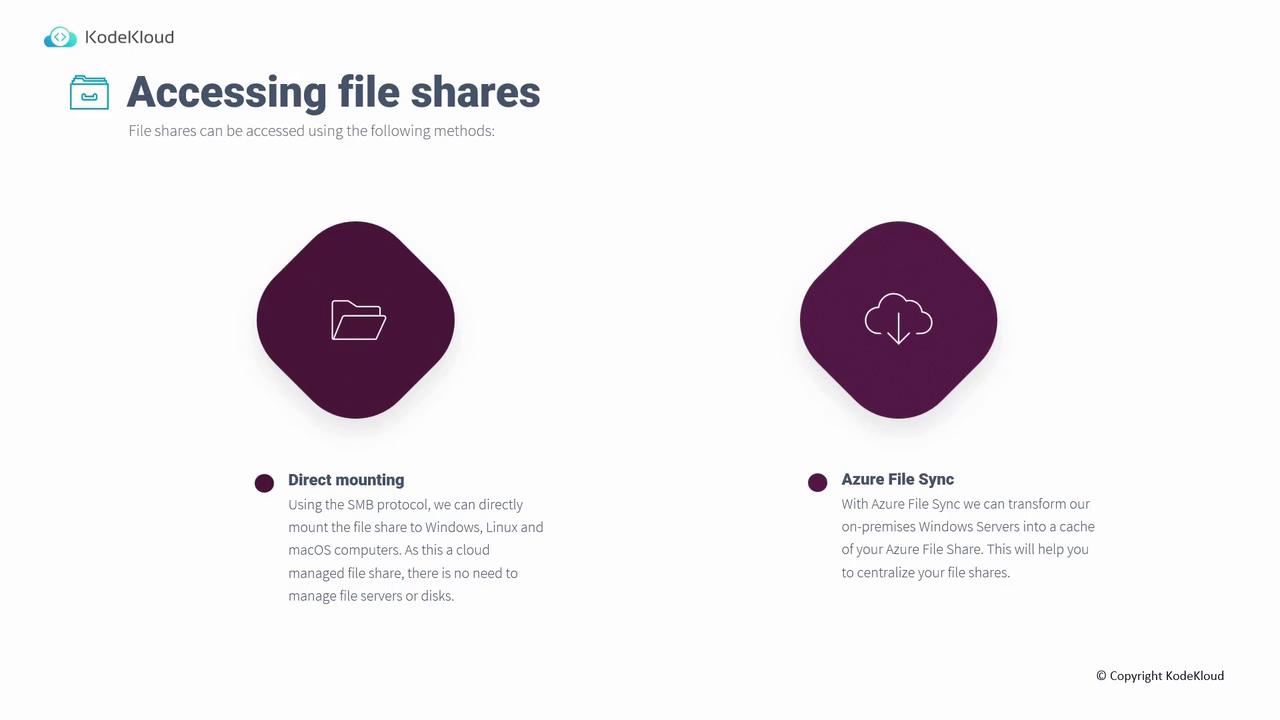
There are two main methods to access your Azure file shares:-
Direct Mounting:
You can directly mount file shares to Windows, Linux, or macOS devices using the SMB or NFS protocols. When creating a file share in the Azure portal, click the “Connect” button to generate an OS-specific script (PowerShell for Windows, Bash for Linux, or macOS). Ensure that port 445 is enabled because it is essential for SMB communications; the script will verify this before establishing the connection. -
Azure File Sync:
Azure File Sync converts your on-premises Windows servers into caches for your Azure file shares. This setup centralizes file management by caching frequently accessed files locally, thereby reducing retrieval times compared to cloud downloads. The tiering feature helps prioritize and cache critical files on-premises.
Performance Levels
The performance of your Azure file share depends on your business needs and cost considerations. There are two primary performance tiers:-
Standard Tier:
Using HDD storage, the Standard tier typically offers double-digit millisecond latencies, up to 10,000 IOPS, and a maximum bandwidth of 300 megabits per second. It is an economical option when high IOPS or bandwidth is not critical. -
Premium Tier:
This tier takes advantage of SSD storage, resulting in lower, single-digit millisecond latencies. Premium file shares support up to 100,000 IOPS and offer bandwidth up to 5 gigabits per second. Because of its enhanced performance, the premium tier is more expensive and is currently available only in zones that support ZRS. When creating a file share, select the premium option if your region supports it.

Storage Tiers for Azure Files
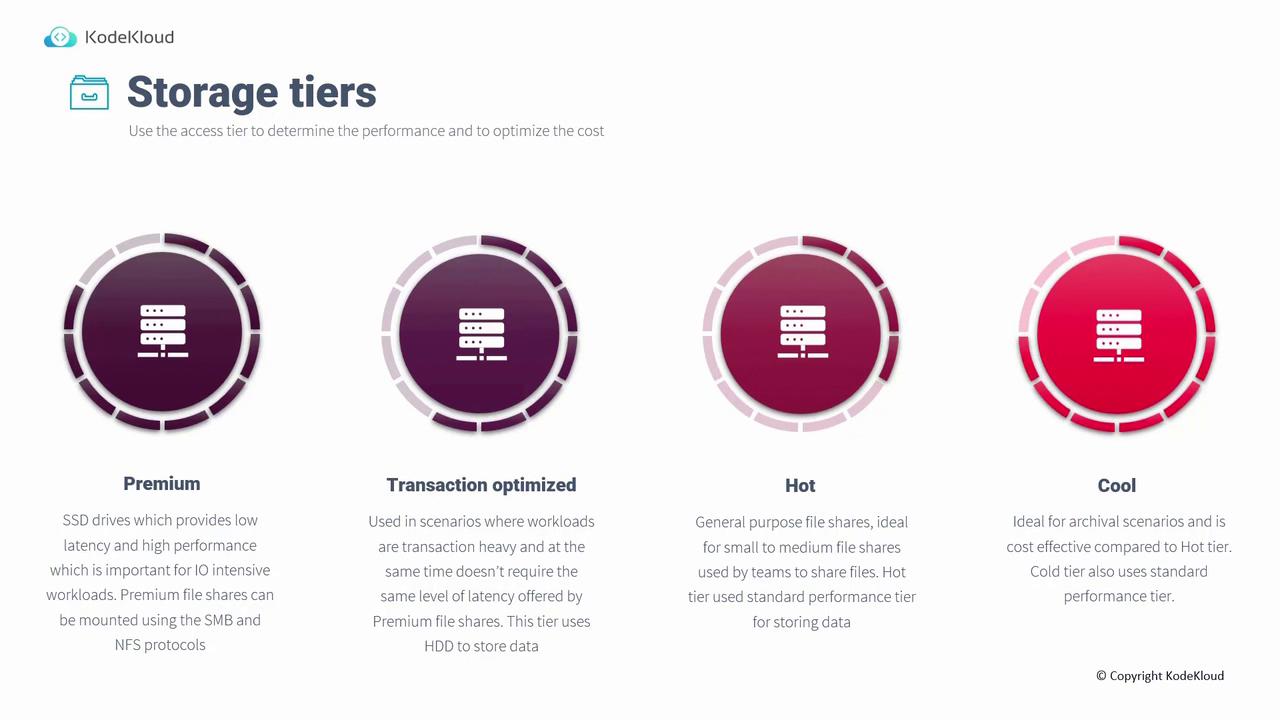
Azure Files provides various storage tiers designed to balance performance and cost. The following table summarizes the key characteristics of each tier:| Storage Tier | Description | Storage Type |
|---|---|---|
| Premium | Uses SSDs for low latency and high performance, ideal for I/O-intensive workloads. | SSD |
| Transaction Optimized | Designed for high transactional workloads with moderate latency; default option for standard storage accounts. | HDD |
| Hot | Best for small to medium file shares that require fast, consistent access, such as in team file sharing scenarios. | HDD |
| Cool | Meant for archival and infrequently accessed data while minimizing cost. | HDD |
Only the Premium tier utilizes SSD storage; the Transaction Optimized, Hot, and Cool tiers all rely on HDD storage.
Comparison with Blob Storage and Azure NetApp Files
When selecting a storage solution, it’s important to understand the differences among Azure Files, Blob Storage, and Azure NetApp Files:-
Blob Storage:
Ideal for large-scale, sequential read workloads. Blob Storage is commonly used for static website content and other scenarios where data is ingested once and read repeatedly. It is cost-effective, low-maintenance, and optimized for serving data. -
Azure Files:
Designed as a fully managed file service, Azure Files supports random access workloads across multiple operating systems via SMB and NFS protocols. NFS support ensures full POSIX file system compatibility, making it suitable for persistent storage in containerized environments like ACI and AKS. Additionally, file shares persist even after container deletion. -
Azure NetApp Files:
Powered by NetApp technology, this fully managed file service offers advanced performance, multi-protocol support (NFS 3.0, 4.1, and SMB concurrently), and robust data protection features. It is ideal for high-performance, random access workloads.
| Service | IOPS | Throughput |
|---|---|---|
| Blob Storage | Up to 20,000 IOPS | 100 GB/s |
| Azure Files | Up to 100,000 IOPS | 80 Gbps |
| Azure NetApp Files | Up to 460,000 IOPS | 36 Gbps |
Demonstration in the Azure Portal
Below is a walkthrough of how to configure Azure Files using the Azure portal:-
Viewing and Editing a File Share:
- Navigate to your Storage Account and select “File Shares.”
- To modify an existing file share (for example, one configured with the Transaction Optimized tier), click on “Edit Quota” to update the storage limit.
- To create a new file share, provide a name and select the appropriate tier. Note that for standard storage accounts, the Premium option is not available; you will choose between Transaction Optimized, Hot, or Cool tiers based on your requirements.
-
Connecting to a File Share:
- When you select a file share, a “Connect” button appears at the top of the interface.
- Clicking this button provides OS-specific scripts for connecting to the file share.
- The scripts include a verification check to ensure that port 445 is open for SMB connections.
-
Creating a Premium File Share:
- To create a Premium file share, begin by creating a new storage account with the Premium performance tier.
- In the portal, select a resource group, choose “Premium” for the account type, and ensure the FileShares option is enabled.
- Remember, for Premium file shares, only LRS or ZRS options are available; options such as GCRS or GRS are not supported.
- Once the premium storage account is active, create a new file share similarly to a standard file share. However, you will benefit from enhanced IOPS and lower latency due to the SSD storage. Additionally, you can choose between SMB or NFS protocols (note that both protocols cannot be enabled simultaneously).
Choose the appropriate storage tier and performance level based on your workload requirements and cost constraints to optimize your Azure Files deployment.