- Detect identity-based risks.
- Remediate detected risks by enforcing predefined policies.
- Export risk detection data to third-party tools, such as SIEM, for additional investigation.
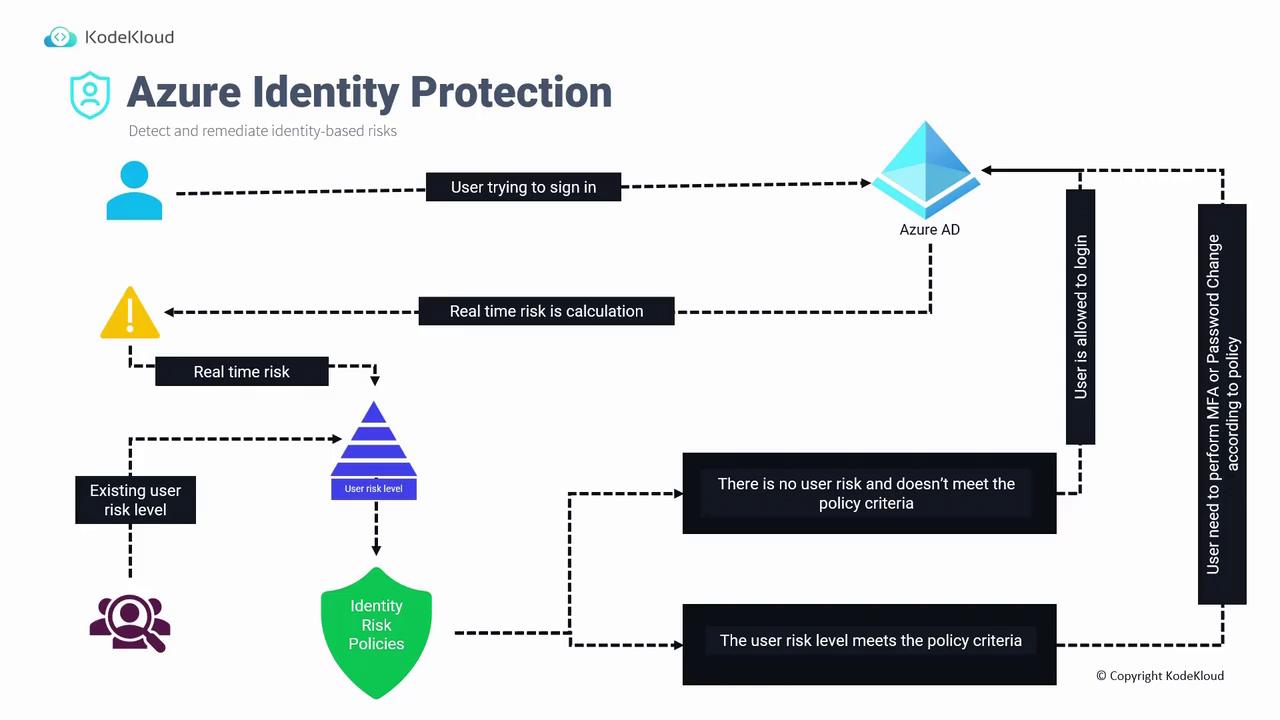
How Identity Protection Works
When a user attempts to sign in to Azure AD, the system performs a real-time risk calculation based on several factors, including:- Location
- IP address
- Multi-Factor Authentication (MFA) usage
- Browser and device details
- Device status
- If the risk level is below the threshold, the user is allowed to sign in.
- If the risk level meets or exceeds the threshold, additional security measures (such as MFA challenges or a prompt for a password change) are enforced through conditional access policies before the sign-in is completed.
- User Risk Policy: Evaluates the likelihood that an account is compromised by detecting factors such as exposed credentials, often sourced from dark web data breaches, and leveraging Azure AD threat intelligence.
- Sign-In Risk Policy: Analyzes sign-in-specific properties like IP address, location, and travel patterns (e.g., detecting atypical travel where a user signs in from two distant geographic locations within a short timeframe).
Examples of Risky Sign-In Behaviors
- Anonymous IP Address: A user typically signing in from Singapore suddenly uses a VPN or Tor browser, leading the system to flag the new IP address as anonymous.
- Atypical Travel: A sign-in attempt from Singapore followed by nearly simultaneous sign-in from Japan will trigger a warning.
- Malware-Linked IP Address: If the IP address is associated with known malware or botnet activity.
- Password Spray Attacks: When multiple sign-in attempts are made using common or compromised passwords.
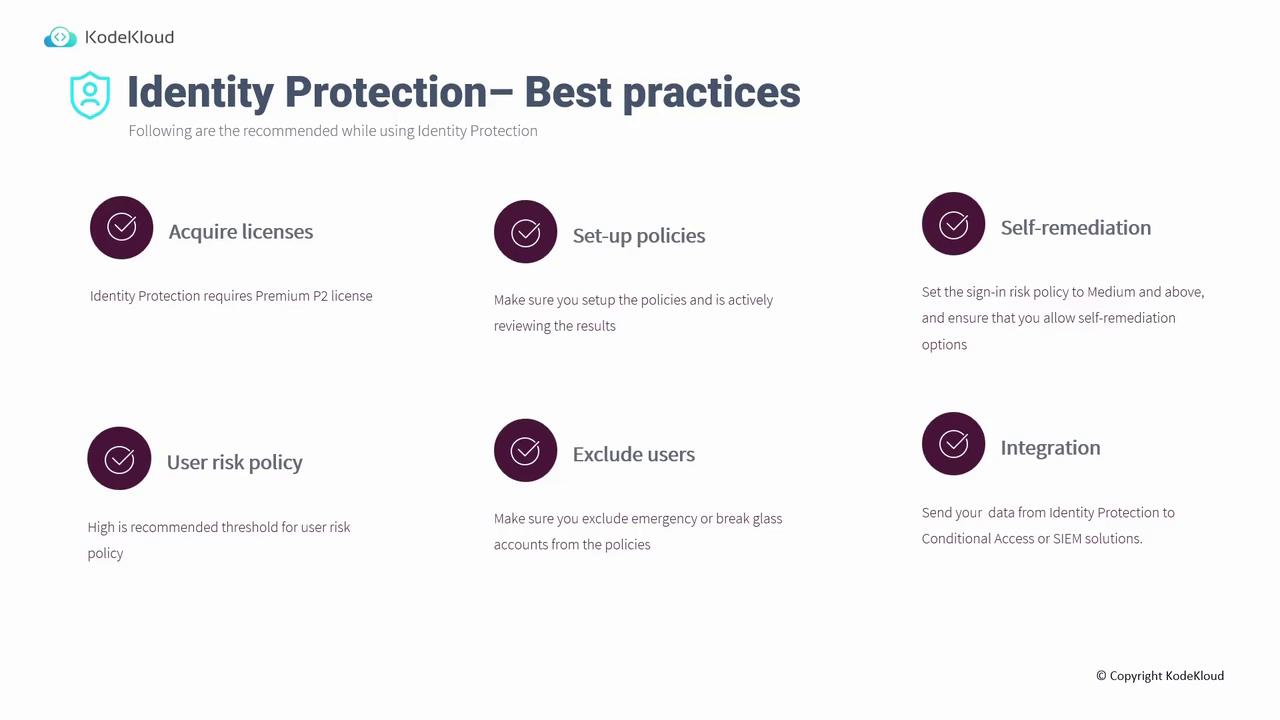
Best Practices for Identity Protection
Before implementing Identity Protection, follow these best practices:- License Acquisition:
Azure Identity Protection is a premium service that requires a P2 license.
- Policy Setup and Review:
- Configure user risk and sign-in risk policies.
- Regularly review policy outcomes to investigate potential false positives.
-
Self-Remediation Options:
Configure sign-in risk policies to trigger self-remediation actions (e.g., enforcing MFA or prompting for a password change) for medium-risk events. For user risk policies where blocking is necessary, apply a higher threshold; allow self-remediation for medium-risk events. - Exclude Critical Accounts:
Exclude emergency or break-glass accounts from identity protection policies. Ensure these accounts have strong, securely stored passwords so they remain accessible if primary global administrator accounts face issues.
- Integration with Other Systems:
Integrate Identity Protection with Conditional Access, Azure Sentinel, Splunk, and other tools to enhance risk analysis and response.
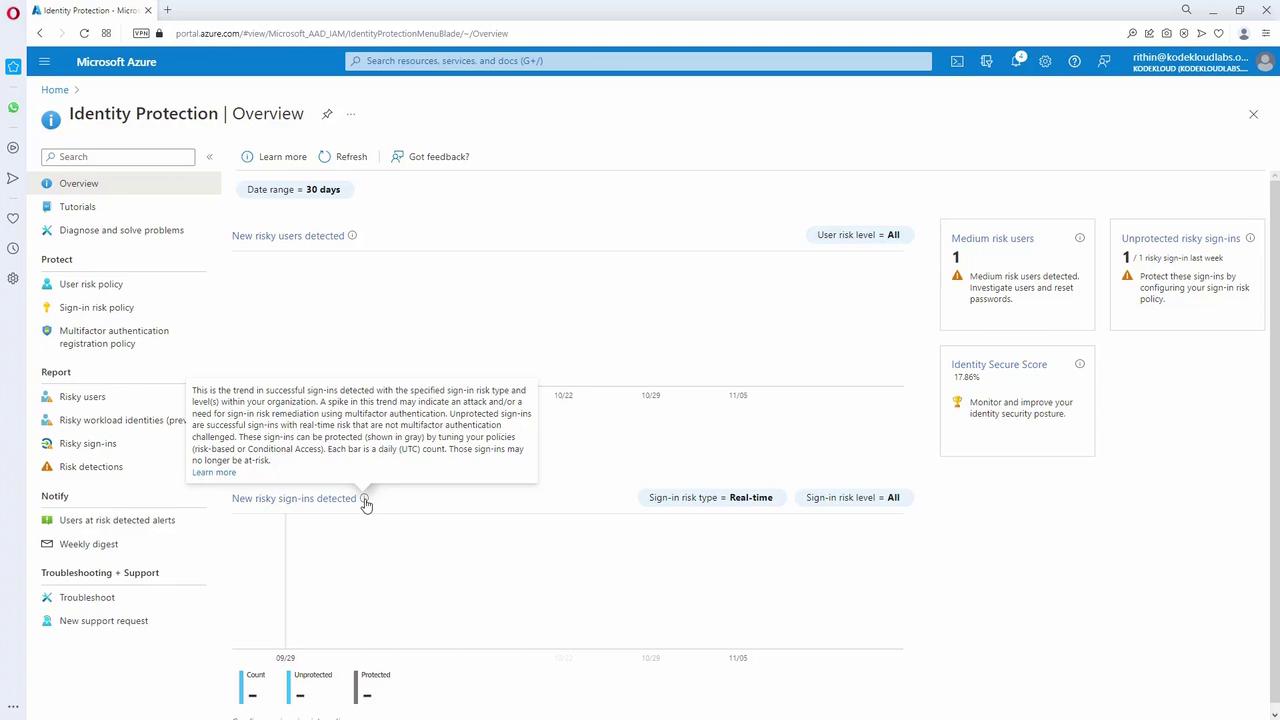
Setting Up Identity Protection in the Azure Portal
When you access the Azure portal and navigate to Identity Protection, the dashboard provides an overview of risk events, which includes:- Risky users and risky sign-ins.
- Trends detailing successful sign-ins with varying risk levels.
- Options to configure user risk and sign-in risk policies directly.
Azure Identity Protection is an essential tool for mitigating identity-based risks. Additionally, incorporating regular access reviews into your identity governance strategy further strengthens your security posture. For more comprehensive insights on cloud security strategies, refer to related resources: By following best practices and configuring the appropriate policies and integrations, organizations can create a robust defense against identity-based threats while ensuring secure and seamless access for users.