Advanced Jenkins

Pipeline Enhancement and Caching

Pipeline Caching

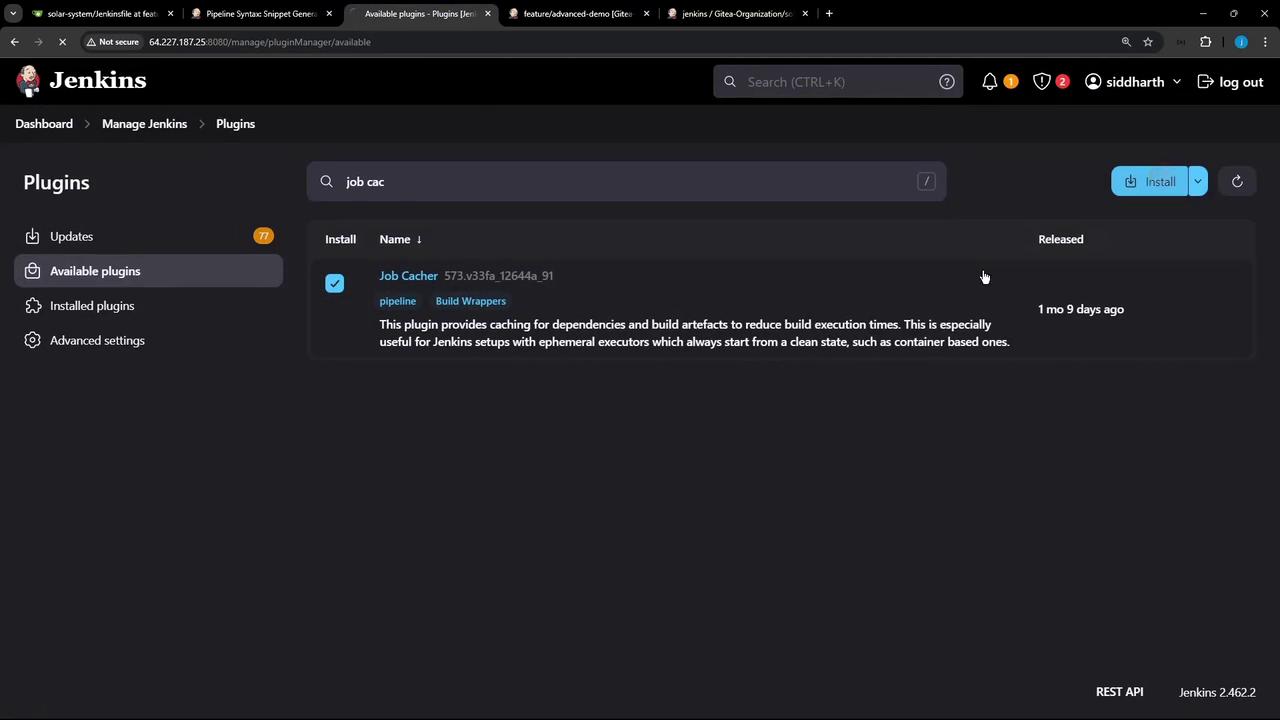
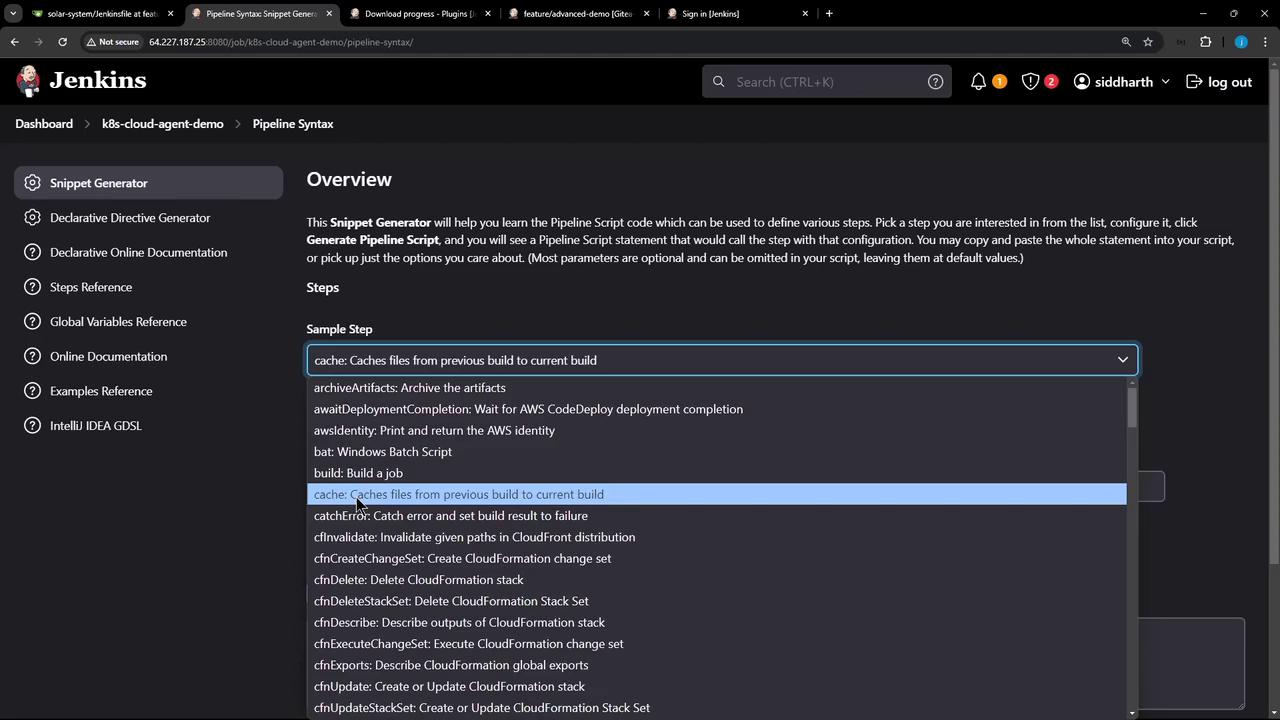
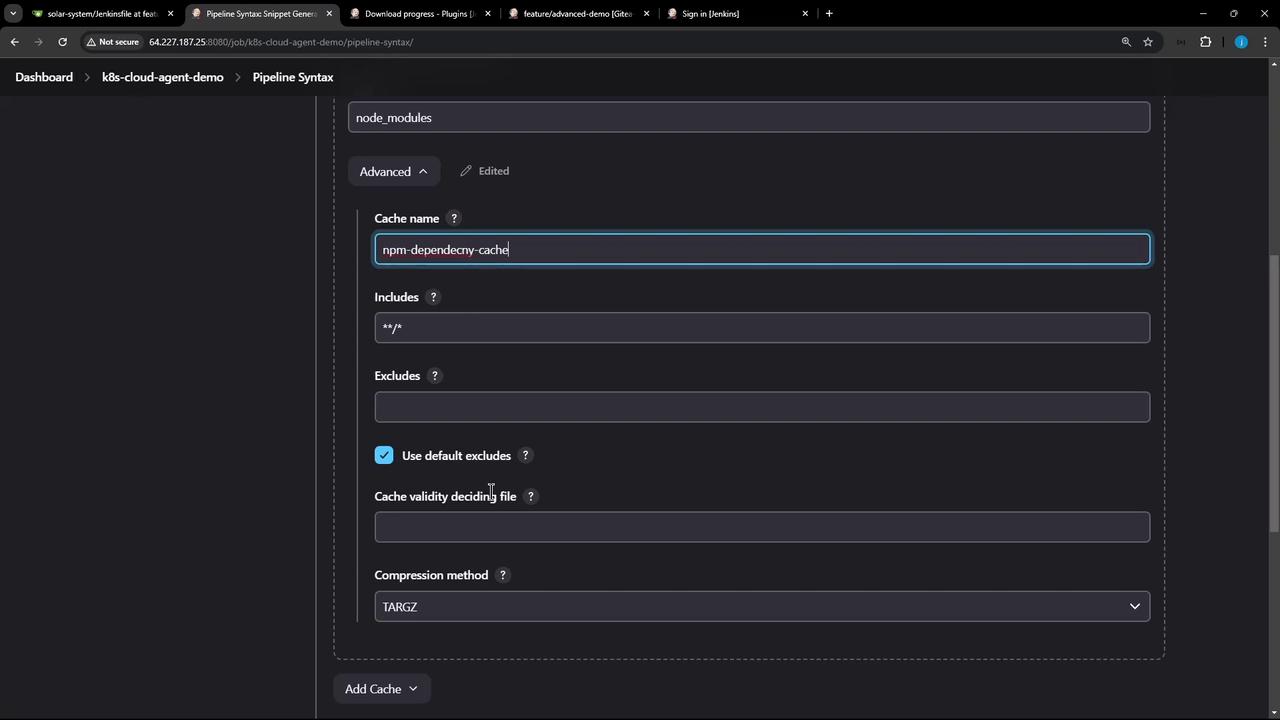
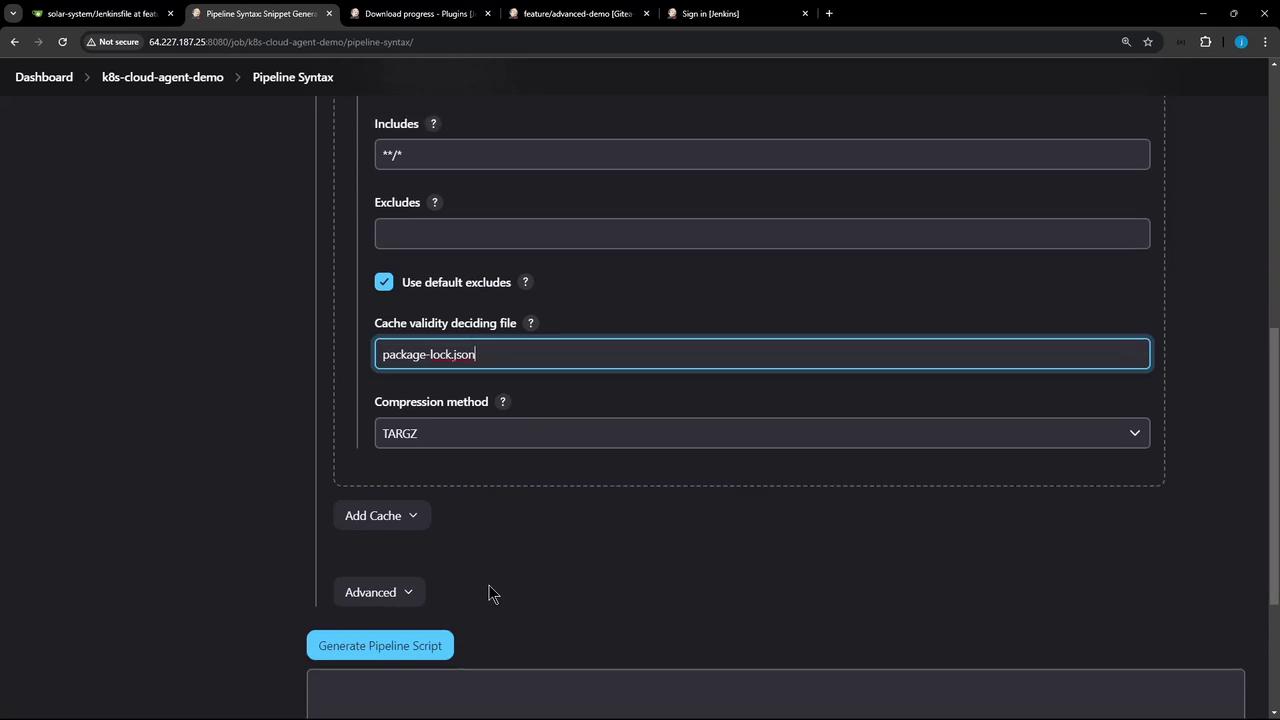
Efficient dependency caching in a CI/CD pipeline can dramatically reduce build times by reusing previously downloaded libraries and generated artifacts. In Jenkins, the Job Cacher Plugin enables you to store and restore cache items—such as node_modules—across pipeline runs, even in ephemeral environments like containers.

Why Cache?

Caching avoids repeated downloads and installations, leading to faster feedback loops and lower resource usage. It’s especially helpful for languages and frameworks with large dependency trees (e.g., Node.js, Python).

Example: Arbitrary File Cache Configuration

Below is a sample YAML definition showing how to cache an arbitrary folder. You can adapt this for different languages or tools.

arbitraryFileCache:
  path: "my-cache"
  cacheValidityDecidingFile: "src/_src/*.generated"
  includes: "**/*"
  excludes: "**/*.generated"
FieldDescriptionExample
pathDirectory to cachenode_modules
cacheValidityDecidingFileFile that triggers cache invalidation when it changespackage-lock.json
includesGlob pattern to include in cache**/*
excludesGlob pattern to exclude from cache**/*.generated

Installing the Job Cacher Plugin

  1. Navigate to Manage Jenkins > Manage Plugins > Available.
  2. Search for Job Cacher Plugin and install it.
  3. Restart Jenkins to activate the plugin.

The image shows a Jenkins interface displaying the "Available plugins" section, with a search result for the "Job Cacher" plugin, which provides caching for dependencies and build artifacts.

The image shows a Jenkins restart notification screen with a message indicating that Jenkins is restarting and the browser will reload automatically when ready. There is also an option for a "Safe Restart."

Generating Cache Snippet with the Snippet Generator

Use the Pipeline Syntax Snippet Generator to create a cache step:

  1. Go to Pipeline > Snippet Generator.
  2. Select the cache step.
  3. Fill in the fields:
    • Path: node_modules
    • Cache name: npm-dependency-cache
    • Includes: **/*
    • Excludes: (leave default)
    • Cache validity deciding file: package-lock.json
    • Compression: tar or zip
    • Max cache size: 550 (MB)

The image shows a Jenkins interface with the "Snippet Generator" tool open, displaying options for generating pipeline scripts. A dropdown menu lists various sample steps for pipeline configuration.

The image shows a Jenkins pipeline configuration screen with settings for caching, including fields for cache name, includes, excludes, and compression method. The cache name is set to "npm-dependecny-cache" with a typo in "dependency."

The image shows a Jenkins Pipeline Syntax configuration screen with options for includes, excludes, cache settings, and compression method. The "Generate Pipeline Script" button is visible at the bottom.

Generated snippet:

cache(
  caches: [
    arbitraryFileCache(
      cacheName: 'npm-dependency-cache',
      cacheValidityDecidingFile: 'package-lock.json',
      includes: '**/*',
      path: 'node_modules'
    )
  ],
  maxCacheSize: 550
) {
  // your build steps here
}

Integrating Caching into Your Jenkinsfile

Insert the cache block around your dependency installation stage. Here’s a streamlined Jenkinsfile example:

pipeline {
  agent any

  stages {
    stage('Installing Dependencies') {
      options { timestamps() }
      steps {
        cache(
          maxCacheSize: 550,
          caches: [
            arbitraryFileCache(
              cacheName: 'npm-dependency-cache',
              cacheValidityDecidingFile: 'package-lock.json',
              includes: '**/*',
              path: 'node_modules'
            )
          ]
        ) {
          sh 'node -v'
          sh 'npm install --no-audit'
          stash(includes: 'node_modules', name: 'npm-node-modules')
        }
      }
    }

    stage('Dependency Scanning') {
      steps {
        // Add your scanning logic here
      }
    }

    stage('Unit Testing') {
      parallel {
        stage('NodeJS 18') {
          options { retry(2) }
          steps {
            unstash 'npm-node-modules'
            sh 'node -v'
            sh 'npm test'
          }
        }
        stage('NodeJS 19') {
          options { retry(2) }
          steps {
            container('node-19') {
              unstash 'npm-node-modules'
              sh 'node -v'
              sh 'npm test'
            }
          }
        }
      }
    }

    stage('Code Coverage') {
      steps {
        catchError(buildResult: 'SUCCESS', message: 'Coverage step failed', stageResult: 'FAILURE') {
          unstash 'npm-node-modules'
          sh 'node -v'
          sh 'npm run coverage'
        }
      }
    }
  }
}

The image shows a Visual Studio Code interface with a Jenkinsfile open, displaying code related to dependency caching. Below, a terminal window is open with a command prompt.

Executing and Verifying the Pipeline

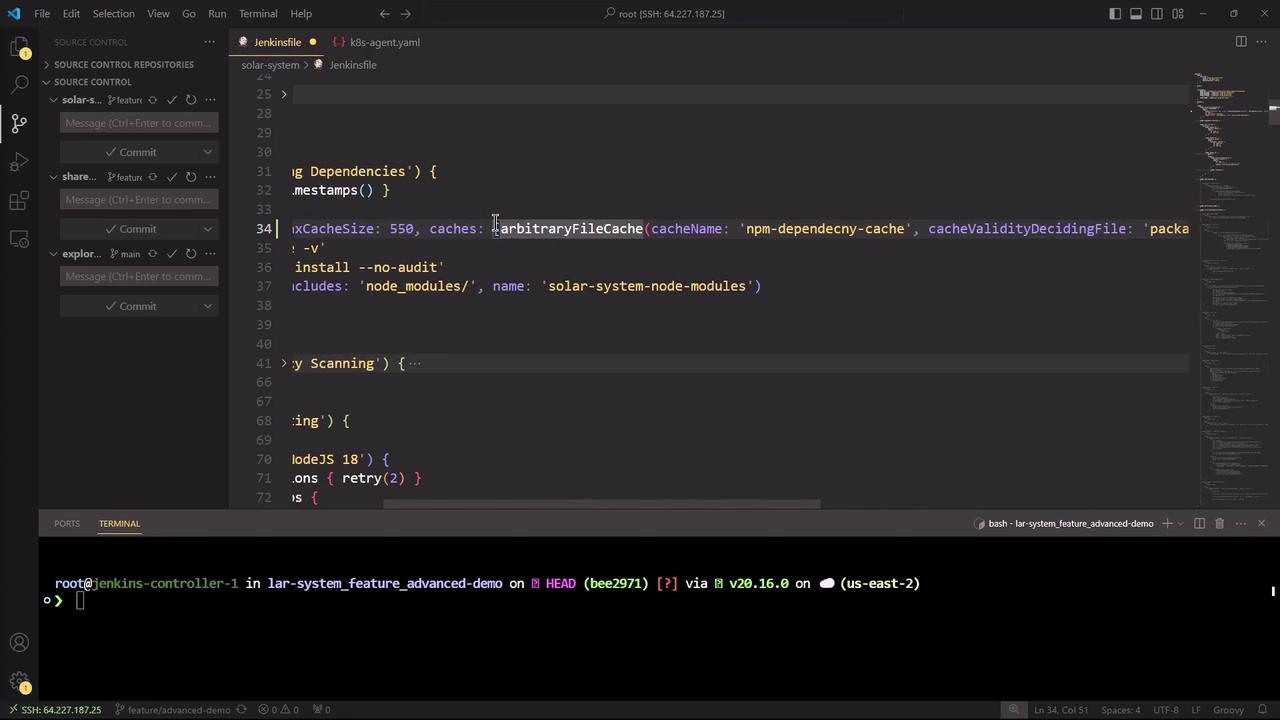
Commit and push your updated Jenkinsfile. On the next build, you’ll see cache operations in the console:

Searching cache in job specific caches...
Searching cache in default caches...
Skip restoring cache as no up-to-date cache exists
> node -v
v22.6.0
> npm install --no-audit
up to date in 1s
...
Stashed 4993 file(s)
Creating cache for node_modules (npm-dependency-cache) [id: 3ec03583f8eaec275c2183db769ff47]
Cache created in 164ms

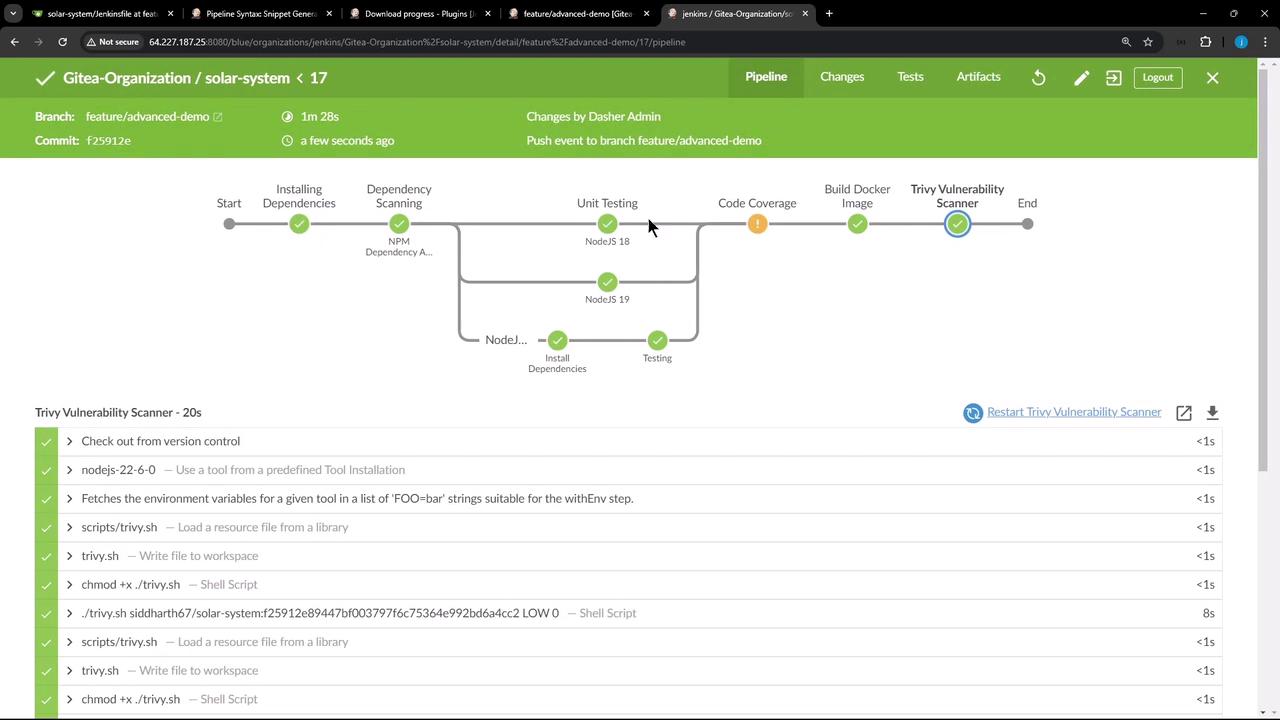
After success, the Blue Ocean UI highlights each stage:

The image shows a Jenkins pipeline interface for a project named "solar-system" with various stages like installing dependencies, unit testing, and vulnerability scanning. The pipeline appears to have completed successfully, with all stages marked as successful.

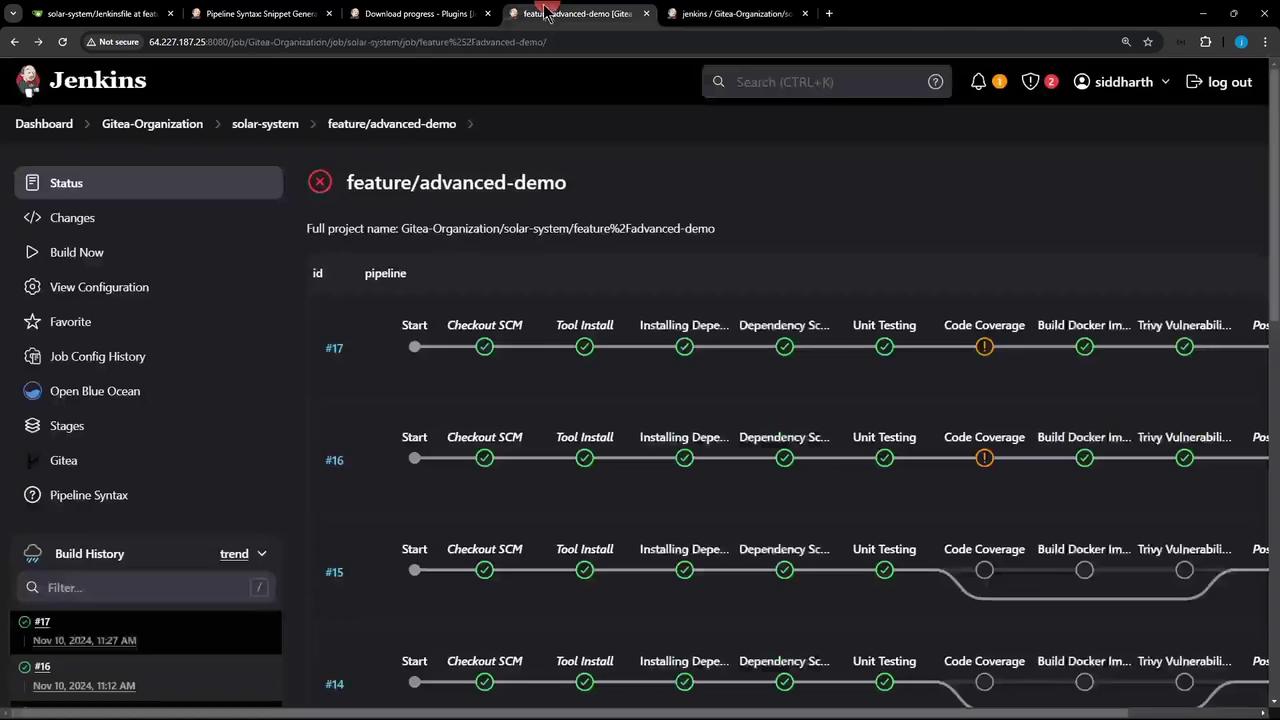
In the classic UI, inspect cache logs under Build Details:

The image shows a Jenkins dashboard displaying the pipeline status for a project named "feature/advanced-demo," with various stages like "Checkout SCM," "Tool Install," and "Code Coverage." Each stage is marked with a status indicator, showing successful and failed steps.

Console output for the Installing Dependencies stage:

{cache for node_modules (npm-dependency-cache) with id ...} Searching cache in job specific caches...
{cache for node_modules (npm-dependency-cache) with id ...} got hash a47b9ef602dbc79d72ab6385105e0142 for /var/lib/jenkins/.../package-lock.json
{cache for node_modules ...} Restoring cache...
> npm install --no-audit
up to date in 1s
...
{cache for node_modules ...} Skipped saving cache as it is up to date

On subsequent runs, the plugin will restore the cache automatically and skip redundant installations—saving precious build time.

Next Steps

  • Modify dependencies in package-lock.json to trigger cache invalidation.
  • Experiment with different maxCacheSize values.
  • Combine caching with parallel stages for maximum efficiency.

References

Watch Video

Watch video content

Previous
Stash and Unstash