Amazon Elastic Container Service (AWS ECS)

Deploying a new application from scratch

Demo Creating Task Definition

After setting up your cluster for deployment, the first step is to create Task Definitions that serve as a blueprint for your application. In this guide, we will walk through defining a new task, configuring container settings, and launching the task as a service on AWS Fargate.

Step 1: Create a New Task Definition

Navigate to the Task Definitions section in your AWS ECS console and select Create new Task Definition. Since the deployment target is Fargate, choose Fargate as the launch type. Provide a task definition name (for example, "ECS-Project1") and select the pre-created role.

Tip

If you have not run the initial quick start wizard, make sure to do so in order to establish the necessary permissions for ECS to manage underlying resources.

Next, choose Linux as the operating system and retain the same Execution IAM role. Then, specify the task size based on your application’s CPU and memory requirements. For this demo, select the smallest configuration available.

The image shows a configuration screen for setting up an AWS ECS task, including options for network mode, operating system family, task execution IAM role, and task size.

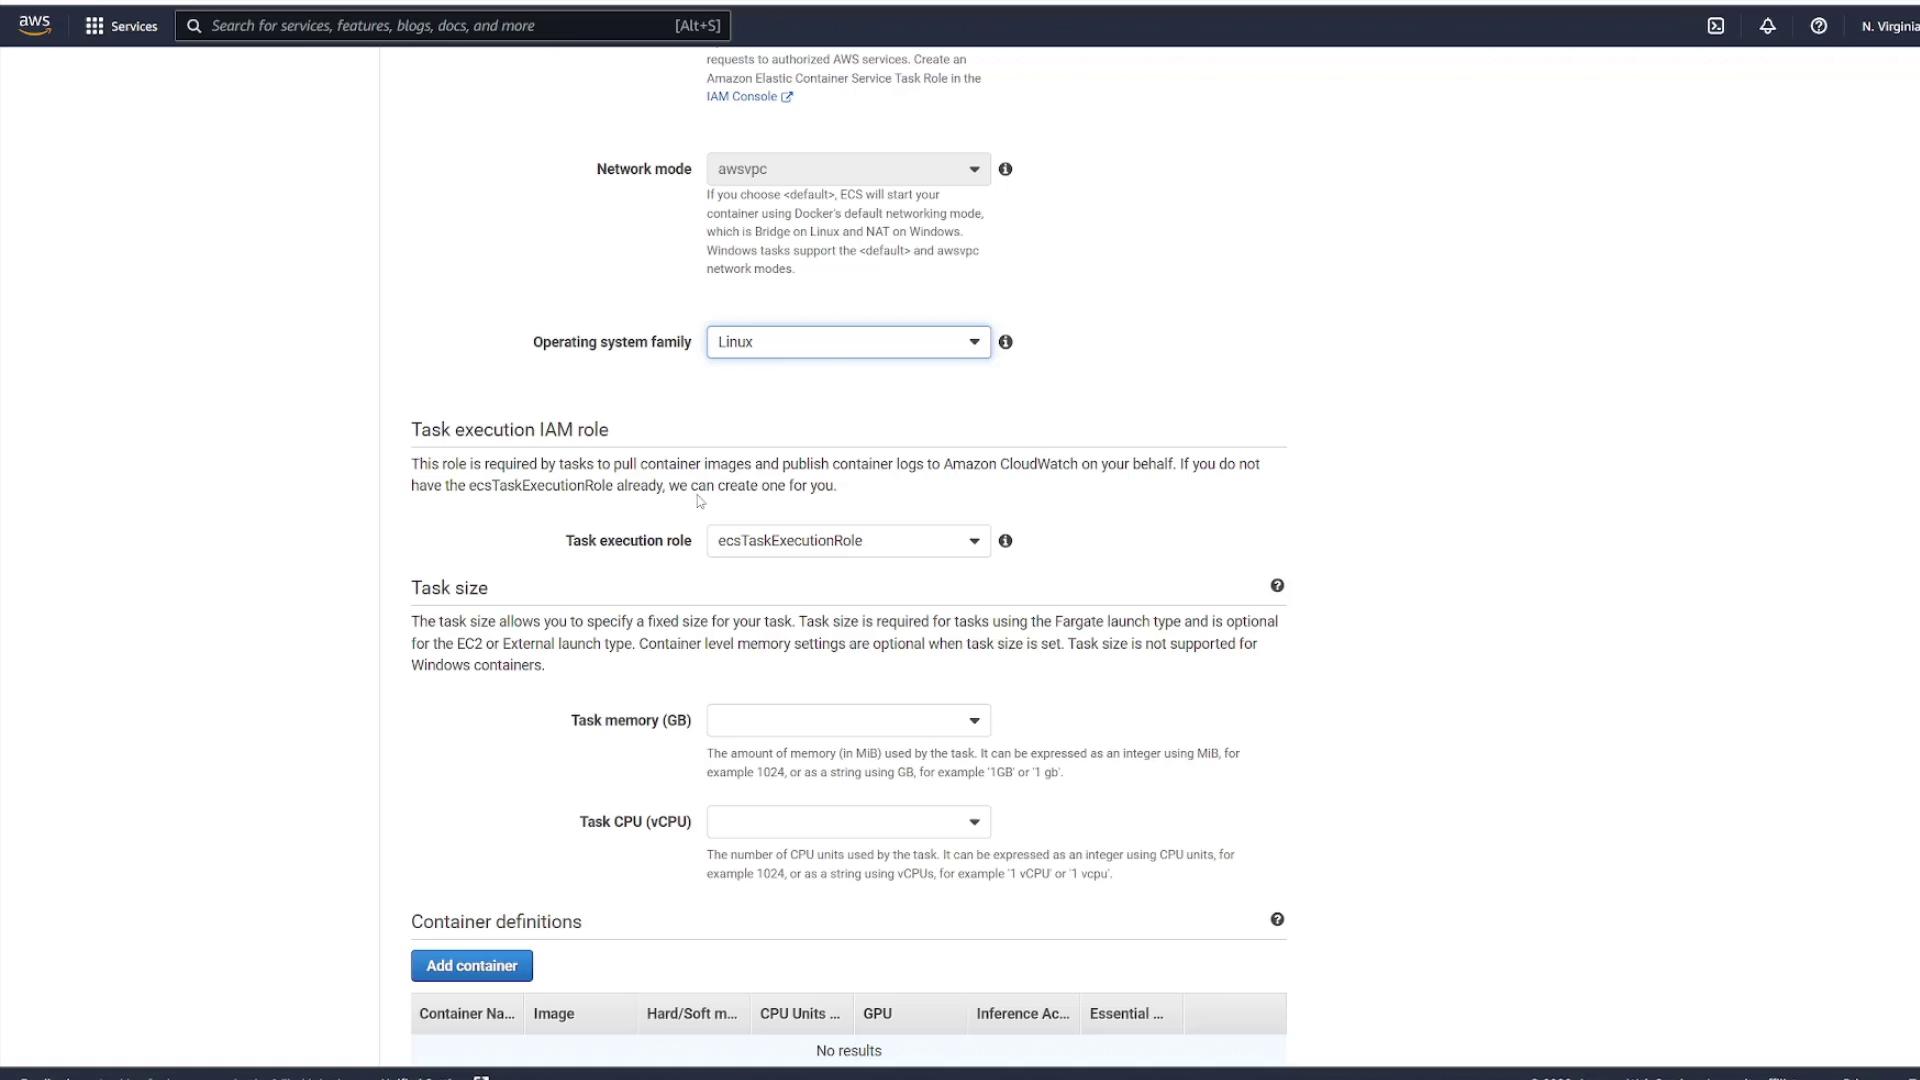
Step 2: Add a Container Definition

Add a container definition by entering a container name (for instance, "node_app_image") and specifying the container image you used previously. Configure the startup command by including the following check to ensure your application starts correctly:

CMD-SHELL, curl -f http://localhost/ || exit 1

Set up port mapping to expose port 3000. Although you can modify additional configurations, the defaults are sufficient for this demonstration. Click Add to include the container, then Create to finalize your task definition.

After creation, choose View Task Definition to review the blueprint. Keep in mind that this task definition outlines how your task will run but does not instantiate any tasks.

Step 3: Launch the Task Definition as a Service

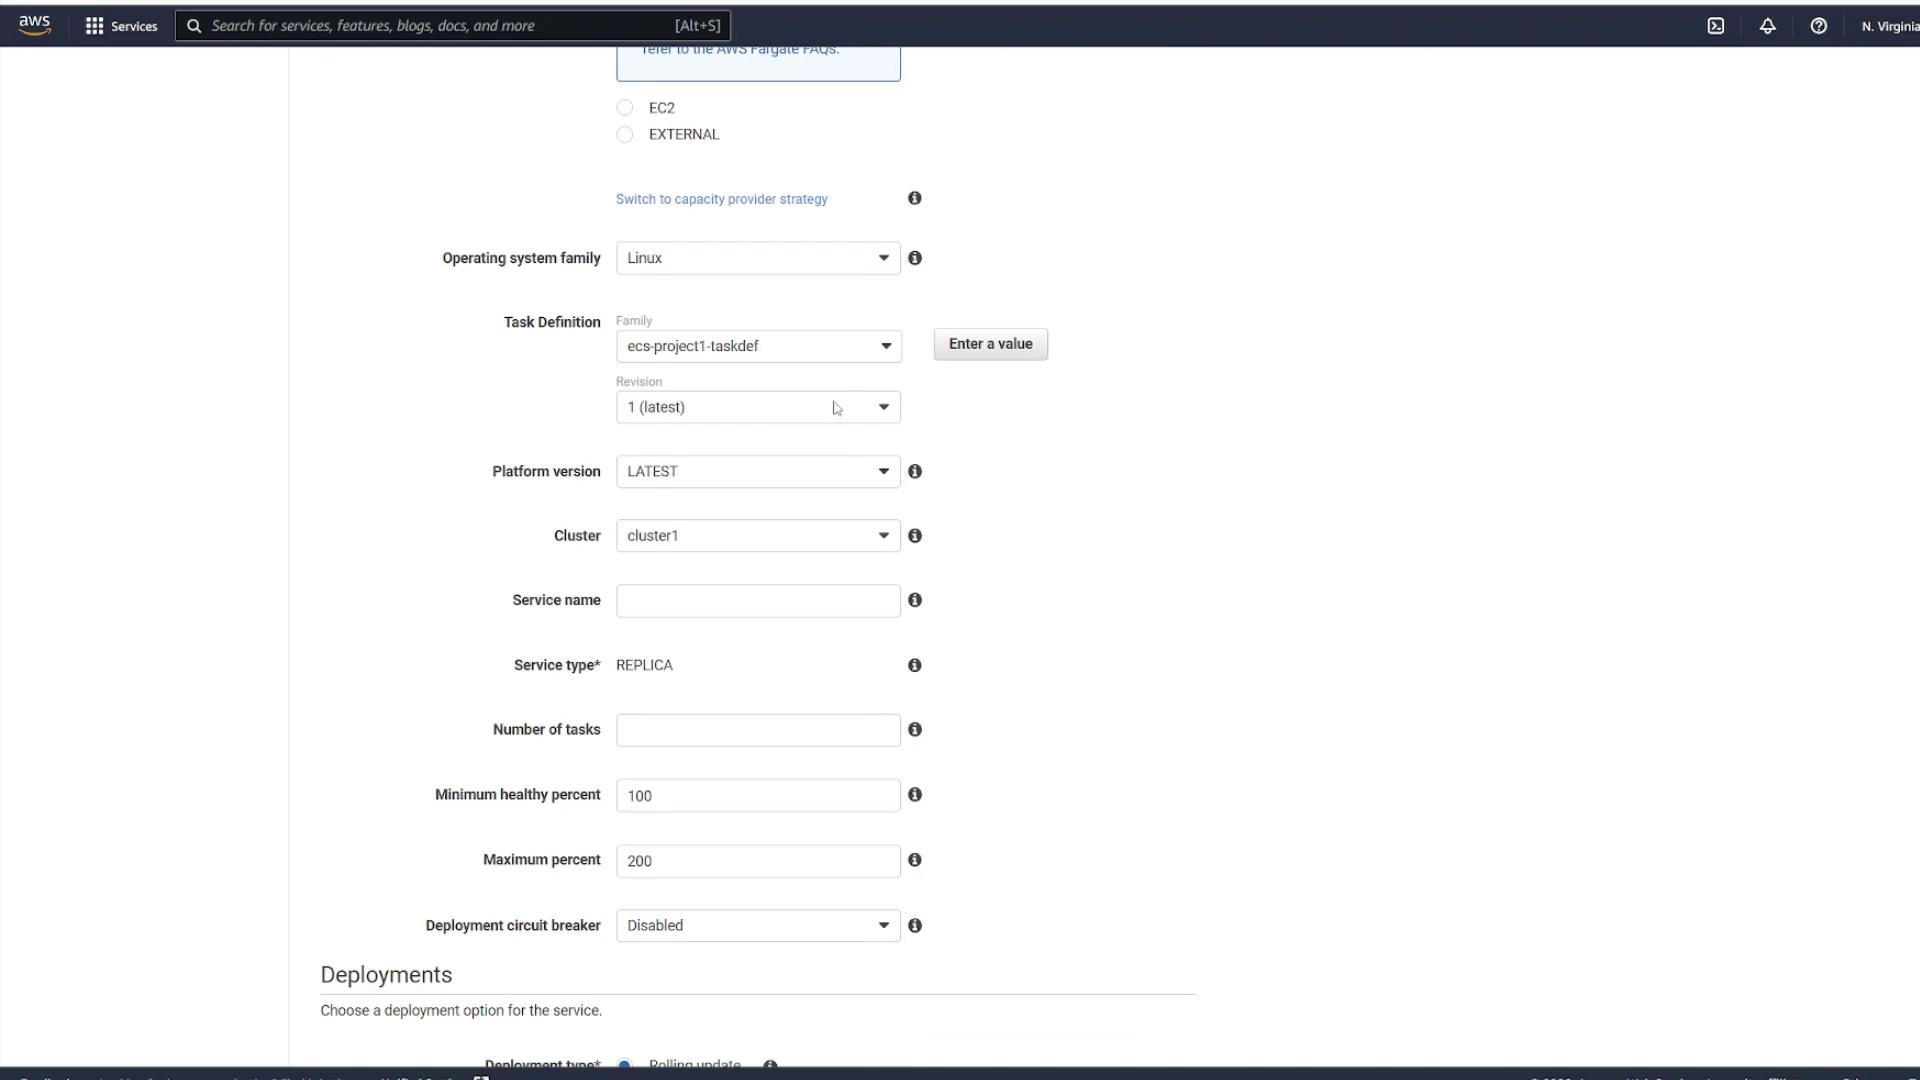
To run an instance of your task definition, navigate to the Services section within your cluster. Click on your cluster (for example, "cluster one") and go to the Services tab. When creating a service, use the following settings:

  • Launch type: Fargate
  • Operating system: Linux
  • Task Definition: Select your created file (e.g., "ECS-Project1") and choose the latest revision.
  • Cluster: Use the default cluster.
  • Service Name: Enter a name such as "project1-service".
  • Number of Tasks: Specify the desired instances (for example, select two to create two task instances).

The image shows an AWS management console screen for configuring an ECS service, including options for operating system, task definition, cluster, and deployment settings.

Step 4: Configure Networking and Security

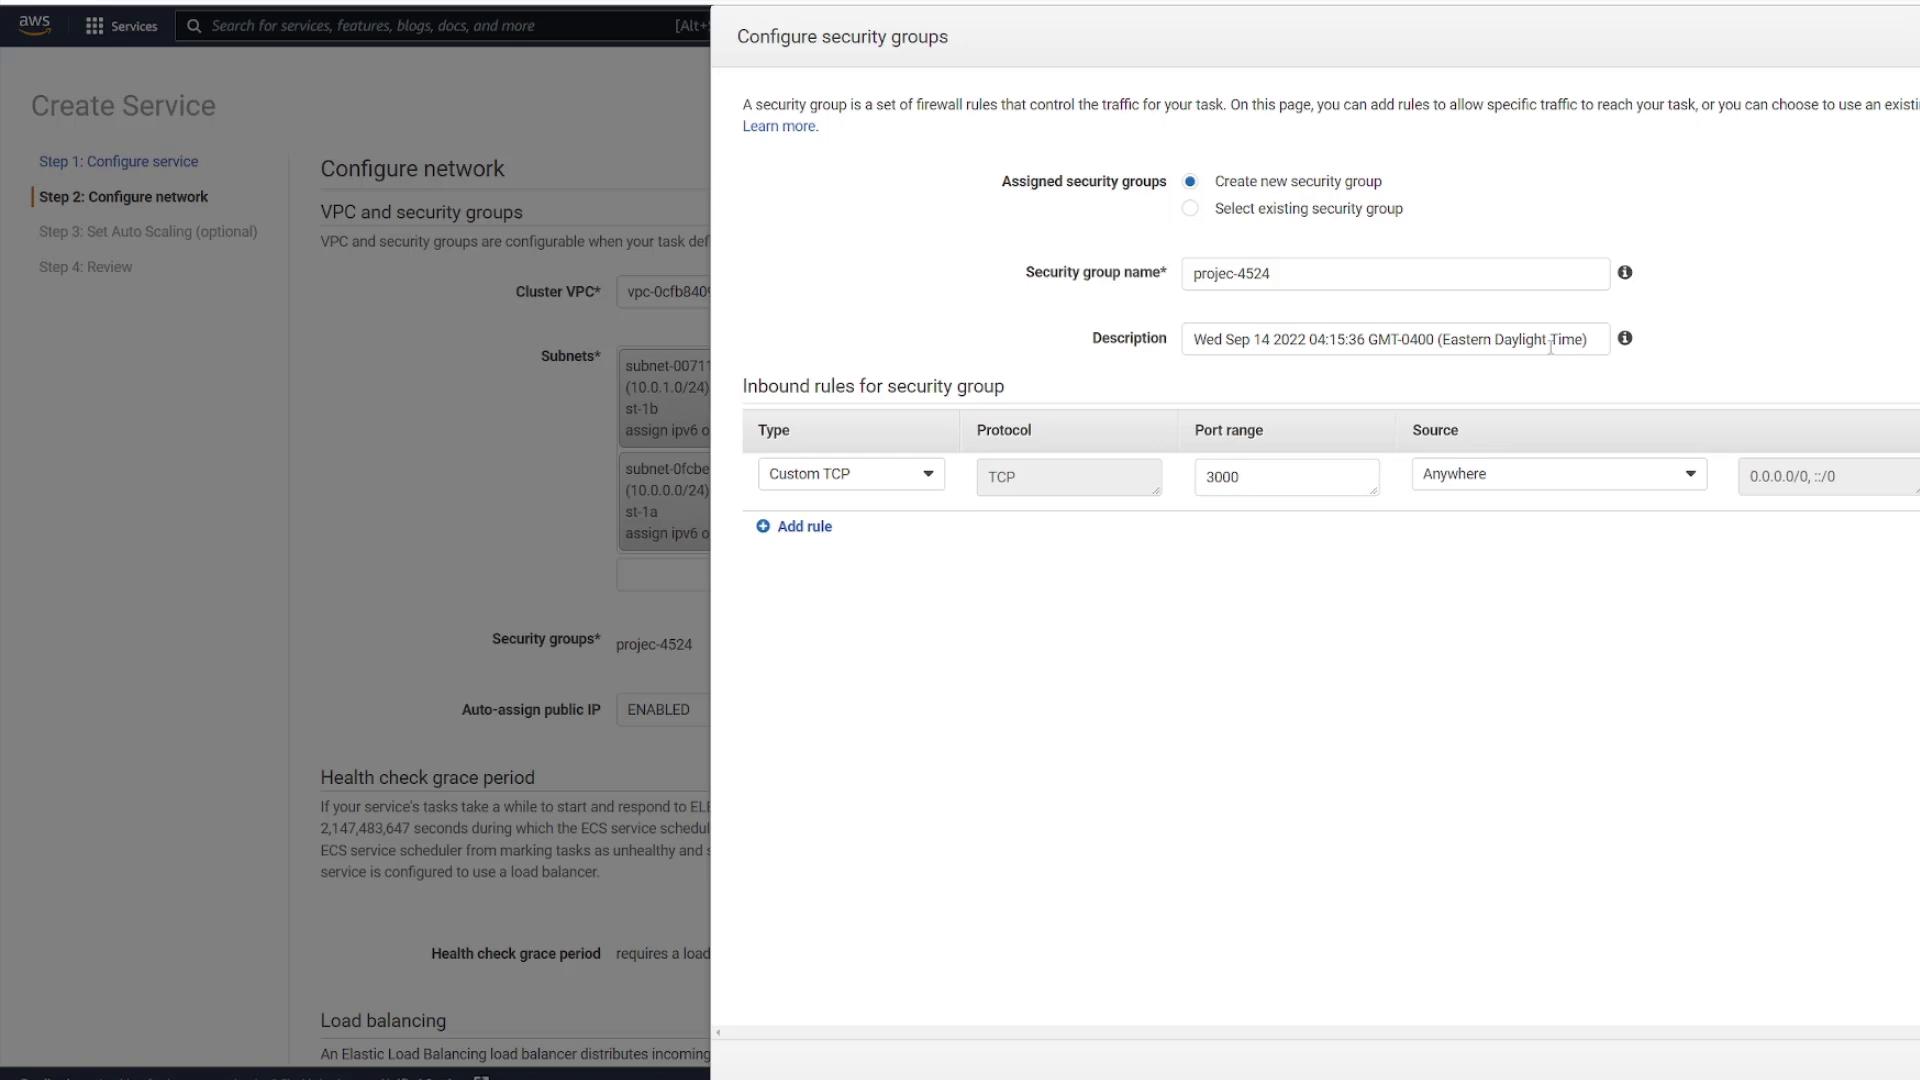
Proceed by selecting the appropriate VPC (the one created specifically for ECS) along with two subnets. Configure your security groups to control traffic for the service.

The image shows a configuration screen for setting up a network in AWS, specifically for creating a service with options for VPC, subnets, and security groups.

In the security group settings, you can edit an existing group or create a new one. For instance, create a new security group called "project." Although the default settings might allow inbound traffic on port 80, change the rule to allow custom TCP traffic on port 3000 from any source.

The image shows a configuration screen for setting up security groups in AWS, with options to create or select a security group and define inbound rules, such as allowing TCP traffic on port 3000 from any source.

Click Save to apply your changes and leave the remaining settings as default. When prompted to add a load balancer, select No thanks since load balancing will be covered in a later lesson.

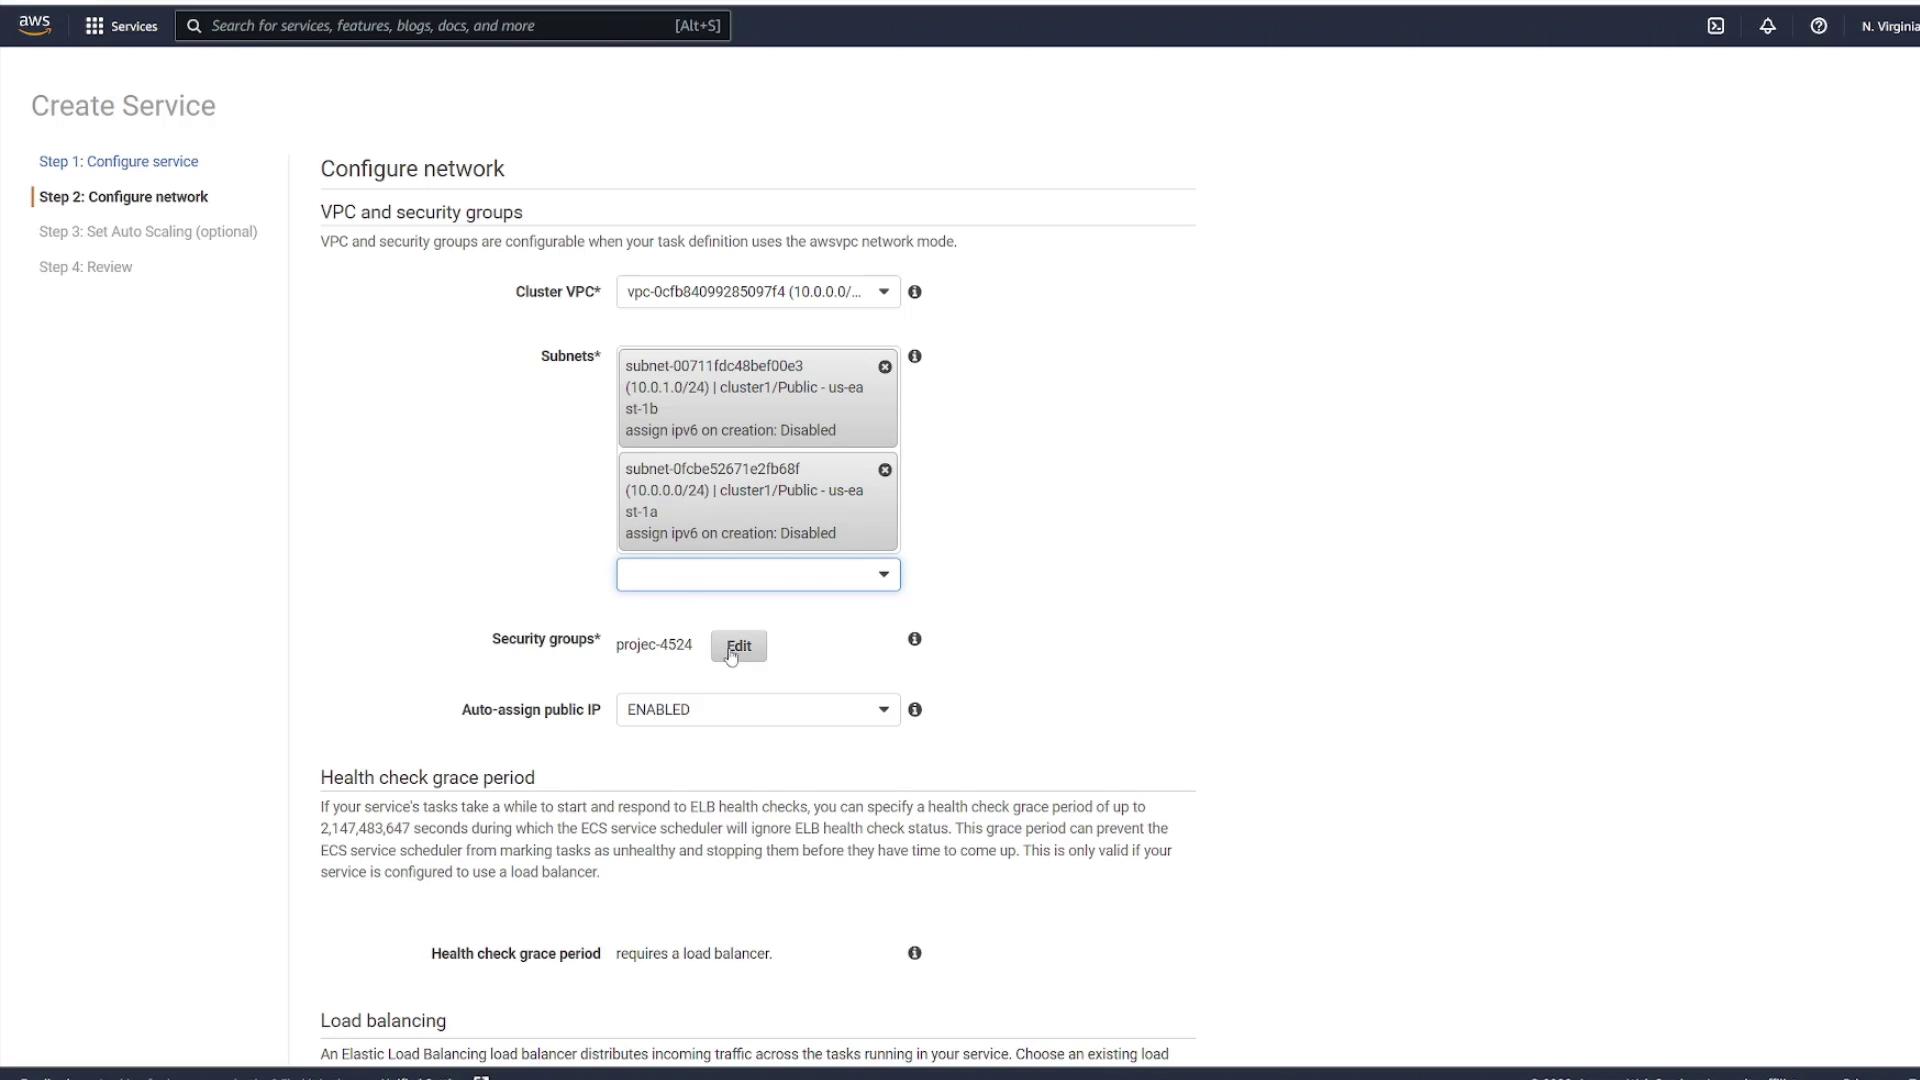
Step 5: Configure Auto Scaling and Create the Service

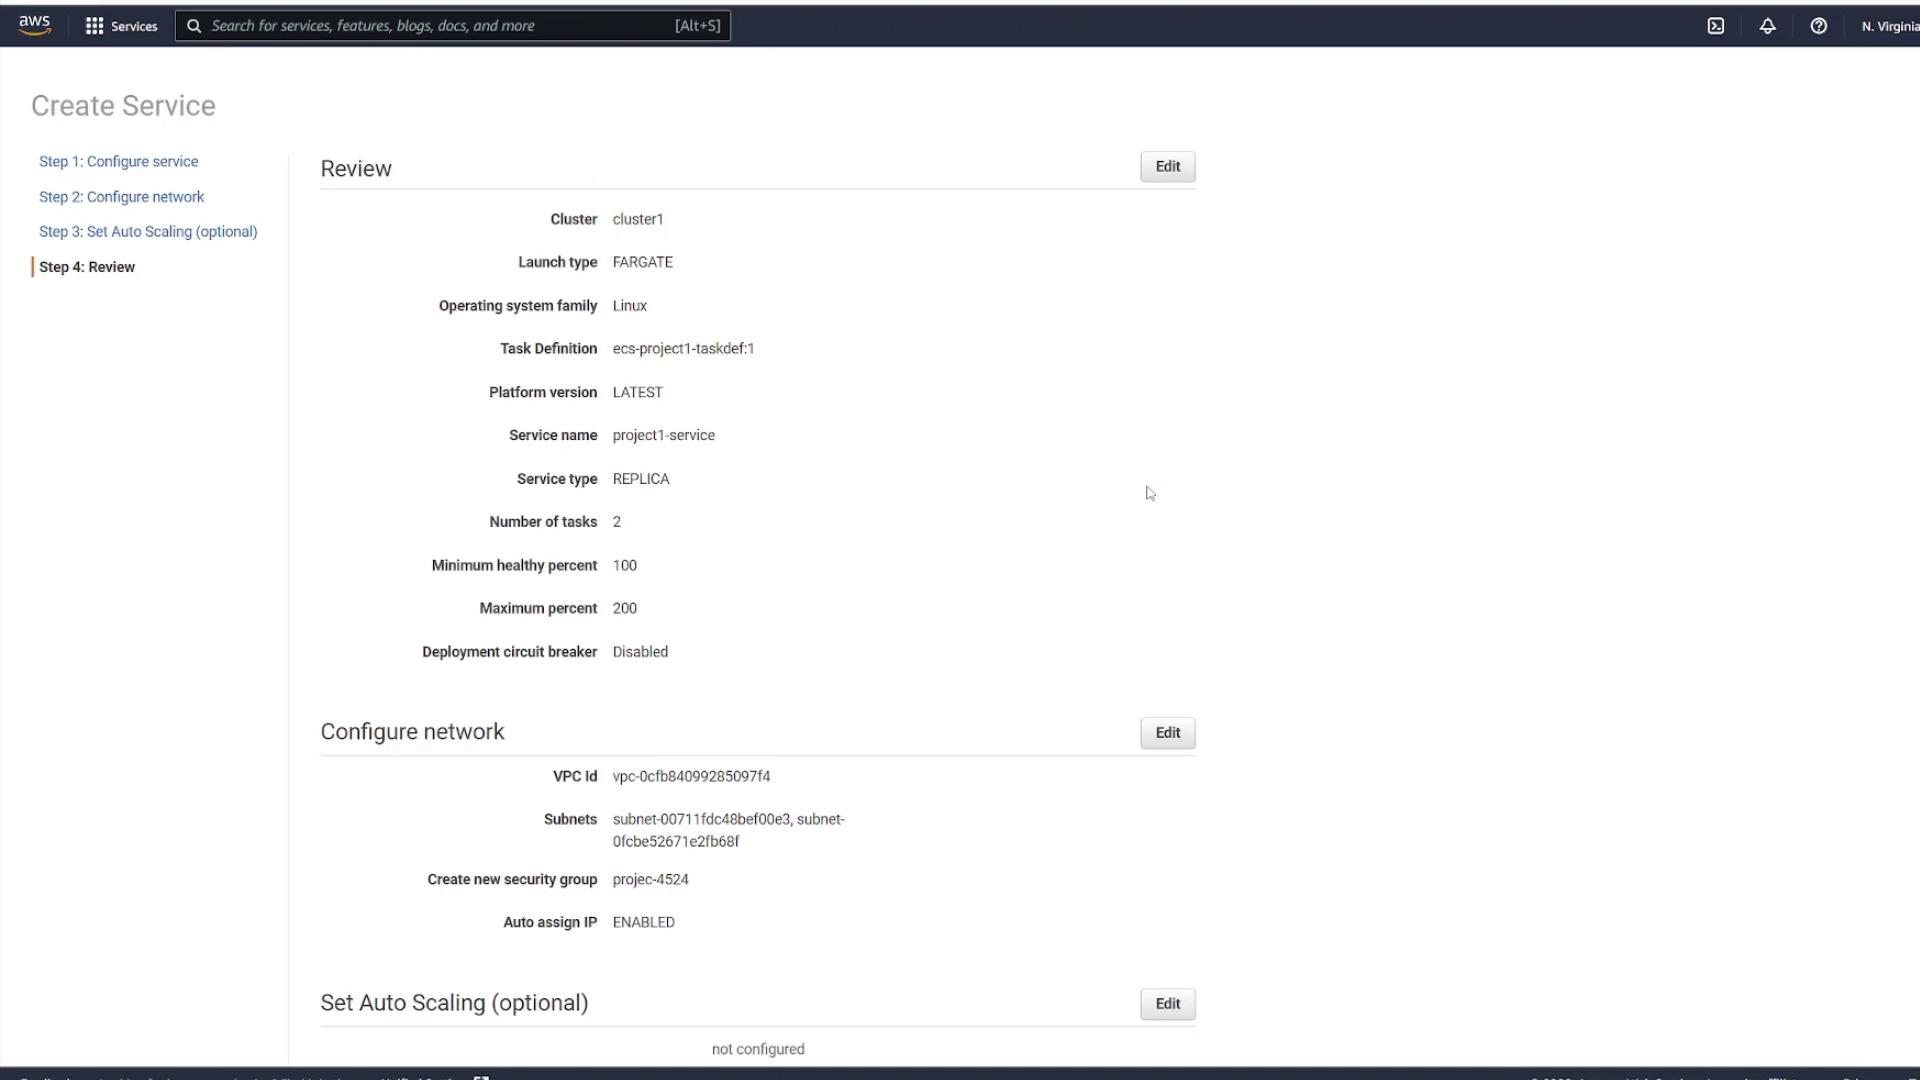
In the subsequent step, you have the option to configure auto scaling for the service. For this demonstration, disable auto scaling. Review all configurations carefully, then click Create Service.

The image shows an AWS interface for creating a service, specifically the step for setting auto-scaling options. It offers choices to either not adjust the service's desired count or configure auto-scaling.

The image shows an AWS console screen for creating a service, detailing configurations such as cluster, launch type, operating system, and network settings. It includes options for configuring auto-scaling and reviewing service parameters.

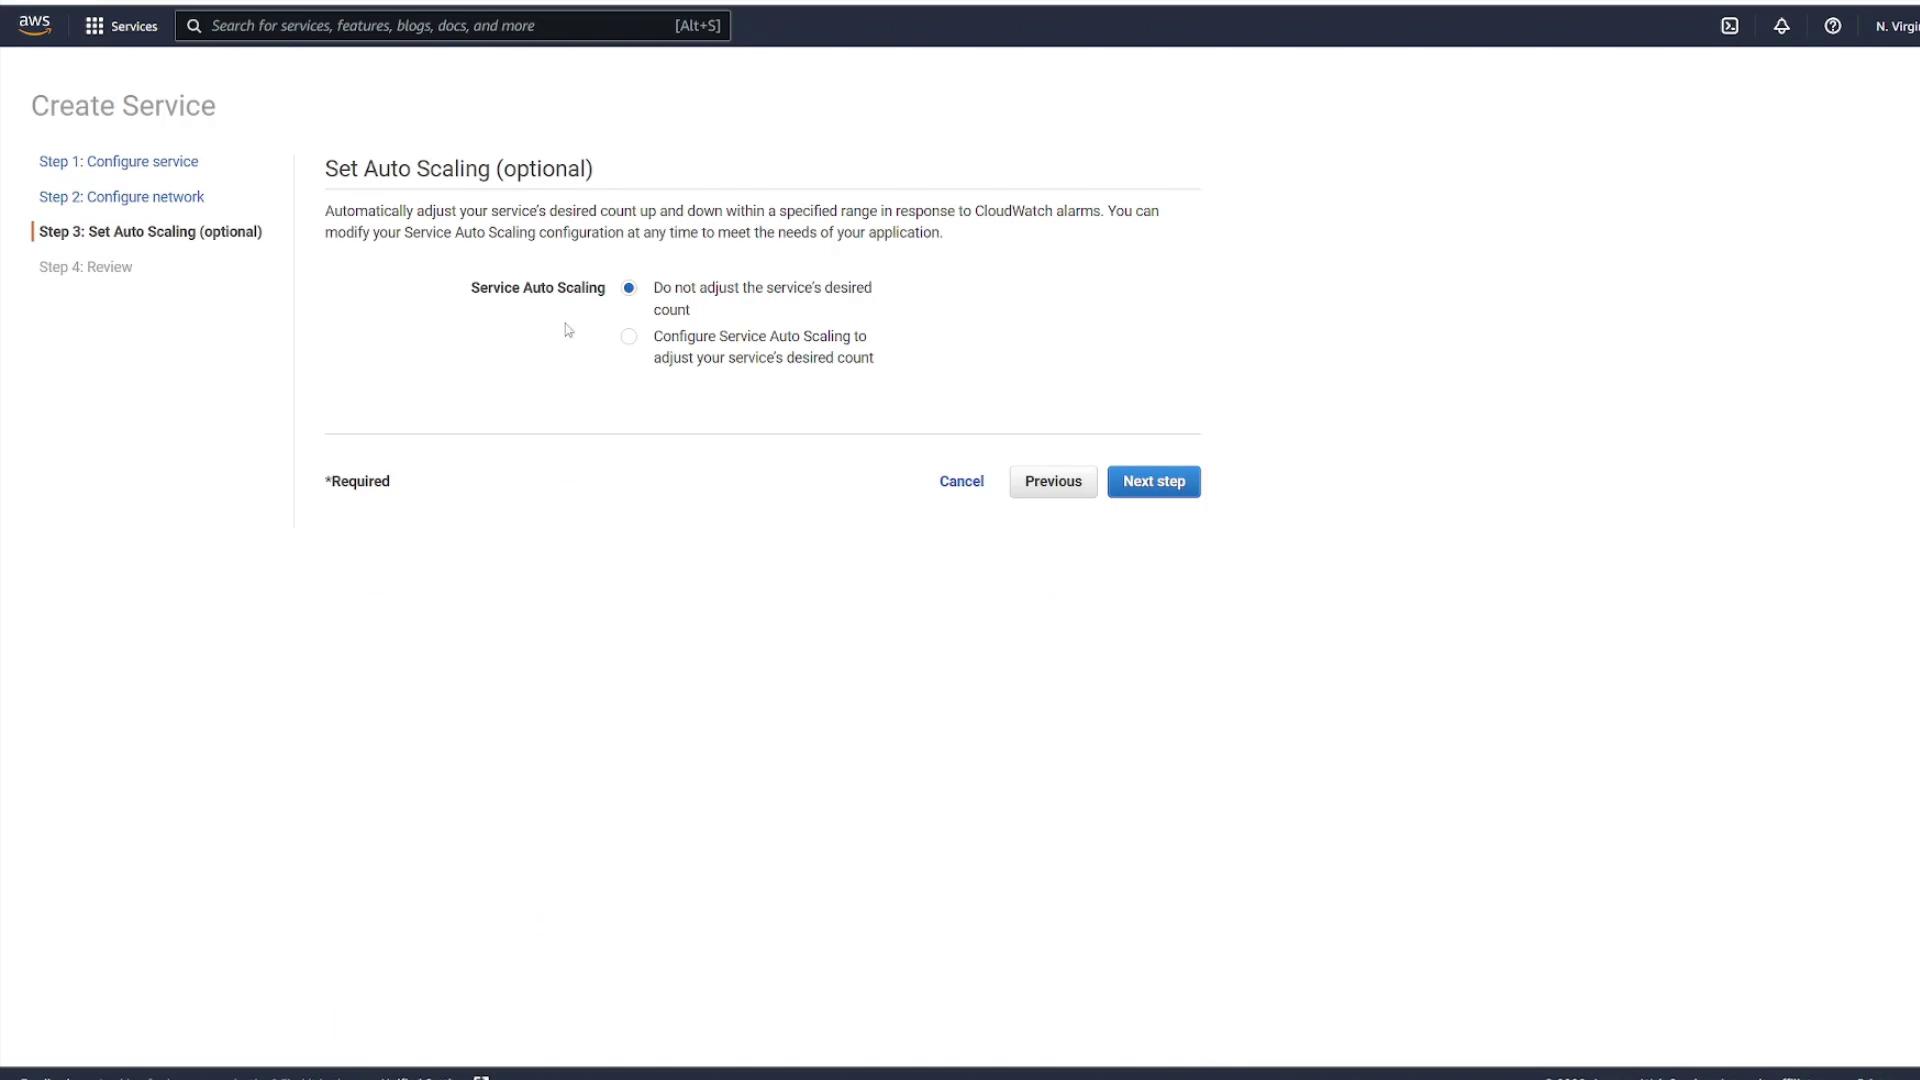
Step 6: Review and Monitor Your Service

Once the service is created, select View Service. Initially, you might see no running tasks; however, a refresh will reveal that provisioning has begun based on the number of tasks selected (in this example, two).

The image shows an AWS ECS console displaying details of a service named "project1-service" with tasks in provisioning status. It includes information about the cluster, task definition, and launch type.

Each task is deployed as a separate instance, even though they share the same task definition. This is why unique public IP addresses are assigned to each. When you inspect a task, its status may initially display as pending before transitioning to running.

The image shows an AWS ECS console displaying details of a running task, including network information and container status. The task is part of a cluster named "cluster1" and is using the FARGATE launch type.

After the tasks are running, retrieve the public IP address from one of the tasks and test your application in a browser. You’ll observe that each task has a unique IP address.

The image shows an AWS ECS task details page, displaying information about a running task, including network settings and container status.

Scaling Consideration

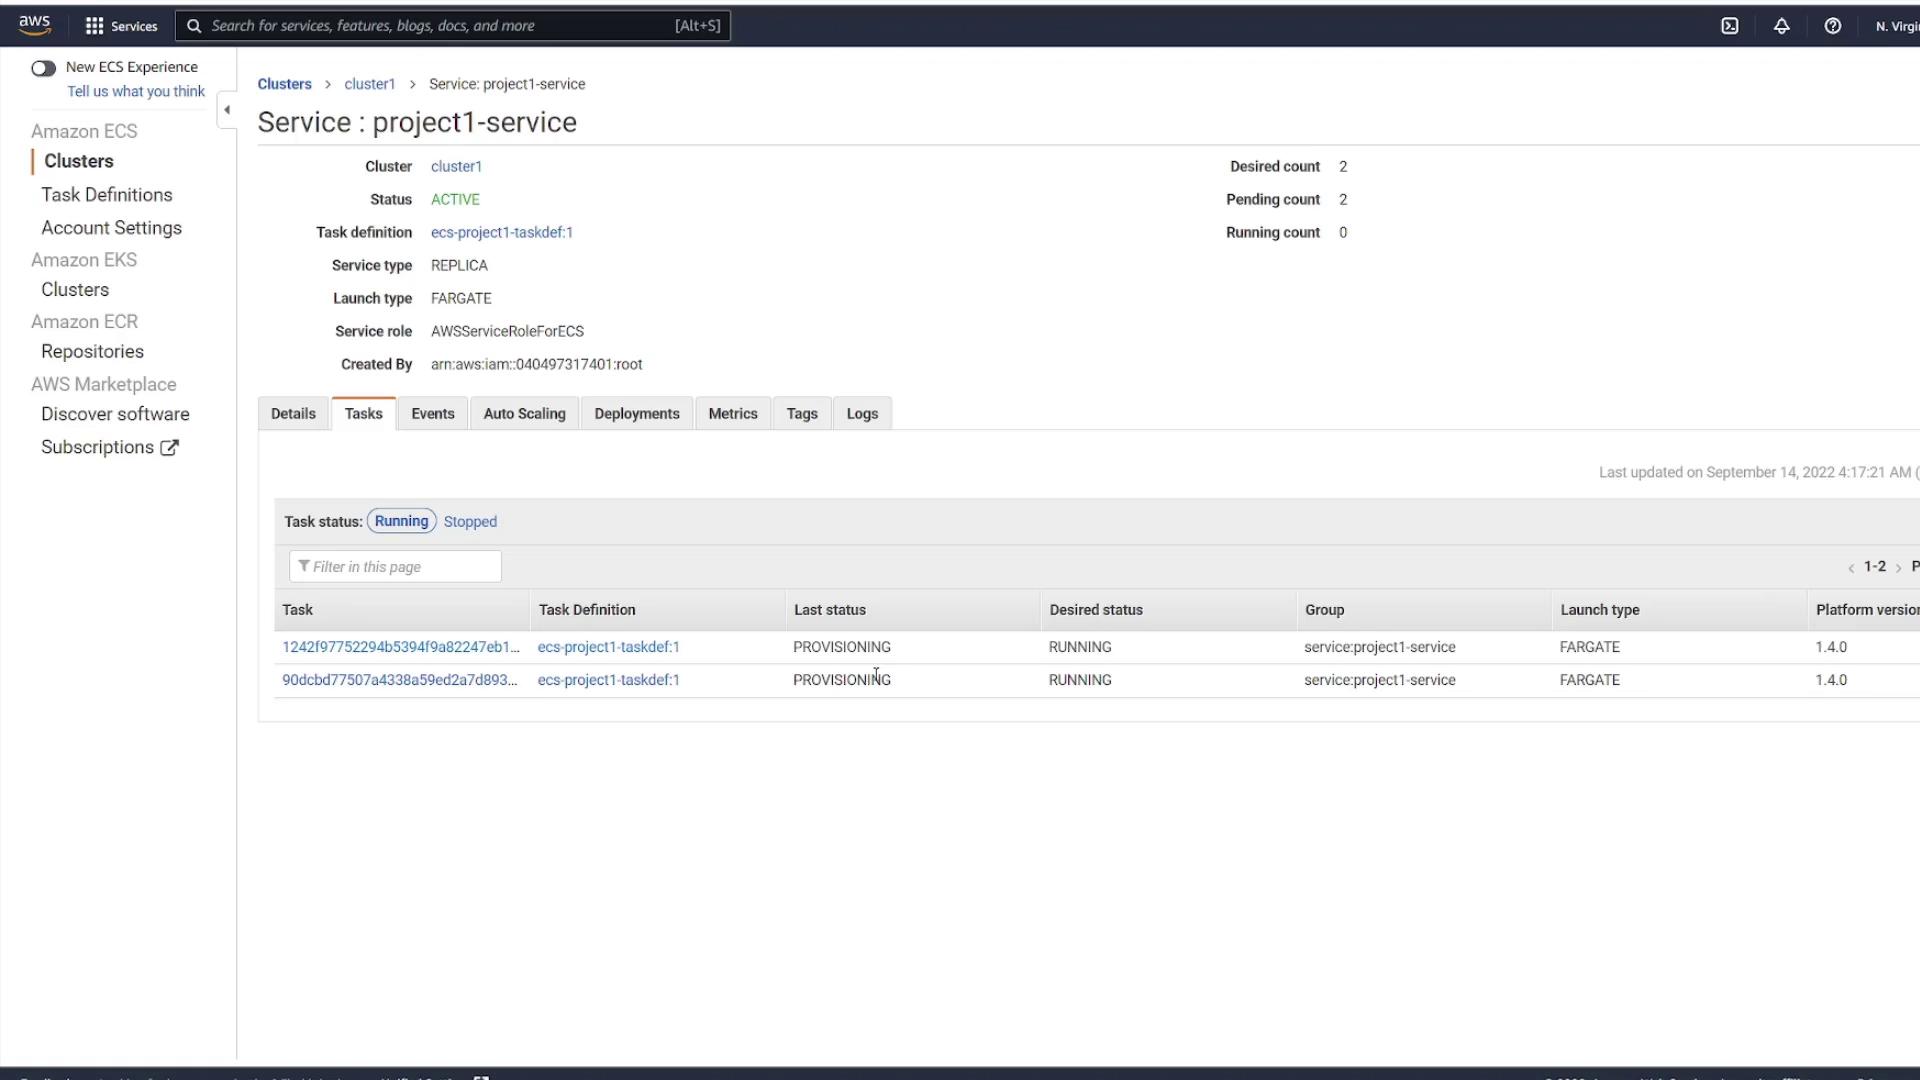
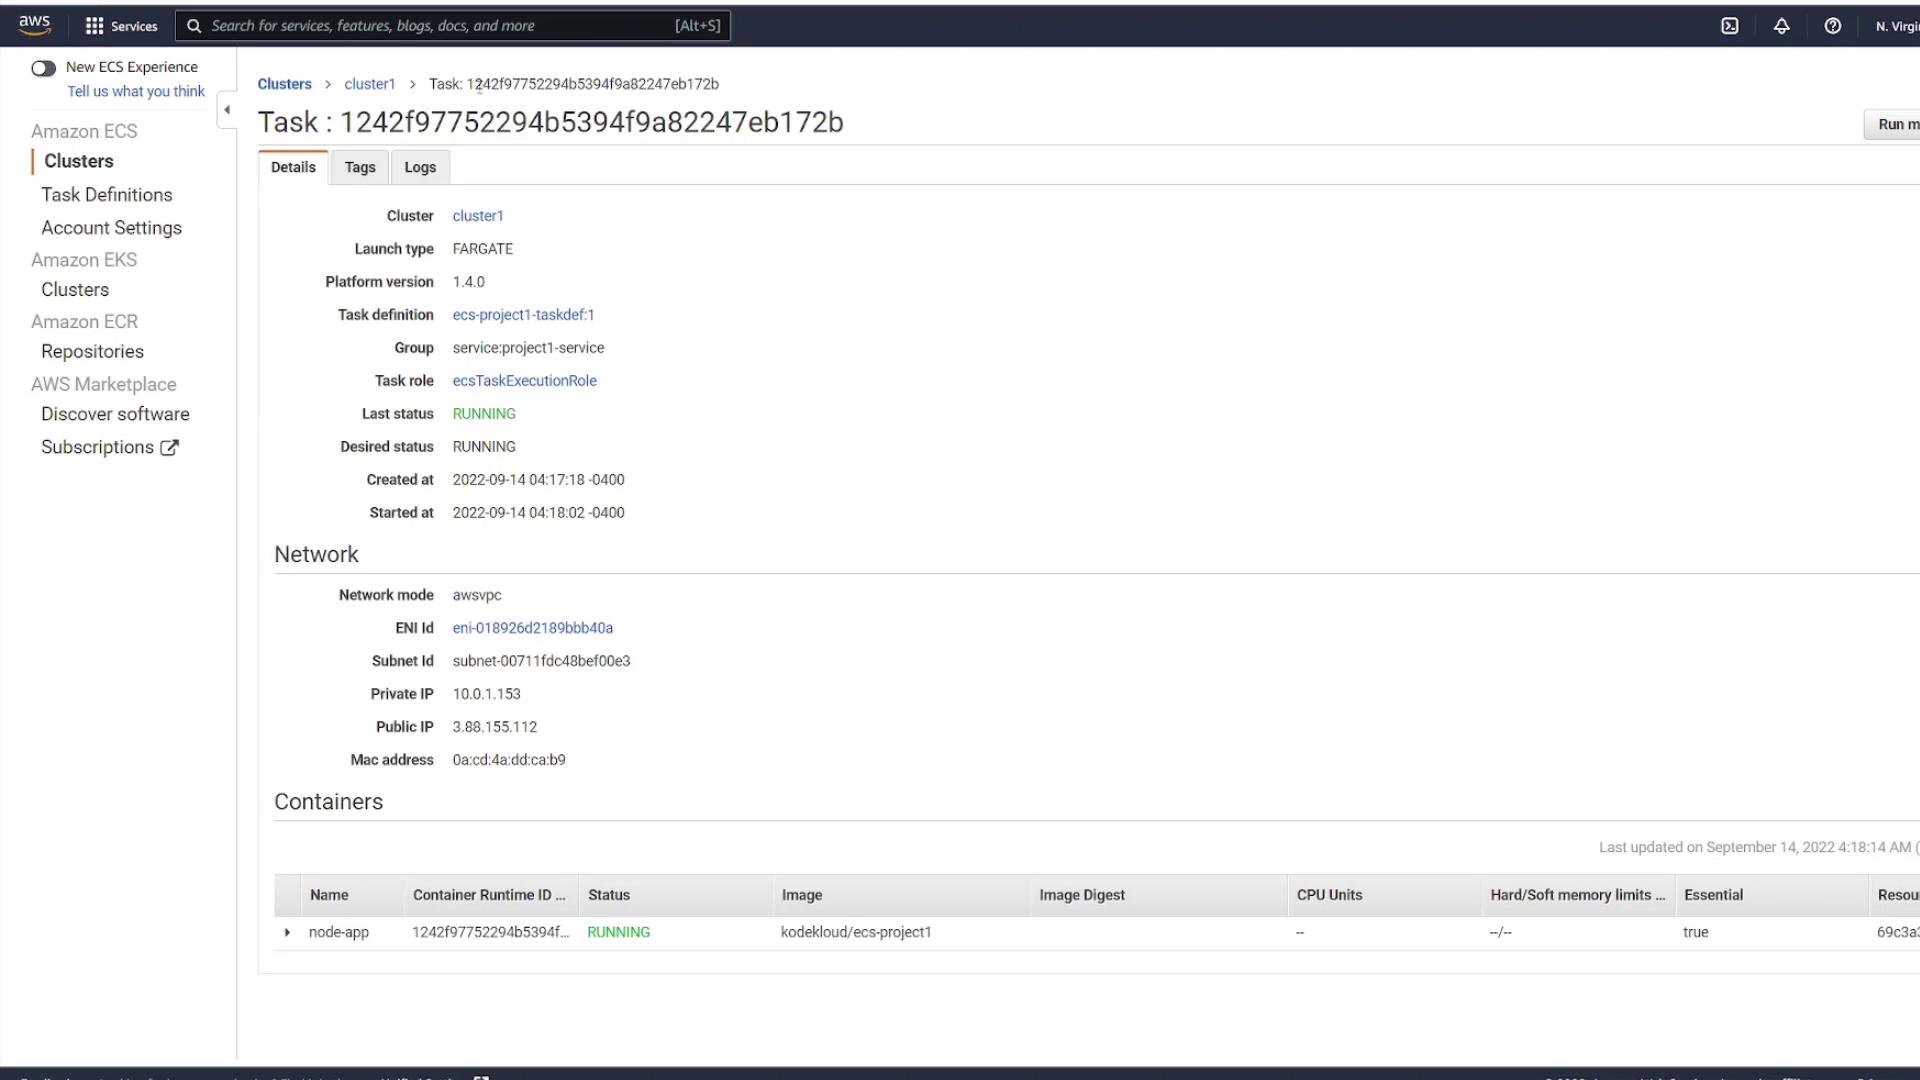
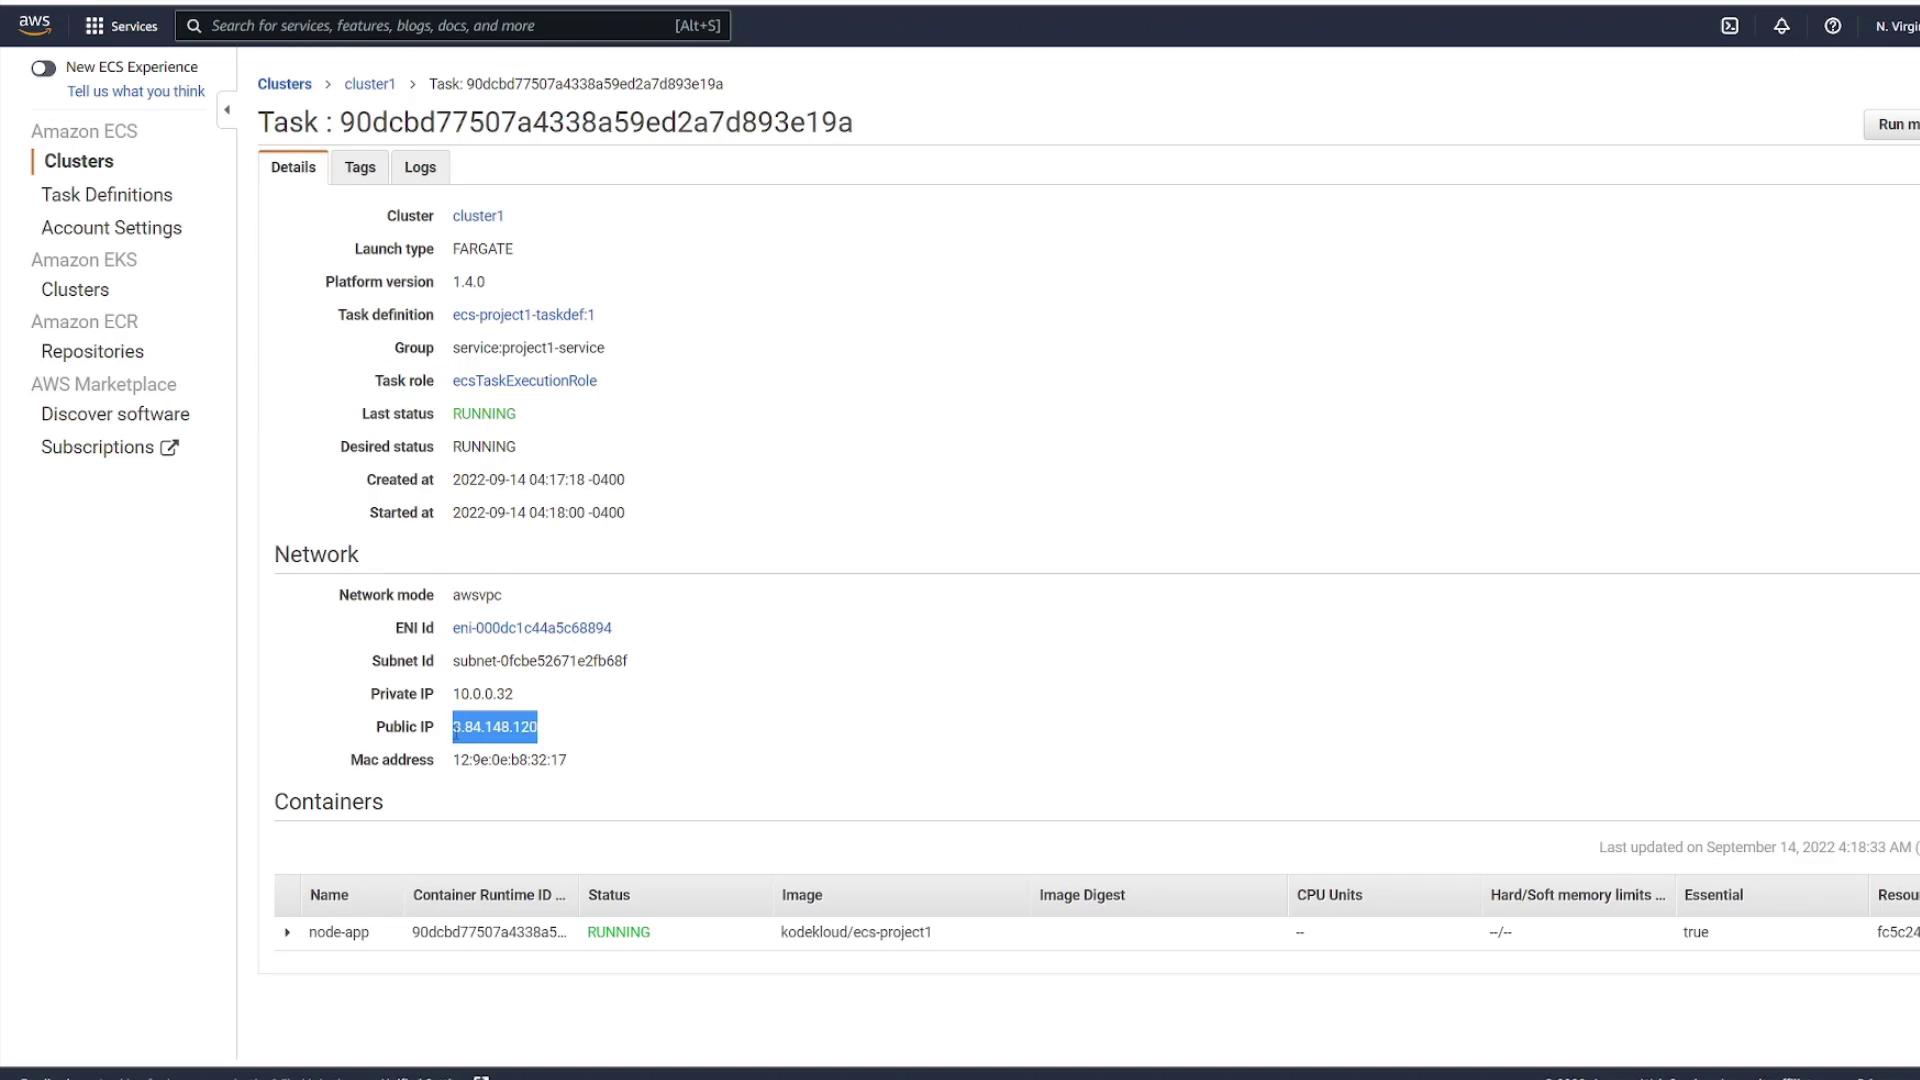
For front-end applications, having a single IP or DNS name can simplify traffic management. In robust architectures, consider configuring a load balancer to distribute incoming requests evenly across tasks. This approach exposes a single endpoint while managing dynamic IP addresses behind the scenes.

Watch Video

Watch video content

Previous
Demo Creating new cluster