This article explains how to review and understand project configuration in Amazon ECS for successful application deployment.
Before validating that your application deployed successfully, it’s essential to review all the resources created by the ECS task wizard. The wizard performs multiple behind-the-scenes operations, and understanding each step can help you troubleshoot and optimize your deployment.
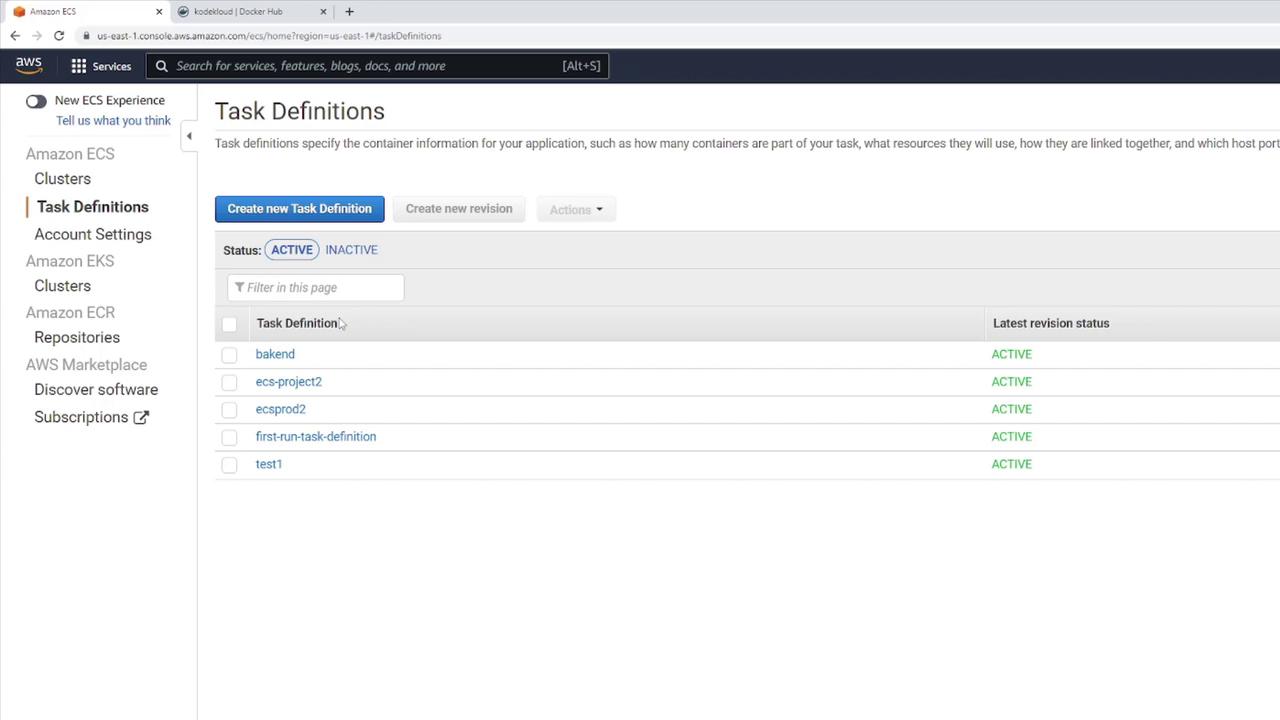
Start by navigating to the Task Definitions section. The Task Definition file is where all container configurations reside, much like a Docker Compose file or Docker run command flags. It includes vital settings such as port mappings, volume definitions, and environment variables.
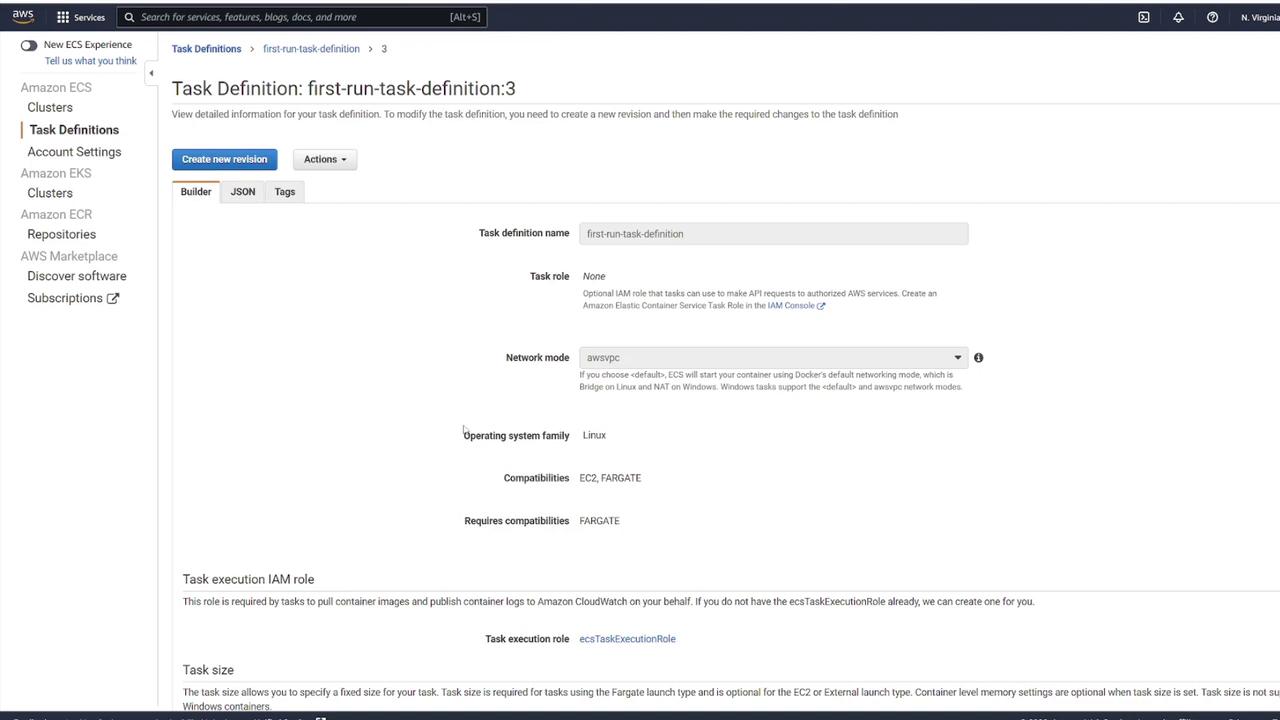
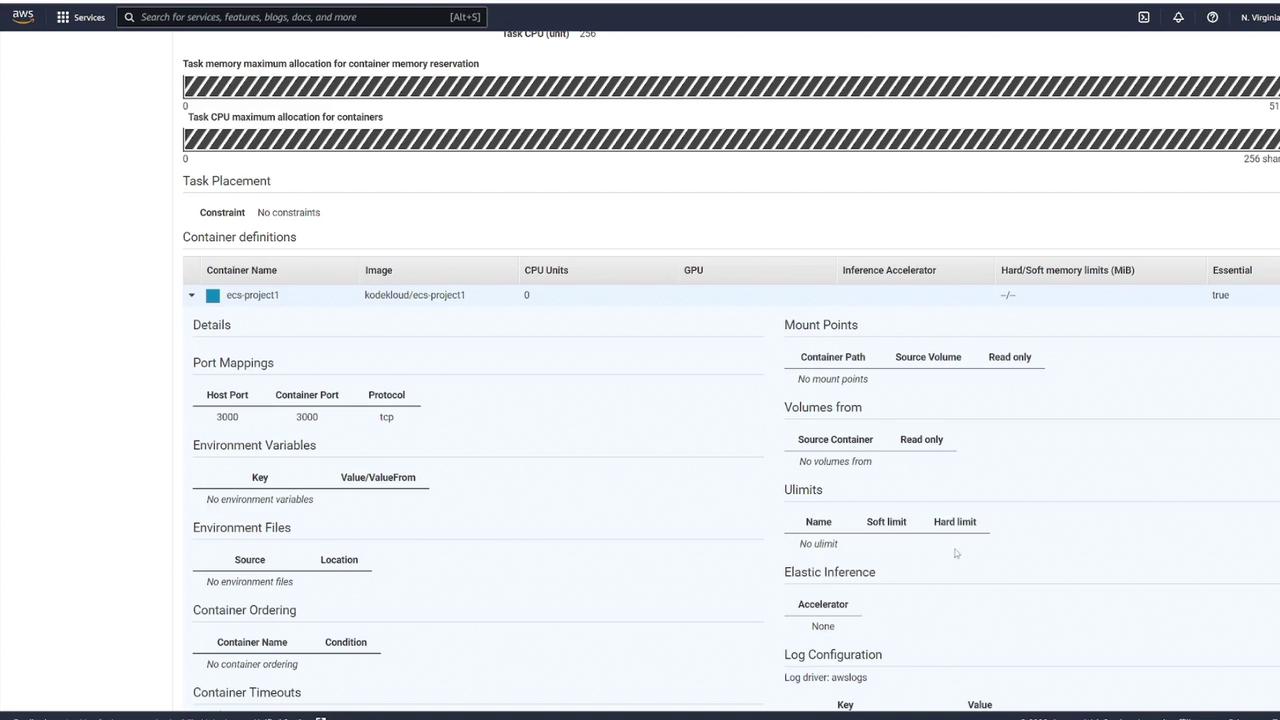
If you are new to ECS, you might find only a single task definition corresponding to your initial run. In cases where multiple task definitions are displayed, select the one relevant to your project. Note that if any container configurations have been updated, multiple revisions will be listed. The highest numbered revision indicates the most recent configuration.When you inspect a Task Definition, you’ll see all of the container configuration settings. Default settings such as using Fargate as the launch type are clearly visible. A scroll through the configuration allows you to review resource allocations like memory and CPU, along with container-specific settings such as host-to-container port mappings (for example, port 3000 mapped to port 3000), volumes, and environment variables.
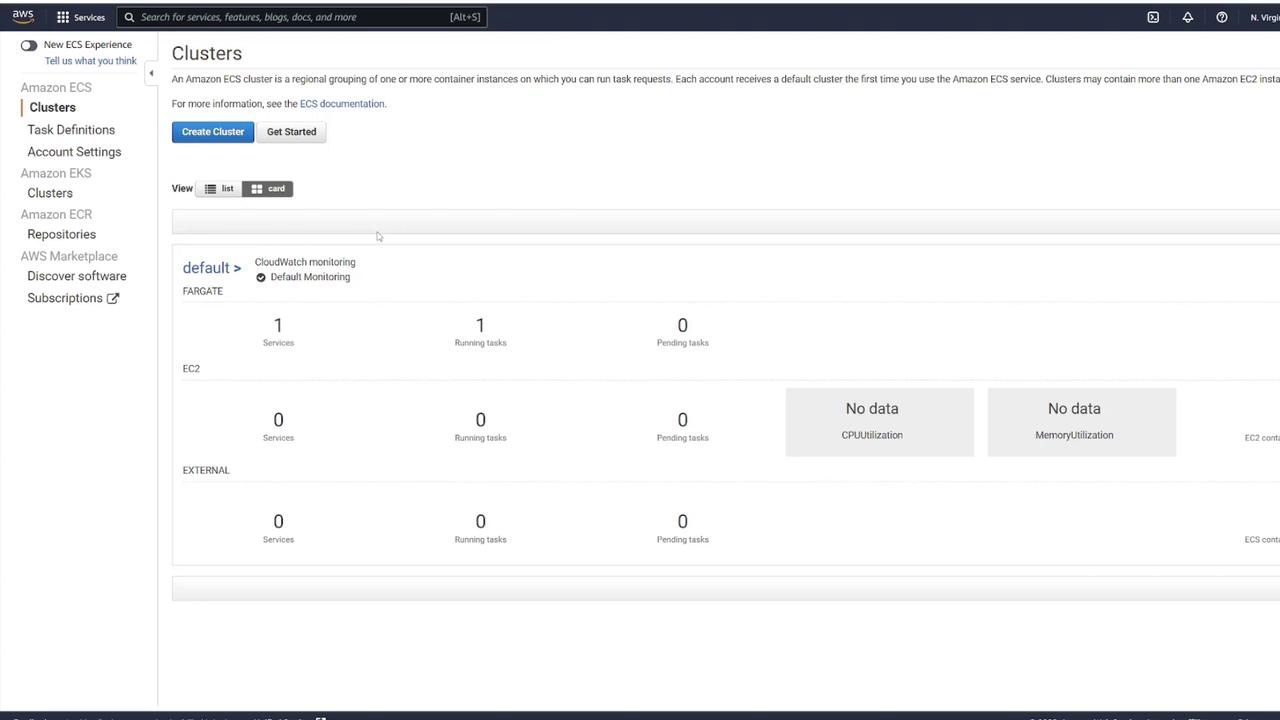
In this example, the task definition contains the configuration for a single container. However, you can define multiple containers within one task definition or create separate task definitions depending on your deployment strategy.Next, click on Clusters to view the cluster that the wizard created. The cluster represents the underlying resources on which your containers run. In this setup using Fargate, the cluster only contains the necessary configurations for your containerized application. If you deployed with an ECS cluster on EC2 instances, you would have details for each EC2 instance instead.
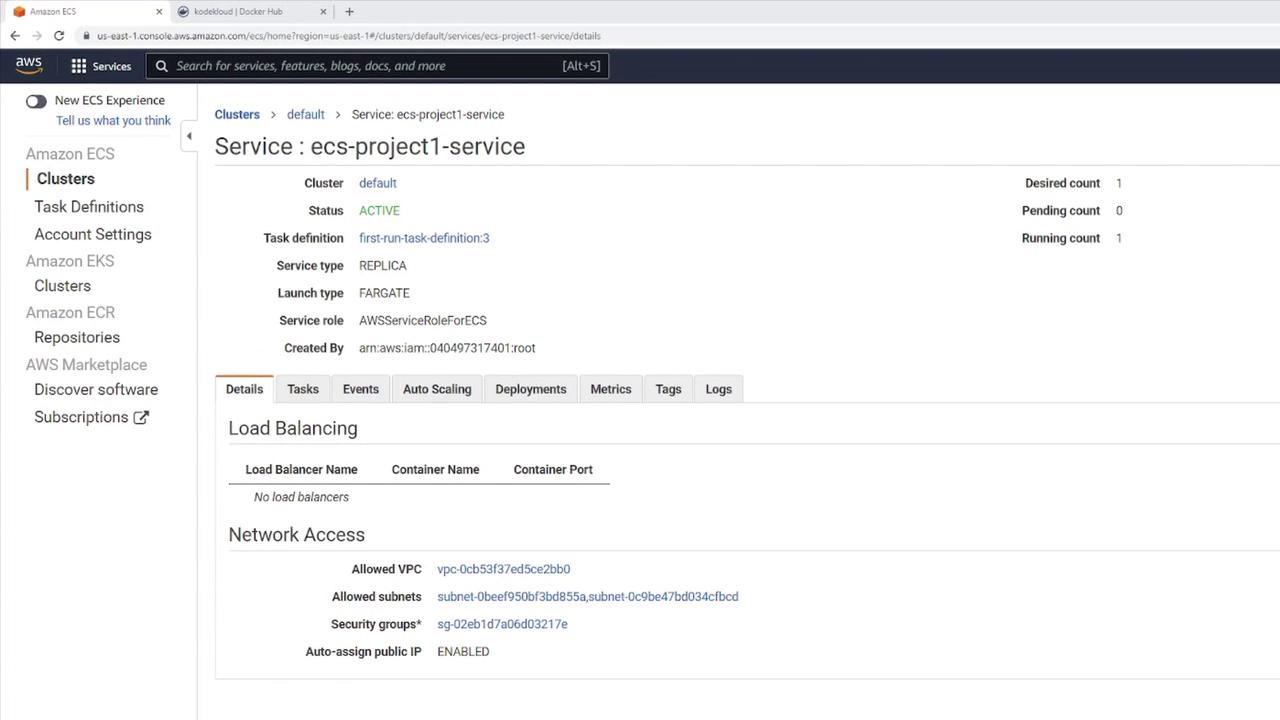
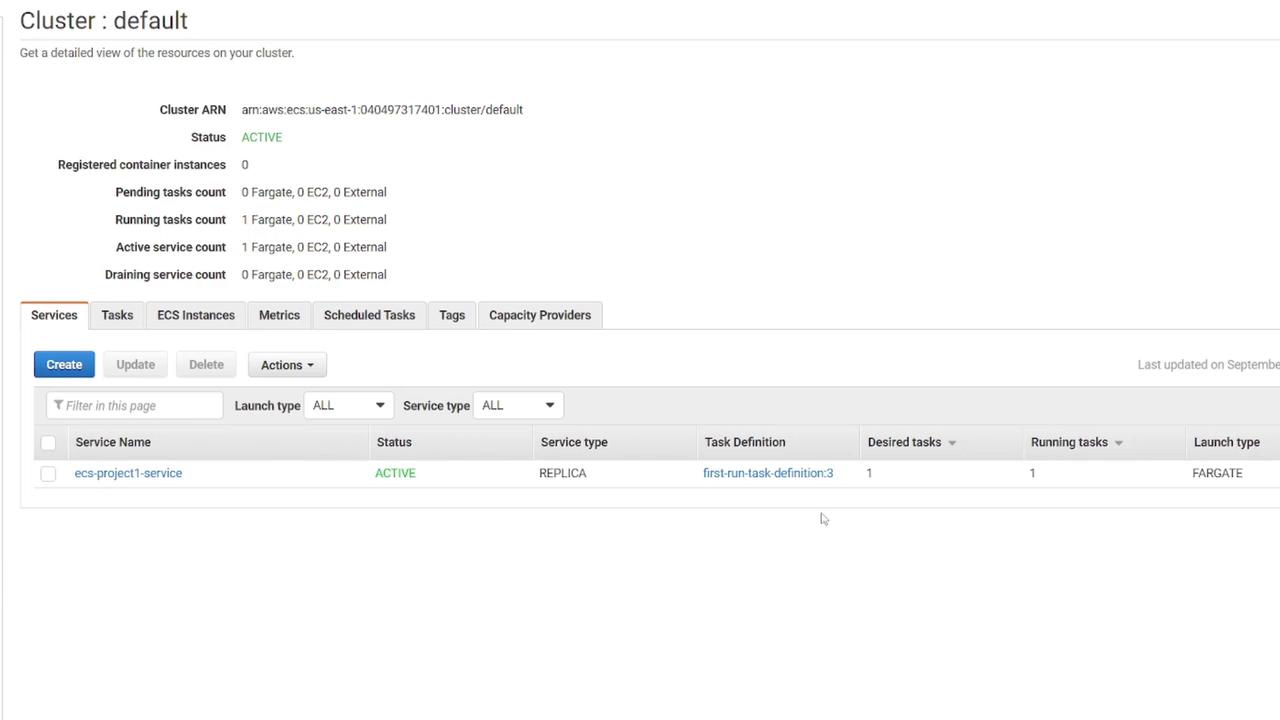
When you select the default cluster, you’ll see a list of services created by the wizard. One of these services is named “ECS - project one - service.” Its active status is confirmed, along with details of the associated task definition files. The dashboard indicates one desired task and one running task.
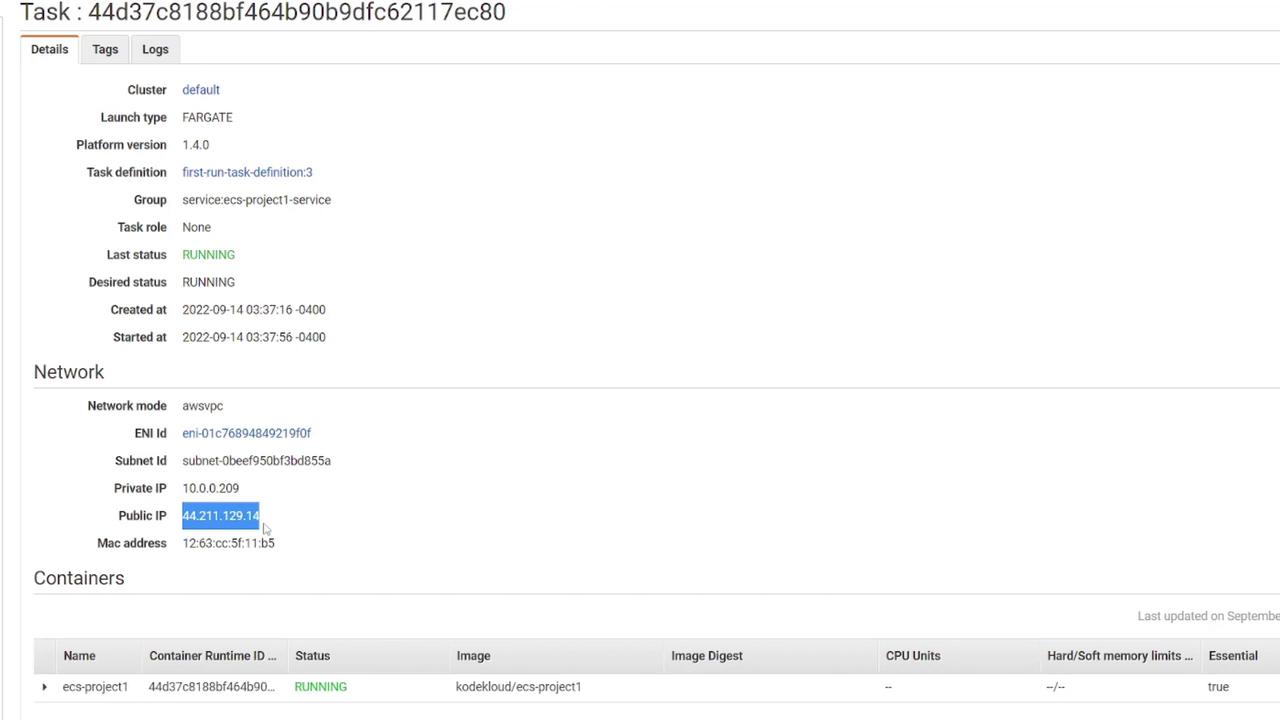
By selecting the service, you can review additional configuration details such as network settings (including VPC, subnets, and security groups). Next, navigate to the Tasks section to examine the running task. Here, you’ll notice that the task is active and has been assigned a public IP address. This address is crucial because it provides access to your application.
After copying the public IP address and opening it in your browser, check that it displays the demo application. Since the application is configured to run on port 3000, accessing the IP on port 3000 should serve a simple HTML file, confirming that the deployment is successful.