Azure Kubernetes Service
Working with AKS
Deploying an Azure Kubernetes Service AKS Cluster
Learn how to deploy an Azure Kubernetes Service (AKS) cluster via the Azure Portal. This step-by-step guide assumes you have an active Azure subscription.
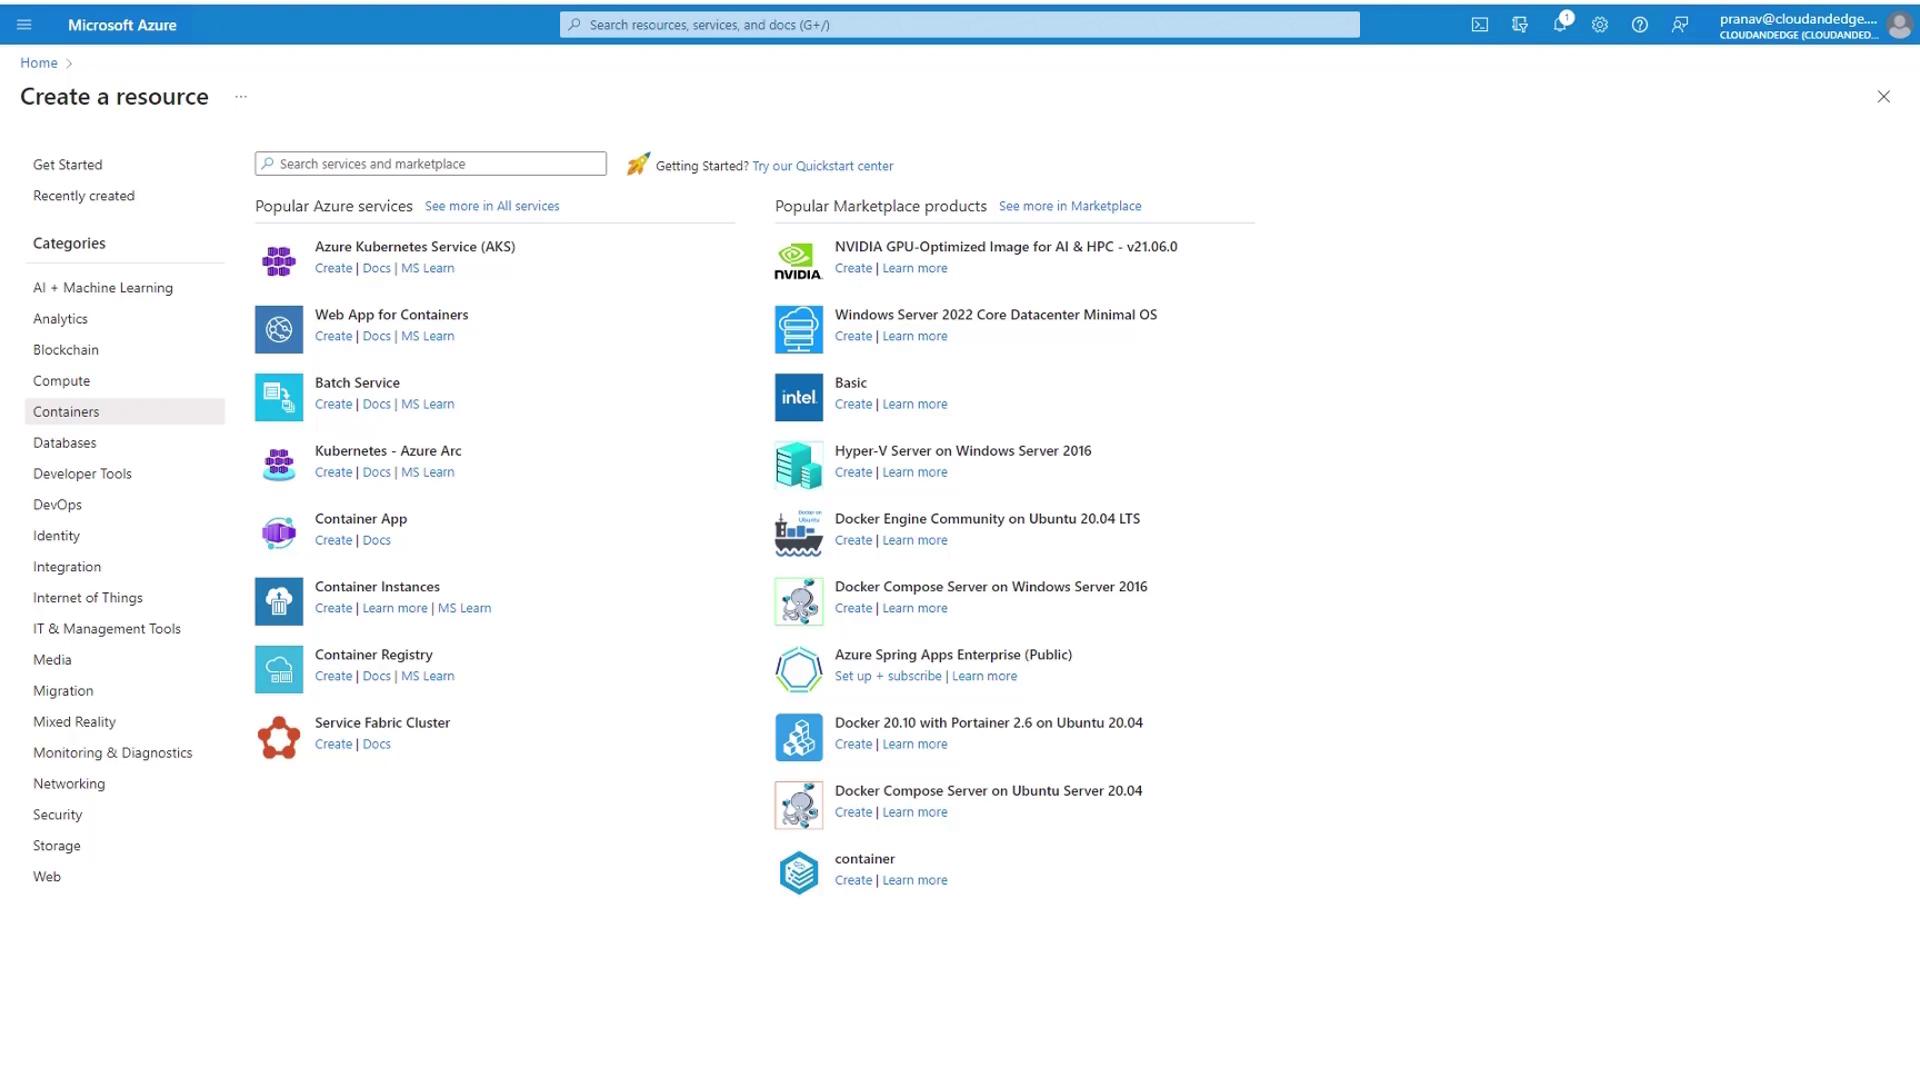
1. Create the AKS Resource
- Sign in to the Azure Portal.
- Click Create a resource, then choose Containers.
- Under Azure Kubernetes Service, select Create.
2. Project and Cluster Details
Provide subscription and cluster metadata:
- Subscription: Pick your active Azure subscription.
- Resource group: Click Create new, name it
rg1-kodekloud-aks.Note
Resource group names must be unique within your subscription.
- Cluster name:
aks1-KodeKloud-app(unique within the resource group). - Region: Southeast Asia (Singapore).
- Availability Zones: Uncheck all to reduce cost.
Warning
For production workloads, enable multi-AZ to ensure high availability.
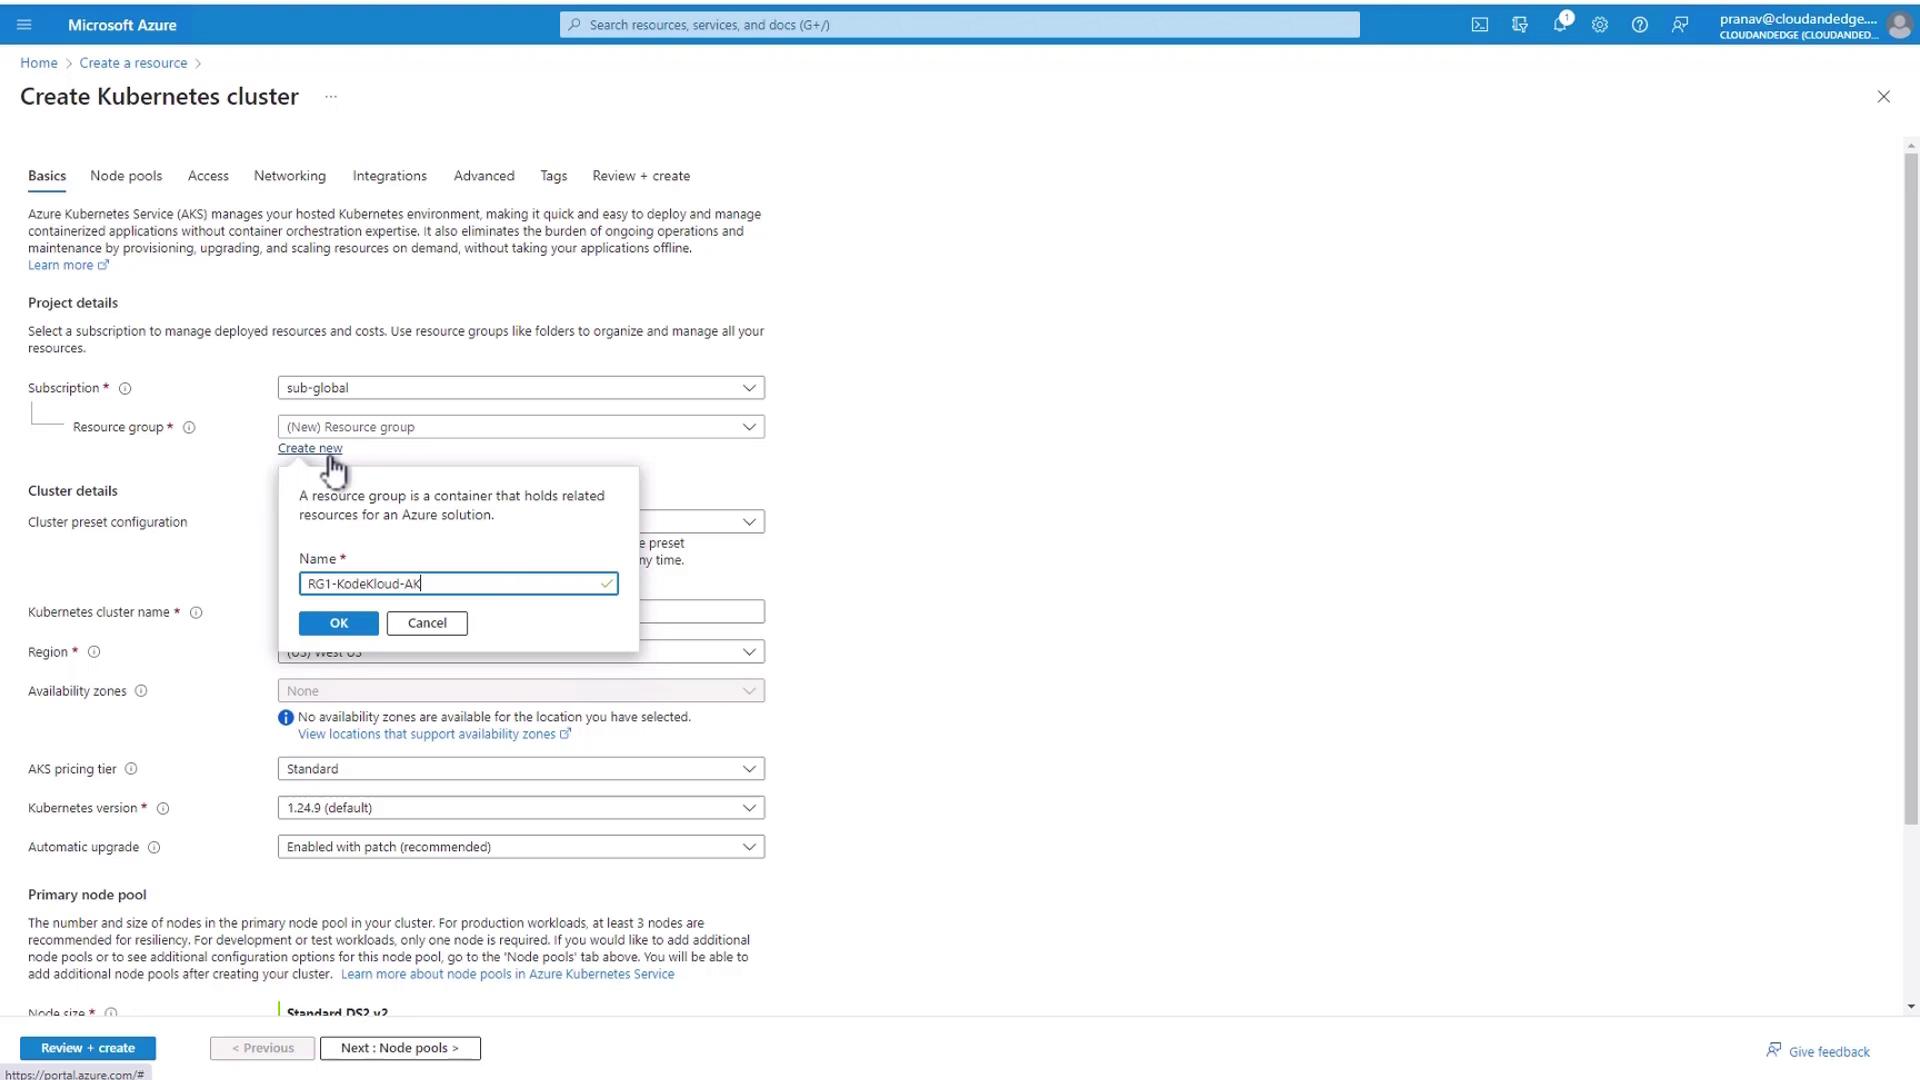
- Kubernetes version: Keep the default.
Note
AKS supports each GA Kubernetes version for 12 months, with seamless upgrade paths.
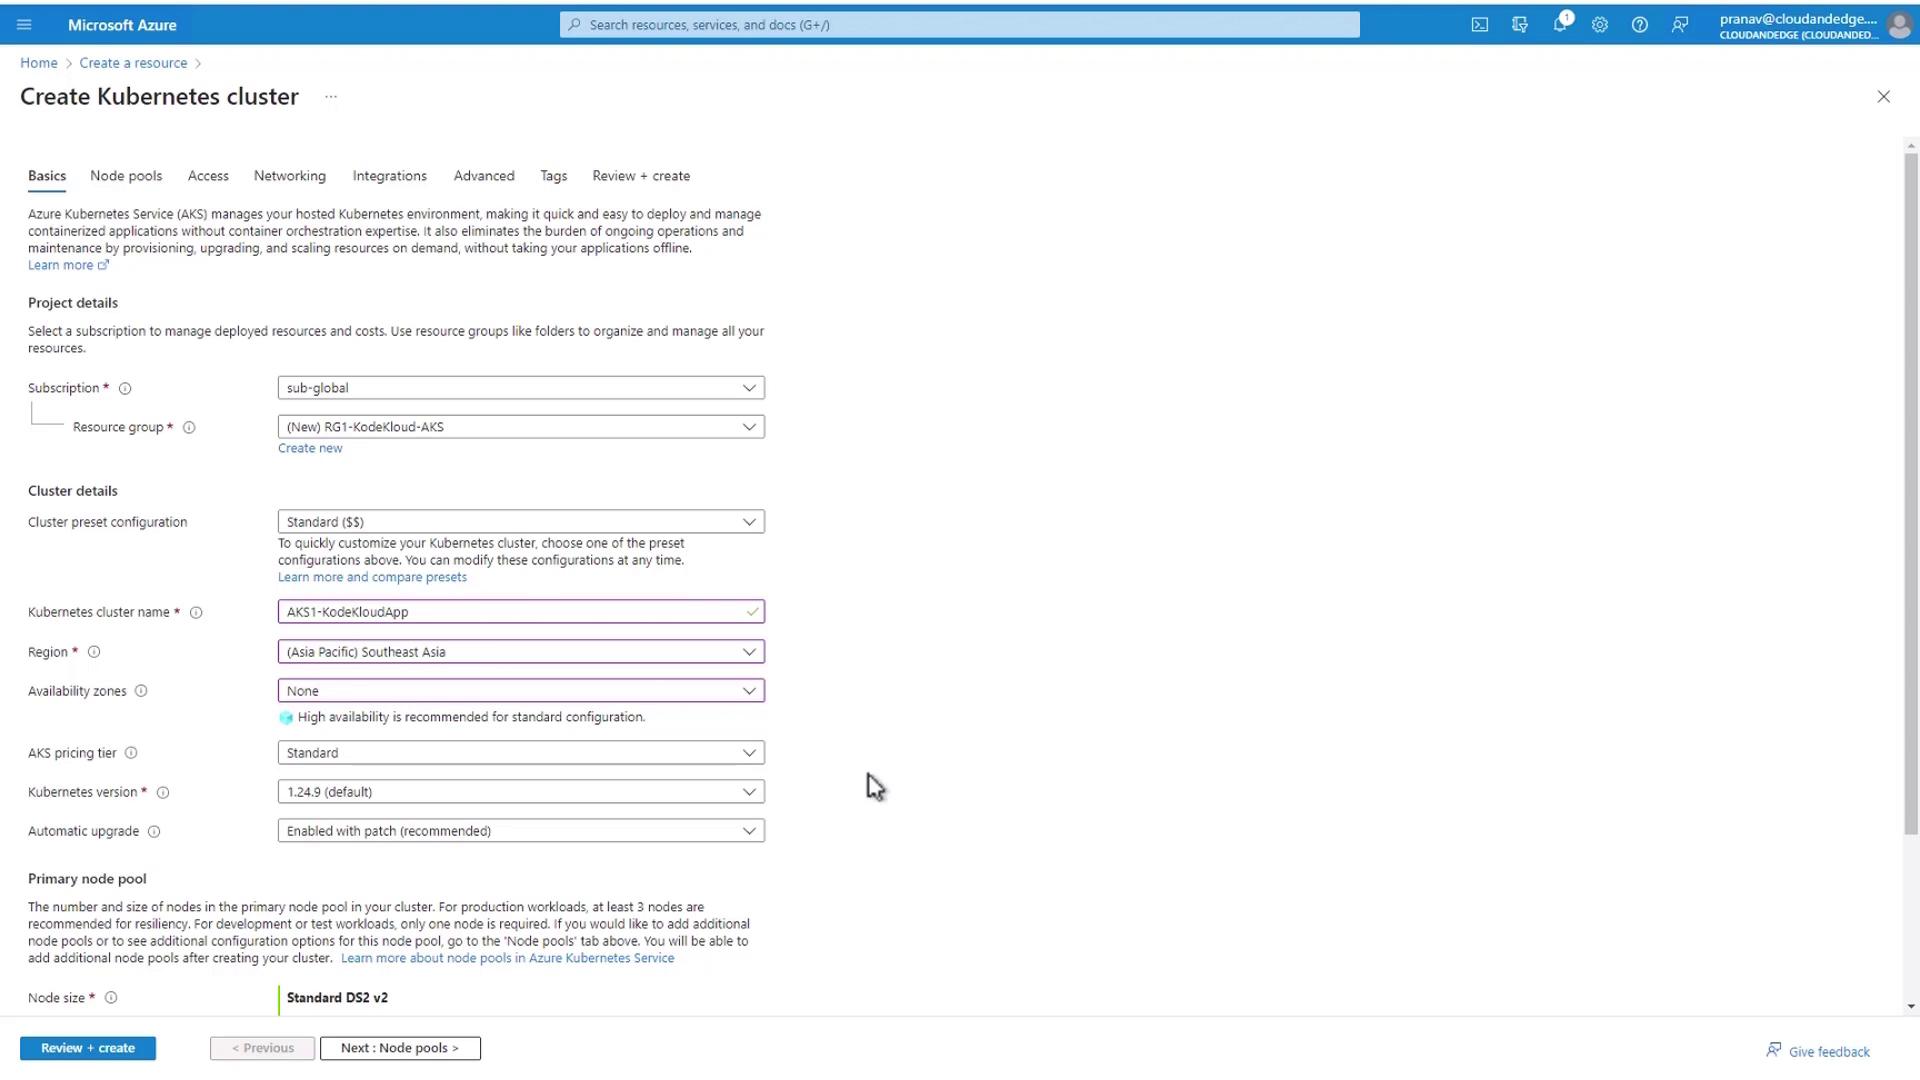

3. Default Node Pool
Configure the initial node pool:
| Setting | Value |
|---|---|
| Node size | DS2_v2 |
| vCPUs / RAM | 2 / 7 GB |
| Node count | 1 |
Click Next: Default Node Pools.
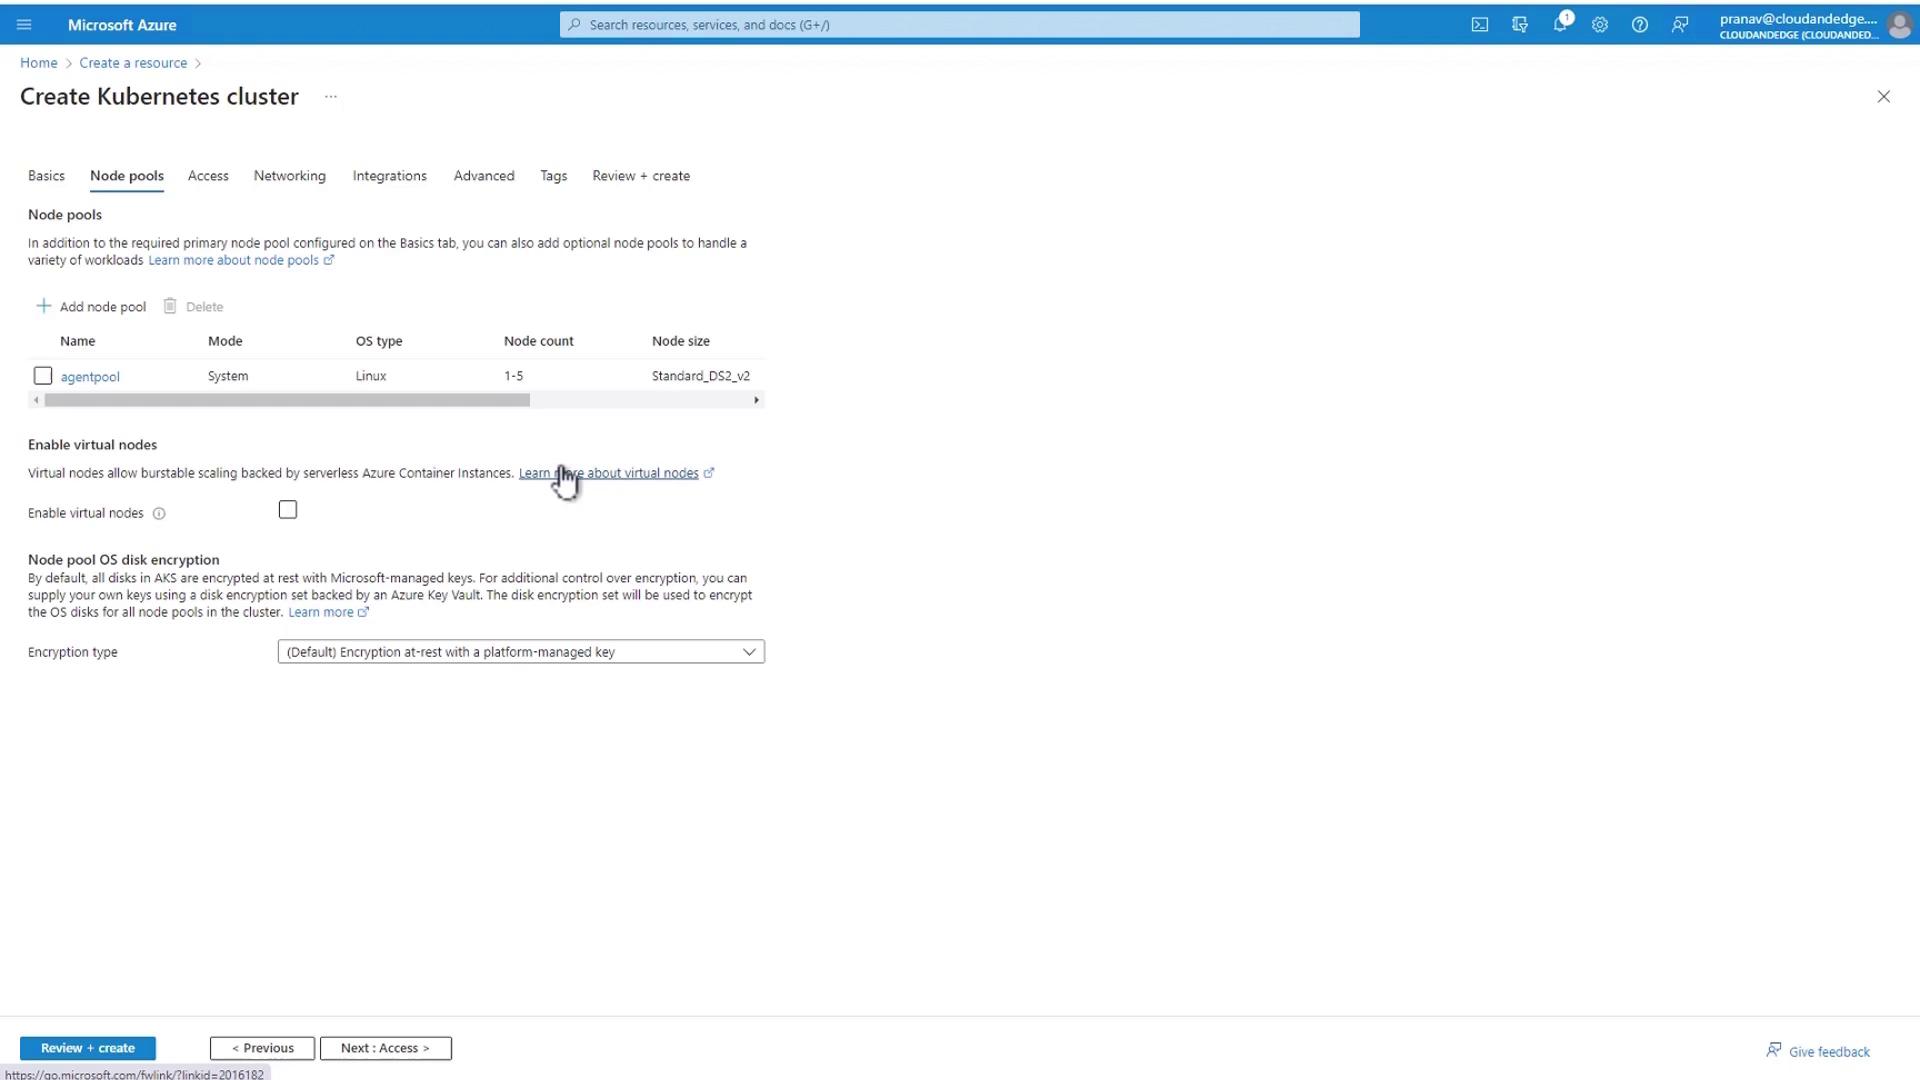
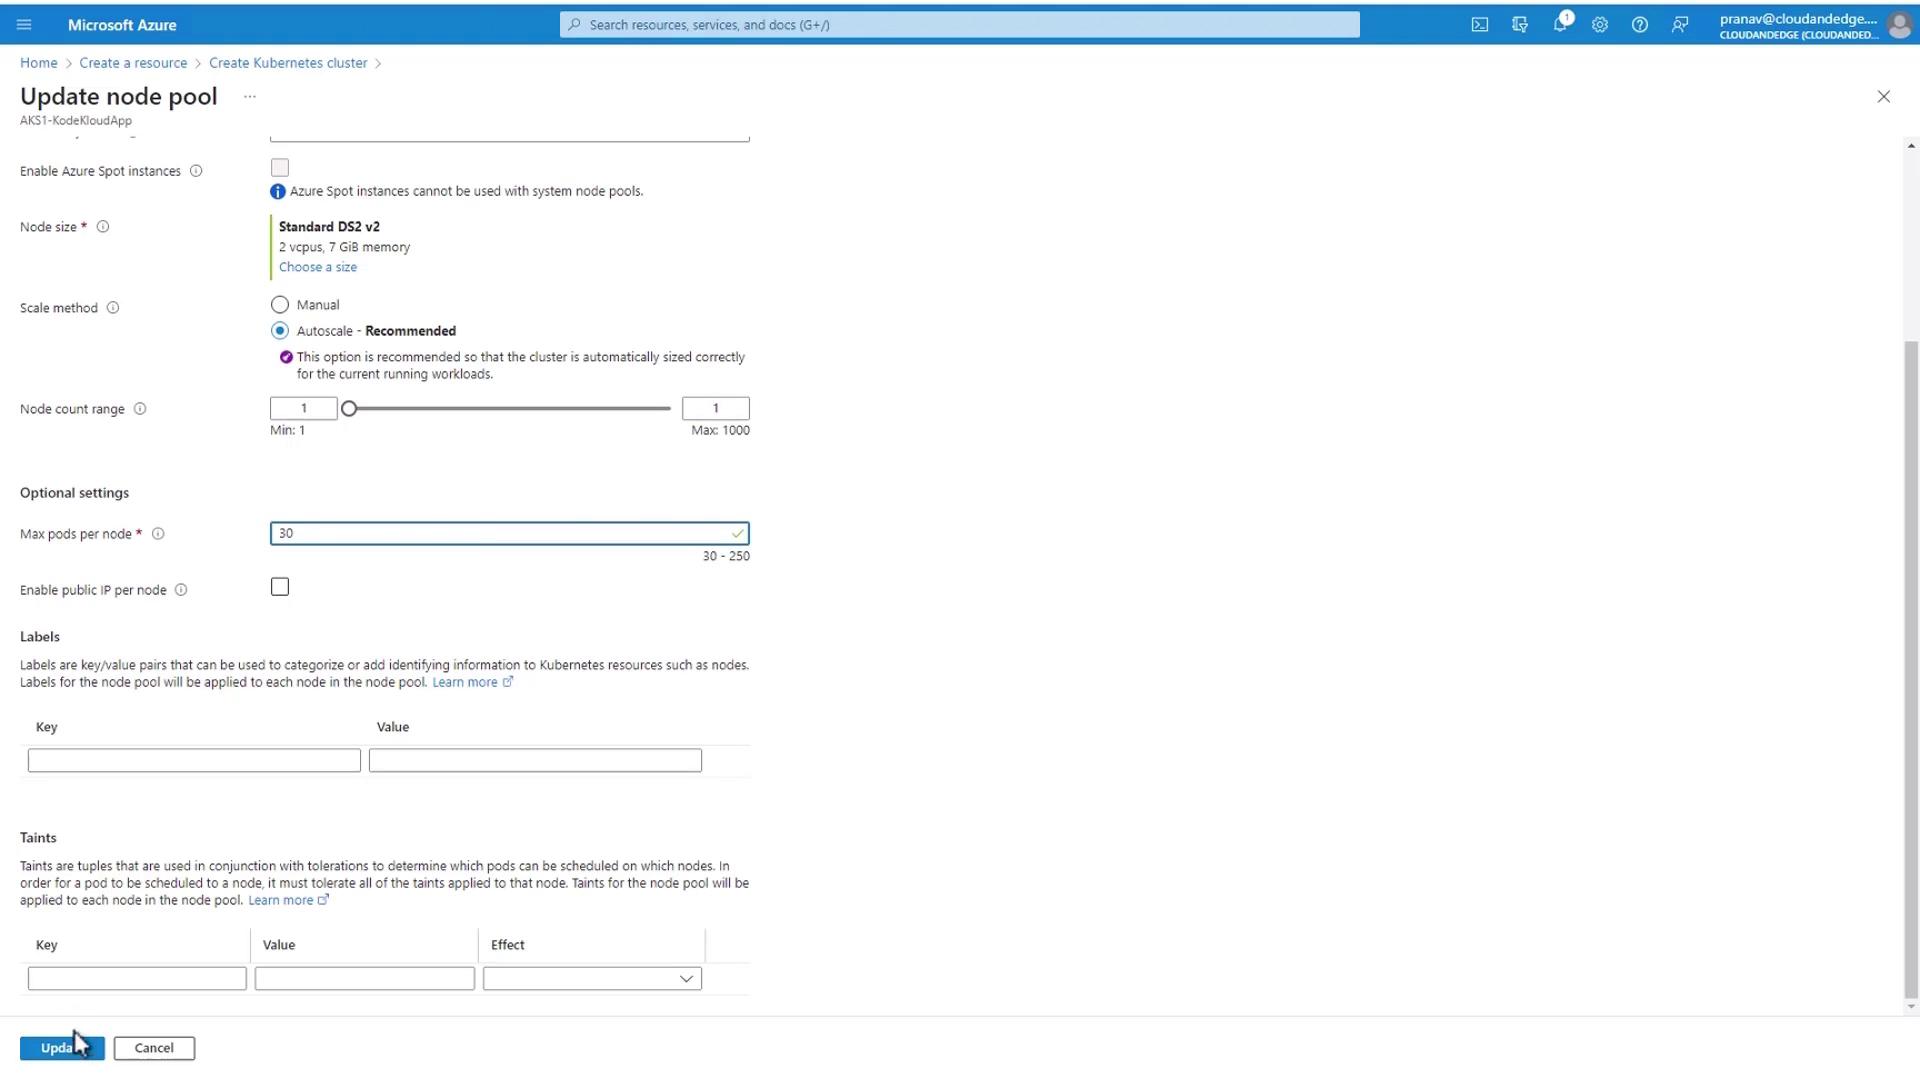
4. Configure Node Pools
Adjust autoscaling and pod limits:
- Min count:
1 - Max count:
1(or increase to5for autoscaling) - Max pods per node: Default is
110
To customize pods per node:
- Go to Agent pools.
- Set Max pods per node to
30. - Click Update, then Next.
5. Authentication and Authorization
Accept the default managed identities and RBAC settings.
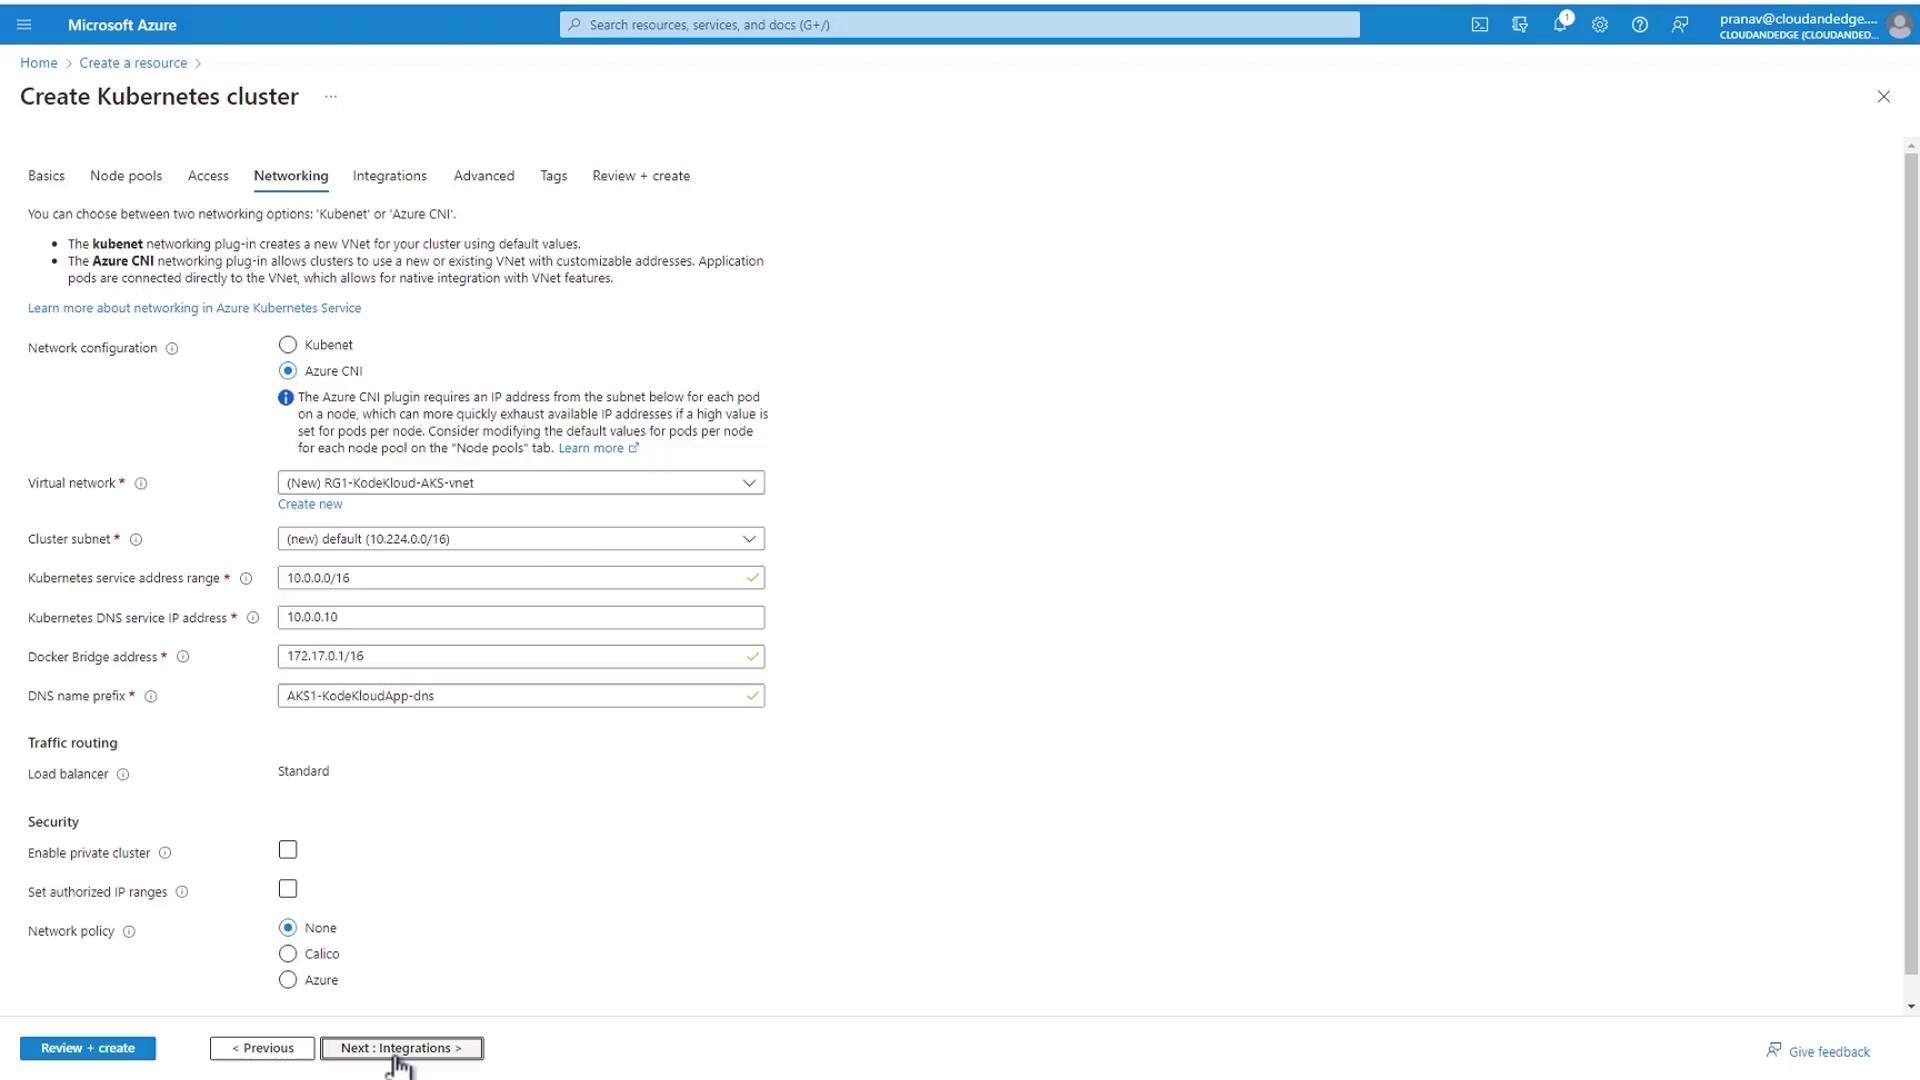
6. Networking
Choose the network setup that integrates seamlessly with Azure VNets:
- Network configuration: Azure CNI
- Virtual network: Create a new VNet automatically
- Network policies: Default
7. Container Registry
Enable an Azure Container Registry (ACR) for private image storage:
- Click Enable Container Registry.
- Enter a unique registry name.
- Use the same resource group and region.
- Select Basic SKU.
- Click OK.
ACR (Basic SKU) meets most development and testing scenarios.
Enable container logs and route them to the new Log Analytics workspace.
8. Advanced Settings and Tags
- Infrastructure resource group: Default (stores VMs, VNet, etc.).
- Tags: Add optional metadata (e.g.,
environment=dev,project=AKS) for cost tracking.
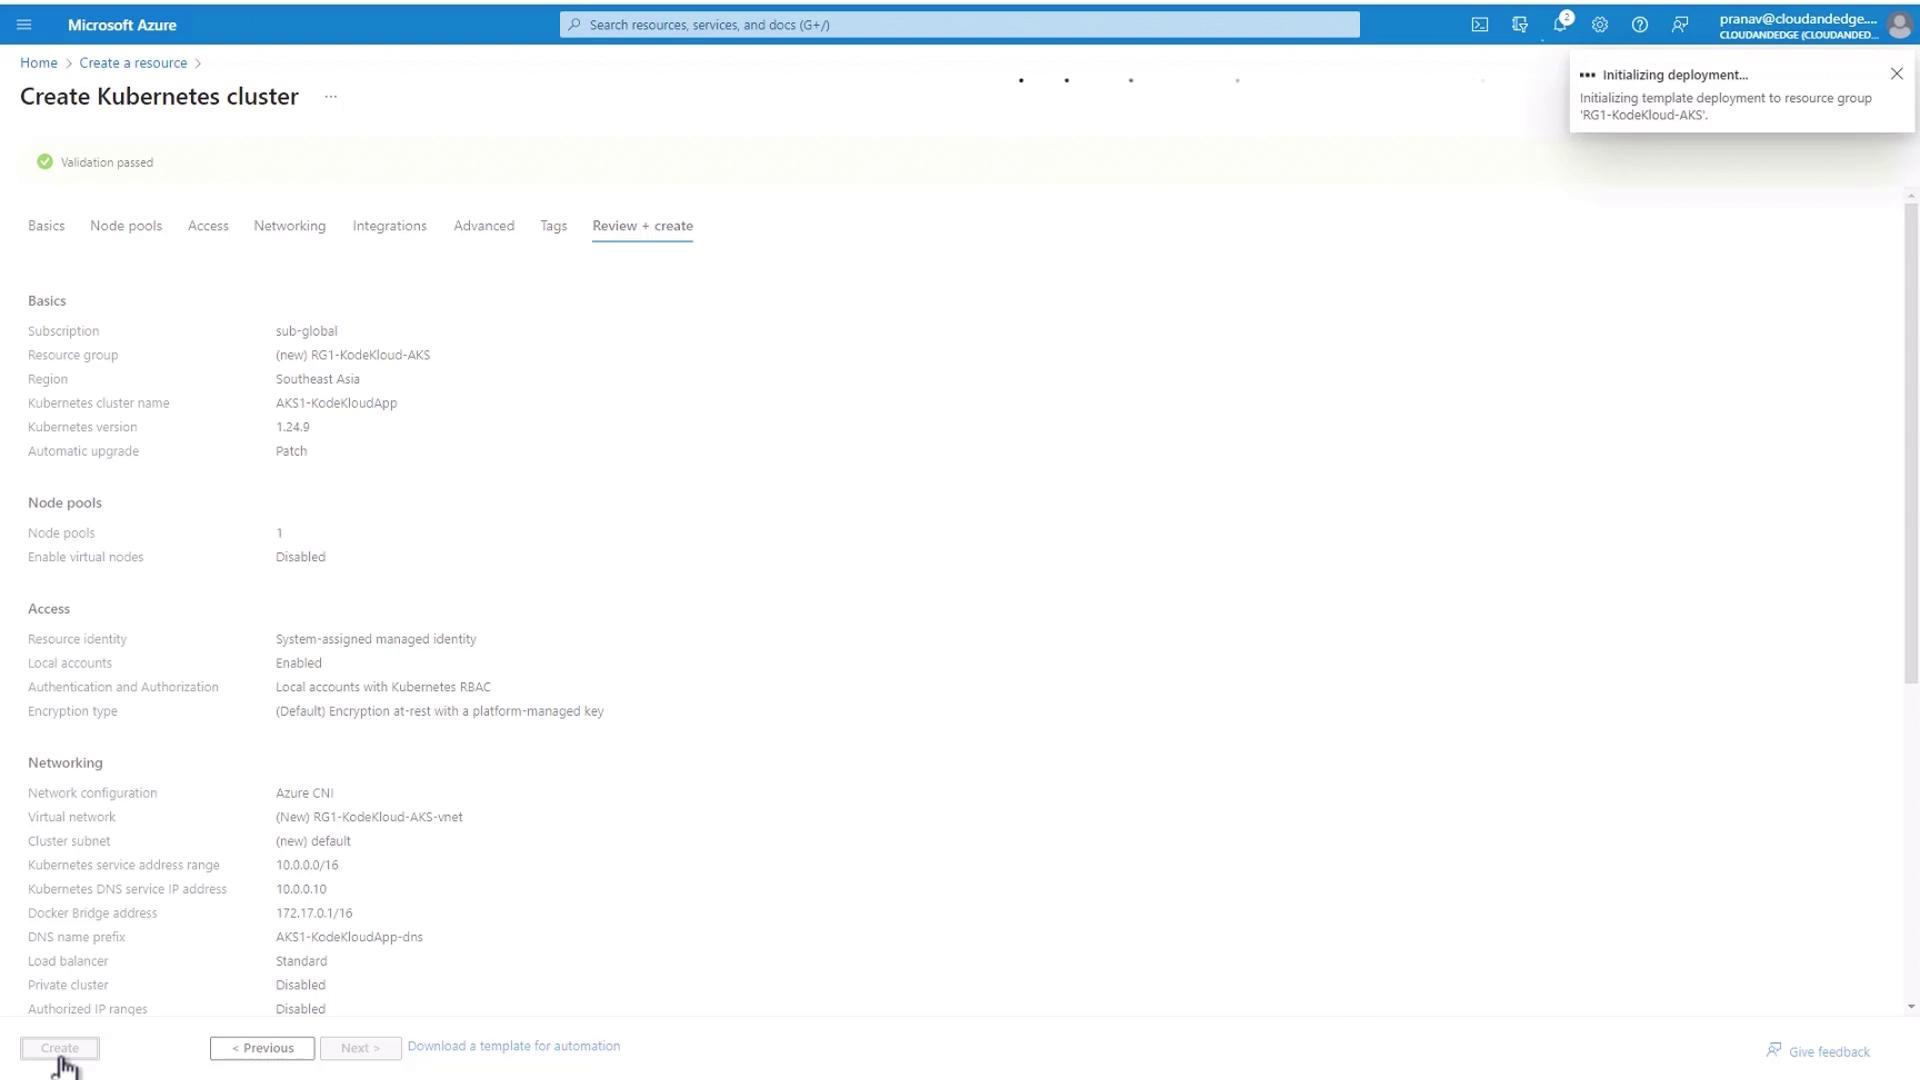
9. Review + Create
Azure will validate your configuration. Once validation passes, click Create.
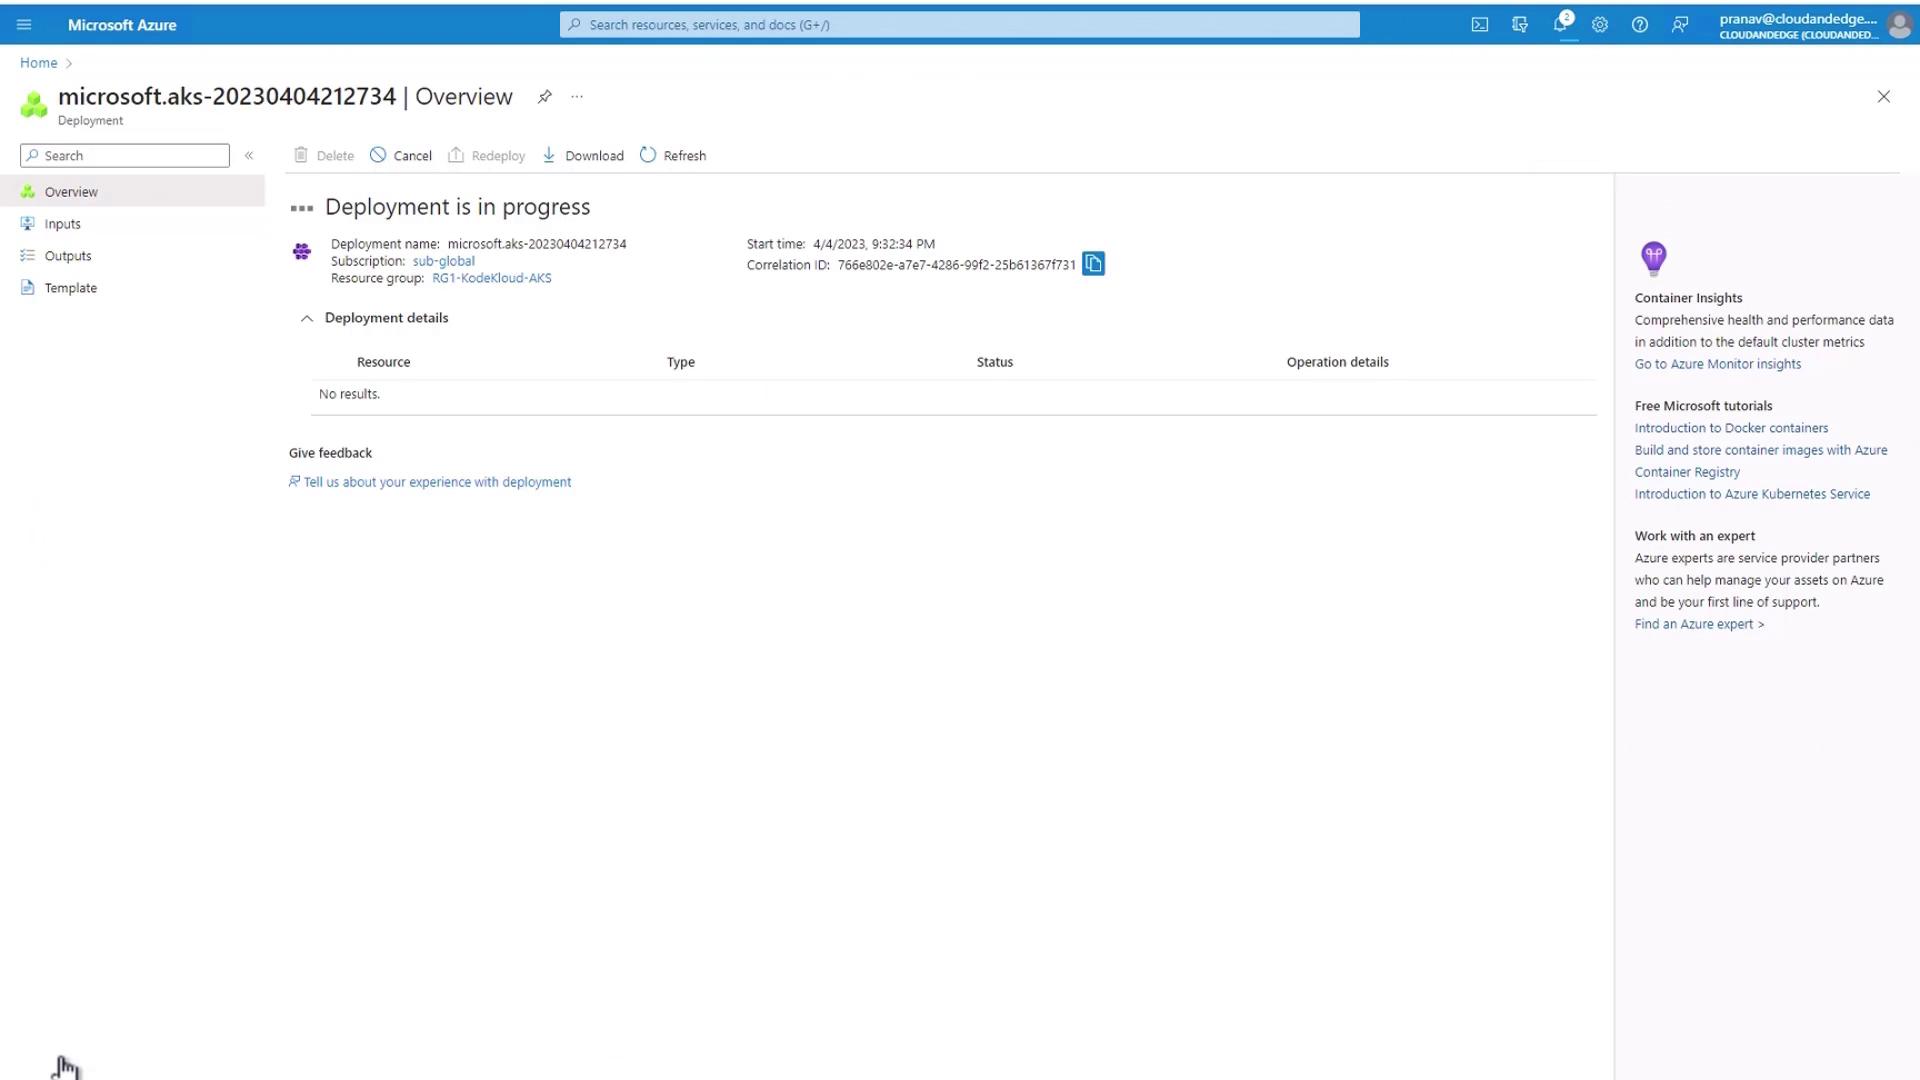
Deployment typically completes within a few minutes. After provisioning, connect to your new AKS cluster using the Azure CLI or Cloud Shell.
References
Watch Video
Watch video content