Azure Kubernetes Service

Working with AKS

Pushing Image to ACR

A container registry is a service for storing and distributing container images and related artifacts. While Docker Hub is a popular public registry, Azure Container Registry (ACR) offers a fully managed, private registry with advanced features like geo-replication, content trust, and virtual network integration.

Azure Container Registry SKUs

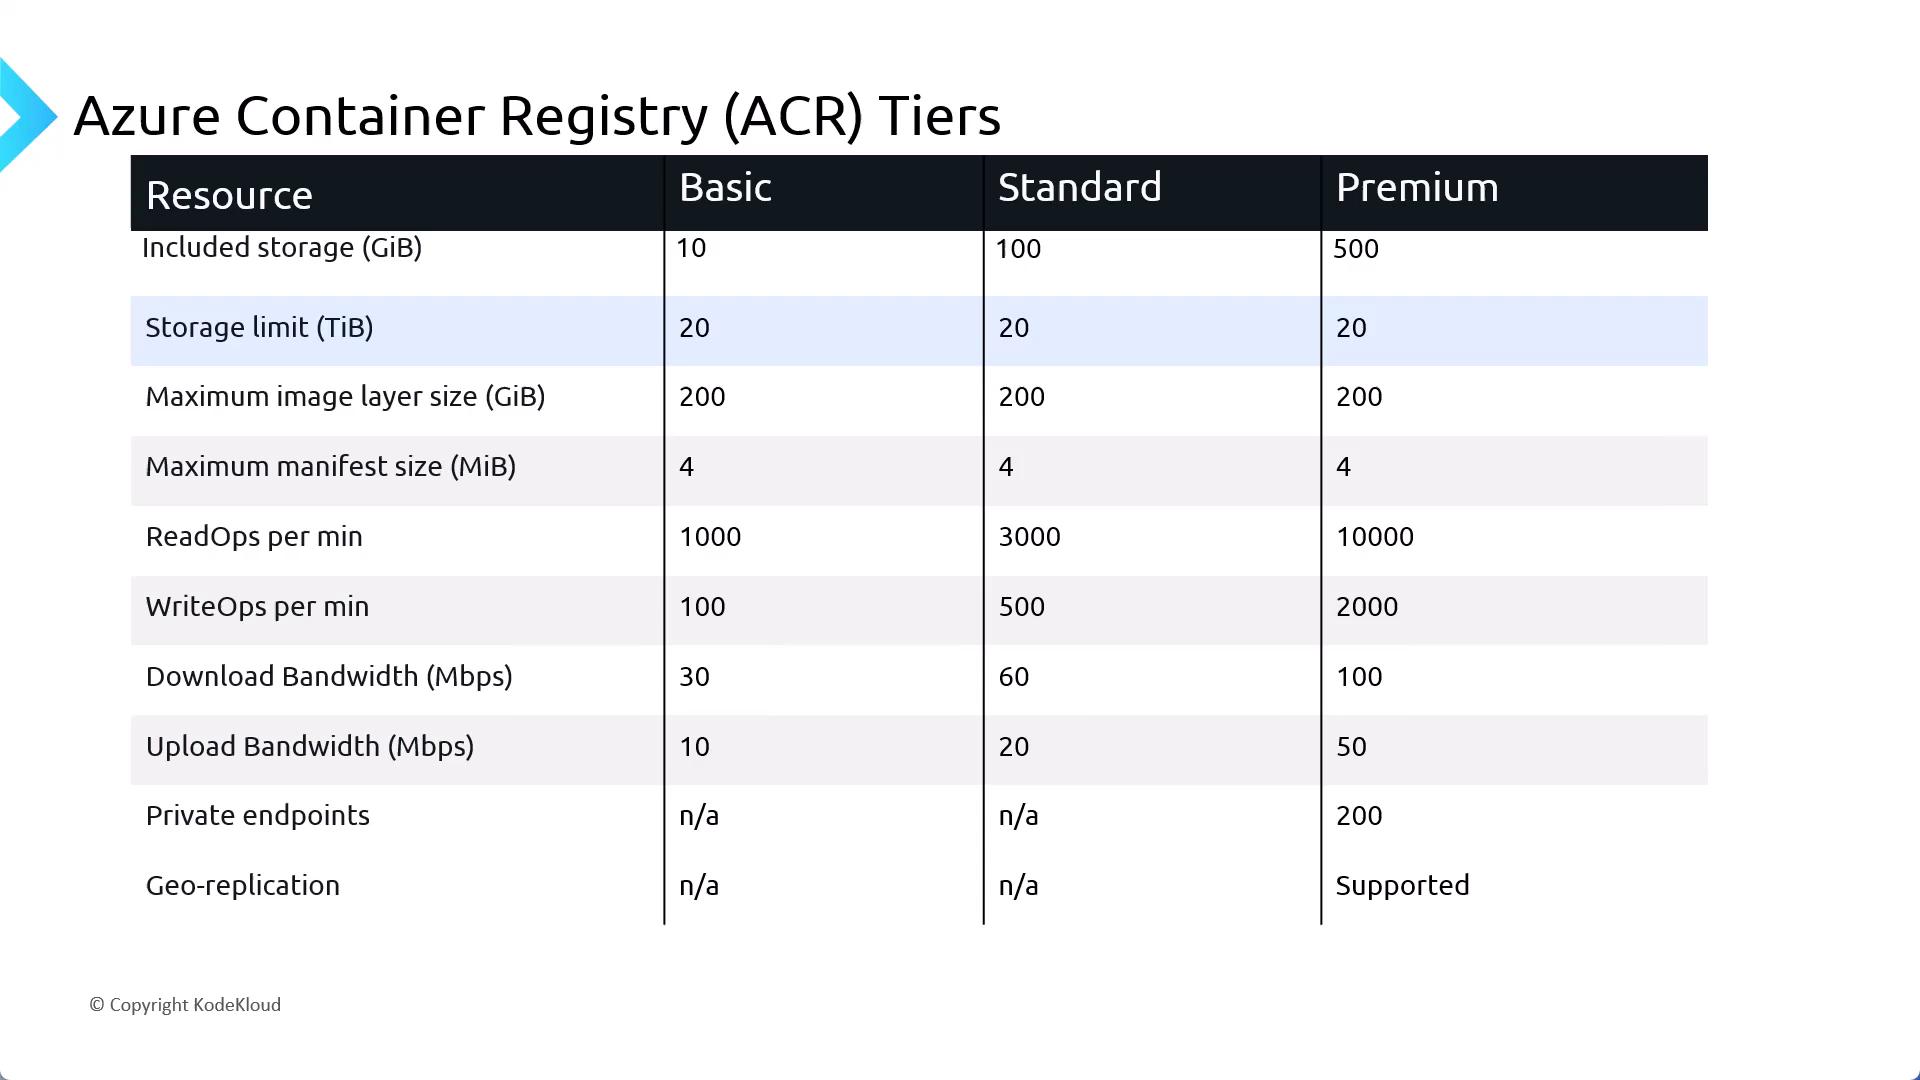
ACR comes in three SKUs—Basic, Standard, and Premium—each varying by storage capacity, daily operations, and outbound bandwidth. As you move from Basic → Standard → Premium, quotas increase and additional features are unlocked.

Note

You can upgrade or downgrade between SKUs as long as your storage usage stays within the target tier’s quota.

Warning

Downgrading from Premium (200 GB) to Standard (100 GB) will fail if your registry exceeds 100 GB of stored artifacts.

The image is a table comparing the features of different Azure Container Registry (ACR) tiers: Basic, Standard, and Premium, detailing resources like storage, operations, and bandwidth.

For full details, see Azure Container Registry SKUs & pricing.

Provisioning and Access Control

When you create an AKS cluster with the Azure CLI or Portal, you can automatically provision an ACR instance and grant the cluster’s managed identity the AcrPull role. If you create your registry separately, assign roles as follows:

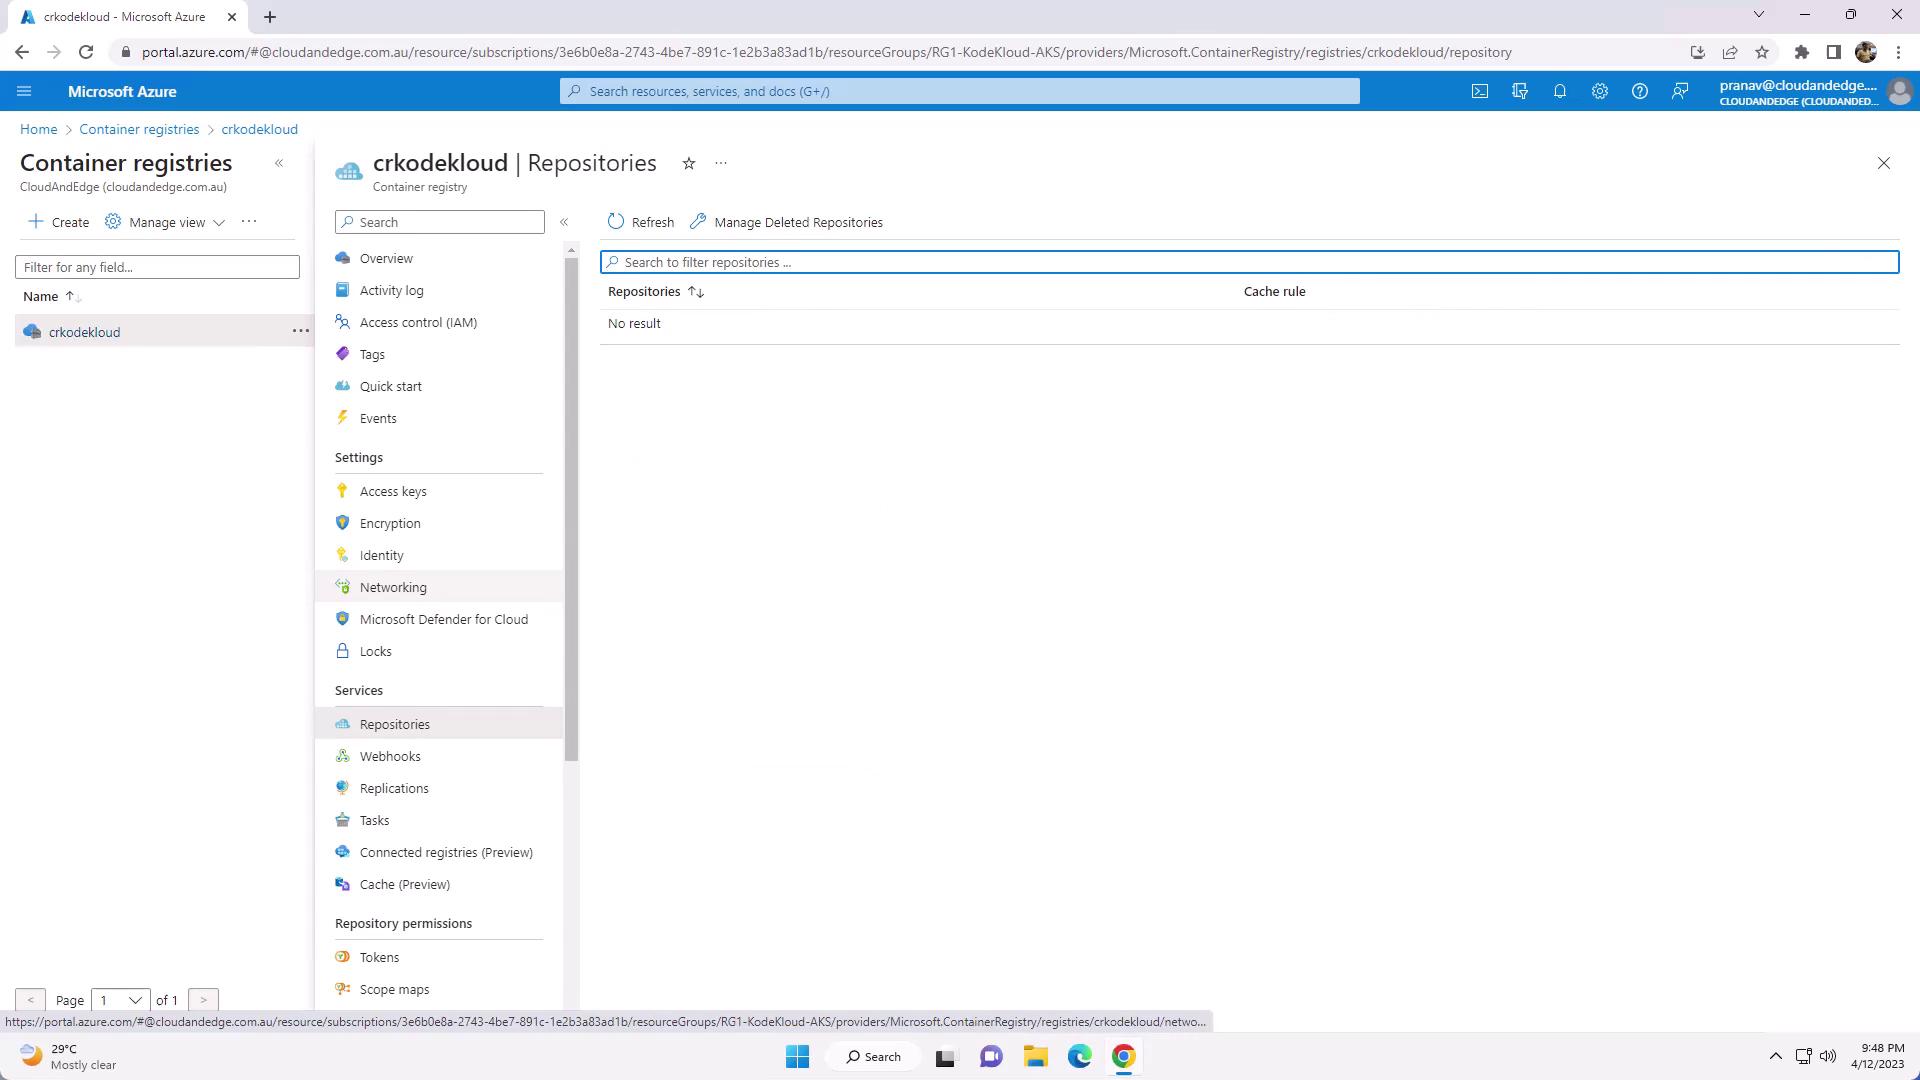
  1. In the Azure Portal, navigate to your Container Registry.
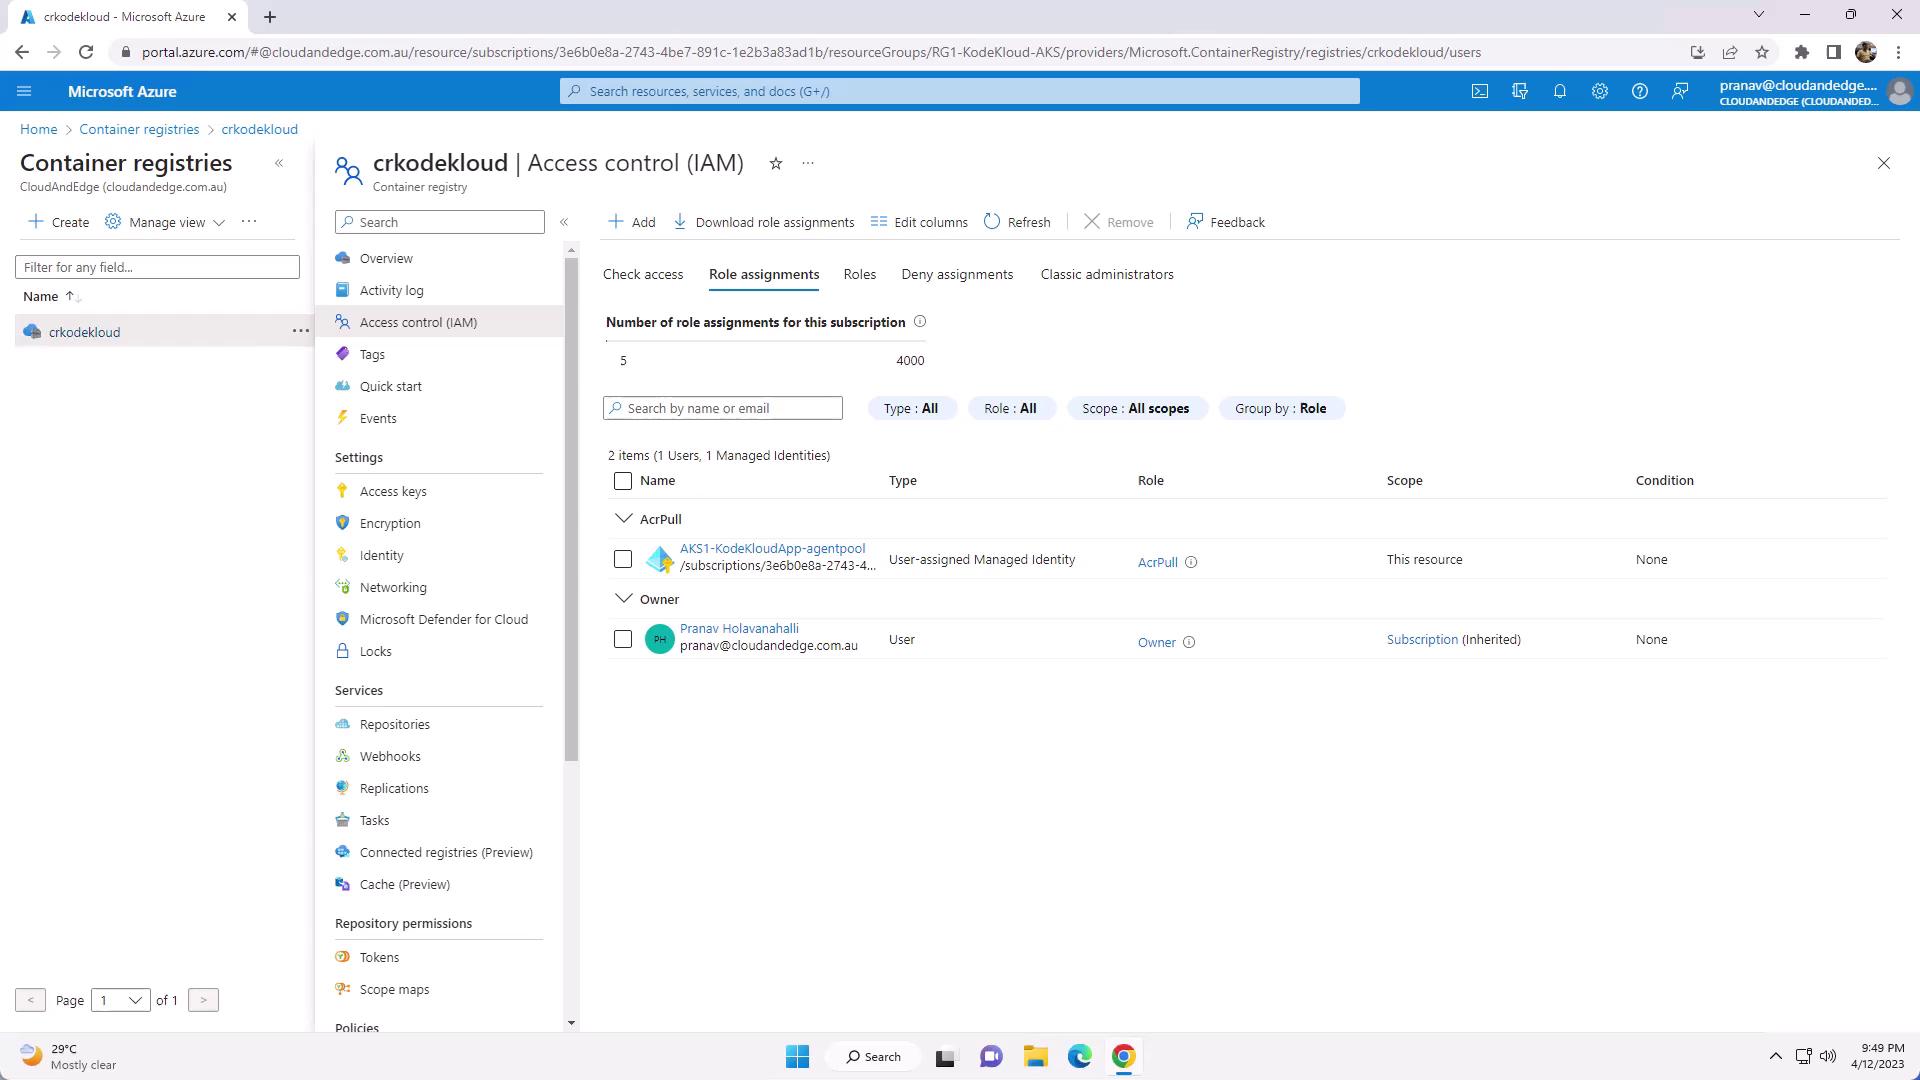
  2. Open Access Control (IAM)Role assignments.
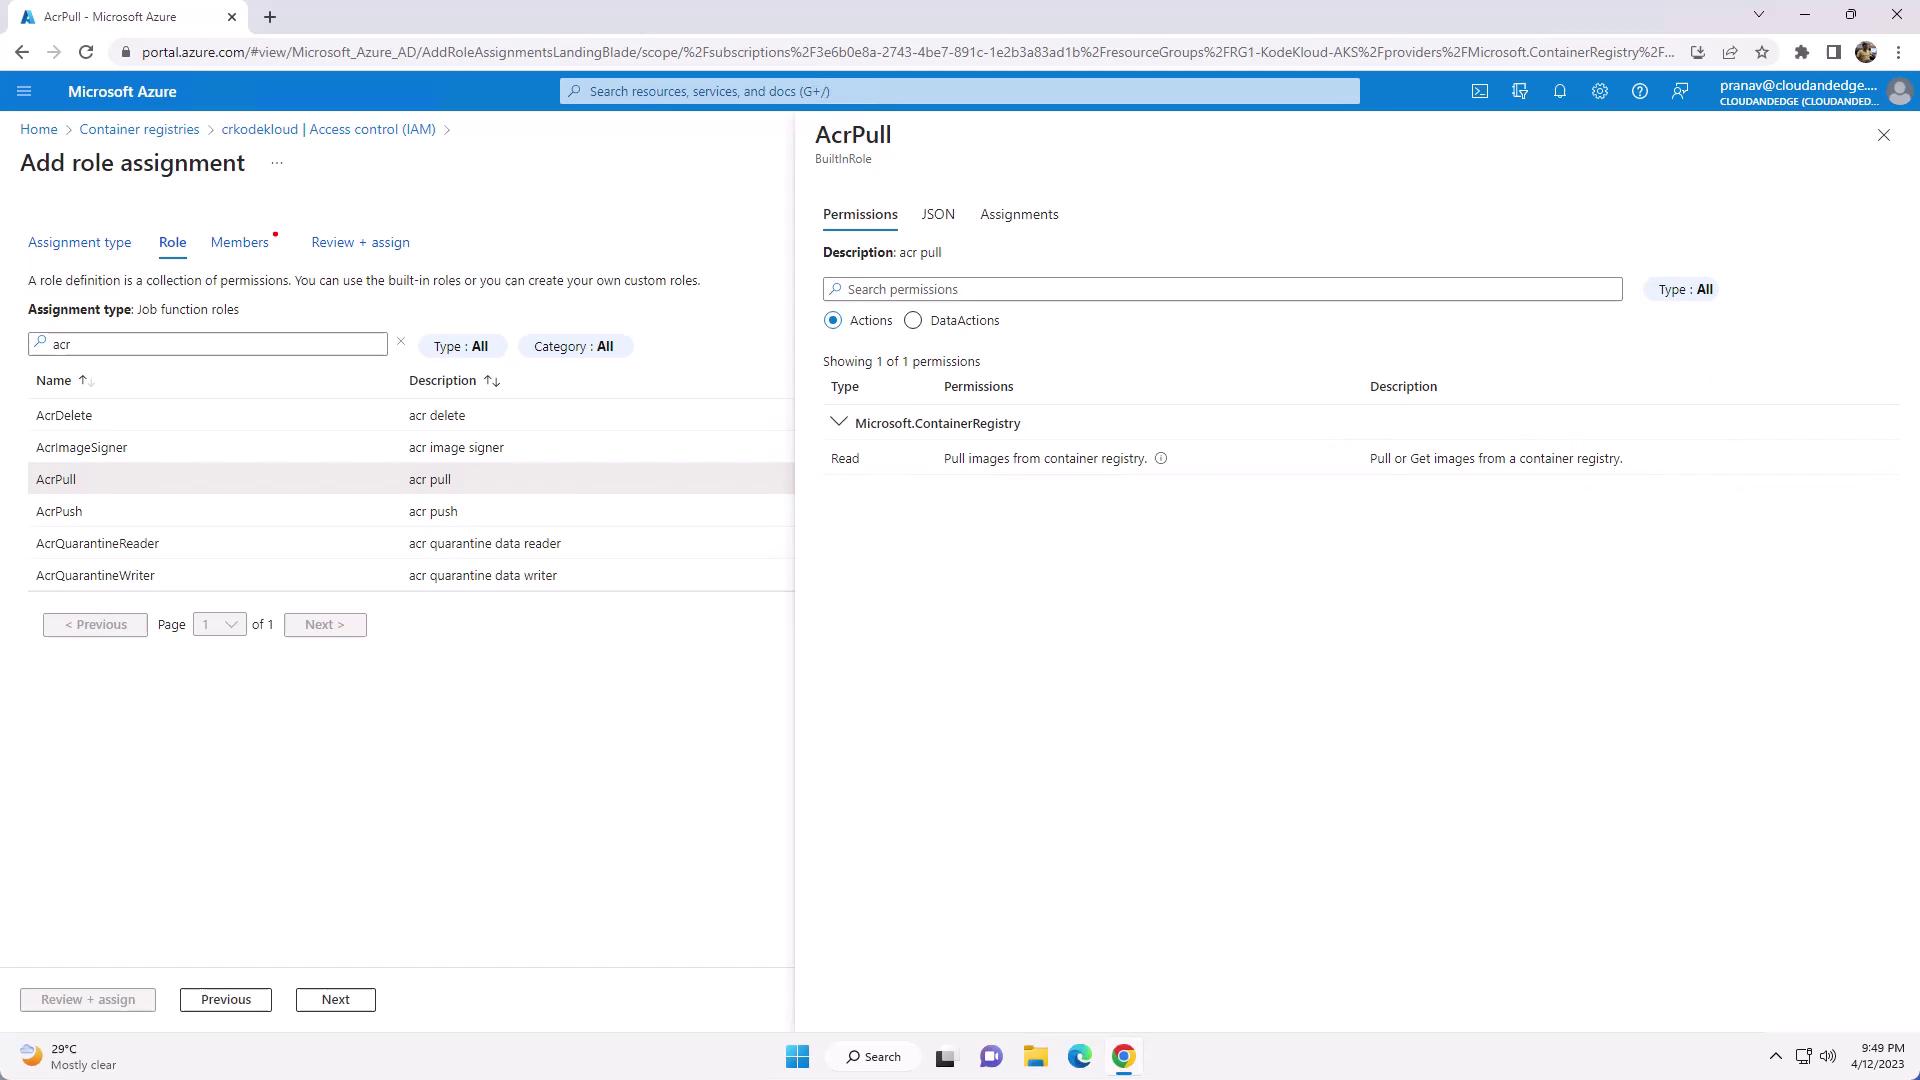
  3. Filter by “ACR” to see built-in roles: AcrPull, AcrPush, Owner.
  4. Click Add role assignment, select the appropriate role, and assign it to your AKS managed identity or service principal.

The image shows a Microsoft Azure portal interface displaying a container registry named "crkodekloud" with no repositories listed. The left sidebar includes various settings and services options.

The image shows the Microsoft Azure portal, specifically the Access Control (IAM) section for a container registry. It lists role assignments, including an "AcrPull" role for a managed identity and an "Owner" role for a user.

The image shows a Microsoft Azure portal interface for adding a role assignment, specifically highlighting the "AcrPull" role, which allows pulling images from a container registry.

Built-in ACR Roles

RolePermissionsDescription
AcrPullregistries/pull/readRead-only access for pulling images
AcrPushregistries/push/write <br> registries/pull/readPush and pull access
OwnerAll container registry operationsFull control over the registry

Here’s the JSON definition of the AcrPush role:

{
  "id": "/providers/Microsoft.Authorization/roleDefinitions/8311e382-0749-4cb8-b61a-304f252e45ec",
  "properties": {
    "roleName": "AcrPush",
    "description": "Allows push and pull operations in Azure Container Registry",
    "assignableScopes": [ "/" ],
    "permissions": [
      {
        "actions": [
          "Microsoft.ContainerRegistry/registries/pull/read",
          "Microsoft.ContainerRegistry/registries/push/write"
        ],
        "notActions": [],
        "dataActions": [],
        "notDataActions": []
      }
    ]
  }
}

Tagging and Pushing Images to ACR

  1. List your local Docker images:

    PS C:\> docker image ls
    
  2. Tag each image for your ACR:

    PS C:\> docker tag kodekloudappcs:v1 crkodekloud.azurecr.io/kodekloudappcs:v1
    PS C:\> docker tag kodekloudappcs:v2 crkodekloud.azurecr.io/kodekloudappcs:v2
    
  3. Verify the new tags:

    PS C:\> docker image ls
    
  4. Authenticate with your registry:

    PS C:\> az acr login --name crkodekloud
    Login Succeeded
    
  5. Push both tags:

    PS C:\> docker push crkodekloud.azurecr.io/kodekloudappcs:v1
    PS C:\> docker push crkodekloud.azurecr.io/kodekloudappcs:v2
    
  6. In the Azure Portal, go to your registry’s Repositories blade to confirm the image tags.

Deploying to Azure Kubernetes Service (AKS)

Deploy version v1 of your application directly from ACR:

kubectl create deployment kodekloudapp \
  --image=crkodekloud.azurecr.io/kodekloudappcs:v1 \
  --replicas=1
kubectl get deployment kodekloudapp

Expose the deployment via an Azure Load Balancer:

kubectl expose deployment kodekloudapp \
  --type=LoadBalancer \
  --port=80 \
  --target-port=80
kubectl get service

Example output:

NAME            TYPE           CLUSTER-IP     EXTERNAL-IP      PORT(S)        AGE
kodekloudapp    LoadBalancer   10.0.199.121   20.247.251.108   80:30895/TCP   2m
kubernetes      ClusterIP      10.0.0.1       <none>           443/TCP        2d

Open the EXTERNAL-IP in your browser to verify the application is running.


Watch Video

Watch video content

Previous
Scaling the Nodes using Azure CLI