Use Case: From Internal Networking to External Access
So far, we’ve seen how Pods communicate internally using the Kubernetes network. Consider a scenario where you deploy a Pod running a web application and want an external user to access it. Here’s a quick overview of the setup:- Kubernetes Node IP: 192.168.1.2
- Laptop IP (same network): 192.168.1.10
- Internal Pod Network: 10.244.0.0
- Pod IP: 10.244.0.2
curl to reach the Pod:
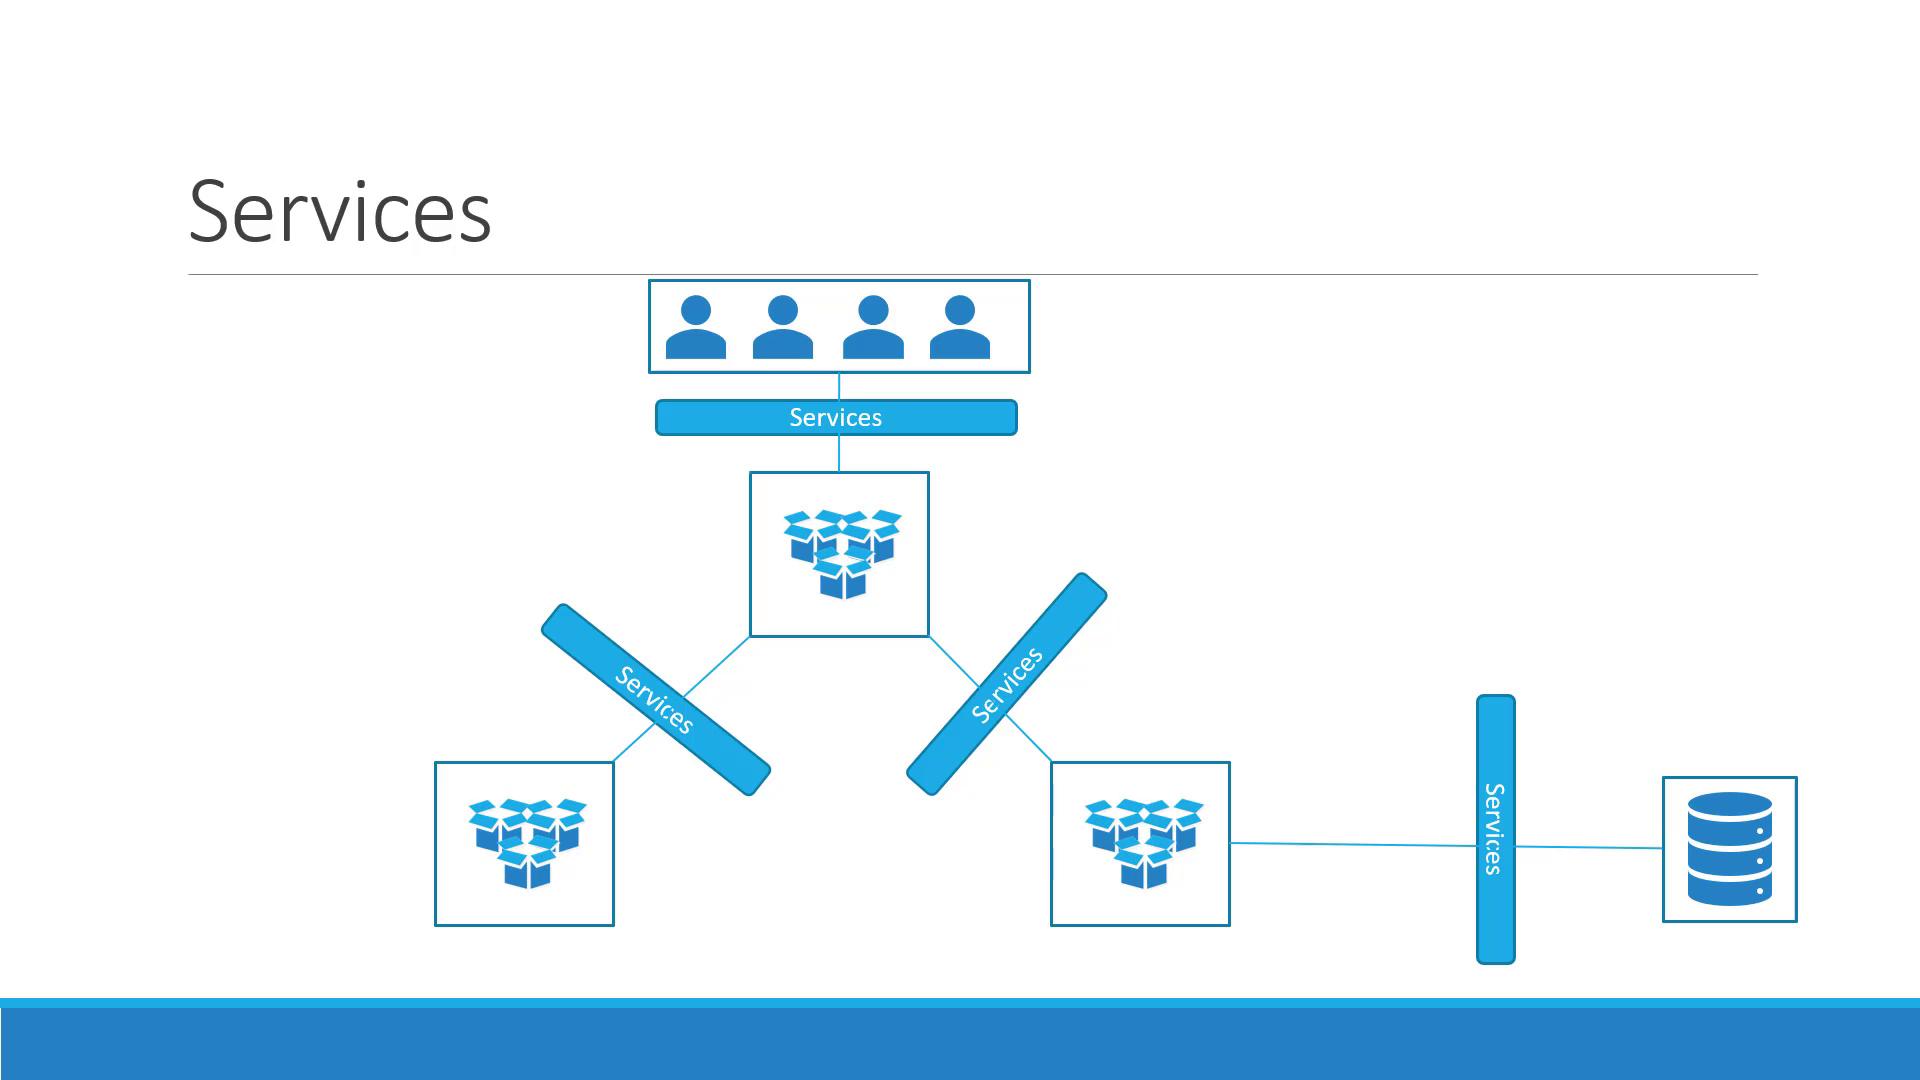
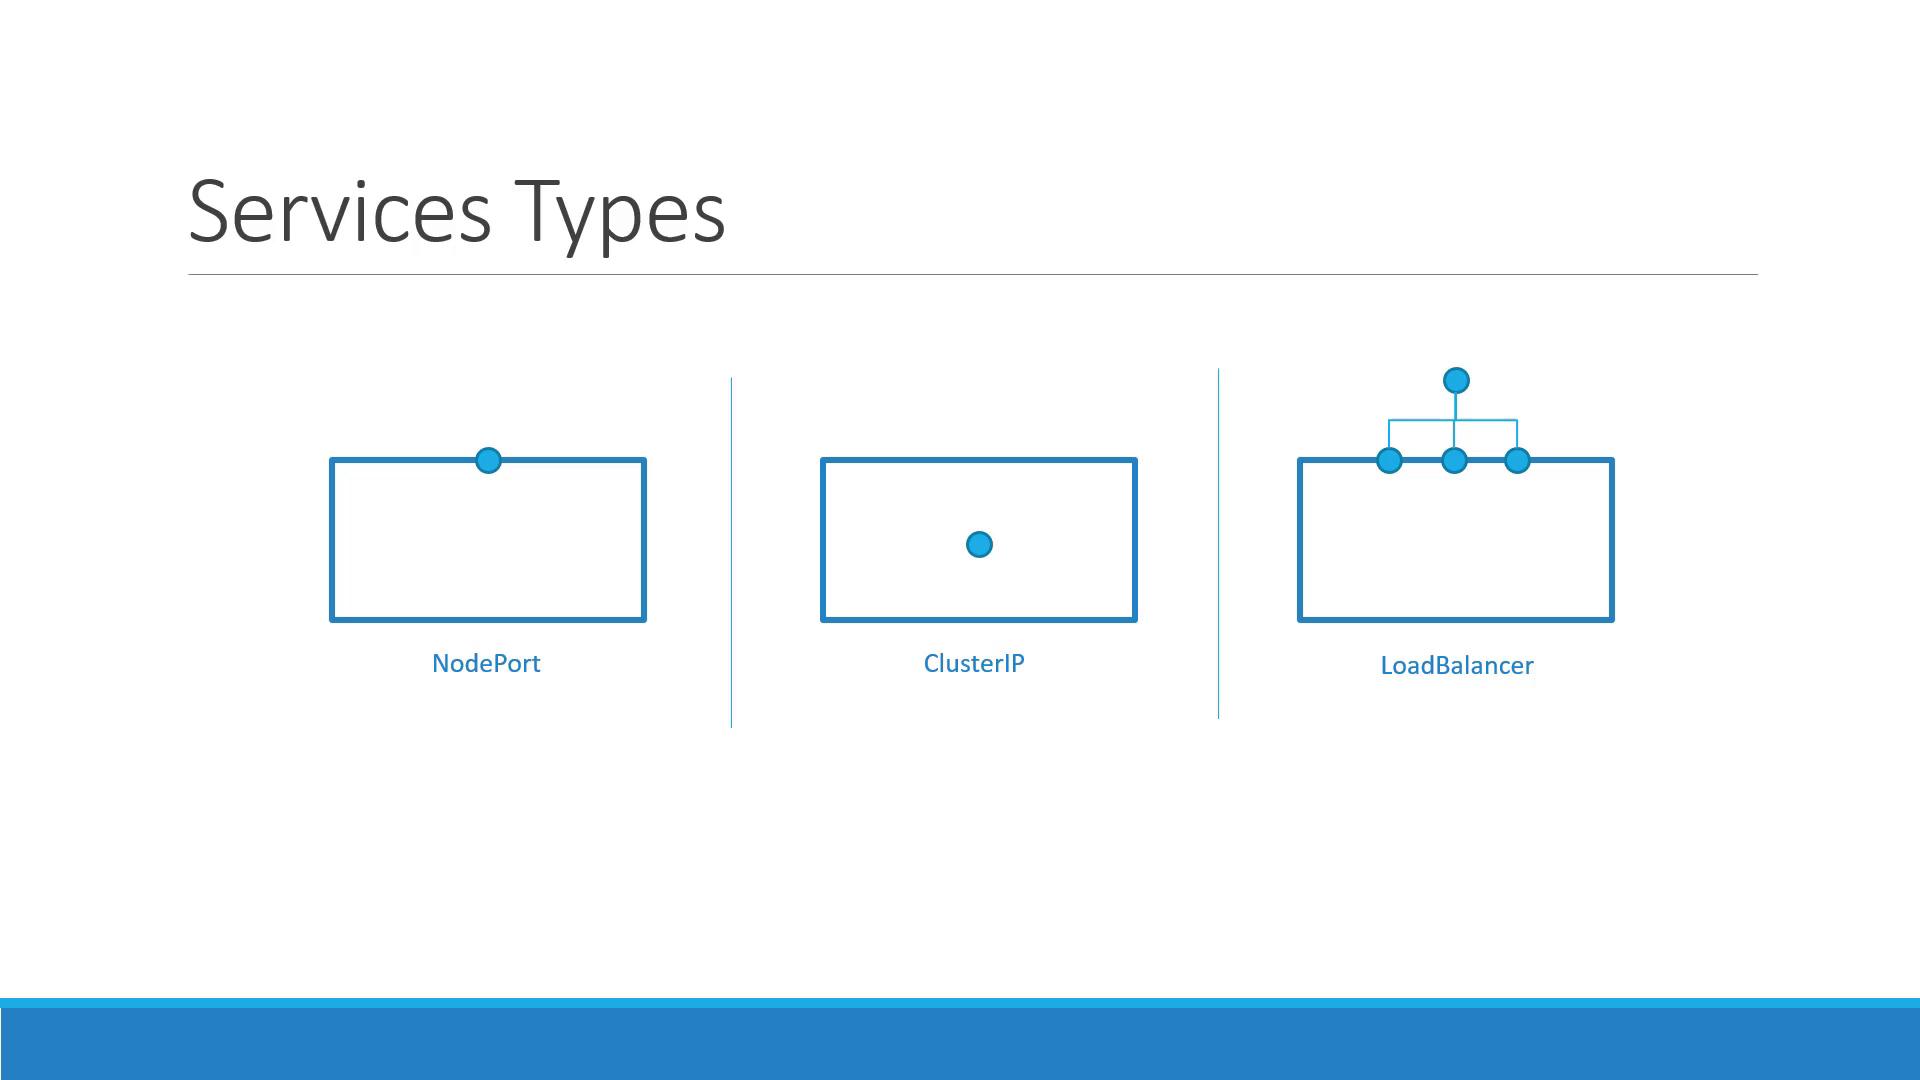
Types of Kubernetes Services
Kubernetes supports several service types, each serving a unique purpose:- NodePort: Maps a port on the node to a port on a Pod.
- ClusterIP: Creates a virtual IP for internal communication between services (e.g., connecting front-end to back-end servers).
- LoadBalancer: Provisions an external load balancer (supported in cloud environments) to distribute traffic across multiple Pods.
Remember: The NodePort service type maps a specific node port (e.g., 30008) to the target port on your Pod (e.g., 80). This provides external access while keeping internal port targeting intact.
NodePort Service Breakdown
With a NodePort service, there are three key ports to consider:- Target Port: The port on the Pod where the application listens (e.g., 80).
- Port: The virtual port on the service within the cluster.
- NodePort: The external port on the Kubernetes node (by default in the range 30000–32767).
Creating a NodePort Service
The process of creating a NodePort service begins with defining the service in a YAML file. The definition file follows a similar structure to those used for Deployments or ReplicaSets, including API version, kind, metadata, and spec. Below is an example YAML file that defines a NodePort service:targetPortspecifies the Pod’s application port.portis the port on the service that acts as a virtual server port within the cluster.nodePortmaps the external request to the specific port on the node (ensure it’s between 30000 and 32767).
targetPort, it defaults to the same value as port. Similarly, if nodePort isn’t provided, Kubernetes automatically assigns one.
However, this YAML definition does not link the service to any Pods. To connect the service to specific Pods, a selector is used, just as in ReplicaSets or Deployments. Consider the following Pod definition:
service-definition.yml and create the service using:
curl with the node IP and NodePort:
Kubernetes Services in Production
In a production environment, your application is likely spread across multiple Pods for high availability and load balancing. When Pods share matching labels, the service automatically detects and routes traffic to all endpoints. Kubernetes employs a round-robin (or random) algorithm to distribute incoming requests, serving as an integrated load balancer. Furthermore, even if your Pods are spread across multiple nodes, Kubernetes ensures that the target port is mapped on all nodes. This means you can access your web application using the IP of any node along with the designated NodePort, providing reliable external connectivity.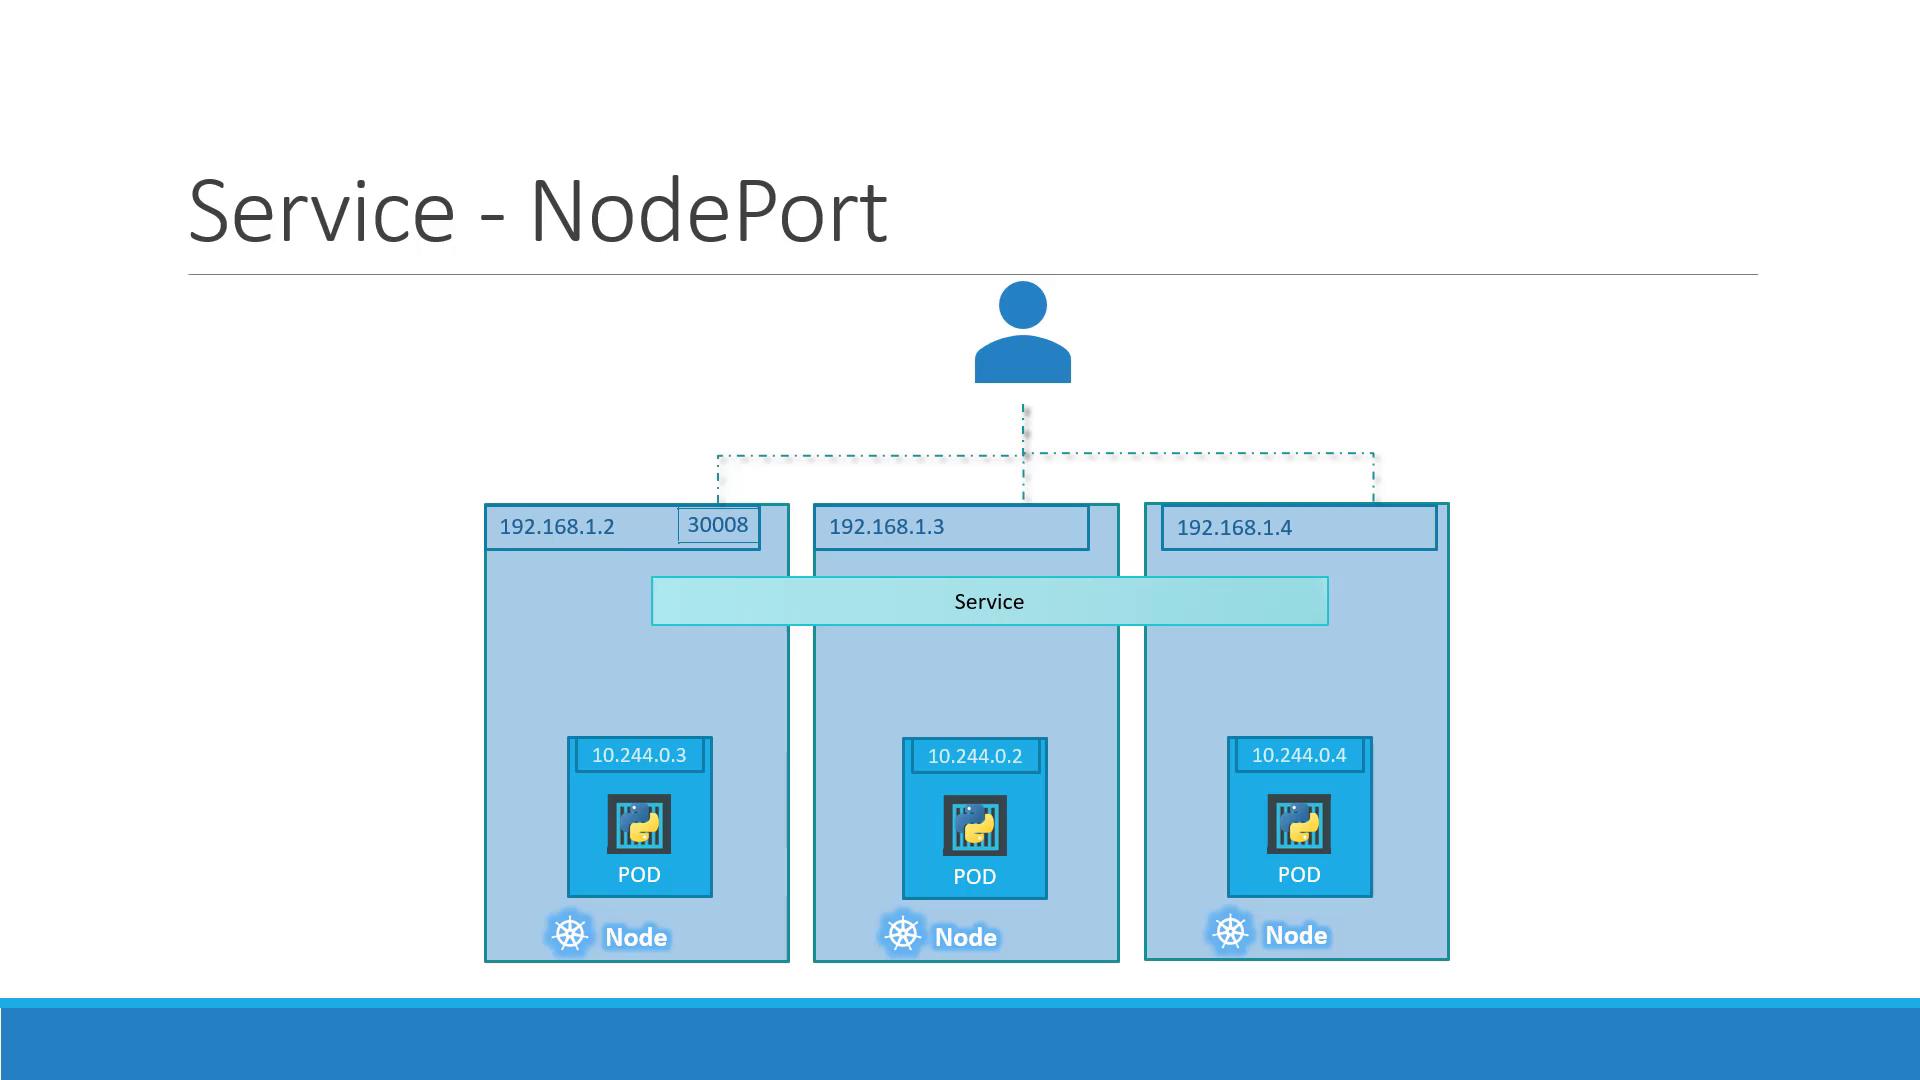
Regardless of whether your application runs on a single Pod on one node, multiple Pods on a single node, or Pods spread across several nodes, the service creation process remains consistent. Kubernetes automatically updates the service endpoints when Pods are added or removed, ensuring a flexible and scalable infrastructure.
Summary
This article has provided a comprehensive introduction to Kubernetes NodePort services, covering the following key points:- The purpose and importance of Kubernetes services in enabling both internal and external communications.
- A detailed explanation of how NodePort services work and the roles of targetPort, service port, and nodePort.
- Step-by-step instructions on creating a NodePort service and linking it to your Pods via selectors.
- An overview of production scenarios where multiple Pods ensure high availability and load balancing.