CKA Certification Course - Certified Kubernetes Administrator
Mock Exams
Mock Exam 1 Step by Step Solutions
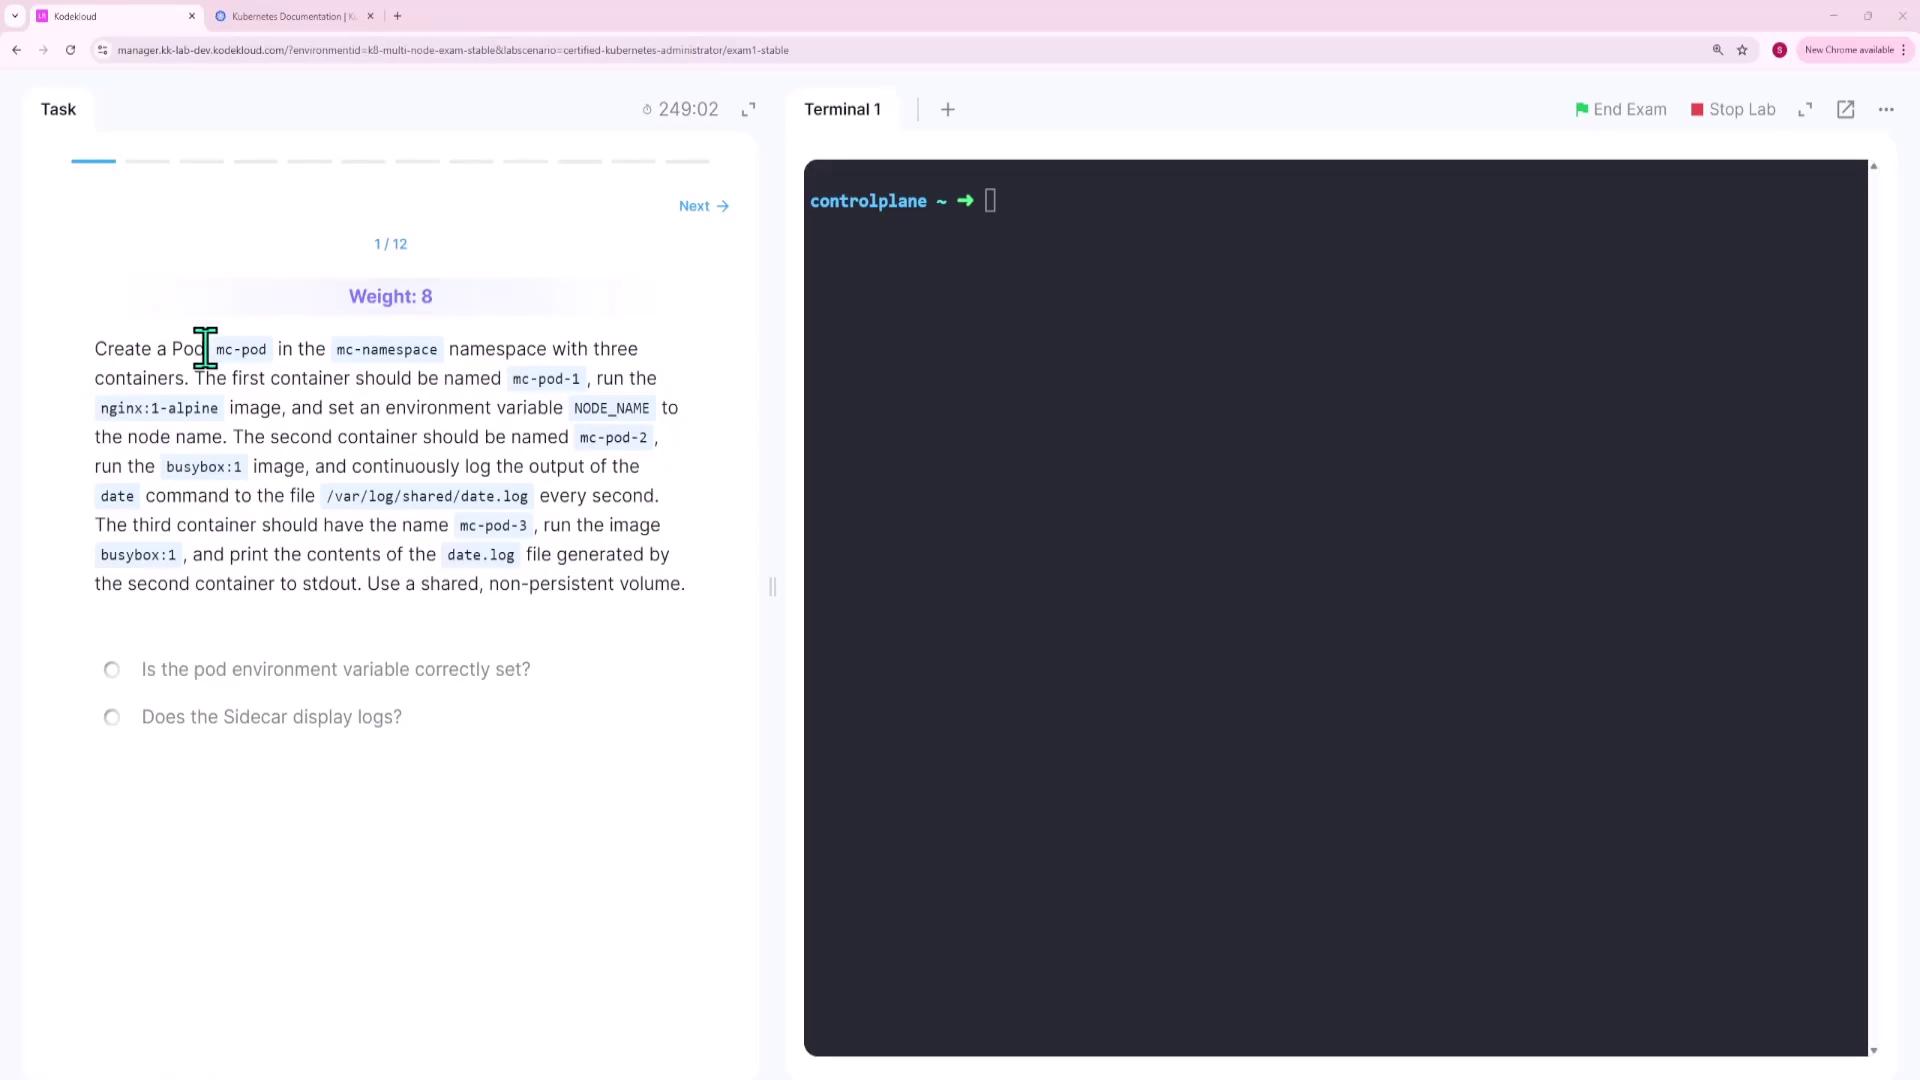
In this article, we walk through the solutions for Mock Exam 1. Each section corresponds to a specific exam question and includes a technical diagram with its original description. Follow the steps carefully to complete each task.
Question 1 – Create a Pod with Three Containers
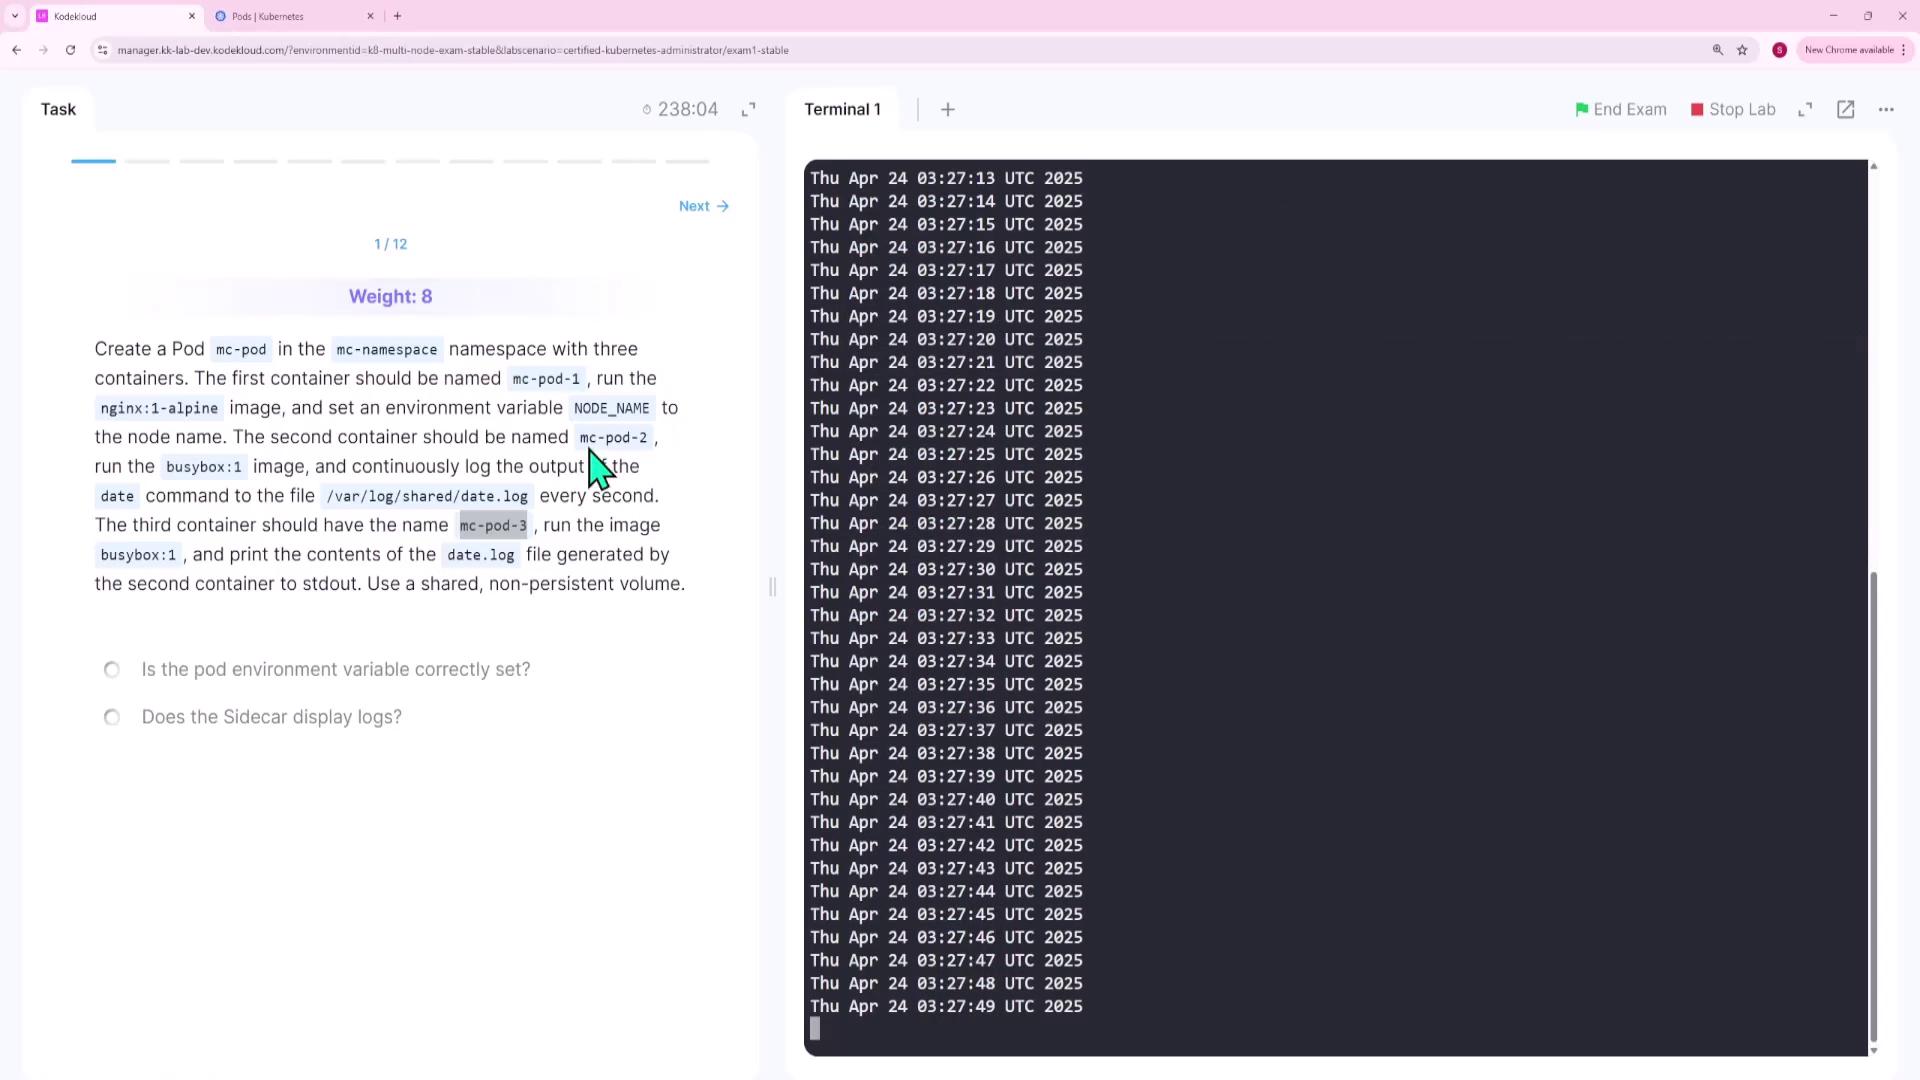
You must create a pod named mc-pod in the MC namespace that includes three containers. You can either consult the documentation for an example pod configuration or use an imperative command with kubectl run and then modify the generated YAML file.

Below is an example of using kubectl run with the --overrides flag to add container definitions. The --dry-run=client flag outputs the YAML for further editing:
kubectl run mc-pod-1 --image=nginx:1-alpine --env=NODE_NAME=$(POD_NAME) --overrides='
{
  "apiVersion": "v1",
  "spec": {
    "containers": [
      {
        "name": "mc-pod-2",
        "image": "busybox:1",
        "command": [
          "sh",
          "-c",
          "while true; do date >> /var/log/shared/date.log; sleep 1; done"
        ]
      },
      {
        "name": "mc-pod-3",
        "image": "busybox:1",
        "command": [
          "sh",
          "-c",
          "tail -f /var/log/shared/date.log"
        ]
      }
    ]
  }
}'
Alternatively, you can generate a base YAML file:
kubectl run mc-pod --image=nginx:1-alpine --dry-run=client -o yaml > question1.yaml
After generating the file, update it as follows:
Rename the pod: Change its name to mc-pod (and remove unnecessary labels and creation timestamps).
Update the first container: Rename it to mc-pod-1 and inject an environment variable (
NODE_NAME) whose value is dynamically set from thespec.nodeNamefield. The YAML snippet becomes:apiVersion: v1 kind: Pod metadata: name: mc-pod spec: containers: - image: nginx:1-alpine name: mc-pod-1 env: - name: NODE_NAME valueFrom: fieldRef: fieldPath: spec.nodeName resources: {}Define the second container: Use the
busybox:1image with the following command:- name: mc-pod-2 image: busybox:1 command: - "sh" - "-c" - "while true; do date >> /var/log/shared/date.log; sleep 1; done"Define the third container: Use the
busybox:1image to tail the shared log file:- name: mc-pod-3 image: busybox:1 command: - "sh" - "-c" - "tail -f /var/log/shared/date.log"Add a shared volume: Since containers 2 and 3 need to share the same filesystem, add a non-persistent volume using
emptyDirand mount it on/var/log/sharedfor both containers. The final YAML is:apiVersion: v1 kind: Pod metadata: name: mc-pod spec: volumes: - name: shared-volume emptyDir: {} containers: - image: nginx:1-alpine name: mc-pod-1 env: - name: NODE_NAME valueFrom: fieldRef: fieldPath: spec.nodeName resources: {} - name: mc-pod-2 image: busybox:1 command: - "sh" - "-c" - "while true; do date >> /var/log/shared/date.log; sleep 1; done" volumeMounts: - name: shared-volume mountPath: /var/log/shared - name: mc-pod-3 image: busybox:1 command: - "sh" - "-c" - "tail -f /var/log/shared/date.log" volumeMounts: - name: shared-volume mountPath: /var/log/shared dnsPolicy: ClusterFirst restartPolicy: Always
After saving and applying this configuration, verify the pod’s status and check the logs of container mc-pod-3. Its output should display the continuously appended date entries from container mc-pod-2.

Question 2 – Prepare Node One for Kubernetes
For this task, you will perform several actions on node one.
SSH into node one using the provided credentials:
ssh node01
# Accept the host key and provide the password when prompted.
Switch to the root user (if necessary):
sudo suNavigate to the
/rootdirectory and locate the CRI Docker package (e.g.,cri-docker_0.3.16.3-0.debian.deb).Install the CRI Docker package:
dpkg -i ./cri-docker_0.3.16.3-0.debian.debStart the CRI Docker service:
systemctl start cri-dockerVerify the service status:
systemctl status cri-dockerEnable the service to start on boot:
systemctl enable cri-docker
Ensure that the service is active (running) and enabled.
Note
If you encounter any issues with the service, recheck the installation and confirm your package file's integrity.
Question 3 – Save Vertical Pod Autoscaler CRDs
On the control plane node, list all Custom Resource Definitions (CRDs) related to the Vertical Pod Autoscaler and save their names to /root/vpa-crds.txt.
Retrieve all CRDs and filter for “vertical”:
kubectl get crd | grep -i verticalExpected output:
verticalpodautoscalercheckpoints.autoscaling.k8s.io    2025-04-24T03:13:05Z
verticalpodautoscalers.autoscaling.k8s.io              2025-04-24T03:13:05Z
Save the CRD names to a file named /root/vpa-crds.txt. The file should include:
verticalpodautoscalercheckpoints.autoscaling.k8s.io
verticalpodautoscalers.autoscaling.k8s.io
No further modifications are required.
Question 4 – Create a Service for the Messaging Application
Expose the messaging application by creating a service named messaging-service on port 6379 within the cluster.
Verify that the messaging pod is running:
kubectl get podExpose the messaging pod:
kubectl expose pod messaging --port=6379 --name=messaging-serviceConfirm the service creation by describing it:
kubectl describe service messaging-service
The output should list the service as a ClusterIP service on port 6379 with endpoints matching the messaging pod’s IP.
Question 5 – Create a Deployment for the HR Web Application
Create a deployment named hr-web-app using the image kodekloud/webapp-color with two replicas.
Run the following command:
kubectl create deployment hr-web-app --image=kodekloud/webapp-color --replicas=2Verify the deployment status:
kubectl get deployment hr-web-app
Ensure that both replicas become available.
Question 6 – Fix the Faulty Init Container in the Orange Pod
The pod named orange is failing because its init container is crashing with exit code 127 due to a typo in the command (sleeep instead of sleep).
Inspect the pod logs to identify the error:
kubectl logs orange -c init-myserviceExpected error output:
sh: sleeep: not foundRetrieve the pod configuration and save it to a file:
kubectl get pod orange -o yaml > question6.yamlEdit the file
question6.yamlto correct the command in the init container. Modify the snippet to:initContainers: - name: init-mysvc image: busybox command: - "sh" - "-c" - "sleep 2"Force update the pod with the corrected configuration:
kubectl replace -f question6.yaml --forceVerify the pod status to ensure it transitions to a running state and the init container completes successfully.
Question 7 – Expose HR Web App via a NodePort Service
Expose the hr-web-app deployment as a service named hr-web-app-service to make it accessible on port 30082 from the nodes. Note that the web application listens internally on port 8080.
Generate a NodePort service configuration with dry-run:
kubectl expose deployment hr-web-app --type=NodePort --port=8080 --name=hr-web-app-service --dry-run=client -o yaml > question7.yamlEdit
question7.yamlto include thenodePort: 30082under the ports section as shown below:apiVersion: v1 kind: Service metadata: name: hr-web-app-service labels: app: hr-web-app spec: type: NodePort selector: app: hr-web-app ports: - port: 8080 targetPort: 8080 nodePort: 30082Apply the updated service configuration:
kubectl apply -f question7.yamlVerify the service details:
kubectl describe service hr-web-app-service
Question 8 – Create a Persistent Volume
Create a persistent volume named pv-analytics with the following specifications:
- Capacity: 100Mi
- Access Mode: ReadWriteMany
- Type: hostPath using the directory
/pv/data-analytics
Create a YAML file (e.g.,
question8.yaml) with the following content:apiVersion: v1 kind: PersistentVolume metadata: name: pv-analytics spec: capacity: storage: 100Mi volumeMode: Filesystem accessModes: - ReadWriteMany hostPath: path: /pv/data-analyticsApply the configuration:
kubectl apply -f question8.yamlVerify that the persistent volume is available:
kubectl get pv
Question 9 – Create a Horizontal Pod Autoscaler (HPA)
Create an HPA for the deployment kkapp-deploy in the default namespace with the following configuration:
- CPU Utilization: Maintain an average of 50%
- Replicas: Scale between 2 and 10 pods
- Stabilization Window: 300 seconds when scaling down
Prepare a YAML file (e.g.,
webapp-hpa.yaml) with this content:apiVersion: autoscaling/v2 kind: HorizontalPodAutoscaler metadata: name: webapp-hpa namespace: default spec: scaleTargetRef: apiVersion: apps/v1 kind: Deployment name: kkapp-deploy minReplicas: 2 maxReplicas: 10 metrics: - type: Resource resource: name: cpu target: type: Utilization averageUtilization: 50 behavior: scaleDown: stabilizationWindowSeconds: 300Apply the HPA configuration:
kubectl apply -f webapp-hpa.yamlCheck the HPA status:
kubectl get hpa
Question 10 – Create a Vertical Pod Autoscaler (VPA)
Create a Vertical Pod Autoscaler that automatically adjusts CPU and memory requests for the deployment analytics-deployment in the default namespace. The VPA should run in auto mode.
Create a YAML file (e.g.,
question10.yaml) with the following content:apiVersion: autoscaling.k8s.io/v1 kind: VerticalPodAutoscaler metadata: name: analytics-vpa namespace: default spec: targetRef: apiVersion: apps/v1 kind: Deployment name: analytics-deployment updatePolicy: updateMode: "Auto"Apply the VPA configuration:
kubectl apply -f question10.yamlVerify that the VPA has been created:
kubectl get vpa
Question 11 – Create a Kubernetes Gateway Resource
Create a Gateway resource for the web application.
Create a YAML file (e.g.,
question11.yaml) with the following content:apiVersion: gateway.networking.k8s.io/v1 kind: Gateway metadata: name: web-gateway namespace: nginx-gateway spec: gatewayClassName: nginx listeners: - name: http protocol: HTTP port: 80Apply the gateway configuration:
kubectl apply -f question11.yamlVerify that the Gateway resource is available in the
nginx-gatewaynamespace:kubectl get gateway -n nginx-gateway
Question 12 – Update a Helm Chart Deployment
A coworker deployed an NGINX Helm chart called kk-dash-mock-one in the kk-dash-ns namespace. An update to the chart is available, and you need to update the Helm repository and upgrade the release to version 18.1.15.
List the current Helm releases in the concerned namespace:
helm list -n kk-nsCheck your chart repositories:
helm repo listUpdate all repositories to fetch the latest chart versions:
helm repo updateSearch the repository for available versions of the NGINX chart:
helm search repo nginx --versionsUpgrade the release with the specified chart version:
helm upgrade kk-mock1 kk-mock1/nginx --version 18.1.5 -n kk-nsVerify the upgrade by listing the release again:
helm list -n kk-ns
By following these detailed steps and verifying each component with the respective kubectl and helm commands, you will successfully complete all the tasks for Mock Exam 1.
Watch Video
Watch video content