CKA Certification Course - Certified Kubernetes Administrator
Scheduling
Admission Controllers 2025 Updates
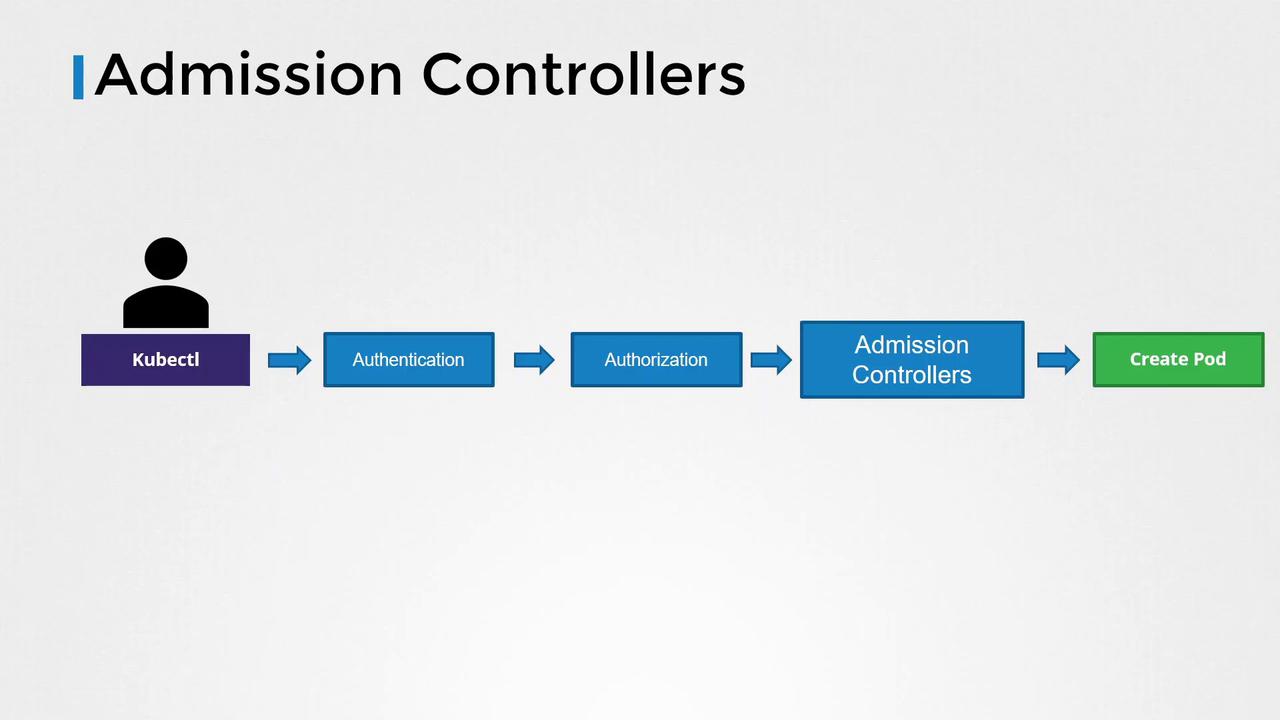
In this lesson, we explore admission controllers in Kubernetes and understand how they play a crucial role in enforcing security policies beyond basic RBAC. When you execute commands using the kubectl utility—such as creating a pod—the request is first sent to the API server, which then processes and persists the data in the etcd database.
Authentication and Authorization Flow
When a command like creating a pod is issued, the following steps occur:
Authentication:
The API server authenticates the request. For example, when you run a command via kubectl, the KubeConfig file provides the necessary certificates. Consider the following configuration:> cat ~/.kube/config apiVersion: v1 clusters: - cluster: certificate-authority-data: LS0tCIlRjdG......BQyMjAwFURs9tCg== server: https://example.com name: example-clusterAuthorization (RBAC):
Once authenticated, the API server checks if the user is authorized to perform the requested action. Role-based Access Control (RBAC) is commonly used here. For instance, if a user is assigned the following role:apiVersion: rbac.authorization.k8s.io/v1 kind: Role metadata: name: developer rules: - apiGroups: [""] resources: ["pods"] verbs: ["list", "get", "create", "update", "delete"]The user is permitted to list, get, create, update, or delete pods. RBAC can also restrict access to specific resource names or namespaces:
apiVersion: rbac.authorization.k8s.io/v1
kind: Role
metadata:
  name: developer
rules:
- apiGroups: [""]
  resources: ["pods"]
  verbs: ["create"]
  resourceNames: ["blue", "orange"]
Note
These RBAC rules are enforced at the API level and determine which API operations a user can access.
The Role of Admission Controllers
While RBAC handles basic authorization, it does not offer advanced validations or mutations. Admission controllers step in to provide additional security by:
- Validating pod specifications (e.g., ensuring that images are not from a public Docker Hub registry or enforcing the prohibition of the "latest" tag).
- Rejecting pods running containers as the root user, or enforcing specific Linux capabilities.
- Ensuring required metadata like labels is included.
Admission controllers can validate requests, modify configurations, or perform extra operations before the resources are persisted to etcd.

Built-In Admission Controllers
Some of the built-in admission controllers in Kubernetes include:
- AlwaysPullImages: Forces image pulling on each pod creation.
- DefaultStorageClass: Automatically assigns a default storage class to PVCs if none is specified.
- EventRateLimit: Limits the number of concurrent API server requests to prevent overload.
- NamespaceExists: Rejects requests to operate in non-existent namespaces.
Detailed Example: Namespace Existence Check
Consider attempting to create a pod in a non-existent namespace named "blue." When you execute:
kubectl run nginx --image nginx --namespace blue
The request proceeds through authentication and authorization, then reaches the admission controllers. The NamespaceExists admission controller checks for the "blue" namespace and rejects the request if it does not exist:
Error from server (NotFound): namespaces "blue" not found
Alternatively, Kubernetes offers the NamespaceAutoProvision admission controller (not enabled by default) to automatically create a missing namespace.
To check the enabled admission controllers, run:
kube-apiserver -h | grep enable-admission-plugins
This command lists the active admission plugins, including defaults such as NamespaceLifecycle, LimitRanger, ServiceAccount, among others.
Configuring Admission Controllers
Enabling Admission Controllers
To add a new admission controller, update the enable-admission-plugins flag on the Kube API server service. For a kubeadm-based setup, modify the kube-apiserver manifest file.
Traditional Kube API Server Service
ExecStart=/usr/local/bin/kube-apiserver \
    --advertise-address=${INTERNAL_IP} \
    --allow-privileged=true \
    --apiserver-count=3 \
    --authorization-mode=Node,RBAC \
    --bind-address=0.0.0.0 \
    --enable-swagger-ui=true \
    --etcd-servers=https://127.0.0.1:2379 \
    --event-ttl=1h \
    --runtime-config=api/all \
    --service-cluster-ip-range=10.32.0.0/24 \
    --service-node-port-range=30000-32767 \
    --v=2 \
    --enable-admission-plugins=NodeRestriction,NamespaceAutoProvision
Kubeadm-Based Setup (API Server as a Pod)
apiVersion: v1
kind: Pod
metadata:
  creationTimestamp: null
  name: kube-apiserver
  namespace: kube-system
spec:
  containers:
  - command:
    - kube-apiserver
    - --authorization-mode=Node,RBAC
    - --advertise-address=172.17.0.107
    - --allow-privileged=true
    - --enable-bootstrap-token-auth=true
    - --enable-admission-plugins=NodeRestriction,NamespaceAutoProvision
    image: k8s.gcr.io/kube-apiserver-amd64:v1.11.3
    name: kube-apiserver
Disabling Admission Controllers
To disable specific admission controllers, use the disable-admission-plugins flag in a similar manner.
Auto-Provisioning a Namespace
Once the admission controller is correctly configured, executing the pod creation command in a previously non-existent namespace "blue" will trigger the NamespaceAutoProvision controller, which will automatically create the namespace and allow the pod creation to succeed. For example:
kubectl run nginx --image nginx --namespace blue
Pod/nginx created!
Listing the namespaces confirms the creation of "blue":
kubectl get namespaces
NAME         STATUS   AGE
blue         Active   3m
default      Active   23m
kube-public  Active   24m
kube-system  Active   24m
Transition from Deprecated Controllers
It is important to note that the NamespaceAutoProvision and NamespaceExists admission controllers have been deprecated. They have been replaced by the NamespaceLifecycle admission controller, which:
- Rejects requests to non-existent namespaces.
- Protects default namespaces (default, kube-system, kube-public) from deletion.
This ensures a robust and consistent namespace management mechanism.
This lesson has provided an in-depth look at how admission controllers enhance Kubernetes security by validating, mutating, and even auto-provisioning resources as required. Head over to the labs to practice working with admission controllers and further solidify your understanding.
For more information, explore the following resources:
| Resource Type | Use Case | Example |
|---|---|---|
| Pod | Basic unit of deployment | kubectl run nginx --image=nginx |
| Deployment | Managed pods with scaling | kubectl create deployment nginx --image=nginx |
| Service | Network access to pods | kubectl expose deployment nginx --port=80 |
Watch Video
Watch video content
Practice Lab
Practice lab