CKA Certification Course - Certified Kubernetes Administrator

Security

TLS Basics

Welcome to this comprehensive lesson on SSL/TLS certificates. In this guide, we will explore the fundamentals of TLS certificates, discuss why they are essential for secure communications, and demonstrate how to configure them for securing SSH and web servers. A TLS certificate establishes trust during a transaction by ensuring that communications are encrypted and that the server is indeed who it claims to be.

Imagine a scenario where a user accesses their online banking application over an unsecured connection. The credentials entered would be transmitted in plain text, making it easy for a hacker spying on the network to intercept and misuse the sensitive data.

The image illustrates a phishing scenario where a user's login credentials are intercepted by a hacker during an online banking session.

To prevent such risks, data is encrypted using encryption keys—a set of random numbers and characters. Initially, symmetric encryption was used, where the same key is responsible for both encrypting and decrypting data. However, transmitting this key over the network to initiate a secure session introduces vulnerabilities, as an attacker intercepting the key could decrypt the data.

This is where asymmetric encryption becomes valuable. Asymmetric encryption uses a pair of keys: a private key and a public key. You can think of these as a private key and a public lock. The private key remains securely with the owner, while the public lock can be shared openly. Data encrypted with the public key can only be decrypted using its corresponding private key, ensuring that intercepted data remains secure.

Before delving into the web server example, let’s explore a simpler use case: securing SSH access using key pairs.

The image illustrates asymmetric encryption, showing a private key, public lock, and a user-password example.

Imagine you need to access a server but want to avoid the security risks associated with passwords. By using key pairs, you can generate a private key (id_rsa) and a public key (id_rsa.pub). The private key stays secure on your device, while the public key is added to the server's SSH authorized keys file. When you initiate an SSH connection, you specify your private key to authenticate.

:::note SSH Key Pair Generation Generate your SSH key pair with the following command: :::

# Generate SSH key pair
ssh-keygen

# Files generated: id_rsa (private key) and id_rsa.pub (public key)

You can review the authorized keys on the server as follows:

cat ~/.ssh/authorized_keys

An example output might appear like:

ssh-rsa AAAAB3NzaC1yc...KhtUBfoTz1BqRV1NThvO0apzEwRQo1mWx user1

To connect securely to the server using your key pair, use:

ssh -i id_rsa user1@server1

If you have multiple servers, simply copy your public key to each server’s authorized keys file so you can authenticate using the same private key on all servers. For additional users who require access, they can generate their own key pairs and have their public keys added to the servers.

Now, let’s return to the web server scenario. With symmetric encryption, the key used for encryption must be sent along with the ciphertext, which introduces risk if intercepted. Asymmetric encryption addresses this by securely transferring the symmetric key. Here’s how the process works for a web server using HTTPS:

  1. The server generates a key pair (private and public keys).
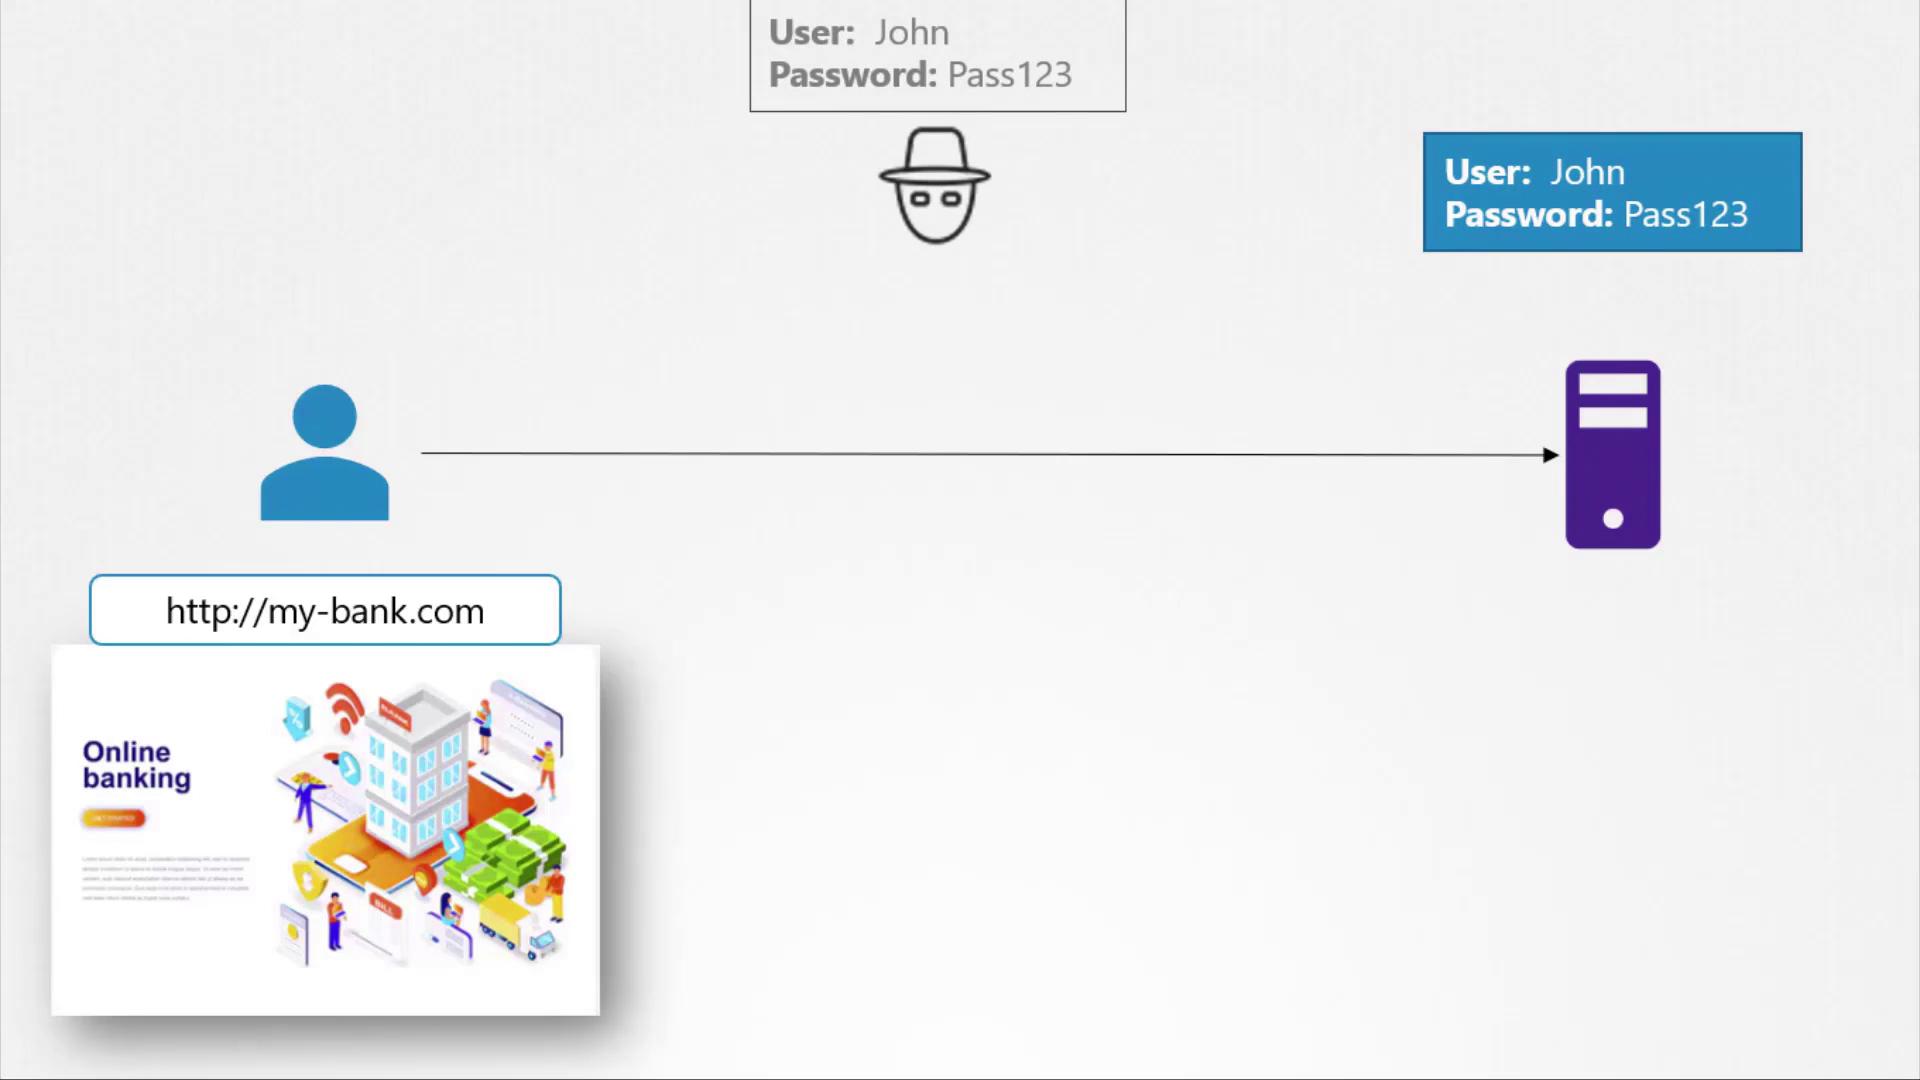
  2. Upon a user's initial HTTPS request, the server sends its public key embedded within a certificate.
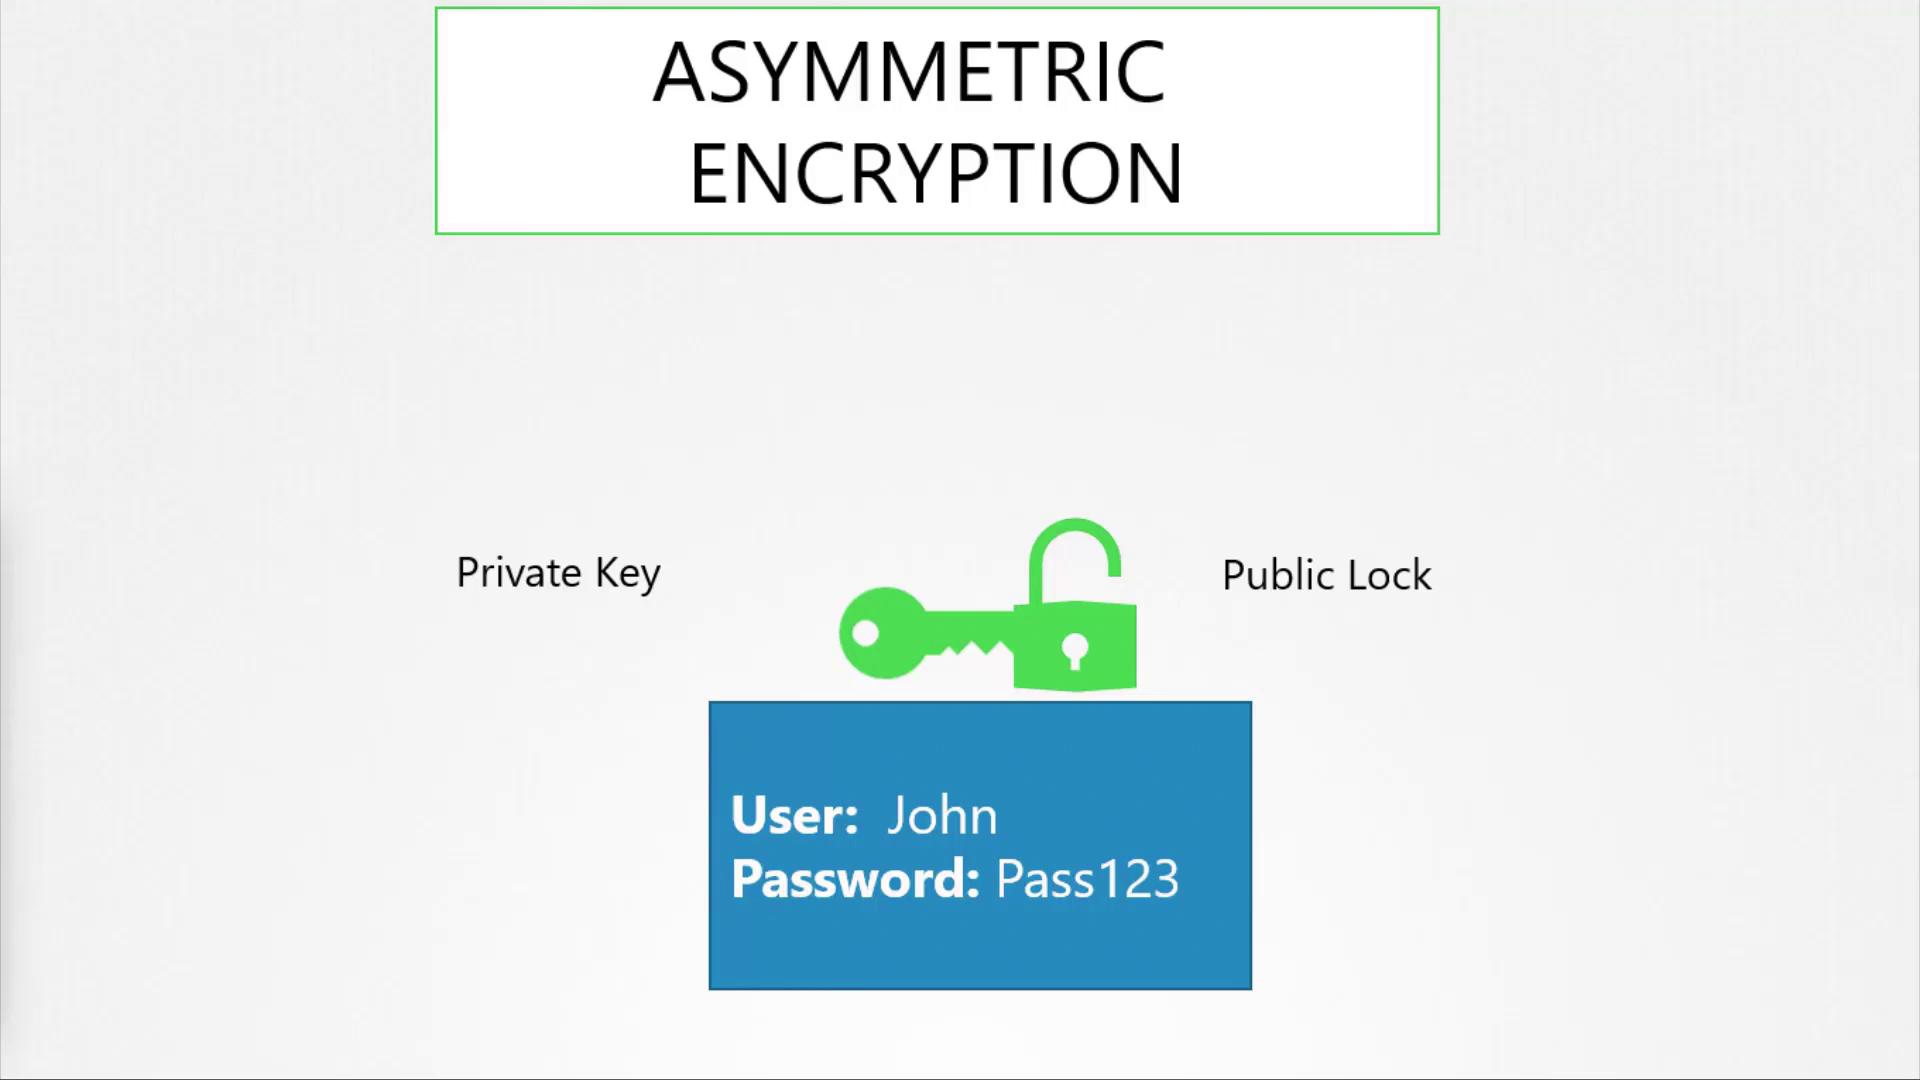
  3. The client's browser encrypts a newly generated symmetric key using the server’s public key.
  4. The encrypted symmetric key is sent back to the server.
  5. The server decrypts the symmetric key using its private key.
  6. All subsequent communications are encrypted with this symmetric key.

For example, to generate a key pair with OpenSSL for encrypting the symmetric key, you can use:

# Generate a private key
openssl genrsa -out my-bank.key 1024

# Extract the public key
openssl rsa -in my-bank.key -pubout > mybank.pem

The above commands demonstrate how to create the necessary keys. Although the original content repeated the process multiple times, we present a single, clear version for simplicity.

Imagine a hacker trying to intercept your bank communications by setting up a counterfeit website. The attacker might generate their own key pair and a self-signed or invalid certificate, tricking your browser into thinking it’s connected to your bank. Modern browsers, however, will alert users if the certificate is untrustworthy.

A certificate contains essential details that help verify its authenticity:

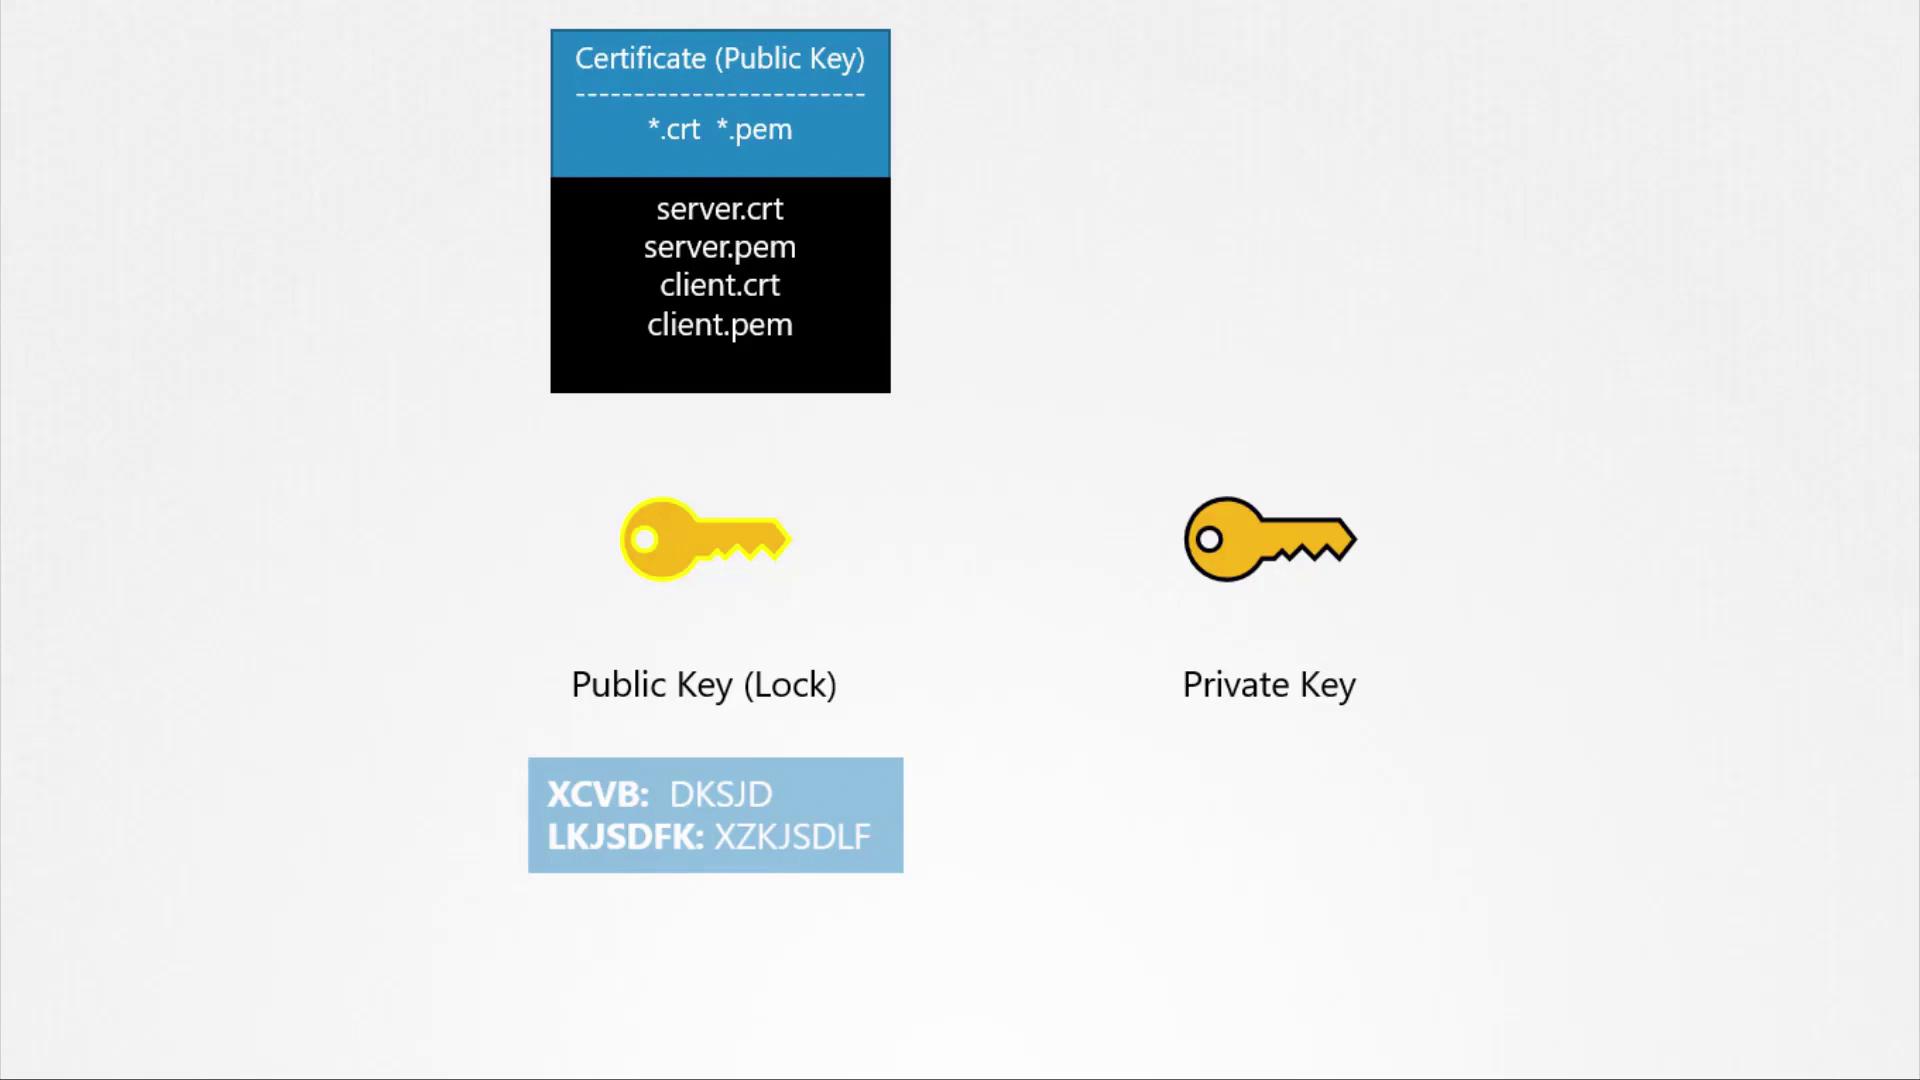
  • Identity of the issuing authority
  • The server’s public key
  • Domain and other related information

Below is an example excerpt from a certificate:

Certificate:
Data:
  Serial Number: 420327018966204255
  Signature Algorithm: sha256WithRSAEncryption
  Issuer: CN=kubernetes
  Validity
    Not After : Feb  9 13:41:28 2020 GMT
  Subject: CN=my-bank.com
  X509v3 Subject Alternative Name:
    DNS:mybank.com, DNS:i-bank.com,
    DNS:we-bank.com,
  Subject Public Key Info:
    00:b9:b0:55:24:fb:a4:ef:77:73:7c:9b

The image shows a digital certificate for "MY-BANK.COM" with details like serial number, issuer, validity, and subject public key information.

Browsers rely on Certificate Authorities (CAs) to sign and validate certificates. Renowned CAs, such as Symantec, DigiCert, Komodo, and GlobalSign, use their private keys to sign certificate signing requests (CSRs). When you generate a CSR for your web server, it is sent to a CA for signing:

openssl req -new -key my-bank.key -out my-bank.csr -subj "/C=US/ST=CA/O=MyOrg, Inc./CN=my-bank.com"

Once your details are validated, the CA signs the certificate and sends it back to be installed on your web server. When a user accesses your website, the process is as follows:

  1. The server presents the certificate.
  2. The browser validates it using pre-installed CA public keys.
  3. Upon successful validation, the browser and server establish a secure session using a symmetric key exchanged via asymmetric encryption.

For internal systems, such as corporate payroll applications, organizations may deploy their own private CA and distribute its public key to employee devices.

:::note Key Points Summary

  • Asymmetric encryption uses a pair of keys (public and private) to securely exchange symmetric keys.
  • SSH access is secured using key pairs.
  • Web servers use CA-signed certificates to establish HTTPS connections.
  • A Certificate Signing Request (CSR) is generated and sent to a CA for signing.
  • Signed certificates, combined with the server’s key pair, secure the communication session. :::

It is important to note that although both keys in an asymmetric pair can encrypt data, only the complementary key can decrypt it. For instance, data encrypted with your private key can be decrypted by anyone with your public key; therefore, it’s crucial to use the correct key for each operation.

Regarding file naming conventions, certificates containing public keys typically have extensions such as .crt or .pem (e.g., server.crt, server.pem or client.crt, client.pem), and private key files usually include "key" in the filename or extension (e.g., server.key or server-key.pem).

The image illustrates public and private keys, showing certificate file types (.crt, .pem) and their roles in encryption.

That concludes this lesson on TLS-Basics. Thank you for reading, and I look forward to seeing you in the next lesson!

Additional Resources

Watch Video

Watch video content

Previous
TLS Introduction