This guide explains how to generate TLS certificates for a Kubernetes cluster using OpenSSL, focusing on CA and client/server certificates.
In this guide, you will learn how to generate TLS certificates for a Kubernetes cluster using OpenSSL. While there are other popular tools such as EasyRSA and CFSSL, we will focus on using OpenSSL to create both Certificate Authority (CA) and client/server certificates. This approach secures the communications within your Kubernetes cluster and ensures certified access.
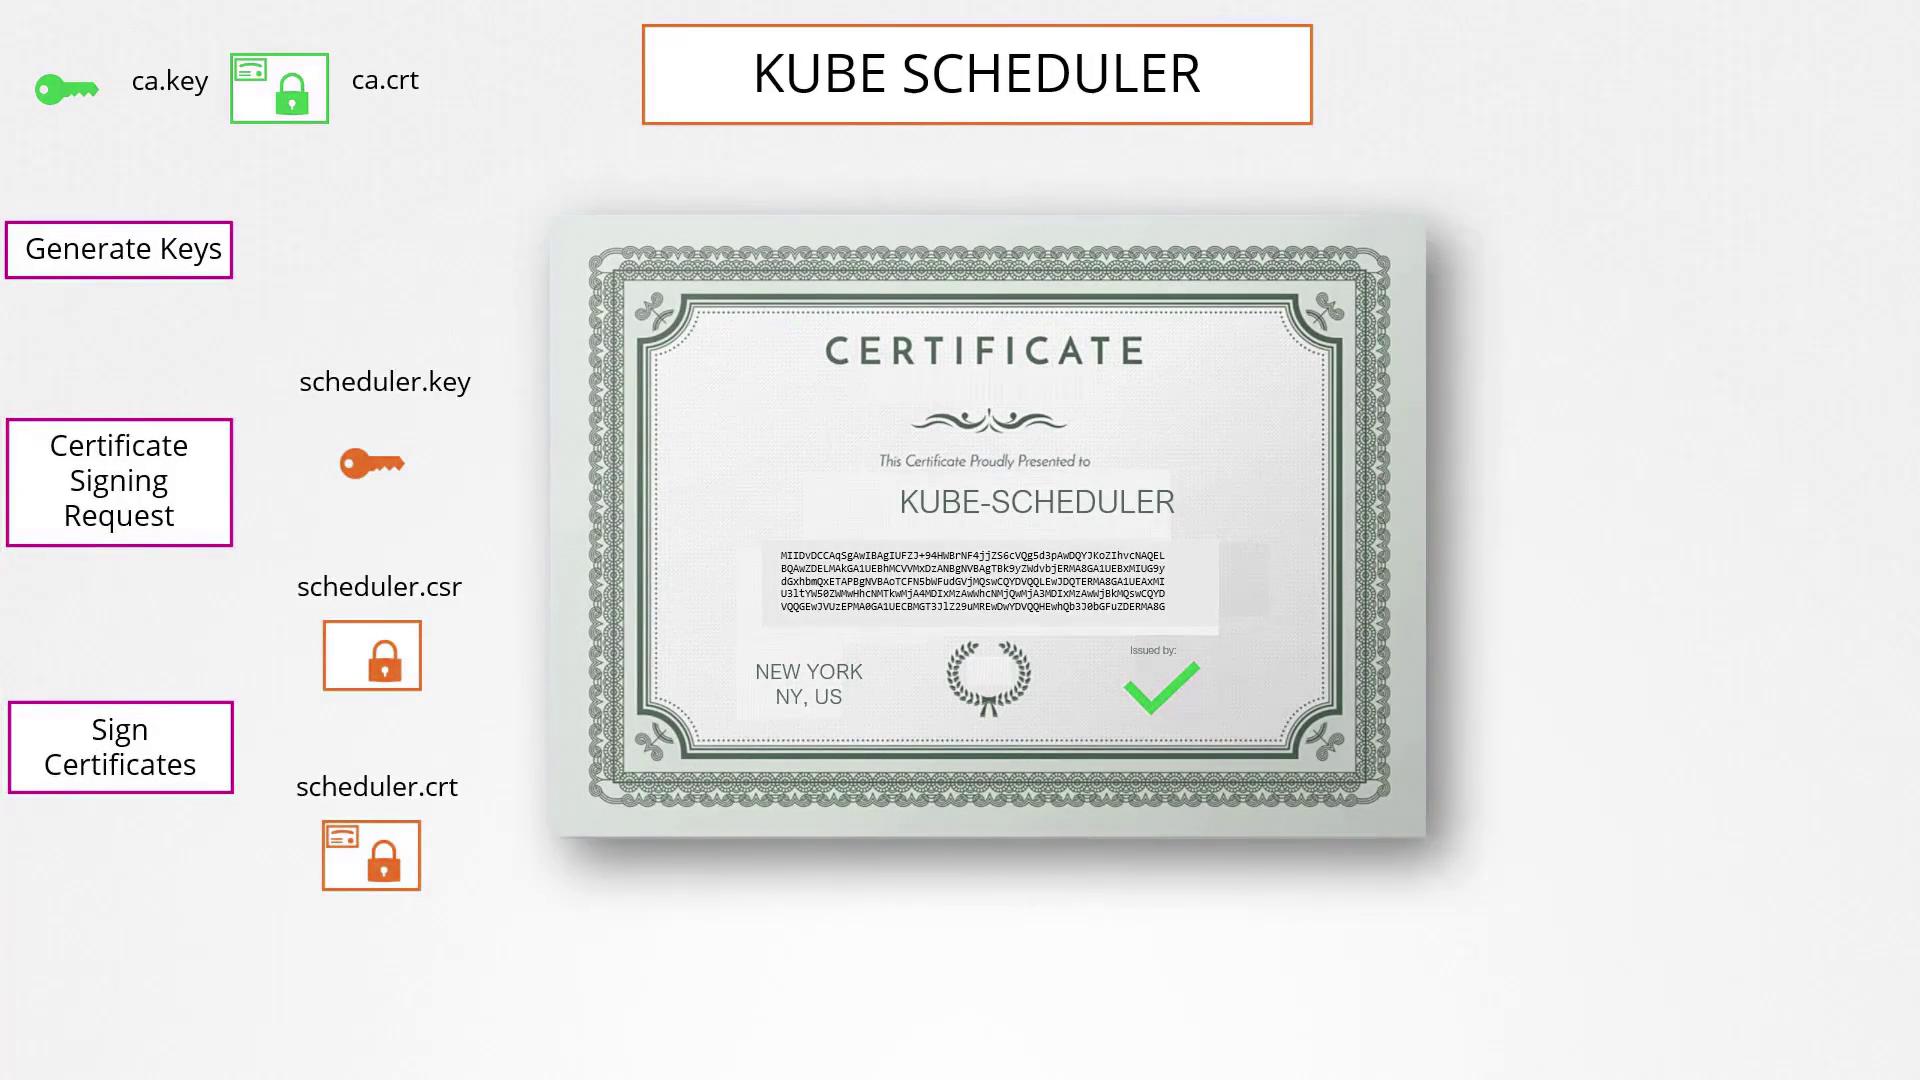
First, create the Certificate Authority (CA) certificates. The process involves generating a private key, creating a Certificate Signing Request (CSR) that includes the CA’s common name, and finally signing the CSR with the private key to produce the CA certificate. The completed process provides the CA with its private key (ca.key) and root certificate (ca.crt), which are essential for subsequently signing other certificates.
Generate a CSR for the admin user specifying the common name (CN) and organizational unit (OU) to reflect group membership (e.g., system:masters). This consistency ensures that the admin identity is properly logged in audit trails and recognized in kubectl commands.
Sign the admin CSR with the CA certificate to produce the final admin certificate.
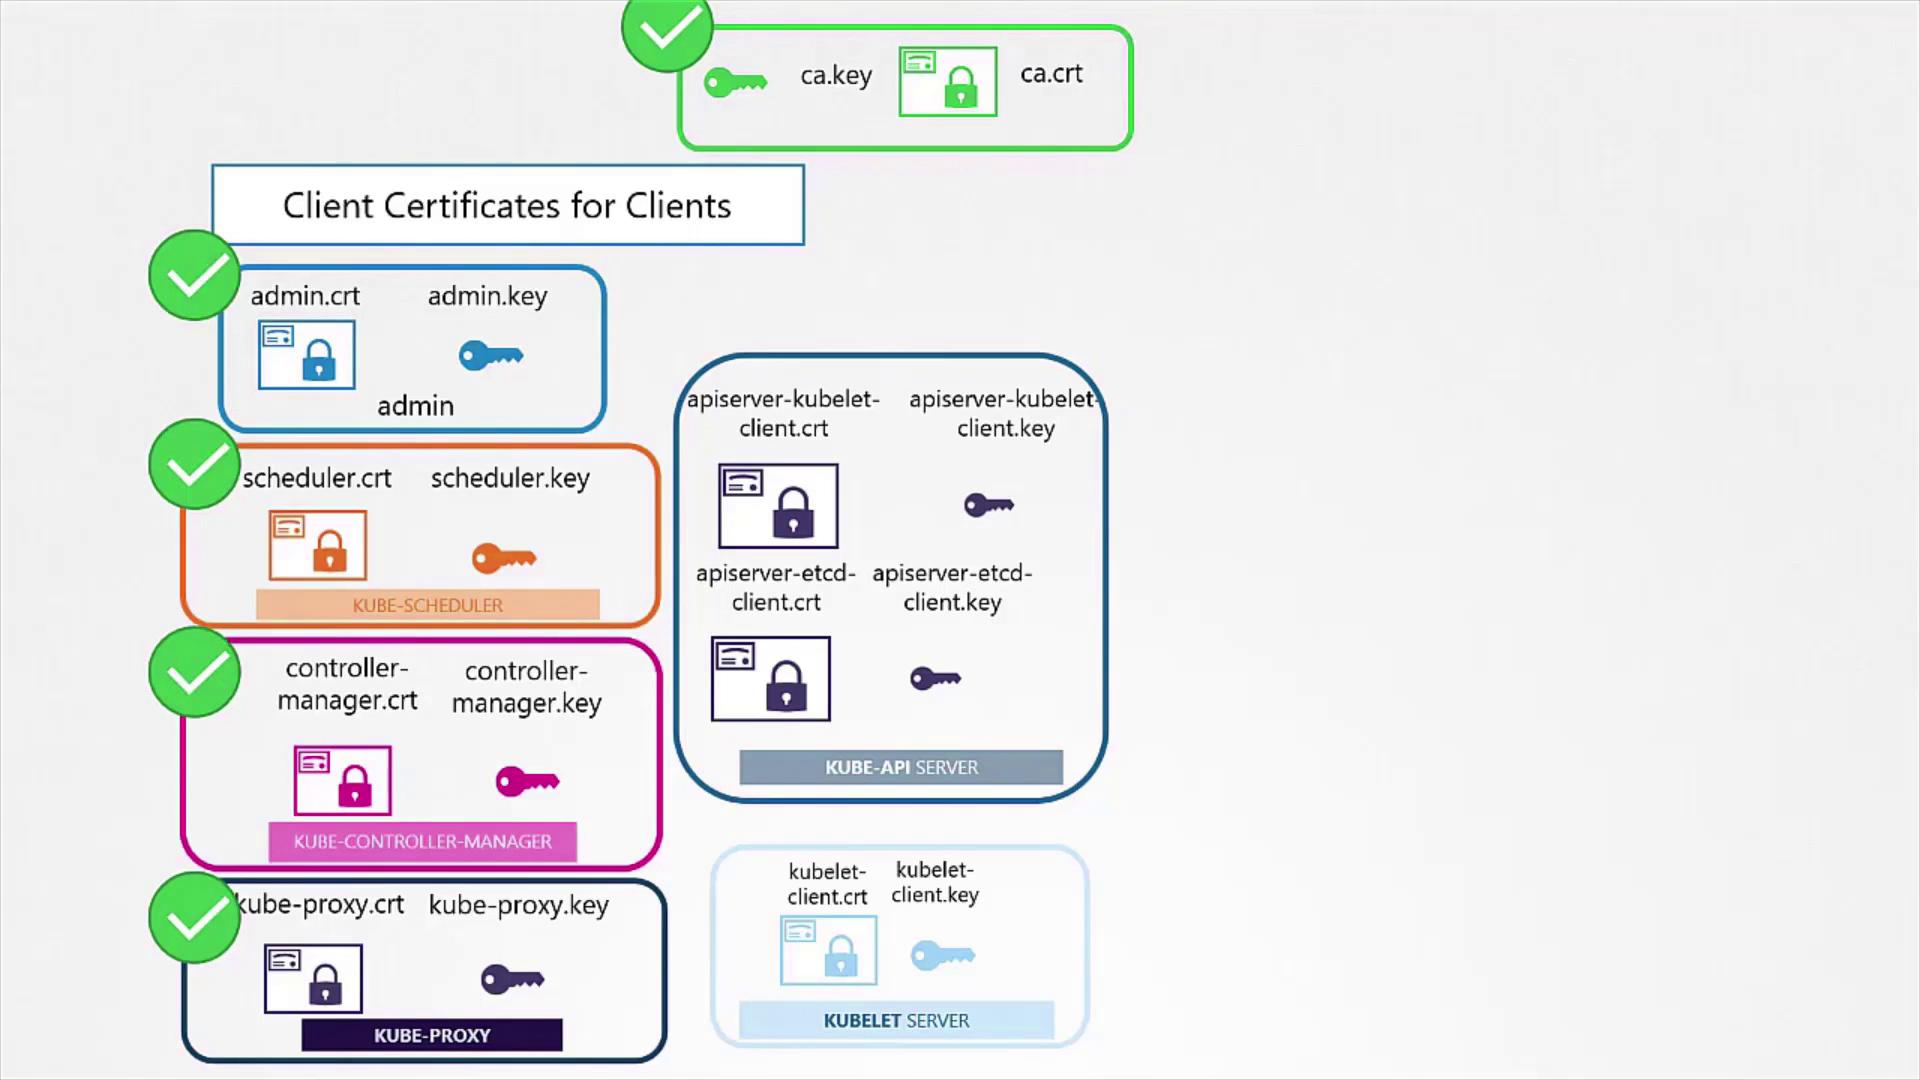
The resulting admin.crt file functions as a secure credential, akin to a username and password pair, for authenticating the admin user with the Kubernetes API server.A similar process is followed to generate client certificates for other components such as the scheduler, controller manager, and kube-proxy.
Client certificates eliminate the requirement for using a username and password when making REST API calls to the Kubernetes API server. The admin certificate, for example, can be used to securely communicate with the server by specifying the key, certificate, and CA certificate in your request.
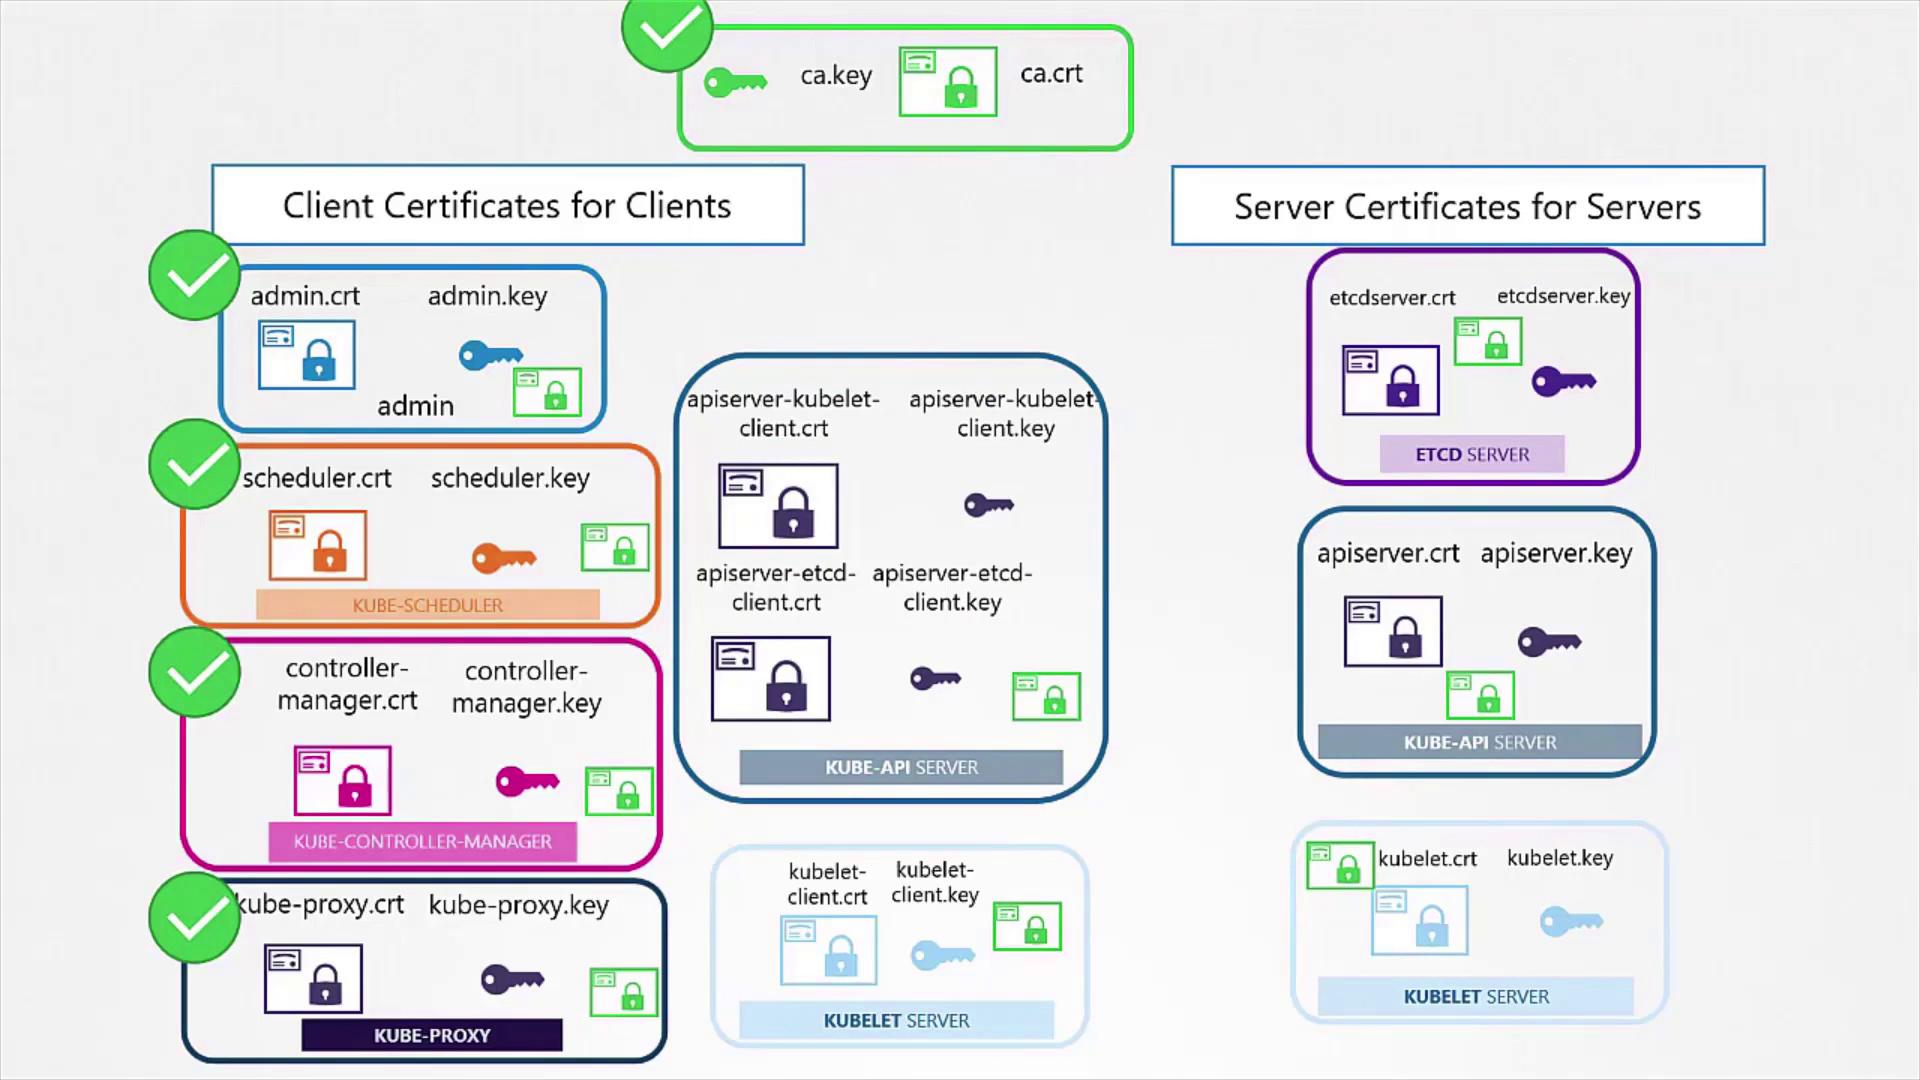
For secure communication, both client and server certificates must trust the same CA root certificate. This certificate is used by both parties to verify the authenticity of the certificate they receive.
The etcd server, a critical component in high availability configurations, also requires a certificate. If etcd is running as a cluster, remember to generate peer certificates to secure inter-member communications. Once created, the certificates are referenced in the etcd configuration file (commonly, etcd.yaml). See the example below:
The Kube API server is the primary access point for the cluster and is known by several aliases such as “kubernetes”, “kubernetes.default”, and “kubernetes.default.svc.cluster.local”, as well as its IP address. This diversity requires that its certificate includes multiple Subject Alternative Names (SANs).
After configuring the CSR with the SANs, sign the certificate using your CA certificate and key. Specify the final certificate parameters in your kube-apiserver configuration, as shown in the configuration snippet below:
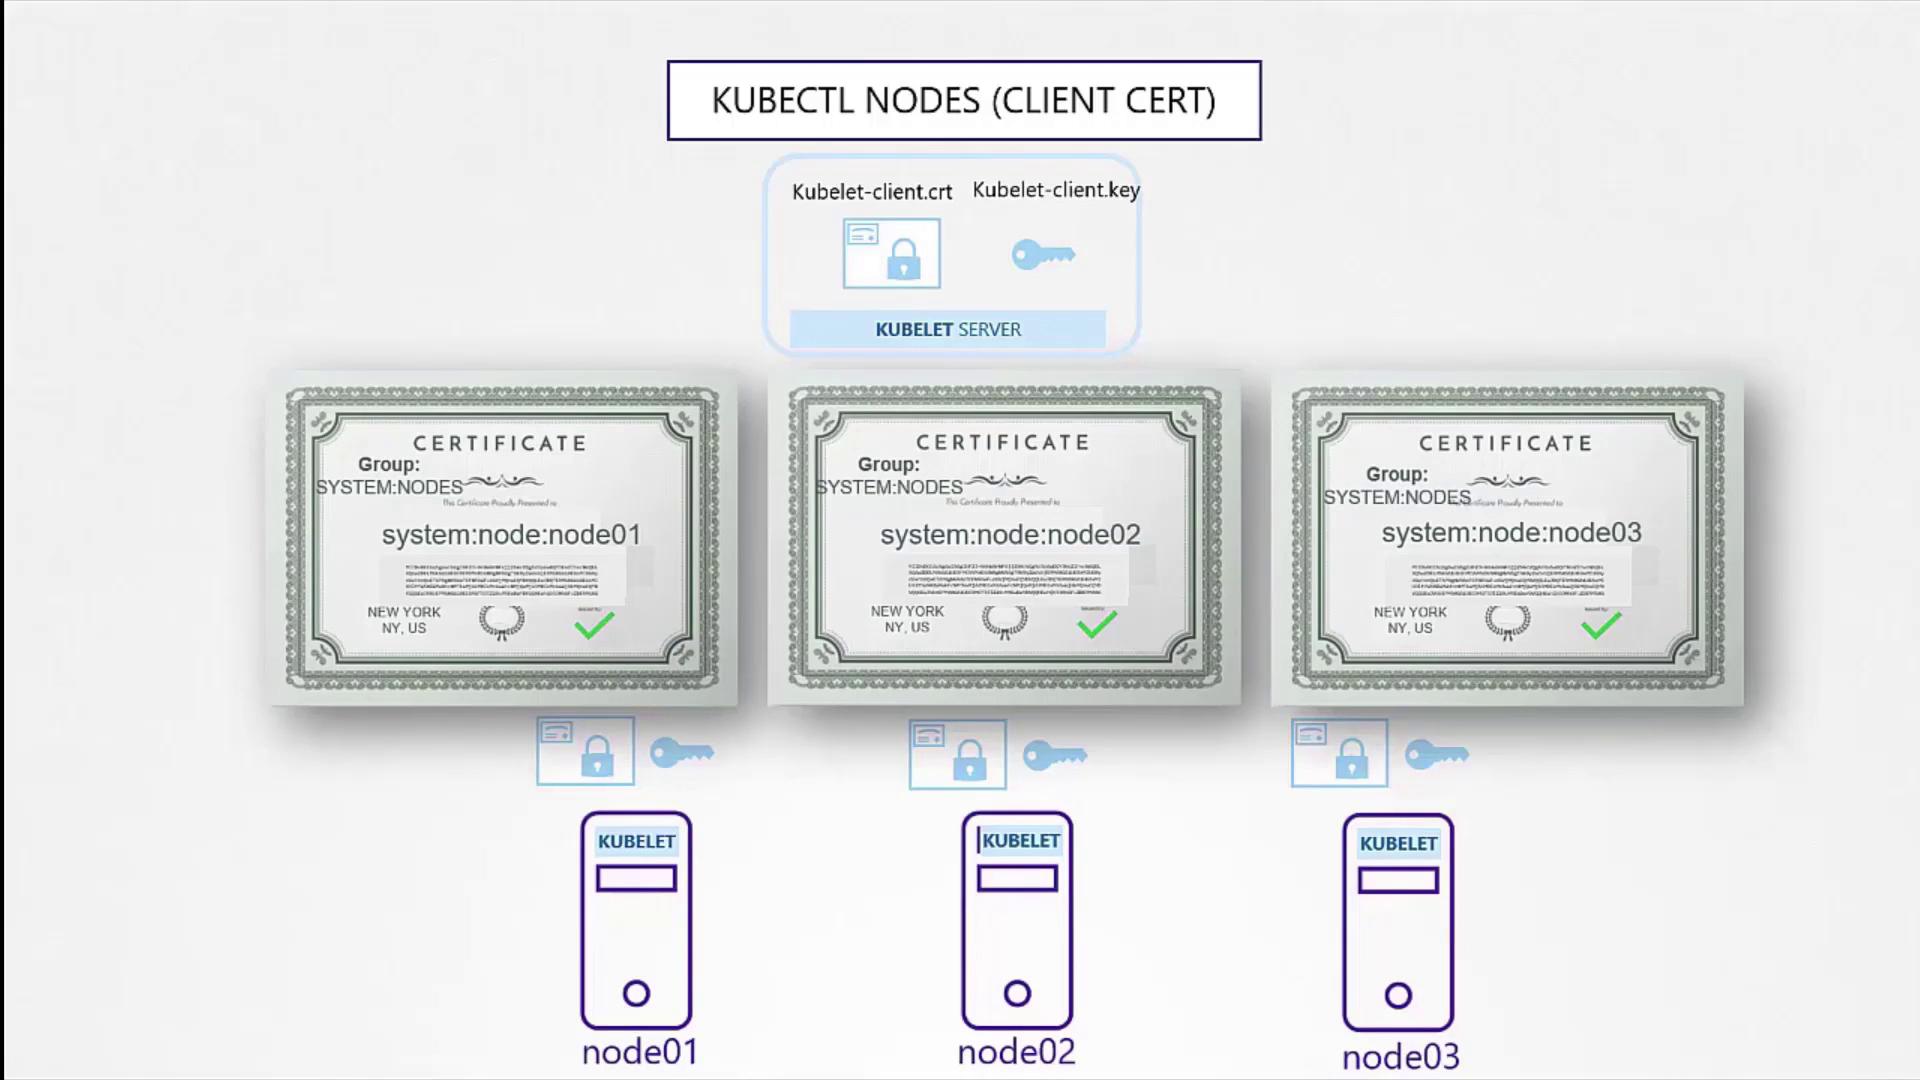
The kubelet is a critical component running on each node, managing node-specific operations and secure communication with the API server. For this purpose, every node needs its own certificate and key pair. When generating these certificates, name them according to the node’s identity (e.g., node01, node02, node03).It is also a best practice to generate a separate certificate for the node when it acts as a client to the API server. This certificate should include an identity format such as “system:node” to ensure the API server can assign the appropriate group membership (e.g., system:nodes).
Once generated, include these certificates in the kubeconfig files for the respective nodes to guarantee secure communication.
This guide has detailed the steps required to generate both client and server certificates using OpenSSL in a Kubernetes environment. You learned how to create a CA certificate, generate and sign client certificates (including for administrative use), and produce server certificates for both etcd and the API server. By including multiple domain names and IP addresses in your certificates, you ensure a robust and flexible security architecture for your cluster.Future topics will explore how to inspect certificate details and how tools like kubeadm streamline certificate management in Kubernetes clusters.