Certified Backstage Associate (CBA)
Production Backstage
Demo Authentication
Enable GitHub authentication in your Backstage instance so users can sign in with their GitHub accounts and be automatically recognized.
In this guide, you will:
- Register a GitHub OAuth App.
- Configure
app-config.yamlfor GitHub auth. - Install the GitHub auth-backend module.
- Update the frontend SignInPage.
- Test login and troubleshoot common issues.
- Import GitHub users into the Backstage catalog.
Quick Steps Overview
| Step | Description |
|---|---|
| 1. Register OAuth App | Create a GitHub OAuth App for Backstage |
2. Configure app-config.yaml | Add GitHub provider under auth |
| 3. Install Backend Module | Add and register @backstage/plugin-auth-backend-module-github-provider |
| 4. Update Frontend Sign-In Page | Add GitHub button on your SignInPage |
| 5. Test & Troubleshoot | Verify login flow and fix configuration errors |
| 6. Import User Entities | Sync your GitHub org users into the catalog |
| 7. Verify Successful Login | Confirm you can sign in as a GitHub user |
1. Register a GitHub OAuth App
Follow the official Backstage GitHub Auth docs to set up your OAuth application.
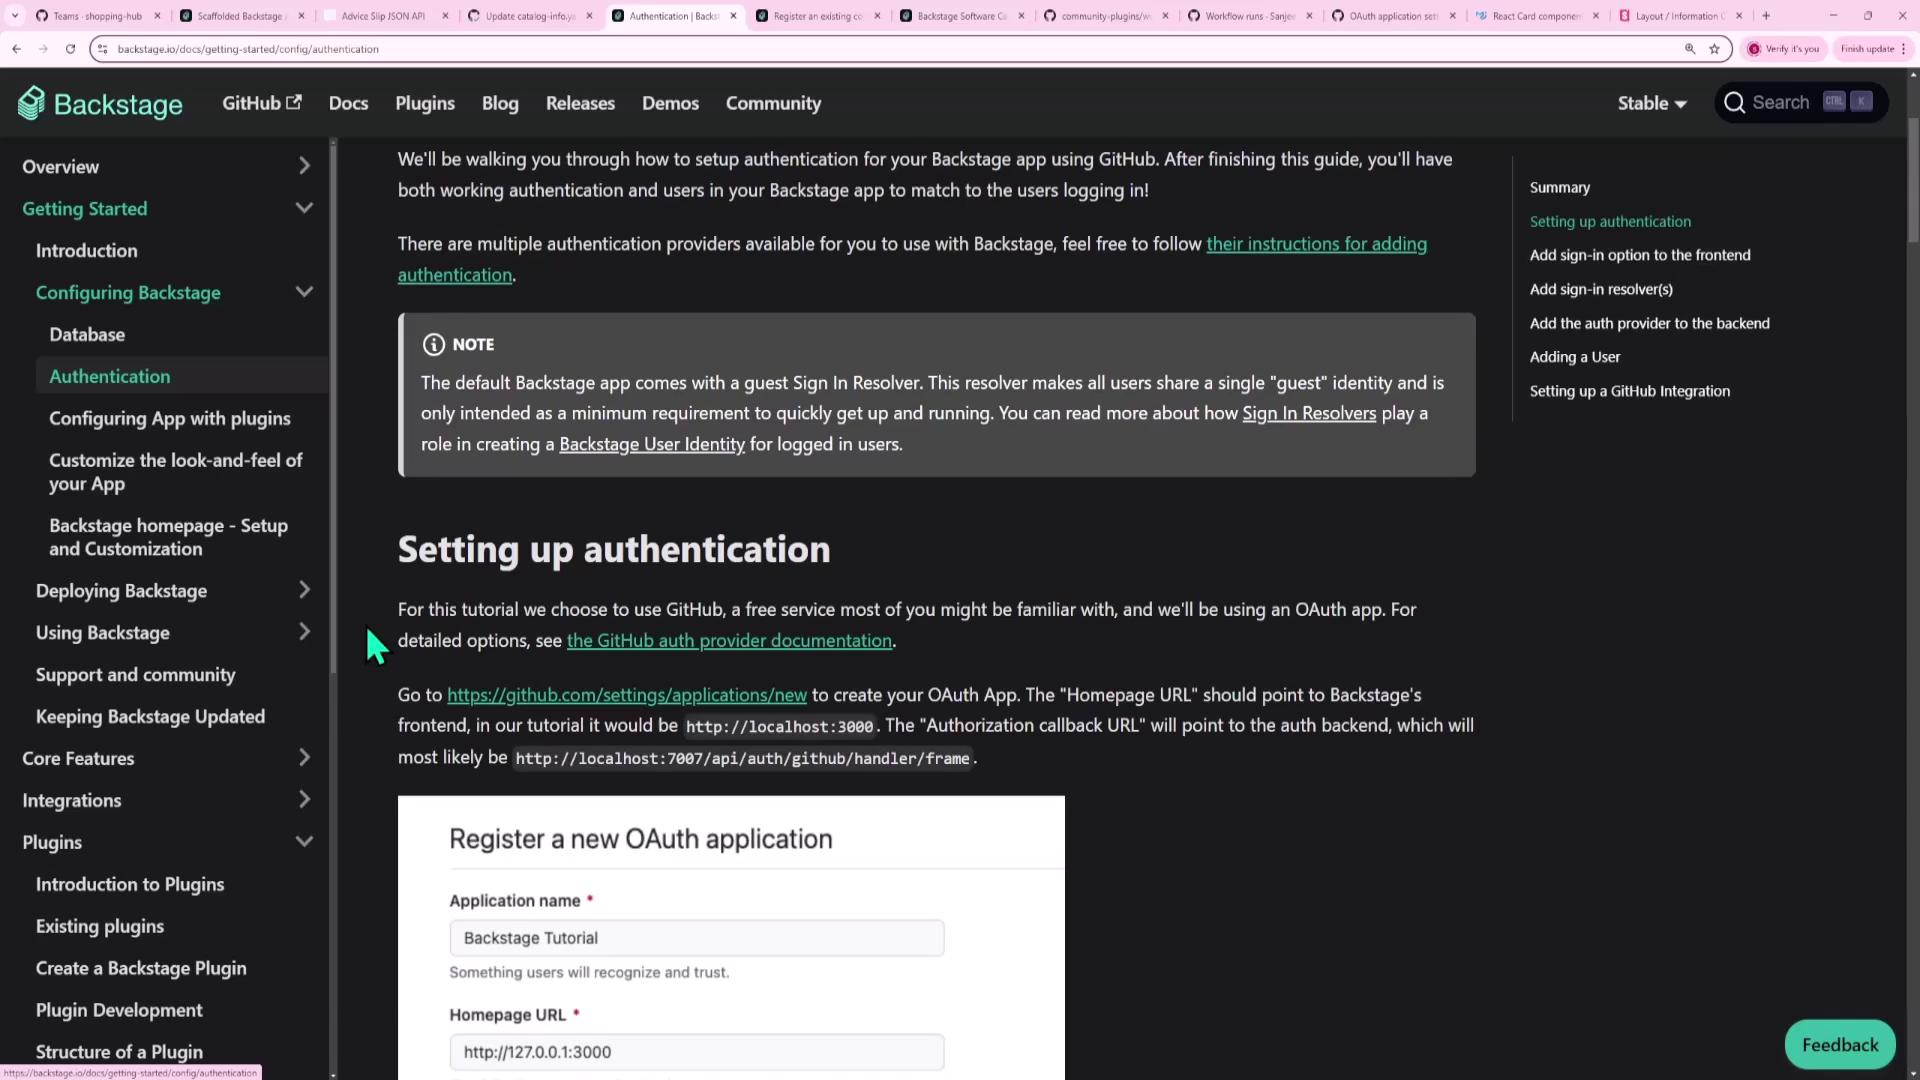
Scroll to the GitHub OAuth section:
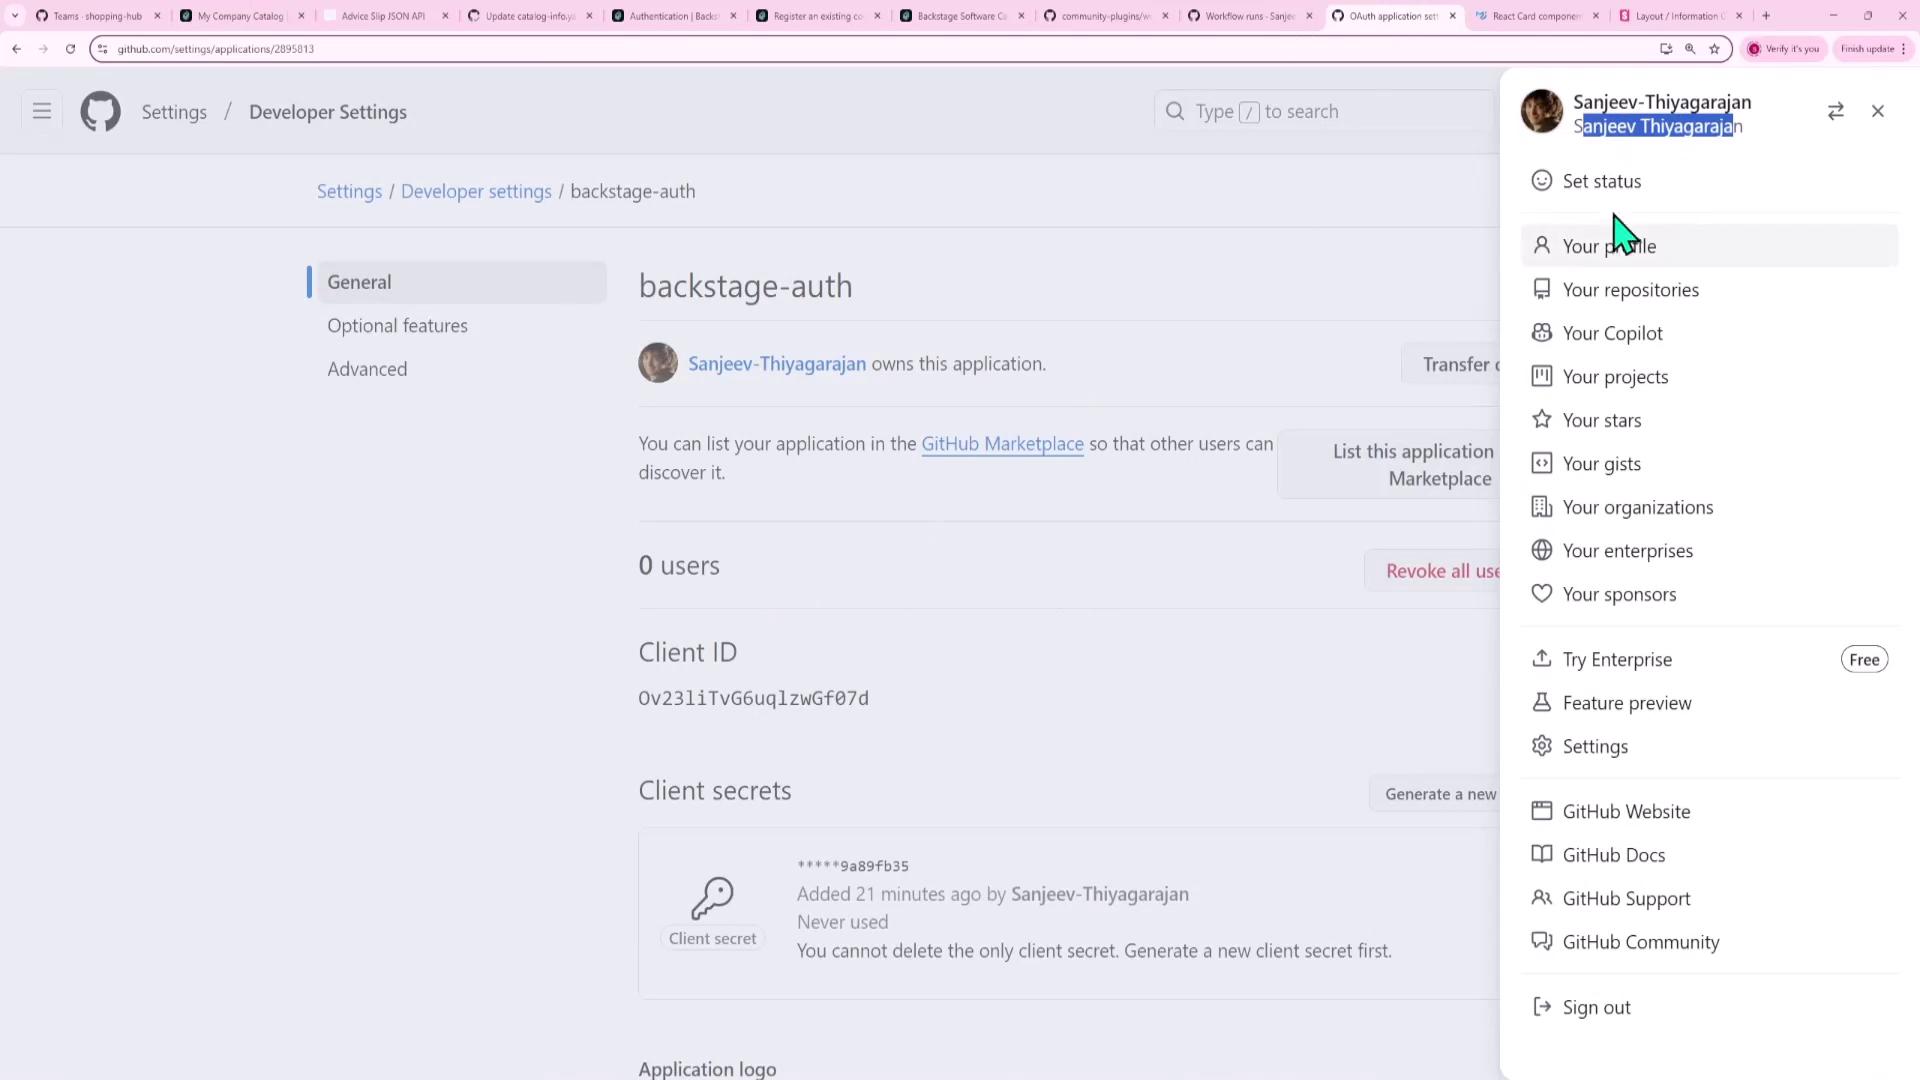
- In GitHub, go to Settings → Developer settings → OAuth Apps.
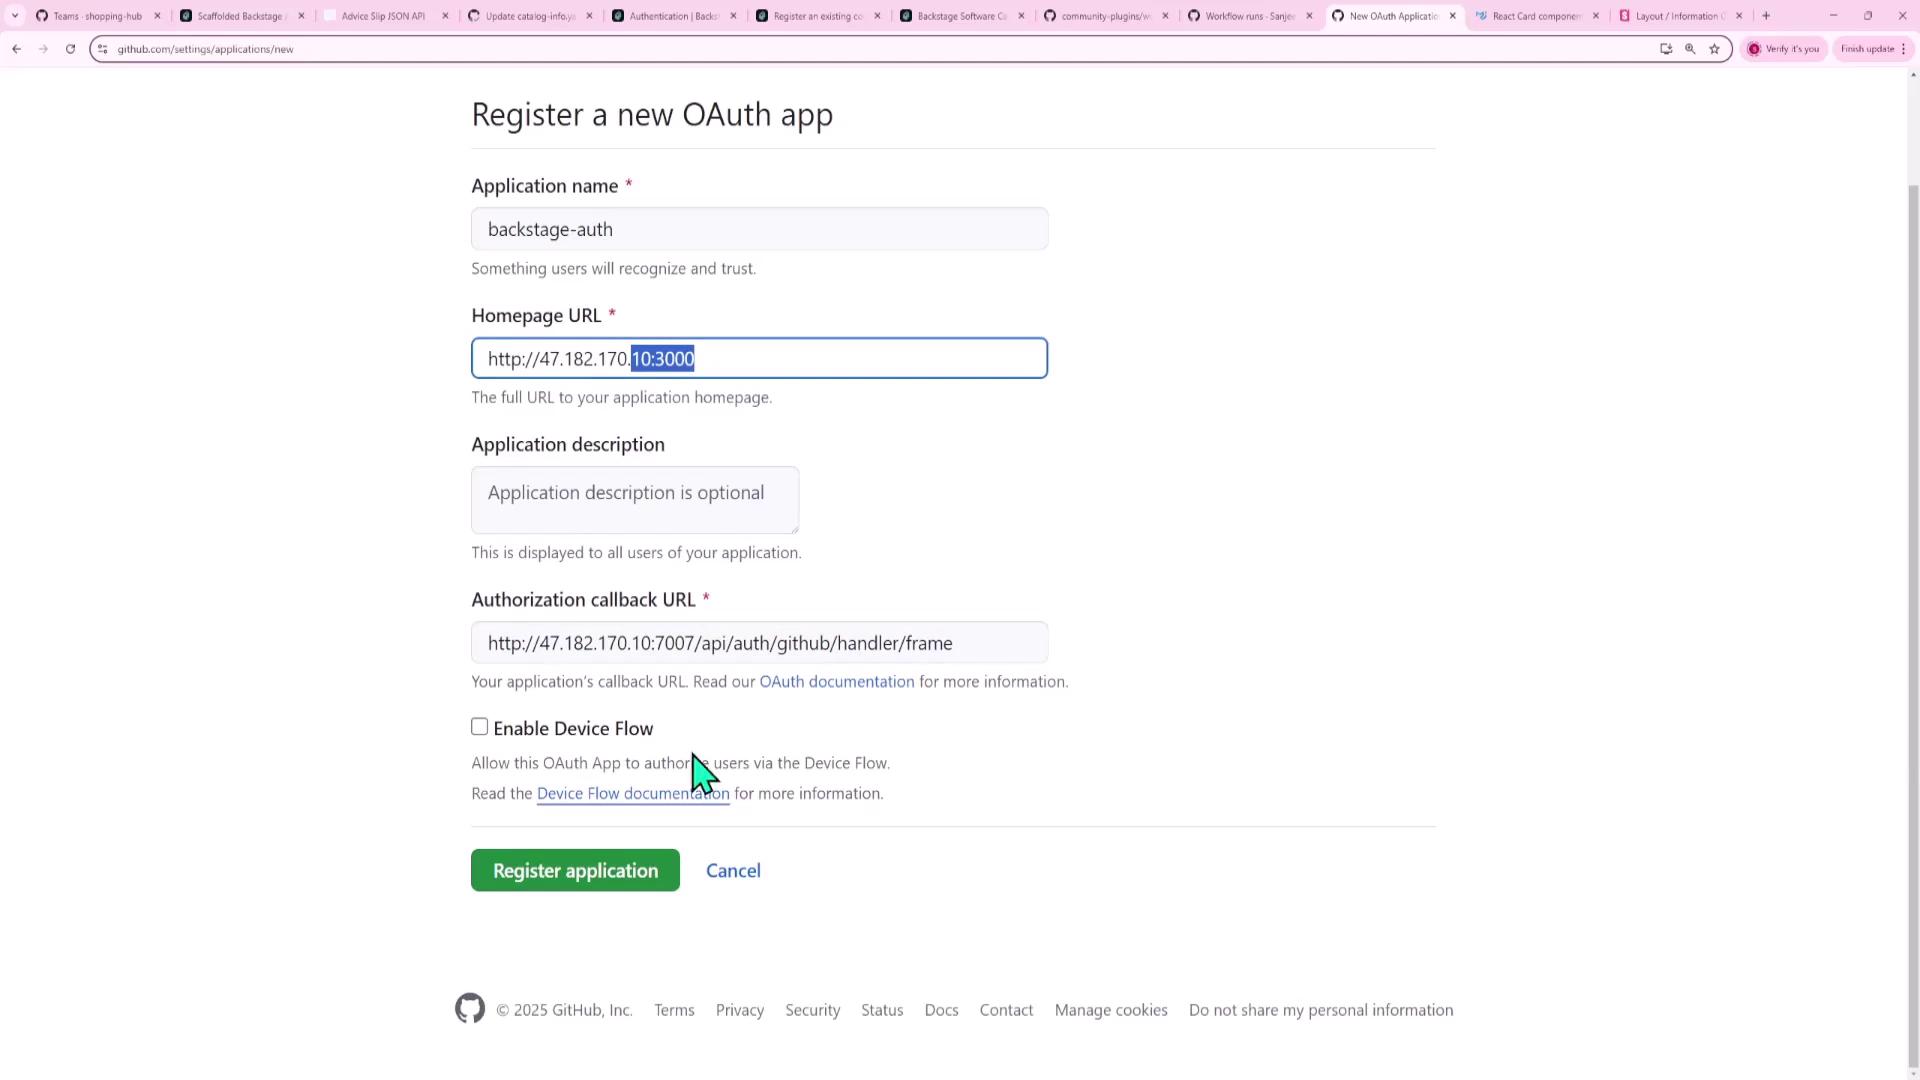
- Click New OAuth App.
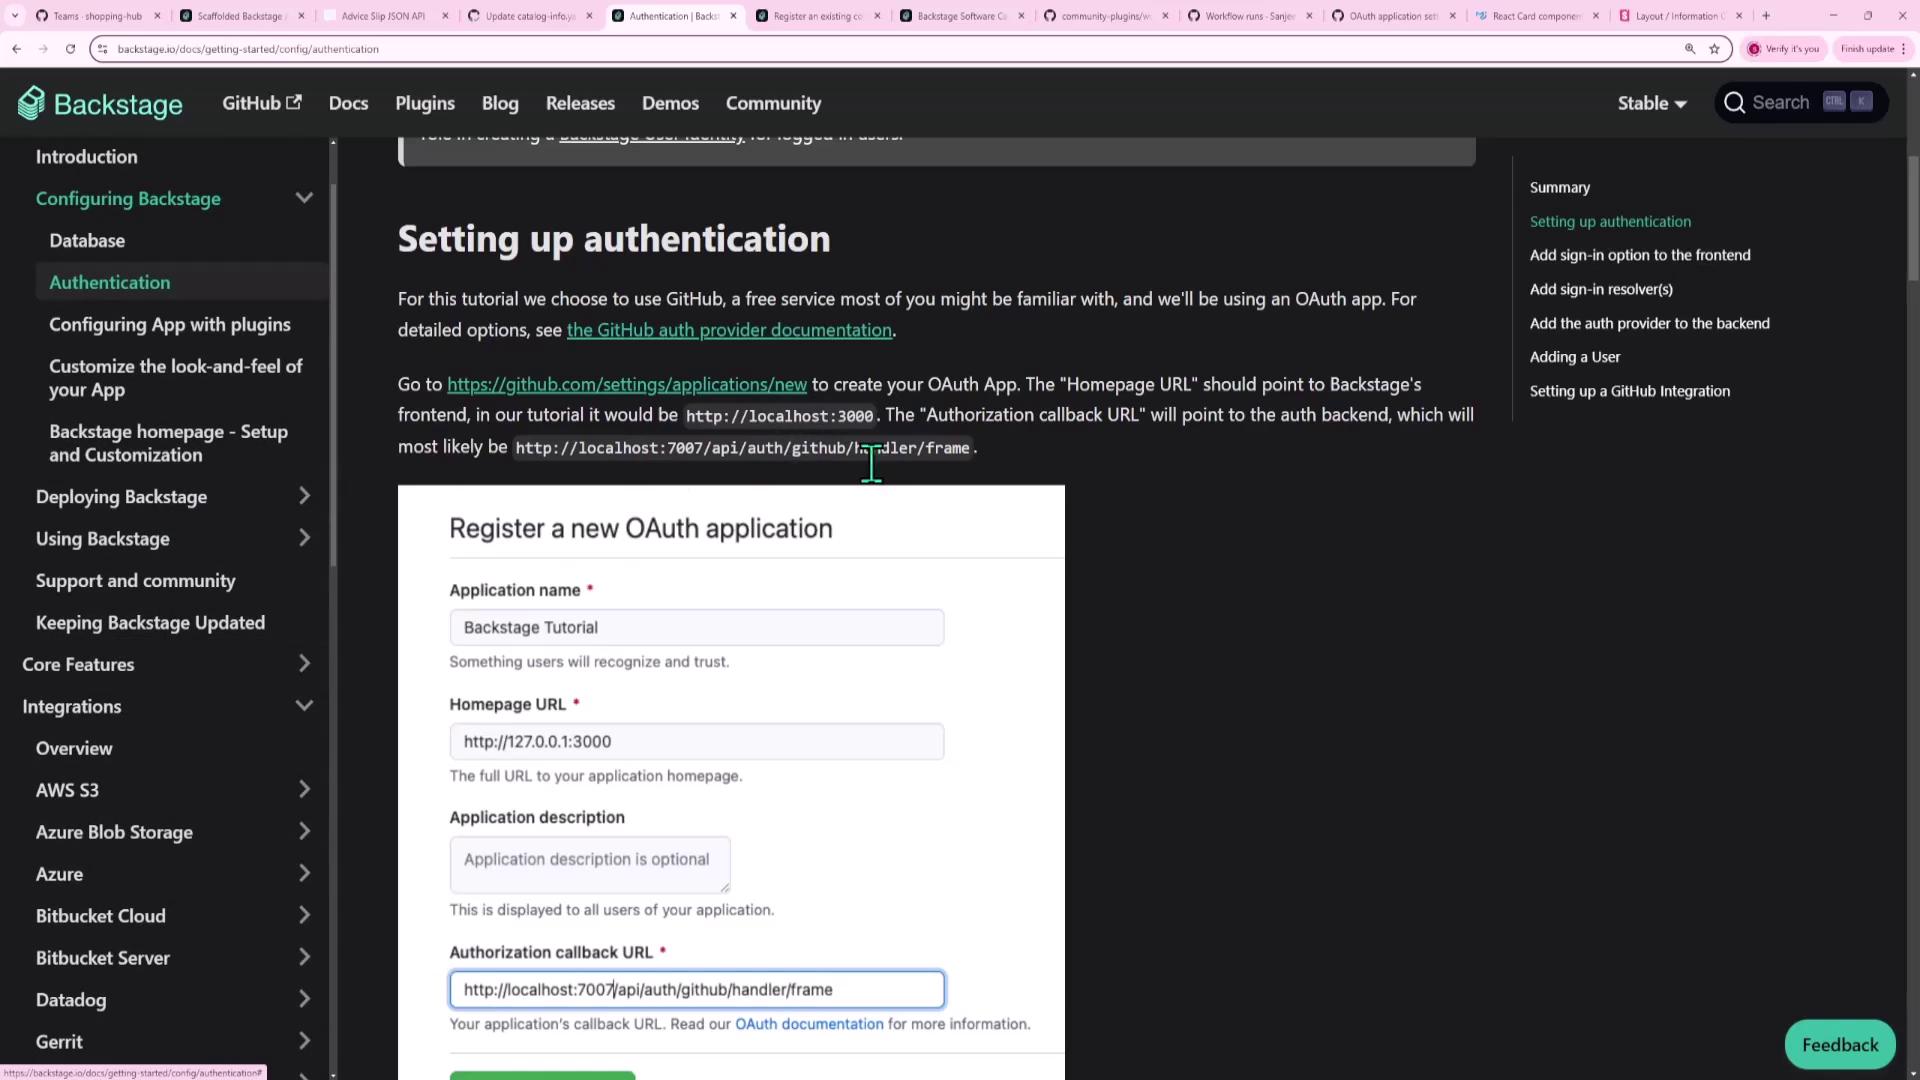
- Fill in the form:
- Application name:
Backstage Auth - Homepage URL:
http://<BACKSTAGE_HOST>:3000 - Authorization callback URL:
http://<BACKSTAGE_HOST>:7007/api/auth/github/handler/frame
- Application name:
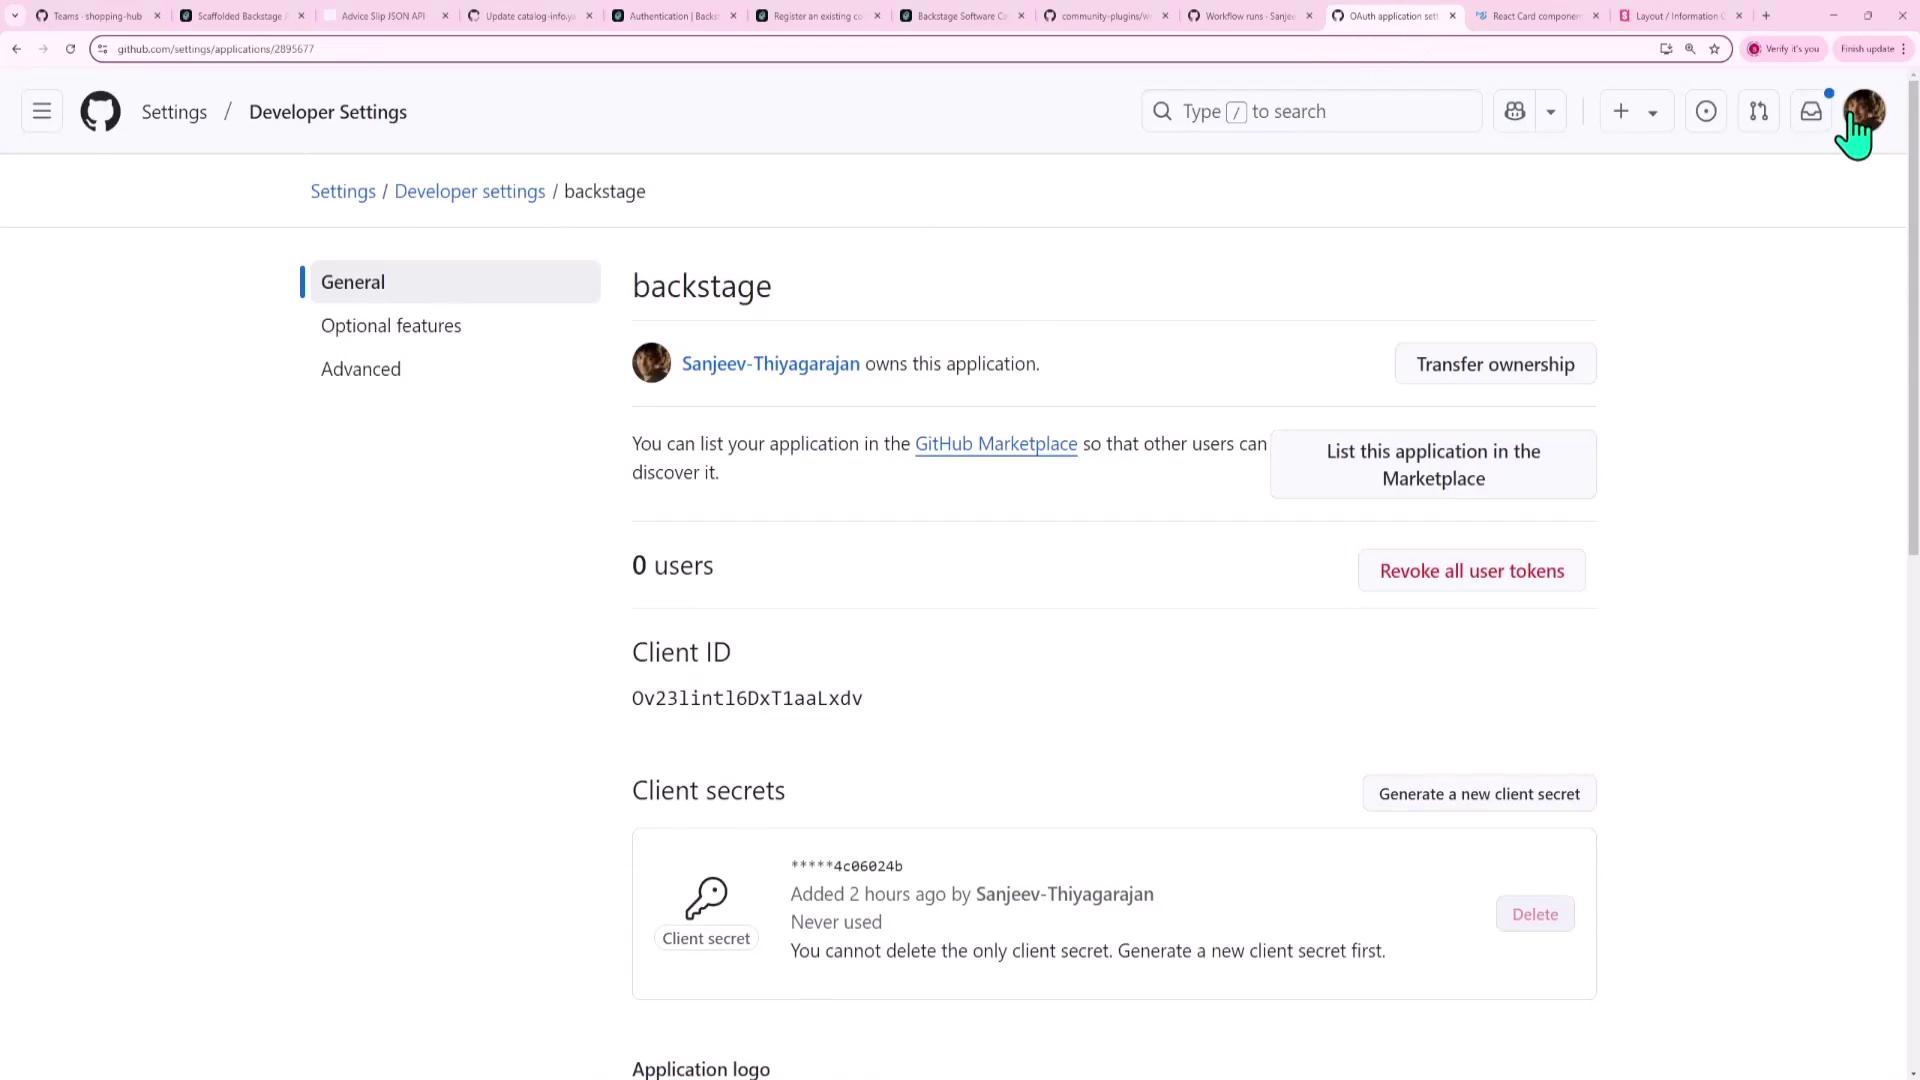
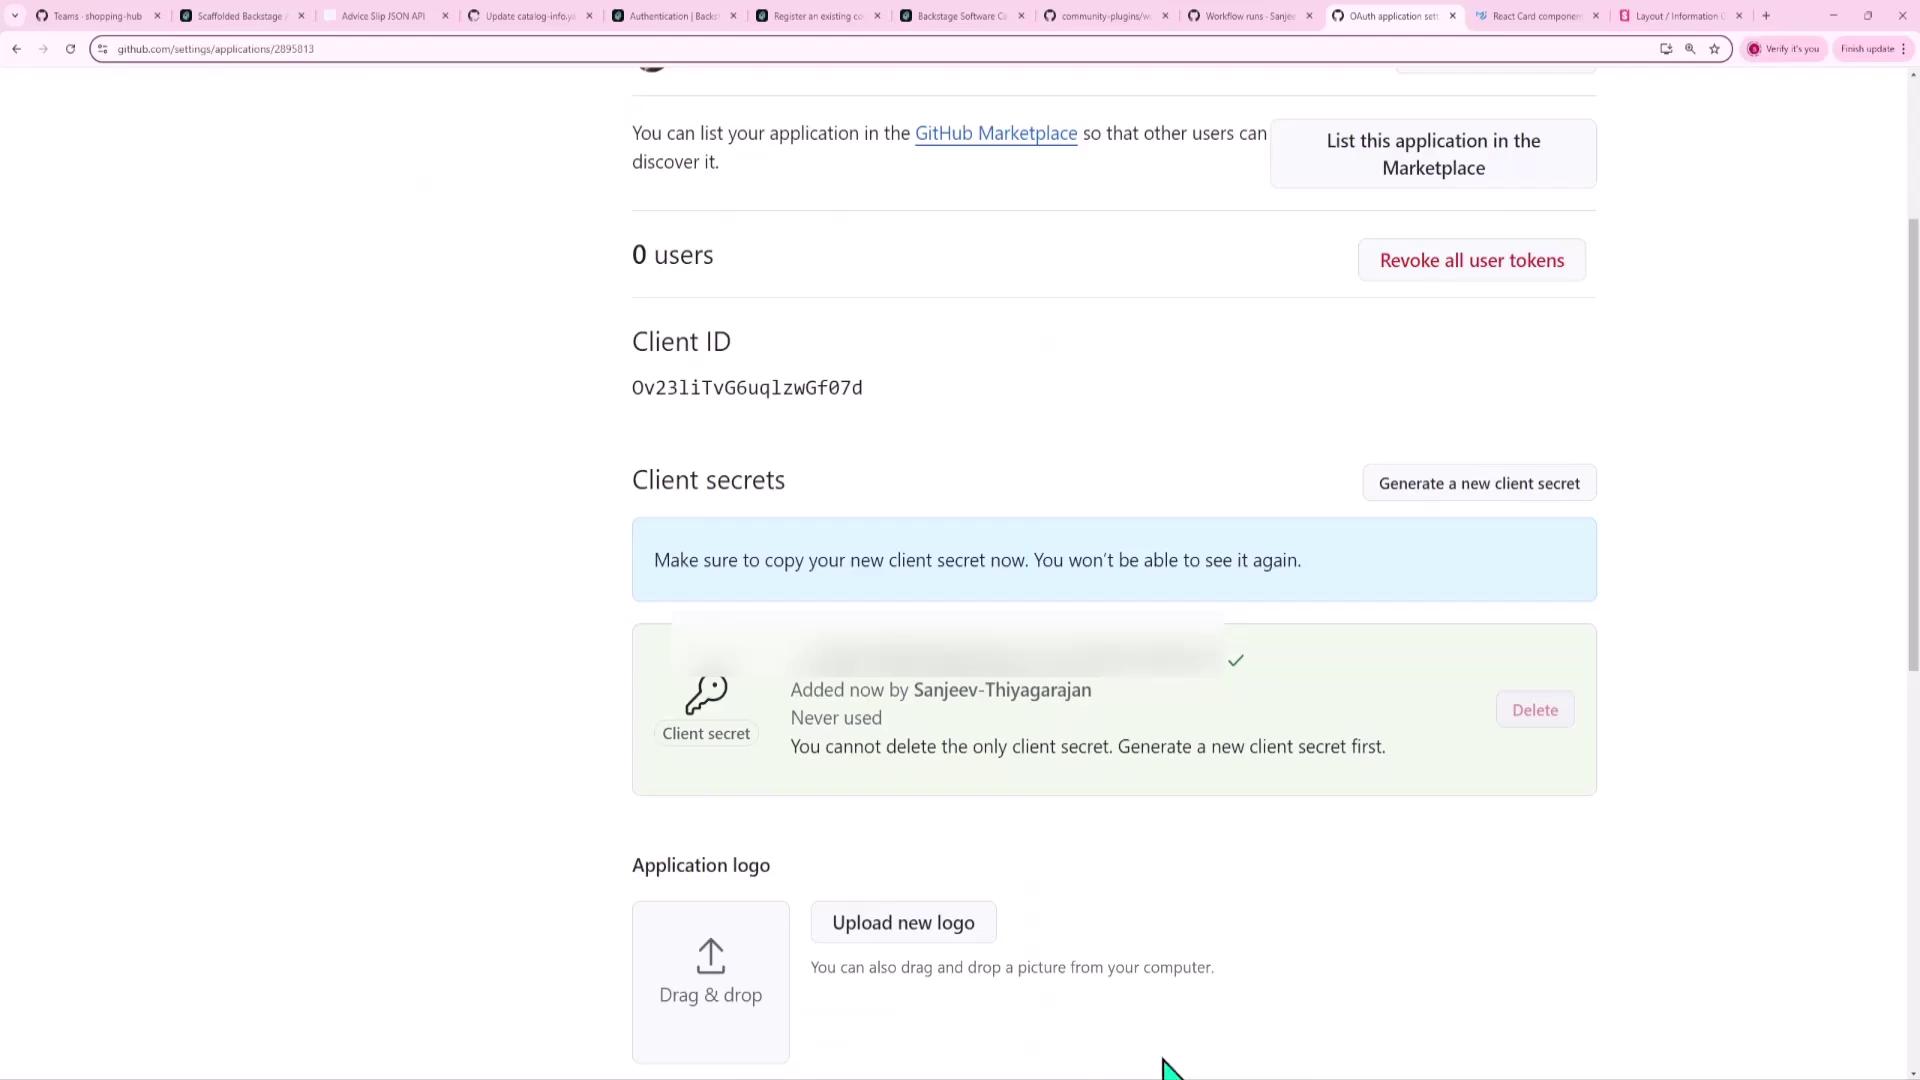
- Register the app, copy the Client ID, and generate a Client Secret:
2. Configure Backstage (app-config.yaml)
Enable GitHub under the auth section of your app-config.yaml:
auth:
  environment: development         # Replace with your environment key
  providers:
    guest: {}
    github:
      development:
        clientId: YOUR_CLIENT_ID
        clientSecret: YOUR_CLIENT_SECRET
        signIn:
          resolvers:
            - resolver: usernameMatchingUserEntityName
Note
Ensure that the environment value matches the top-level key under providers:. If they don't match, the GitHub provider won’t be found.
This setup uses the usernameMatchingUserEntityName resolver to match GitHub usernames to Backstage user entities.
3. Install the GitHub Backend Module
Install the GitHub auth backend package:
yarn --cwd packages/backend add @backstage/plugin-auth-backend-module-github-provider
Then register it in packages/backend/src/index.ts:
import { createRouter } from '@backstage/plugin-auth-backend';
import githubProviderModule from '@backstage/plugin-auth-backend-module-github-provider';
import guestProviderModule from '@backstage/plugin-auth-backend-module-guest-provider';

// ...

backend.add(
  createRouter({
    // other config...
    providers: {
      github: githubProviderModule(),
      guest: guestProviderModule(),
    },
  }),
);
4. Update the Frontend Sign-In Page
In packages/app/src/app.tsx, import githubAuthApiRef and add a GitHub button to SignInPage:
import { createApp } from '@backstage/app-defaults';
import { SignInPage } from '@backstage/core-components';
import { githubAuthApiRef } from '@backstage/core-plugin-api';

const app = createApp({
  components: {
    SignInPage: props => (
      <SignInPage
        {...props}
        auto
        provider={{
          id: 'github',
          title: 'GitHub',
          message: 'Sign in using GitHub',
          apiRef: githubAuthApiRef,
        }}
      />
    ),
  },
  // other app config...
});
5. Test and Troubleshoot
Clear your browser cookies for the Backstage domain and reload. You should see:
- Enter as guest
- Sign in using GitHub
Warning
If you see an error like GitHub provider is not configured to support sign-in, double-check your app-config.yaml for missing environment or providers entries.

6. Import User Entities from GitHub
If you sign in and see:
Error: failed to sign in; unable to resolve user identity;
please verify that your catalog contains the expected user entities
that would match your configured sign-in resolver.
Then enable the GitHub org provider to sync users and teams:
catalog:
  providers:
    githubOrg:
      - id: github
        githubUrl: https://github.com
        orgs: ['shopping-hub']
        schedule:
          initialDelay:
            seconds: 30
          frequency:
            hours: 1
          timeout:
            minutes: 50
Restart Backstage, clear cookies again, and sign in. All members of shopping-hub will be imported into your catalog.

7. Verify Successful GitHub Login
Once your GitHub username matches a catalog user entity, login will succeed and you'll be signed in as that user.
Congratulations—GitHub authentication is now fully integrated into your Backstage instance!
Links and References
- Backstage GitHub Auth Guide
- Backstage Plugin Auth Backend
- GitHub OAuth Apps
- Backstage Catalog Providers
Watch Video
Watch video content
Practice Lab
Practice lab