Certified Kubernetes Application Developer - CKAD
Configuration
Resource Requirements
Understanding resource requirements is crucial for effectively managing a Kubernetes cluster. In this guide, we explore how resource allocation works in a three-node Kubernetes setup and demonstrate best practices for defining and enforcing CPU and memory constraints.
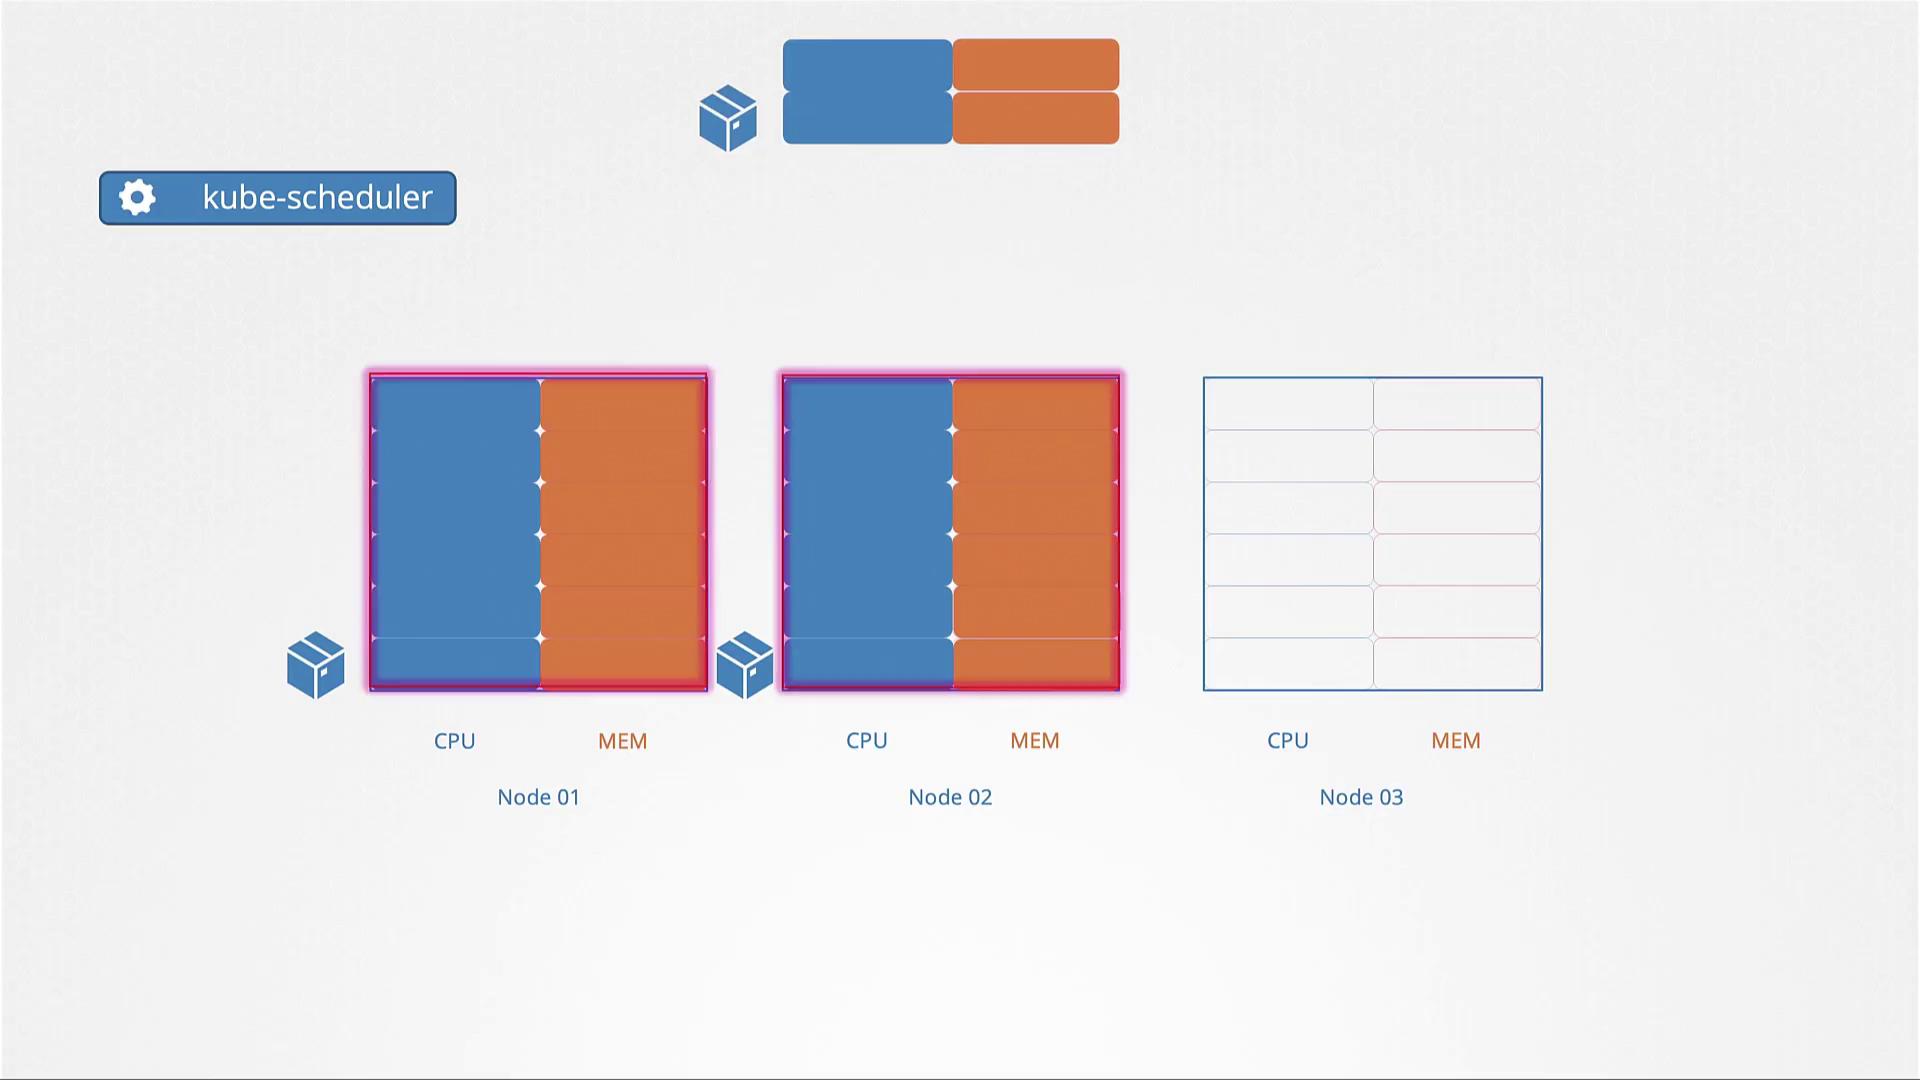
Each node in the cluster has a fixed amount of CPU and memory, and every pod scheduled on those nodes consumes a portion of these resources. For instance, if a pod requires two CPUs and one memory unit, the scheduler evaluates each node’s available resources to determine the best fit. In our scenario, the scheduler selects node 2 because it meets the pod's resource demands. If none of the nodes have sufficient resources, the pod will remain in a pending state. To troubleshoot such cases, use:
kubectl describe pod <pod-name>
This command can reveal issues like insufficient CPU availability.
Defining Resource Requests
A resource request defines the minimum amount of CPU or memory a container requires to run. By specifying these requests in the pod configuration, you ensure that the node selected has the necessary resources. For example, the following YAML configuration sets a pod to request 4 Gi of memory and 2 CPUs:
apiVersion: v1
kind: Pod
metadata:
  name: simple-webapp-color
  labels:
    name: simple-webapp-color
spec:
  containers:
  - name: simple-webapp-color
    image: simple-webapp-color
    ports:
    - containerPort: 8080
    resources:
      requests:
        memory: "4Gi"
        cpu: "2"
This setup guarantees that the node must have at least the requested resources available before scheduling the pod.
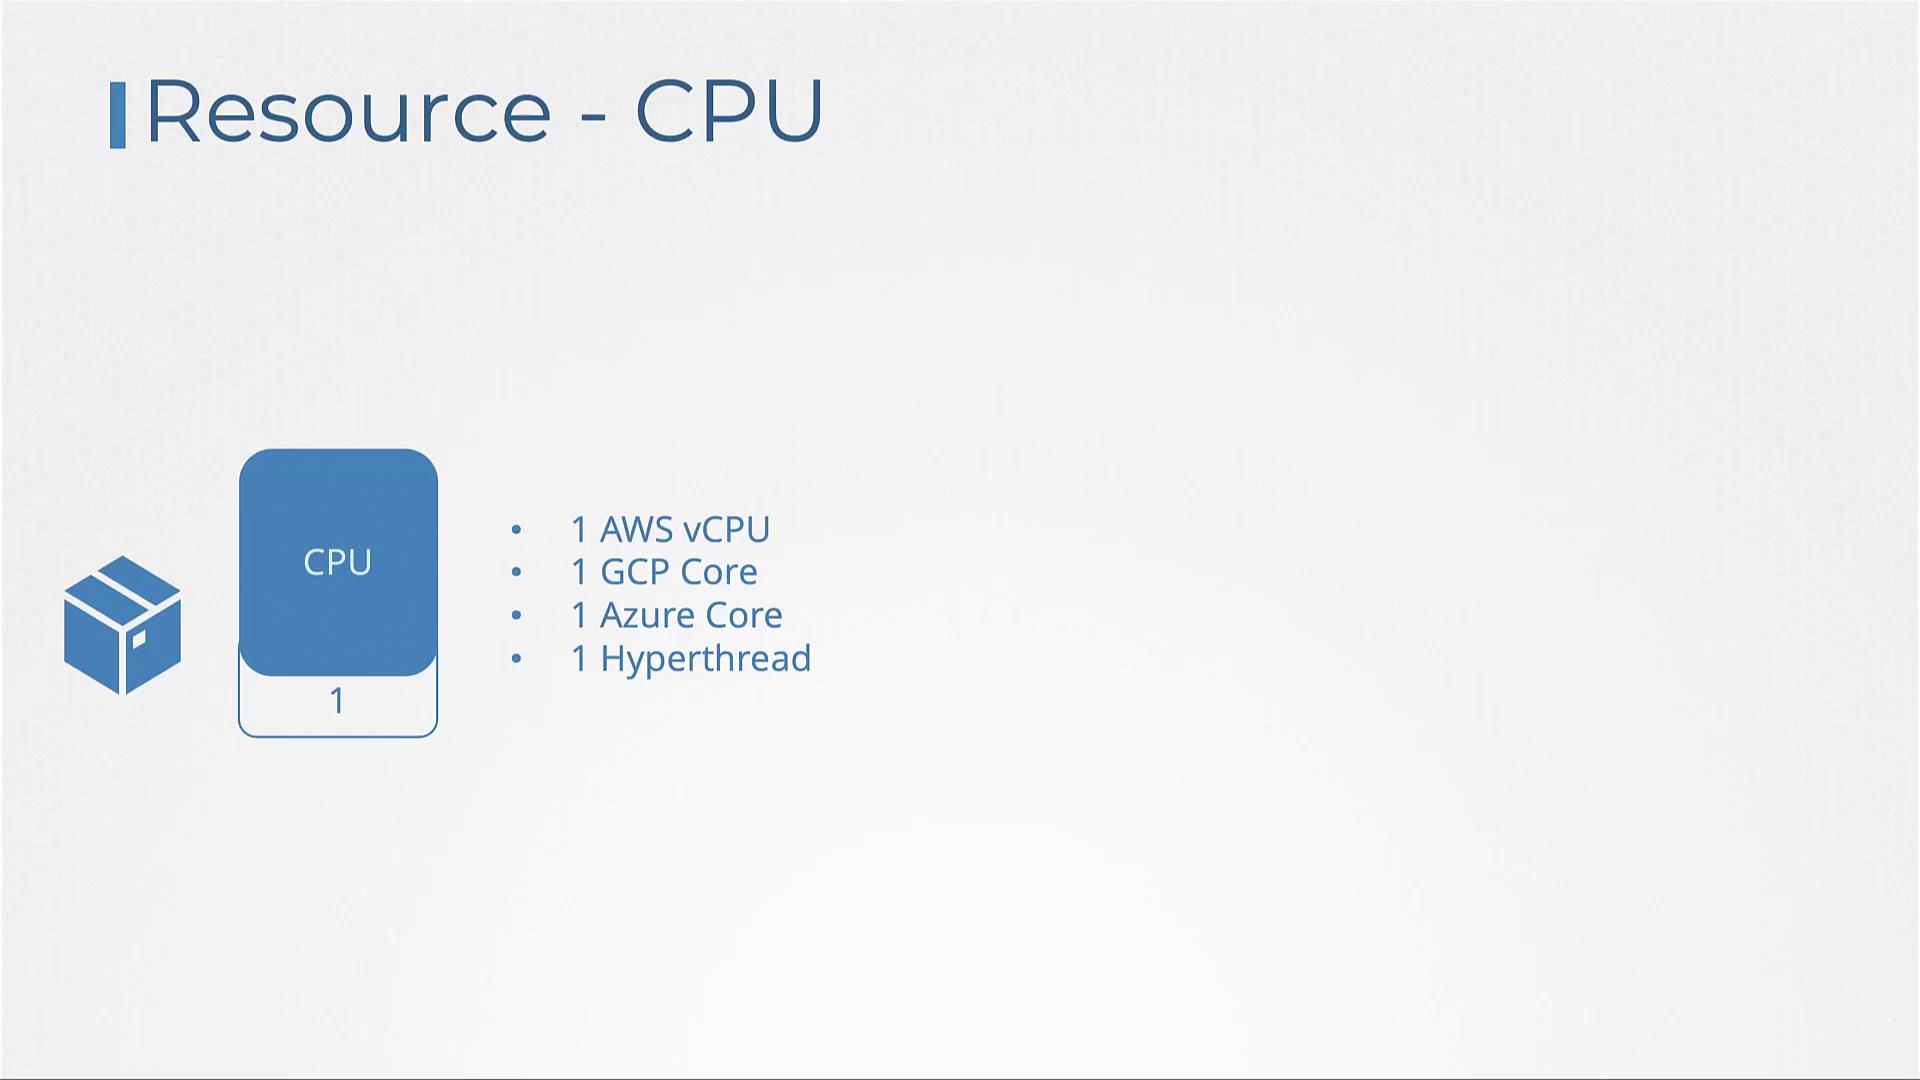
Note that CPU values can be fractional (e.g., 0.1 or 100m, where "m" stands for milli). One CPU represents one vCPU, making it equivalent to 1 AWS vCPU, 1 GCP core, 1 Azure core, or 1 hyper-thread on other platforms.
Setting Resource Limits
By default, containers aren’t restricted in the amount of resources they can consume. For example, a container might start with 1 CPU but later use all available CPU resources on the node. To avoid resource contention among containers or processes, you can set resource limits.
Below is an example of a pod configuration that restricts a container’s CPU to 2 vCPUs and its memory to 2 Gi:
apiVersion: v1
kind: Pod
metadata:
  name: simple-webapp-color
  labels:
    name: simple-webapp-color
spec:
  containers:
  - name: simple-webapp-color
    image: simple-webapp-color
    ports:
    - containerPort: 8080
    resources:
      requests:
        memory: "1Gi"
        cpu: "1"
      limits:
        memory: "2Gi"
        cpu: "2"
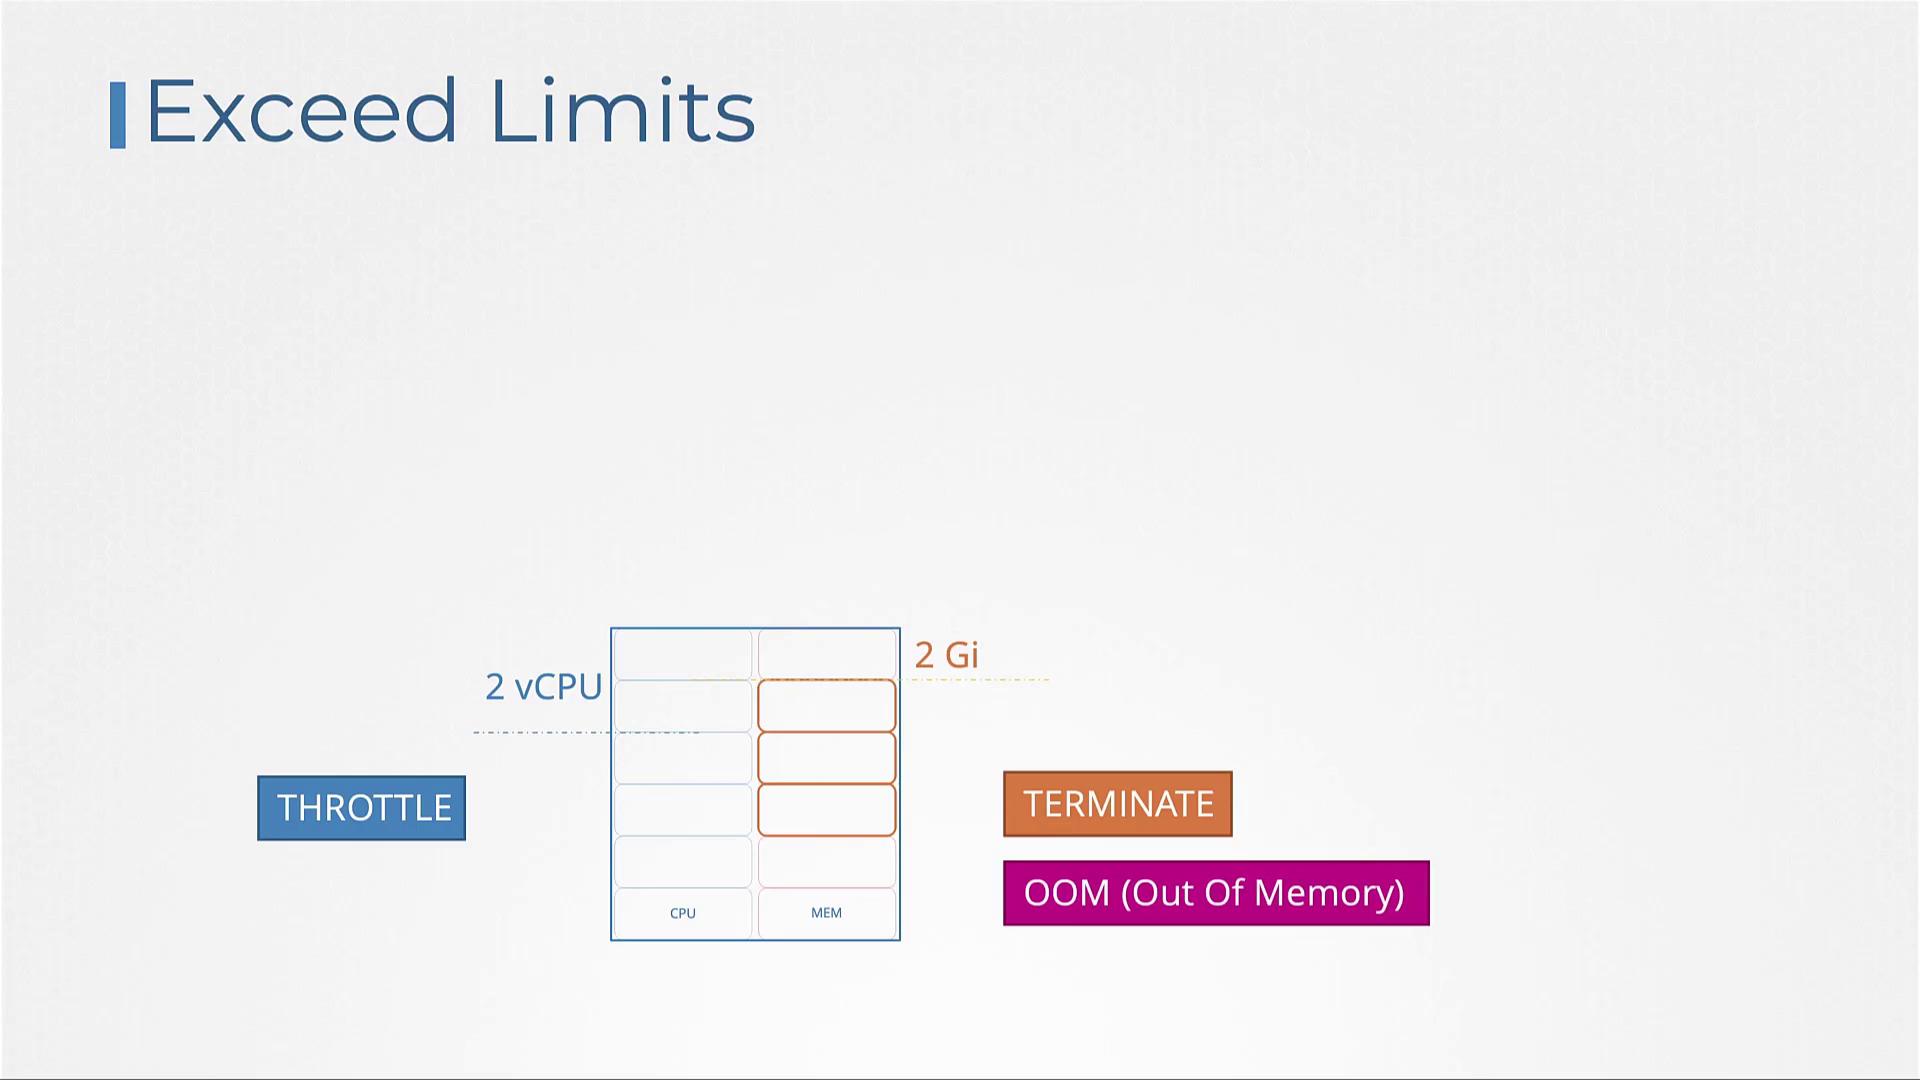
With these limits, the container is throttled if it attempts to use more than 2 vCPUs. Conversely, if a container consistently exceeds its memory limit, it will be terminated, often resulting in an Out Of Memory (OOM) error.
Warning
Exceeding memory limits can cause a pod to be terminated unexpectedly. Always ensure that resource limits are properly calibrated to avoid OOM errors.
Remember that resource requests and limits are set for each container individually. If a pod runs multiple containers, each must have its own resource configuration.
Managing Resource Allocation: Key Scenarios
A few different scenarios can occur depending on how resource requests and limits are configured:
| Scenario | Description | Behavior |
|---|---|---|
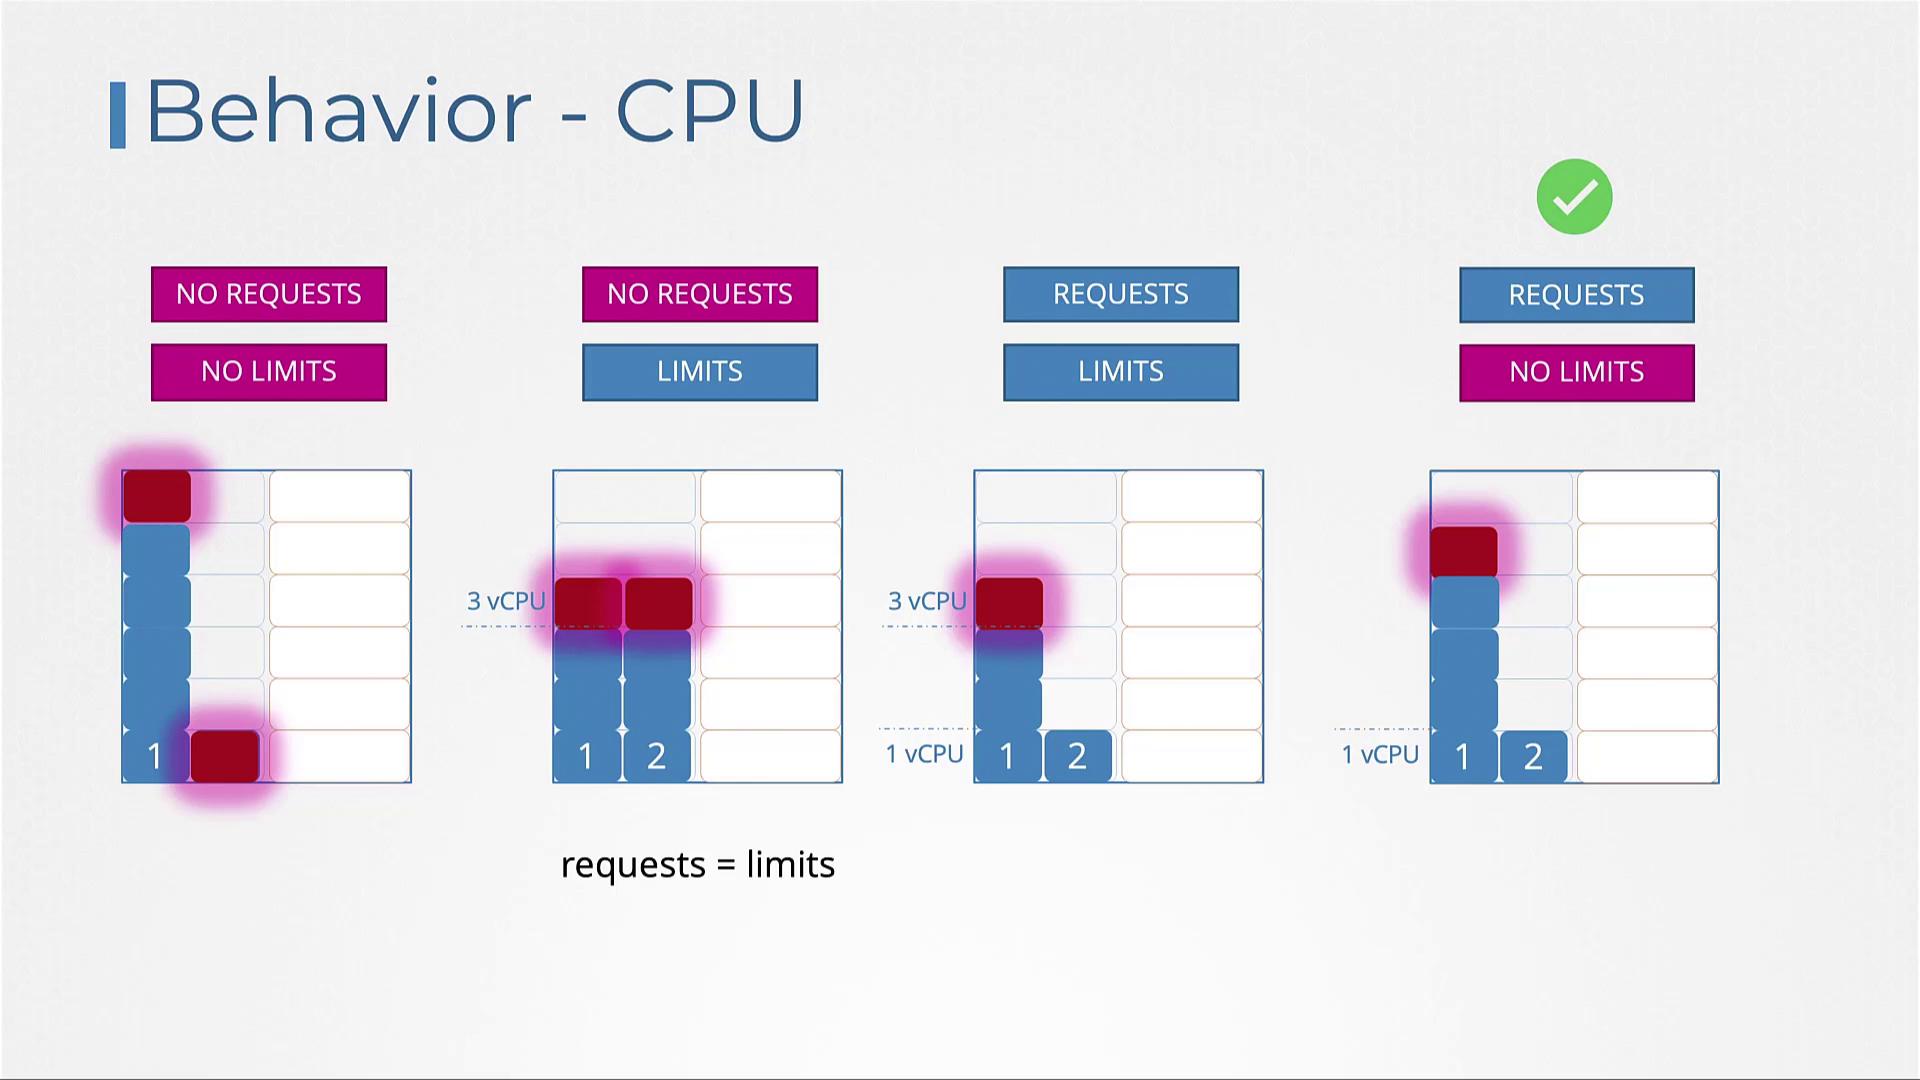
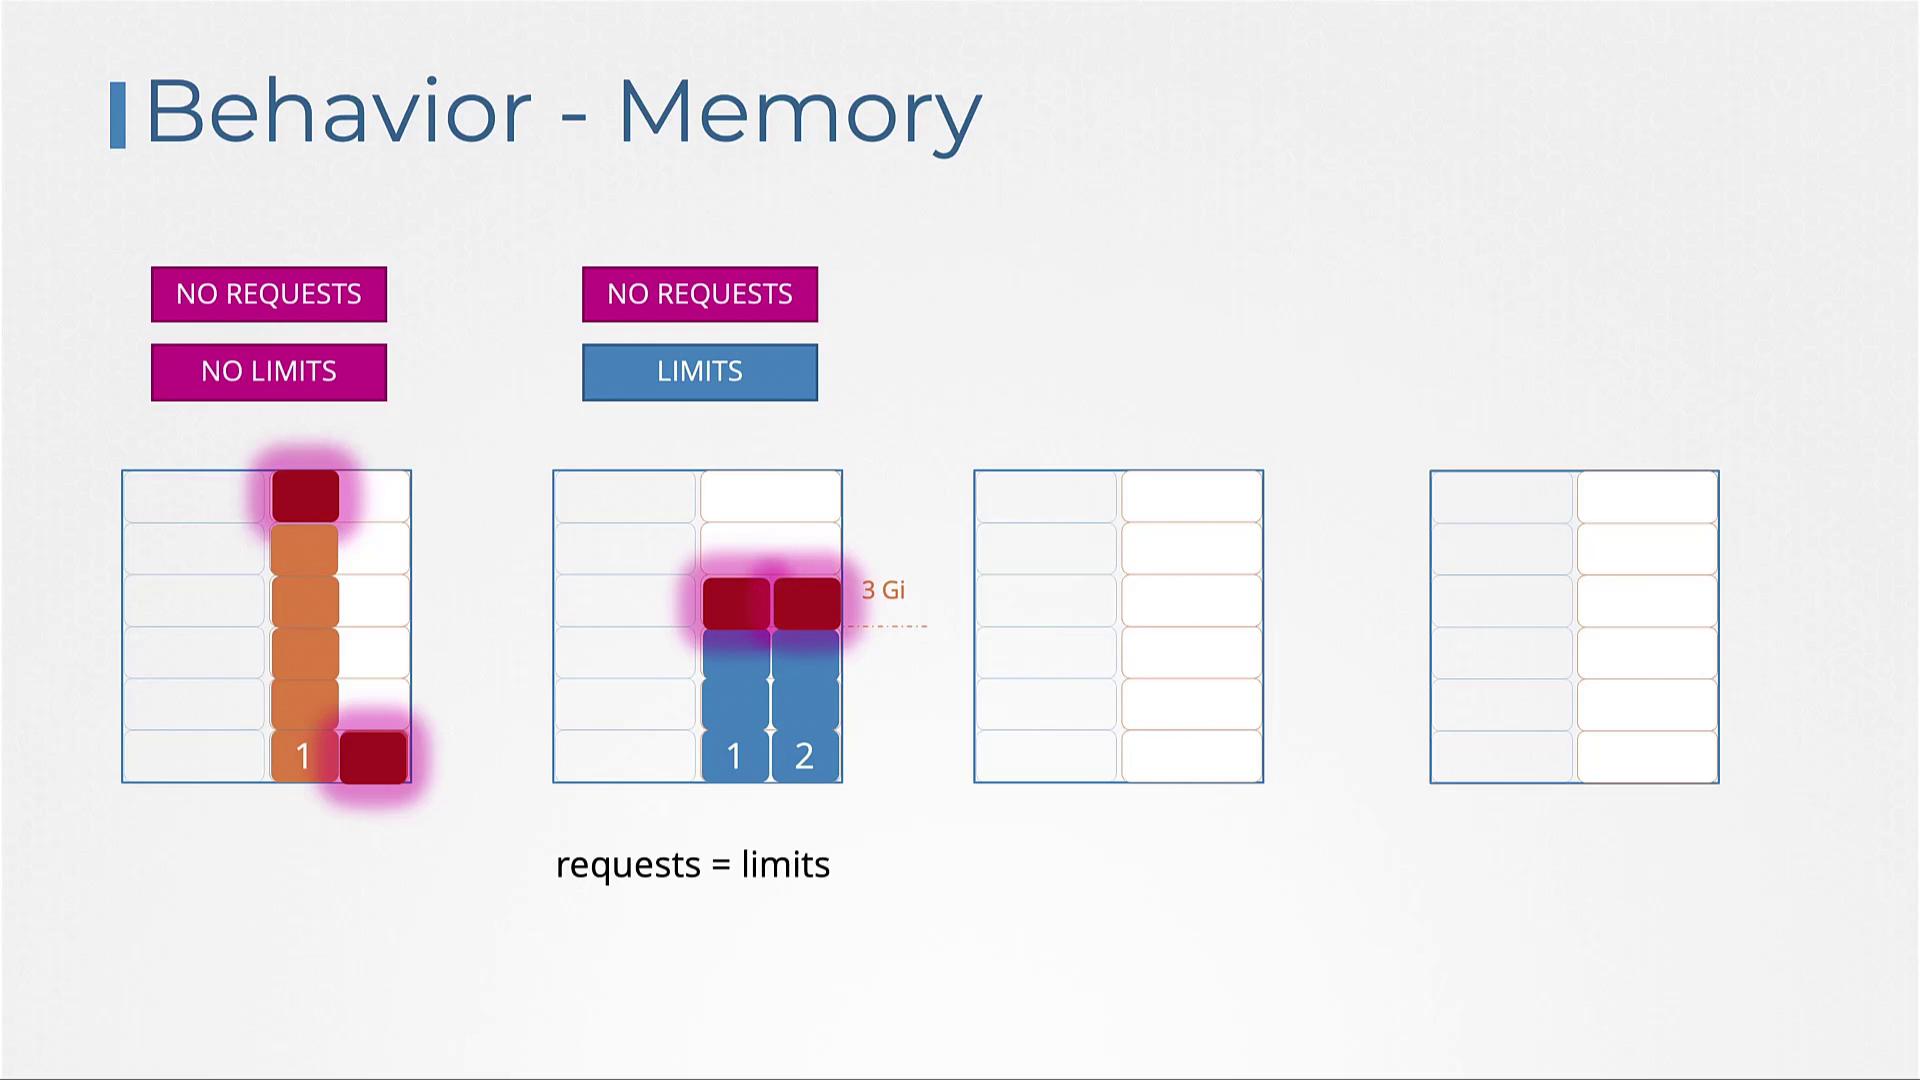
| No resource requests or limits | The container has the potential to consume all available CPU or memory on a node. | May starve other containers or applications. |
| No requests but limits specified | Kubernetes treats the specified limits as the default resource requests. | Each container is guaranteed the defined limit, without the ability to exceed it. |
| Both requests and limits set | Containers receive the requested resources but can use up to the limit if additional resources are available. | Ensures efficient allocation while allowing flexibility for burst usage. |
| Only requests set (no limits) | The container is guaranteed the requested resources, but can consume any additional available resources from the node. | Risk of overconsumption may occur if no limits are enforced. |
CPU overconsumption can be mitigated through throttling, but memory usage cannot be throttled. Instead, containers that exceed their memory limits will be terminated.
Memory management follows similar patterns:
- Without resource requests or limits, a container might use all available memory.
- Specifying only memory limits implies that Kubernetes will use these limits as the default minimum allocation.
- Setting both requests and limits guarantees that a container receives its requested memory while capping its maximum usage.
- Defining only resource requests ensures a guaranteed memory allocation, but excessive usage could lead to container termination, since memory cannot be reallocated on the fly.
Enforcing Defaults with LimitRanges
By default, Kubernetes does not automatically apply resource requests or limits unless explicitly specified in the pod definition. To enforce default settings, use LimitRange resources at the namespace level. Below is an example that applies a default CPU constraint:
apiVersion: v1
kind: LimitRange
metadata:
  name: cpu-resource-constraint
spec:
  limits:
  - type: Container
    default:
      cpu: "500m"
    defaultRequest:
      cpu: "500m"
    max:
      cpu: "1"
    min:
      cpu: "100m"
Similarly, you can enforce memory defaults with a LimitRange:
# limit-range-memory.yaml
apiVersion: v1
kind: LimitRange
metadata:
  name: memory-resource-constraint
spec:
  limits:
  - type: Container
    default:
      memory: "1Gi"
    defaultRequest:
      memory: "1Gi"
    max:
      memory: "1Gi"
    min:
      memory: "500Mi"
These LimitRanges ensure that any container created without specific resource settings receives the defined default values. Note that updates to LimitRange configurations impact new or updated pods only.
Using ResourceQuotas
To control the overall resource usage within a namespace, you can implement ResourceQuotas. A ResourceQuota object sets hard limits on the total CPU and memory consumption (both requested and actual usage) across all pods in the namespace.
For example, a ResourceQuota might restrict the namespace to a total of 4 CPUs and 4 Gi of memory in requests while enforcing a maximum usage of 10 CPUs and 10 Gi of memory across all pods. This mechanism is essential for preventing uncontrolled resource consumption in multi-tenant environments.
Conclusion
In this guide, we detailed how Kubernetes manages resource requests and limits, ensuring proper resource allocation and preventing overuse. We covered pod scheduling based on resource availability, the importance of setting appropriate resource requests and limits, and how LimitRanges and ResourceQuotas help maintain overall cluster stability.
For further insights on Kubernetes resource management, refer to the official Kubernetes documentation on managing CPU, memory, and API resources.
Next Steps
Continue exploring hands-on labs to reinforce these resource management fundamentals and optimize your cluster’s performance.
Watch Video
Watch video content
Practice Lab
Practice lab