This lesson covers Kubernetes Pods, their role in deploying applications, and how to manage them using the kubectl command-line tool.
Hello and welcome to this lesson on Kubernetes Pods. This guide assumes that you have already met the following prerequisites:
Your application has been developed, containerized as Docker images, and pushed to a Docker repository (e.g., Docker Hub).
A Kubernetes cluster is up and running—whether it’s single-node or multi-node, all essential services must be operational.
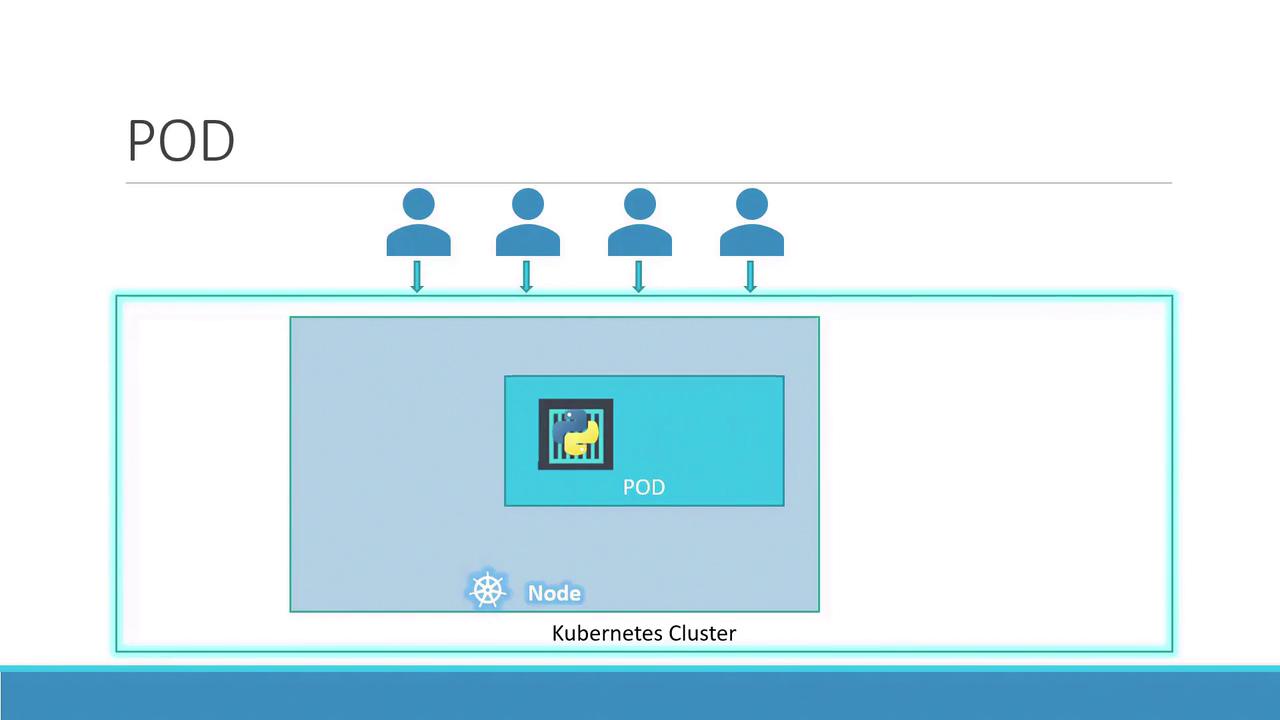
Our objective with Kubernetes is to deploy your application within containers running on a cluster of worker nodes. However, instead of running containers directly, Kubernetes encapsulates them within an object called a pod. A pod is the smallest deployable unit in Kubernetes and represents a single instance of your application.
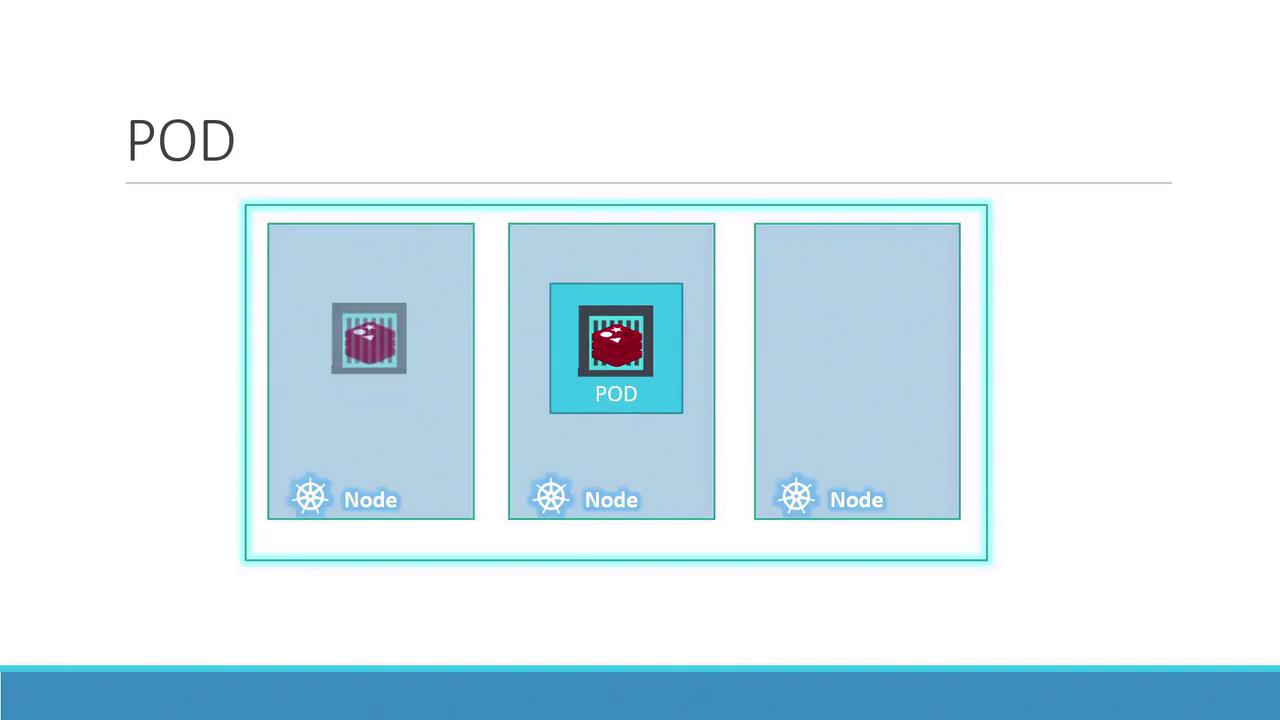
In a simple scenario, a single-node Kubernetes cluster will run one instance of your application inside a Docker container encapsulated within a pod.When your application’s user base grows, you scale up by adding more instances of your application. Instead of launching multiple container instances in the same pod, Kubernetes creates new pods—each running a fresh instance of your application. This design ensures that every instance operates in its own pod. For example:
If the current node reaches its capacity due to increased user load, additional pods can be deployed on new nodes that are added to the cluster. In summary, pods maintain a one-to-one correspondence with application containers: to scale up, new pods are created; to scale down, pods are deleted. It is important not to add extra containers to an existing pod solely for scaling.
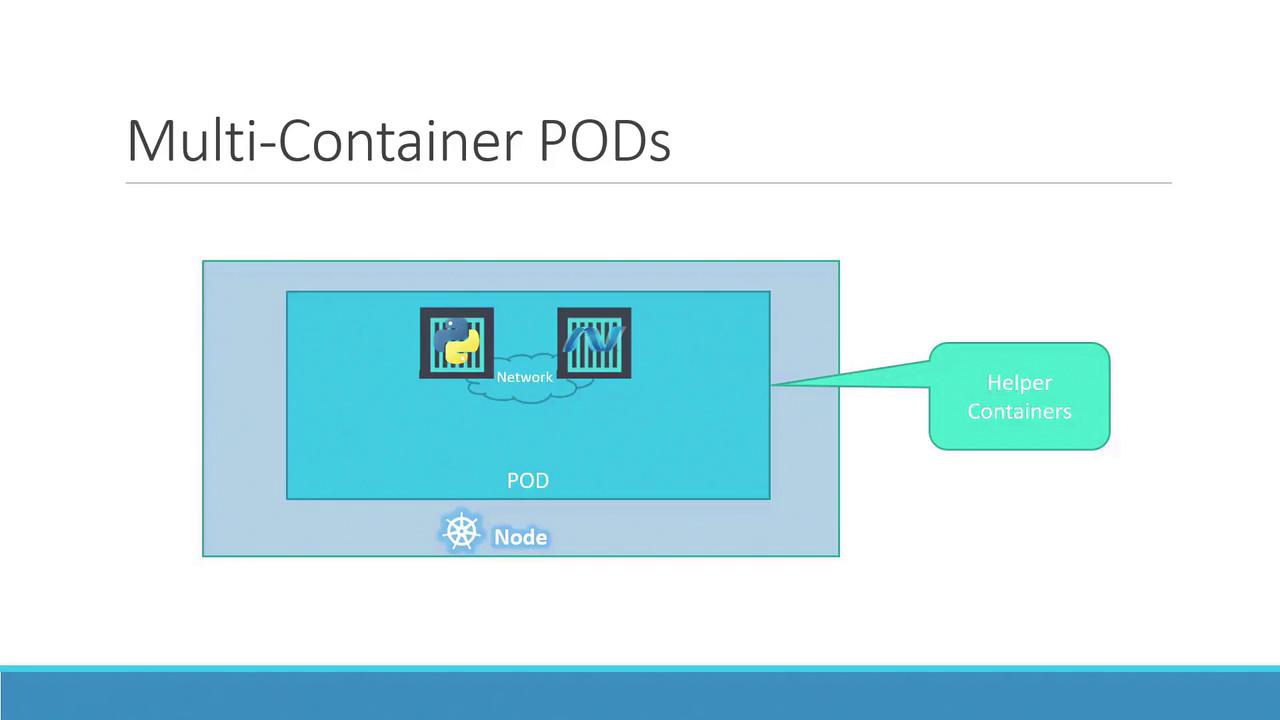
While a pod typically contains a single container, Kubernetes also supports multiple containers within a single pod for cases such as adding helper containers that perform supporting tasks.
Consider a scenario where you might include a helper container alongside your main application container. Both containers share the same pod, meaning they are created and terminated together. They communicate over localhost and can easily share storage.
When a helper container is present, the combined set (application and helper) benefits from shared storage, network namespace, and lifecycle management.
To further understand the benefits of Kubernetes pods, consider a similar Docker scenario. Suppose you deploy your application on a Docker host with:
Copy
docker run python-app
This command launches your application and makes it accessible. As user demand increases, you might run the command multiple times:
Copy
docker run python-appdocker run python-appdocker run python-appdocker run python-appdocker run helper --link app1docker run helper --link app2docker run helper --link app3docker run helper --link app4
In this Docker setup, you must manually manage networking between application and helper containers (using links or custom networks), create shareable volumes, and monitor container states. If an application container fails, you need to manually stop its corresponding helper container, and vice versa.
Kubernetes simplifies this process by automatically managing network connectivity, shared storage, and container lifecycles within pods. You only define the set of containers that comprise a pod, and they are always created and terminated together.
To deploy pods in Kubernetes, you use the kubectl command-line tool. The kubectl run command creates a pod by deploying a Docker container. For example, to deploy an instance of the nginx Docker image, run:
Copy
kubectl run nginx --image=nginx
By default, Kubernetes pulls the specified image (here, nginx) from Docker Hub, a public repository for various Docker images. Kubernetes can also be configured to pull images from a private repository within your organization.After deploying a pod, list the active pods in your cluster using:
Copy
kubectl get pods
The output might look like this:
Copy
C:\Kubernetes>kubectl get podsNAME READY STATUS RESTARTS AGEnginx-8586cf59-whssr 0/1 ContainerCreating 0 3sC:\Kubernetes>kubectl get podsNAME READY STATUS RESTARTS AGEnginx-8586cf59-whssr 1/1 Running 0 8s
Note that although the pod is created, the nginx server is not yet exposed externally—it is only accessible within the node. To expose the service externally, further network and service configurations are required.That concludes this lesson on Kubernetes Pods. Let’s move on to the demo.