Use this file to discover all available pages before exploring further.
In previous lessons, we explored authentication and demonstrated how users or processes gain access to a cluster. With access granted, the next important question is: what actions can they perform? This is where authorization comes into play.As a cluster administrator, you hold full control over operations such as viewing cluster objects (e.g., Pods, Nodes, and Deployments) and modifying them. For example:
kubectl get podsNAME READY STATUS RESTARTS AGEnginx 1/1 Running 0 53skubectl get nodesNAME STATUS ROLES AGE VERSIONworker-1 Ready <none> 5d21h v1.13.0worker-2 Ready <none> 5d21h v1.13.0
Administrators can also create or delete objects. For instance, to remove a node from the cluster:
It is best practice to grant users only the minimum required permissions. For example, a developer might be allowed to deploy applications but should not have permissions to modify cluster-wide configurations like nodes, storage, or networking. Similarly, service accounts should be configured only with the necessary permissions.
Consider the following interactions for a user with restricted privileges:
kubectl get podsError from server (Forbidden): pods is forbidden: User "Bot-1" cannot list "pods"kubectl get nodesError from server (Forbidden): nodes is forbidden: User "Bot-1" cannot get "nodes"kubectl delete node worker-2Error from server (Forbidden): nodes "worker-2" is forbidden: User "developer" cannot delete resource "nodes"
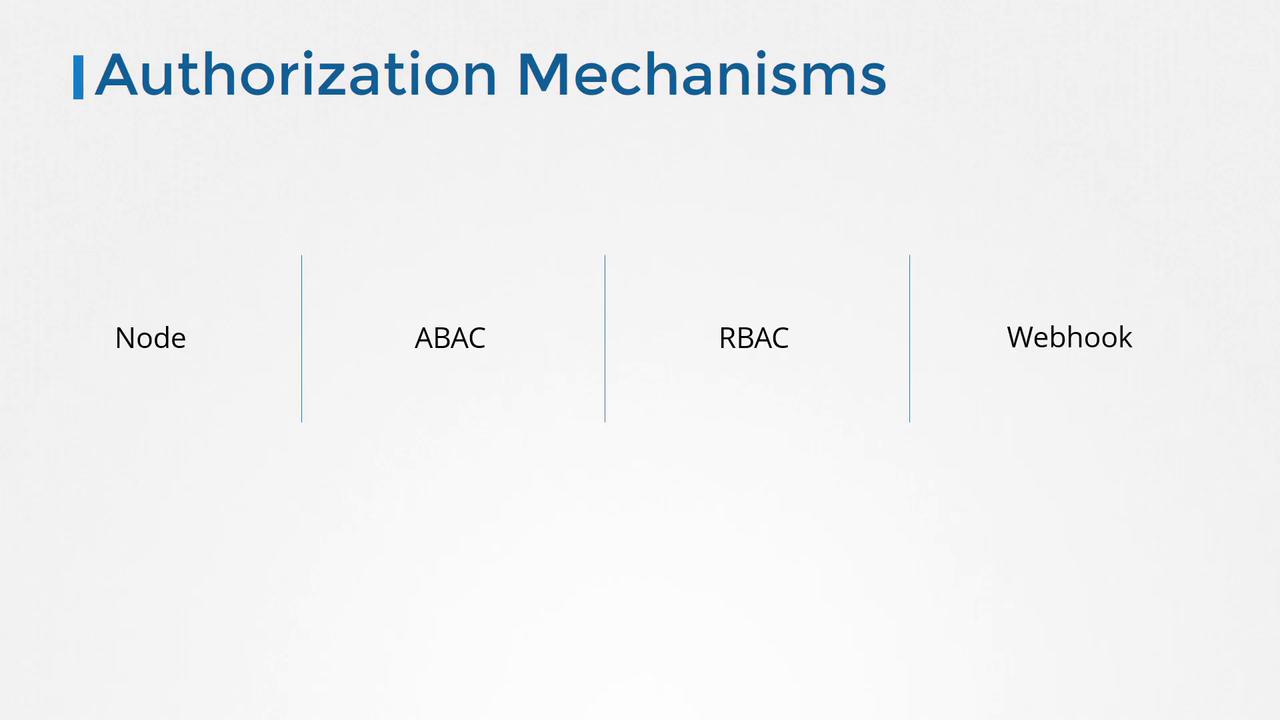
Authorization in Kubernetes is implemented through multiple mechanisms, including Node authorization, Attribute-Based Access Control (ABAC), Role-Based Access Control (RBAC), and Webhook modes. Each mechanism plays a distinct role in managing access control:
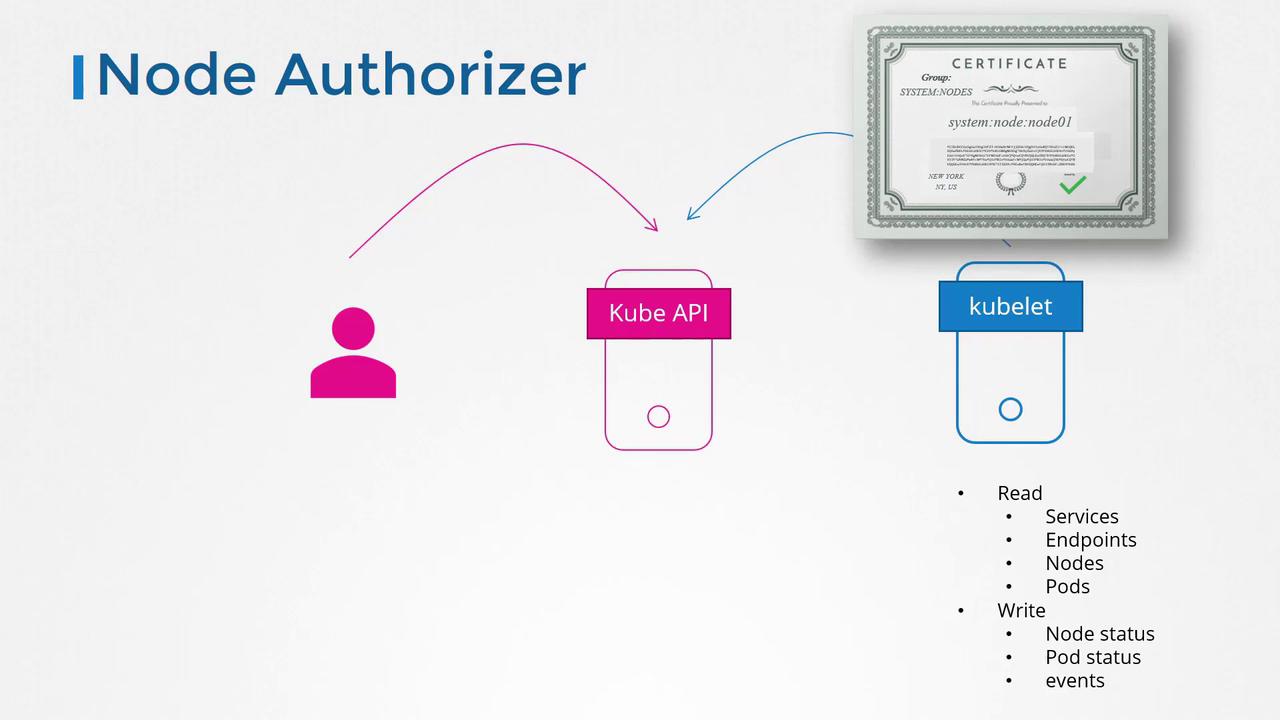
The Kubernetes API server is not only accessed by administrators but also by kubelets (nodes) that report the status of nodes and pods. Kubelets use a special node authorizer to handle requests from users whose names are prefixed by “system:node” and who belong to the “system:nodes” group. This node authorizer validates each request based on naming conventions and group memberships, ensuring that node-level actions are properly verified. Below is an overview of this authorization workflow:
For external API access, ABAC lets you tie individual users or groups to a set of permissions. For example, you can define a policy in a JSON file to allow a developer to view, create, and delete pods:
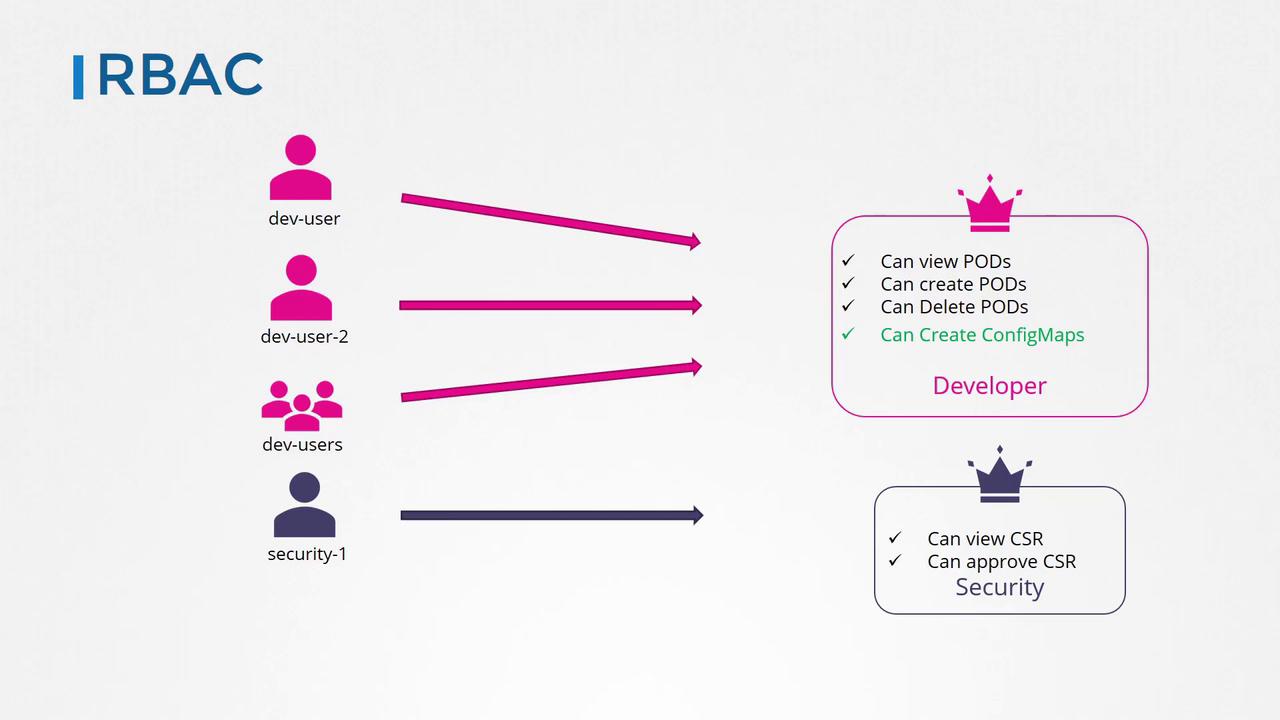
However, changes to a user’s permissions require editing the policy file and restarting the Kubernetes API server, making ABAC somewhat cumbersome. This is why many organizations prefer Role-Based Access Control (RBAC).RBAC simplifies management by allowing the creation of roles that bundle specific permissions, which can then be assigned to users or groups. For example, you can create a role for developers that permits application deployments without granting access to modify cluster configurations, while a separate role for security personnel might include permissions to approve certificate signing requests (CSRs). The structure of these RBAC roles is summarized in the following image:
In addition to the built-in mechanisms, you can delegate authorization to external tools such as Open Policy Agent (OPA). With OPA, Kubernetes sends an API call containing user details and the request to an external service, which then decides whether the request should be approved.Kubernetes also provides two simple modes: AlwaysAllow and AlwaysDeny. As their names imply, AlwaysAllow permits all requests without checks, whereas AlwaysDeny rejects all requests. These modes are configured via the authorization mode option when starting the Kubernetes API server. If no option is specified, the server defaults to AlwaysAllow.For example, here is how you configure the AlwaysAllow mode:
Alternatively, you can configure multiple authorization modes at once with a comma-separated list. The following configuration enables Node, RBAC, and Webhook modes:
When multiple authorization modes are enabled, each incoming request is processed sequentially in the specified order. For example, the request is first evaluated by the Node authorizer; if the request is either not applicable or denied, it then passes to the next module (such as RBAC). As soon as one module approves the request, the evaluation stops and access is granted.That concludes our lesson on authorization. In upcoming lessons, we will dive deeper into role-based access controls and explore their implementation in Kubernetes.