This article explains persistent volumes in Kubernetes, focusing on their implementation and management to simplify storage configuration.
Welcome to this comprehensive guide on Persistent Volumes. My name is Mumshad Mannambeth, and in this article, we walk through the concept and practical implementation of persistent volumes in Kubernetes.In previous discussions, we explored the concept of volumes where storage was configured directly within a pod definition file. For example:
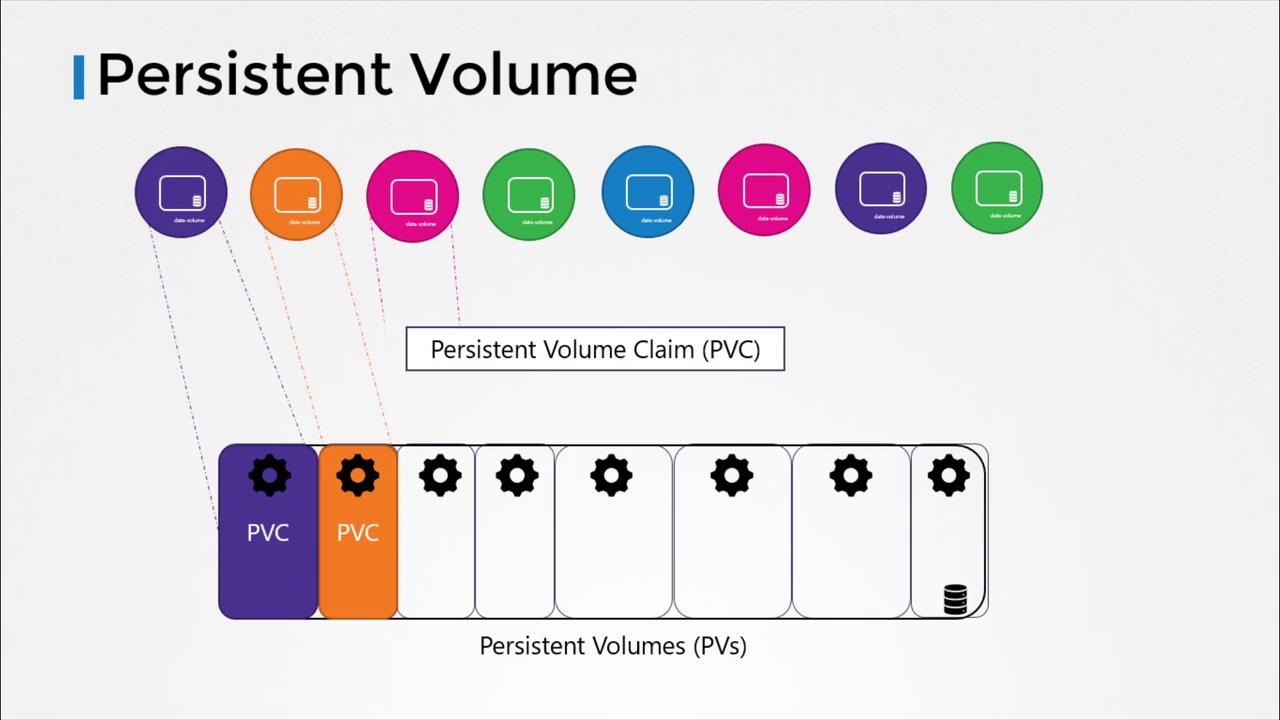
In larger environments with numerous users and multiple pod deployments, manually configuring storage for each pod becomes both tedious and error-prone. Every time a storage configuration change is required, it would need to be updated on every pod individually. Persistent volumes solve this problem by centralizing storage management. Administrators can create a large pool of storage, and users can request specific portions from that pool using Persistent Volume Claims (PVCs).
Users select the storage they need from this pool by using Persistent Volume Claims, simplifying the management and scalability of storage in Kubernetes environments.
To get started, let’s create a Persistent Volume using a base template. The following example demonstrates updating the API version, setting the kind to PersistentVolume, and giving it a name (here, PV-01). Under the spec section, the access modes—which define how a volume is to be mounted (e.g., read-only or read-write)—are specified. Kubernetes offers several modes such as ReadOnlyMany, ReadWriteOnce, and ReadWriteMany. Additionally, you define the capacity to reserve the necessary storage, set to 1Gi in this example. Initially, we use the hostPath option to utilize storage from the node’s local directory.
Using hostPath is intended for demonstration or testing purposes only and is not recommended for production environments.
For production environments, it is advisable to use a cloud storage backend rather than hostPath. For instance, you can configure AWS Elastic Block Store as illustrated below, where you specify both the volumeID and the fsType:
This article provided an overview of how persistent volumes in Kubernetes simplify storage management by centralizing configuration. In the next section, we will delve into Persistent Volume Claims and explore how they seamlessly allocate storage from the available persistent volumes.For more information, explore the following resources: