This article explains how Kubernetes manages authorization to control user operations within a cluster.
In this article, we explain how Kubernetes handles authorization. After establishing access to a cluster through authentication (as discussed in our previous article), authorization determines which operations a user—whether human or machine—can perform within the cluster.For example, a cluster administrator can view, create, or delete objects such as pods, nodes, and deployments. However, when granting access to additional users (e.g., developers, testers, other administrators, or external applications like Jenkins and monitoring tools), it is best practice to restrict their privileges. Developers might be allowed to view pods and deploy applications but should not modify cluster configurations or delete nodes. Similarly, when sharing a cluster among multiple organizations or teams using namespaces, each user’s access should be confined to their designated namespace.
Adjust user privileges using authorization policies to ensure cluster security and maintain operational integrity.
Below are some example commands demonstrating typical administrative operations:
Copy
kubectl get pods# Output:# NAME READY STATUS RESTARTS AGEkubectl get nodes# Output:# NAME STATUS ROLES AGE VERSION# worker-1 Ready <none> 5d21h v1.13.0kubectl delete node worker-2# Output:# Node worker-2 Deleted!
When non-admin users attempt similar operations, they may encounter authorization errors:
Copy
kubectl get podskubectl get nodeskubectl delete node worker-2# Error from server (Forbidden): nodes "worker-2" is forbidden: User "developer" cannot delete resource "nodes"
Kubernetes supports a variety of authorization mechanisms, including:
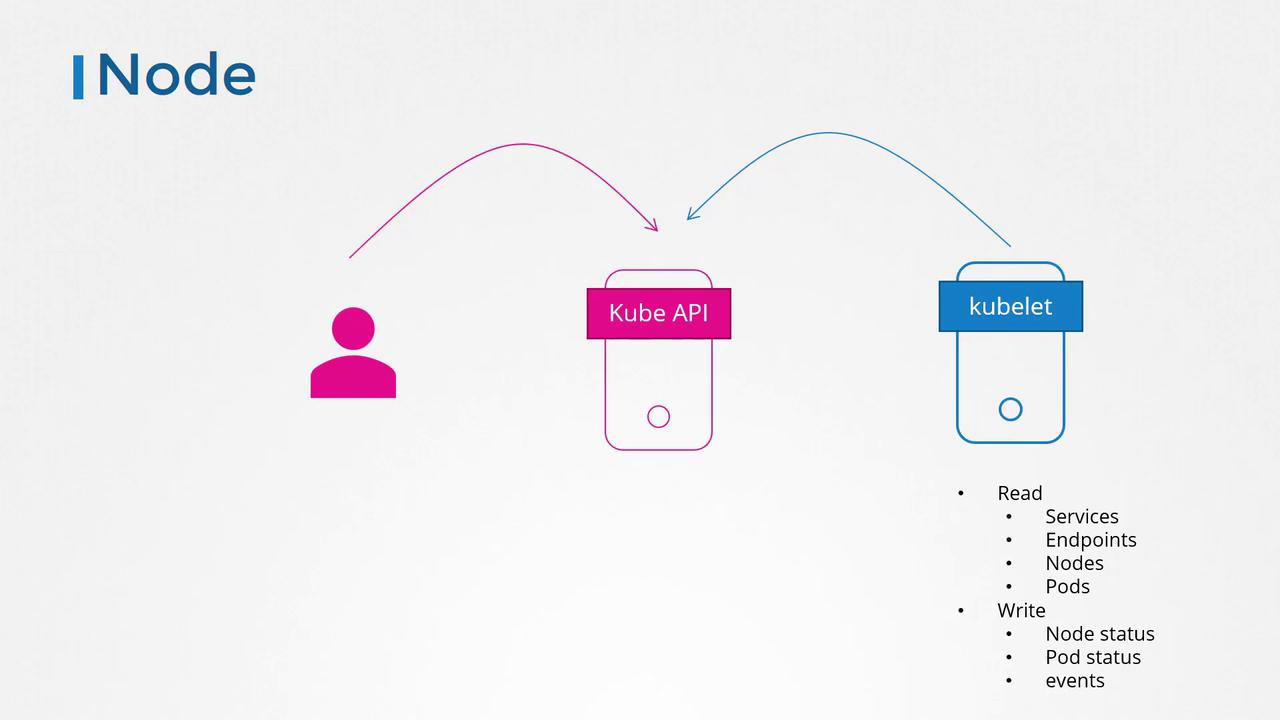
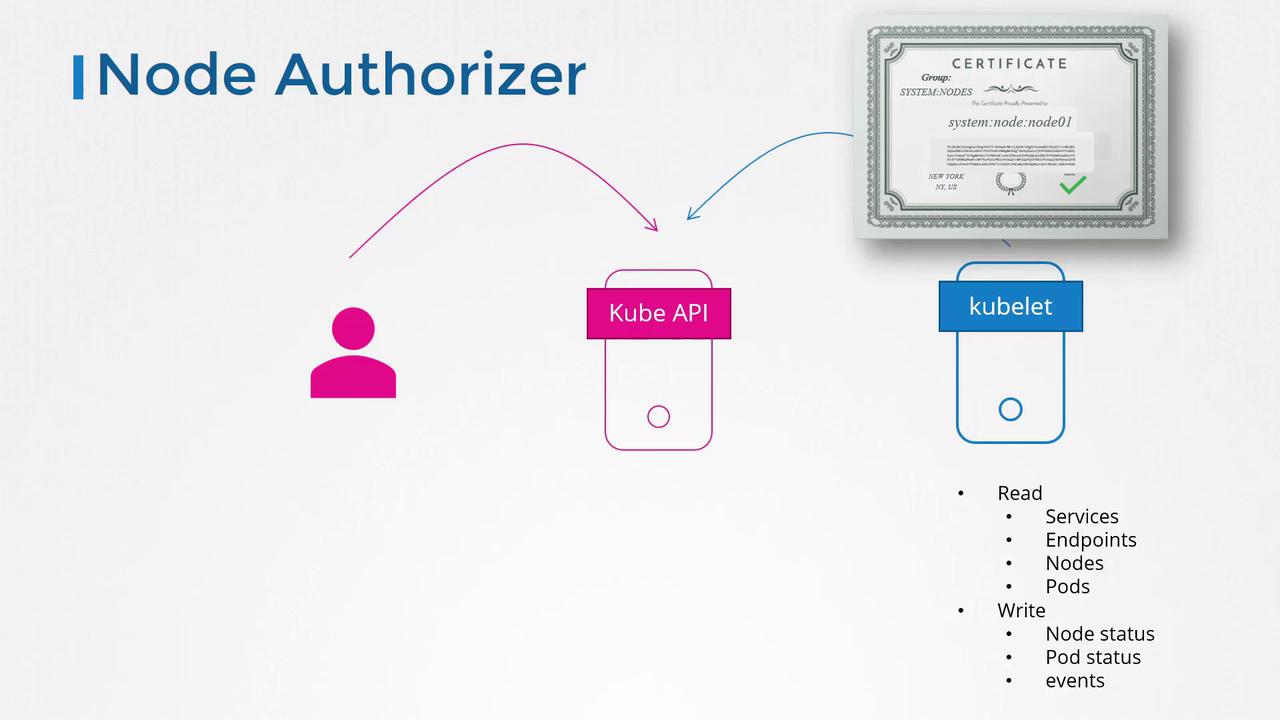
When the Kube API server handles requests from internal components, such as kubelets, it utilizes node authorization. The kubelet is responsible for tasks like reading service and pod information and reporting node status. These requests are authenticated by confirming that they originate from users with a name prefixed by “system:node” who belong to the “system:nodes” group.
Once a kubelet makes a request with the appropriate credentials, the node authorizer grants the necessary privileges.
For external API access, attribute-based authorization enables you to associate specific users or user groups with sets of permissions. For instance, you can define a JSON policy to allow a particular developer user to view, create, and delete pods. Below is an example policy file:
Every time you need to update security settings, modify this policy file and restart the kube-apiserver. However, as the number of users and policies increases, these attribute-based configurations can become difficult to manage.
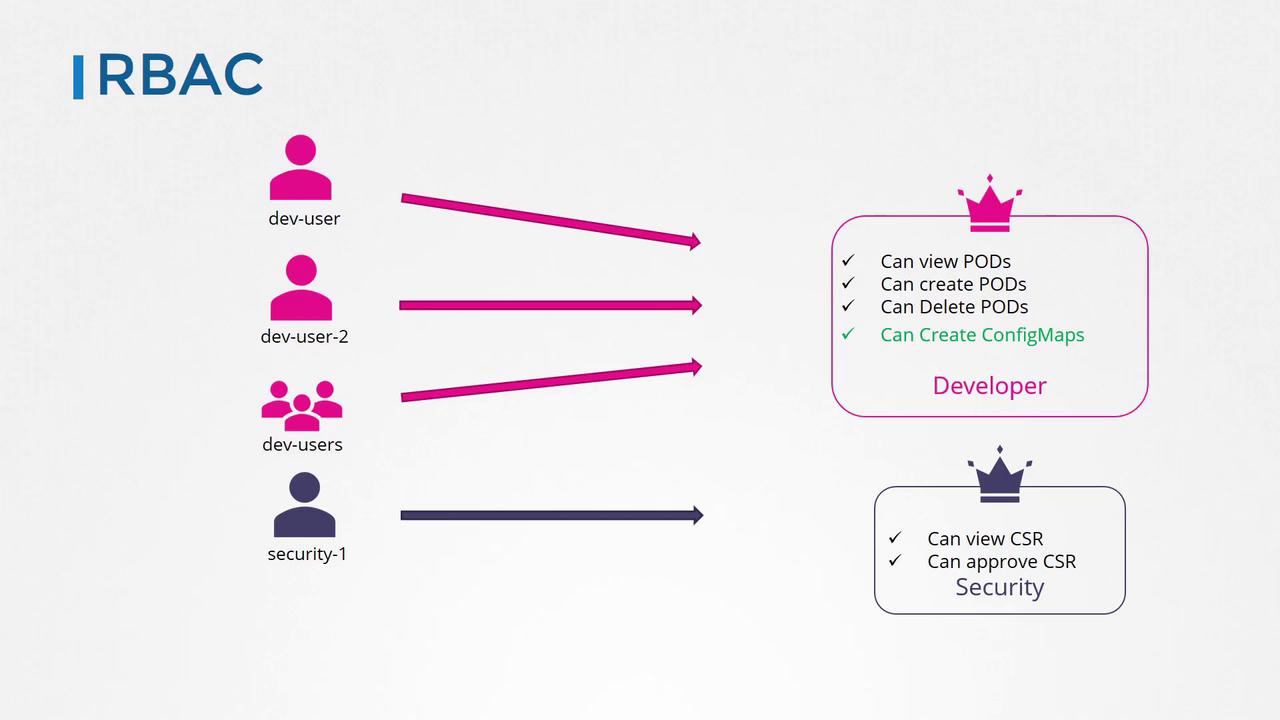
RBAC offers a more scalable approach compared to directly binding permissions to each user. With RBAC, you define roles that encapsulate necessary permissions (for example, one role for developers and another for security users). When users are assigned to roles, any updates made to a role are immediately reflected for all associated users.
If you prefer to manage authorization externally, third-party tools like Open Policy Agent can be used. In this scenario, Kubernetes sends an API call containing user details and request information to the external system. Based on the external decision, the API server either grants or denies access.
Simple Authorization Modes: AlwaysAllow and AlwaysDeny
Kubernetes also includes two straightforward authorization modes: AlwaysAllow and AlwaysDeny. As their names imply, AlwaysAllow permits all requests without checks, while AlwaysDeny blocks all requests. These modes are configured in the kube-apiserver using the authorization mode option. If not specified, the default mode is AlwaysAllow.
It is also possible to enable multiple authorization modes simultaneously by providing a comma-separated list. For example, to enable node authorization, RBAC, and webhook authorization in that order, configure the kube-apiserver as follows:
When multiple modes are configured, the API server processes each request through the specified modules in the provided order:
The node authorizer first examines the request (applicable only for node-related operations). If it denies the request, the process proceeds to the next module.
The RBAC controller evaluates the request. If it approves, no additional checks occur.
If necessary, the webhook authorizer issues the final decision.
Once any module approves the request, remaining checks are skipped, and the user is granted access to the requested object.
More details on RBAC and additional Kubernetes security mechanisms will be provided in upcoming articles.