This article explains Ingress in Kubernetes, detailing its role in managing external access to applications and providing routing configurations.
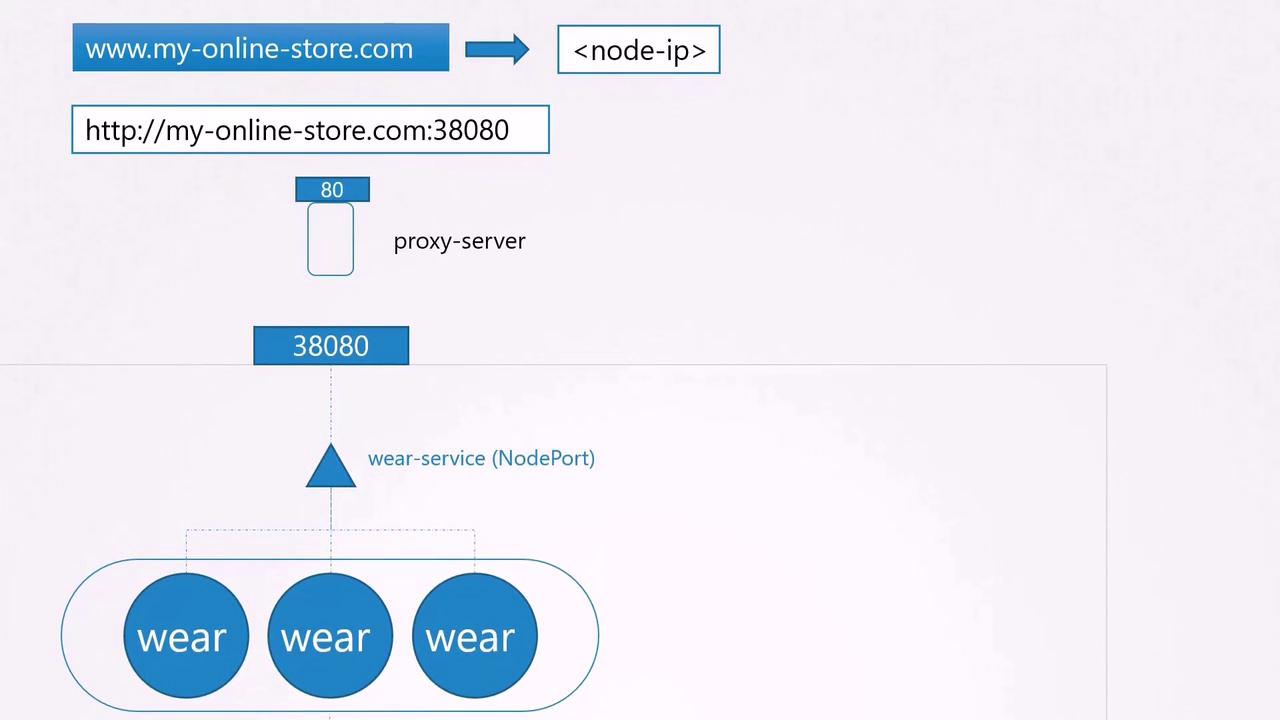
Welcome to this comprehensive lesson on Ingress in Kubernetes. In this article, we revisit Kubernetes services and guide you through the process of understanding and implementing Ingress—a critical component for managing external access to your cluster-based applications.Imagine deploying an online store application at myonlinestore.com. First, you build your application into a Docker image and deploy it on your Kubernetes cluster as a pod within a Deployment. Your application requires a MySQL database, so you deploy MySQL as a pod and expose it internally using a ClusterIP service named MySQL service.To enable external access, you create a NodePort service that exposes your application on a high port (for example, port 38080). With this setup, users can access your application by navigating to http://<node-IP>:38080. Even when scaling the application by increasing the number of pod replicas, the NodePort service efficiently handles traffic distribution.However, for production-grade applications, you often need more advanced configurations. Consider these enhancements:
Configuring a DNS server that points to your node IPs so that users access your application via a friendly domain name (like myonlinestore.com).
Eliminating the need for users to remember port numbers by using a proxy server that forwards requests from port 80 (or 443 for HTTPS) to the NodePort (38080).
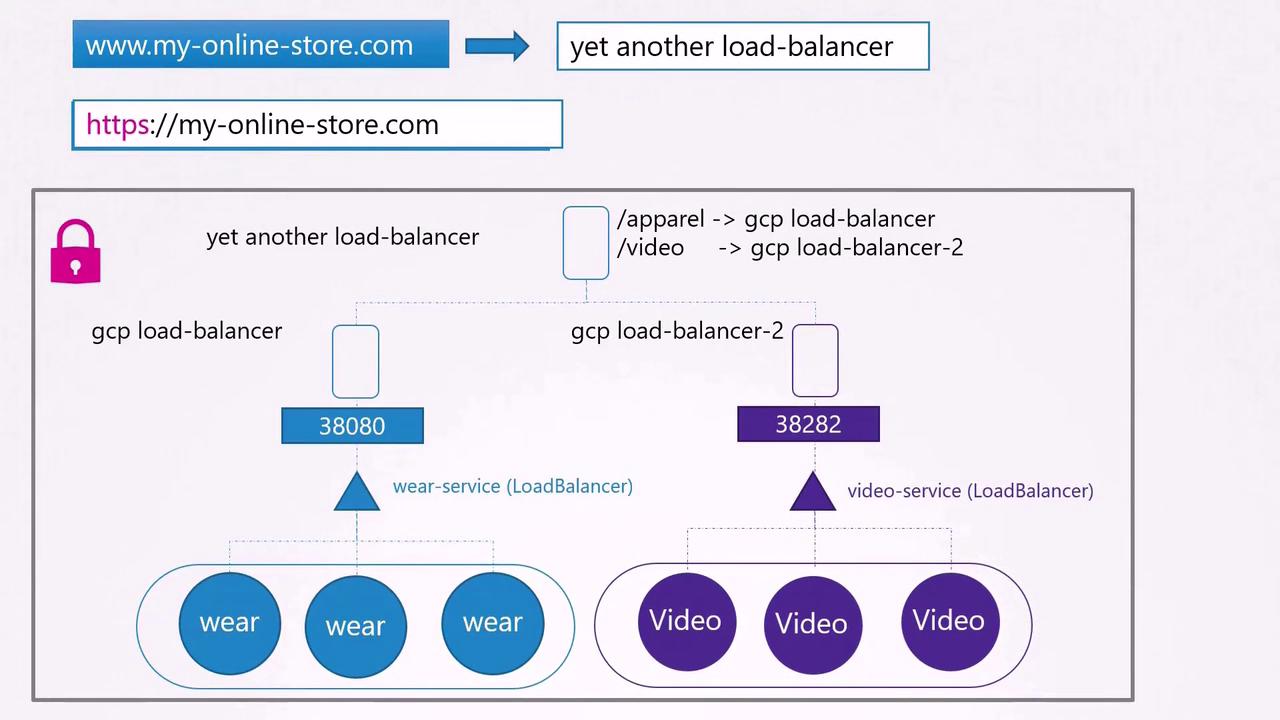
In a public cloud environment such as Google Cloud Platform (GCP), instead of using a NodePort service, you can opt for a LoadBalancer service. Kubernetes will create an internal NodePort and simultaneously instruct GCP to provision a network load balancer. GCP then sets up the load balancer with an external IP address for your DNS settings.As your business expands, you may introduce additional services (for example, a video streaming service available at myonlinestore.com/watch) while keeping your original application at myonlinestore.com/wear. Although these services are developed separately (with distinct Deployments and LoadBalancer services), managing multiple load balancers can be costly and complex. You need to consolidate traffic by directing it based on URL paths and configure centralized SSL termination.
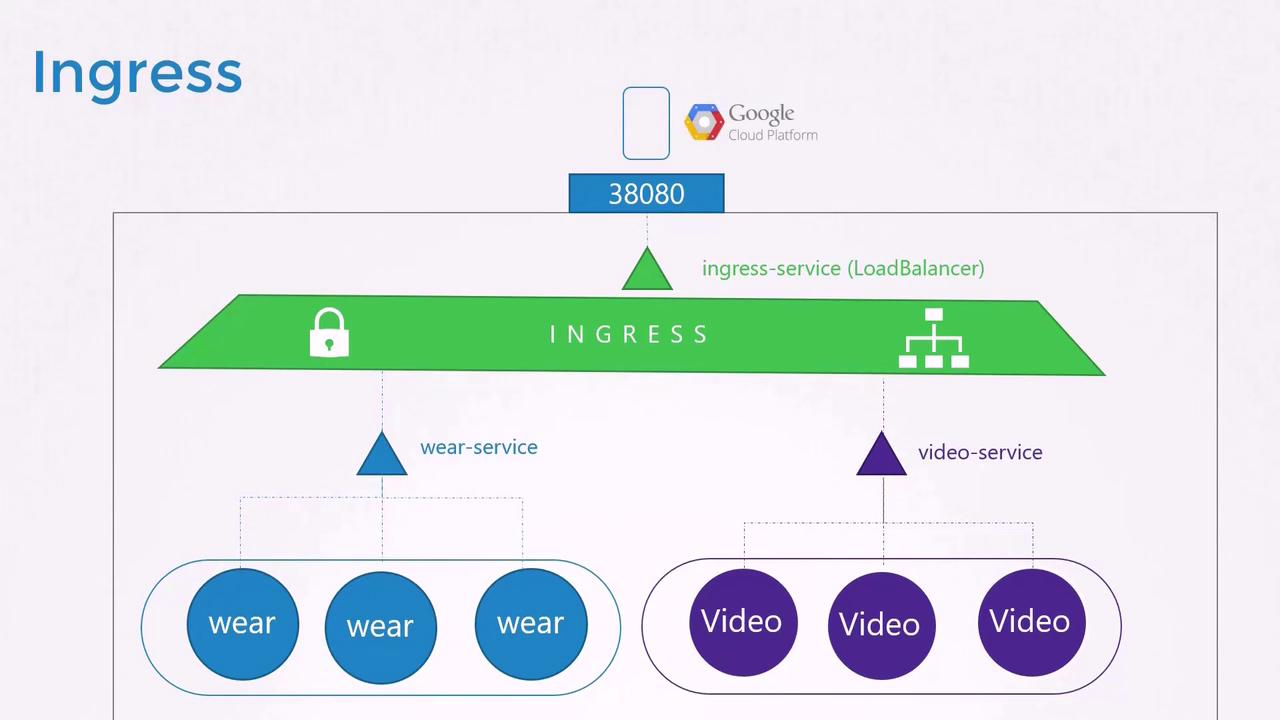
This is where Ingress proves its value. Ingress offers a single externally accessible URL that routes incoming requests to various services within the cluster based on URL paths or hostnames, while also handling SSL termination. Essentially, Ingress acts as a layer-7 load balancer built into Kubernetes, configured using native Kubernetes objects. Although you still need to expose the Ingress controller via a NodePort or a cloud-native load balancer, all advanced load balancing, authentication, SSL, and URL routing settings are managed on the Ingress controller.Without Ingress, you would manually deploy and manage reverse proxies like NGINX, HAProxy, or Traefik, configuring URL routes and SSL certificates for each. With Ingress, you simply deploy an Ingress controller (the proxy) and define Ingress resources (the routing rules) as Kubernetes objects.
Kubernetes does not include an Ingress controller by default. If you create Ingress resources without one, they will not function. Ensure you deploy a supported Ingress controller, such as NGINX, GCE, Contour, HAProxy, Traefik, or Istio. In this lesson, we use NGINX as an example.
The NGINX Ingress Controller monitors the Kubernetes cluster for Ingress resource definitions and adjusts its configuration accordingly. Typically, it is deployed as a Deployment.Below is an example Deployment definition for the NGINX Ingress Controller:
This configuration creates a single replica of the NGINX Ingress Controller using an image built specifically for Kubernetes, with the pod appropriately labeled.To decouple configuration data from the container image (such as log paths and SSL settings), you can provide a reference to a ConfigMap. Here’s an updated Deployment with a ConfigMap reference:
Additionally, the Ingress controller requires specific environment variables (to capture the pod’s name and namespace) and needs to expose ports 80 and 443. Create a Service and ServiceAccount to expose the controller and provide it with the necessary permissions:
In this complete configuration, the Deployment, Service, ConfigMap, and ServiceAccount work together to deploy the NGINX Ingress Controller with proper exposure and permissions. Once deployed, the controller will continuously monitor the cluster for Ingress resources and dynamically adjust its configuration.
Ingress resources define routing rules for how external traffic reaches your services within the cluster. These rules can be based on URL paths or the domain name (host).
If you need to route traffic based on different URL paths—such as sending /wear traffic to one service and /watch traffic to another—define an Ingress resource with explicit rules:
In this configuration, a single rule handles traffic for the domain (e.g., myonlinestore.com), routing the requests to the appropriate backend based on the URL path.After you create this Ingress resource using kubectl create -f, inspect it with:
kubectl describe ingress ingress-wear-watch
This command displays the defined rules and backend configurations, ensuring that traffic is properly directed.
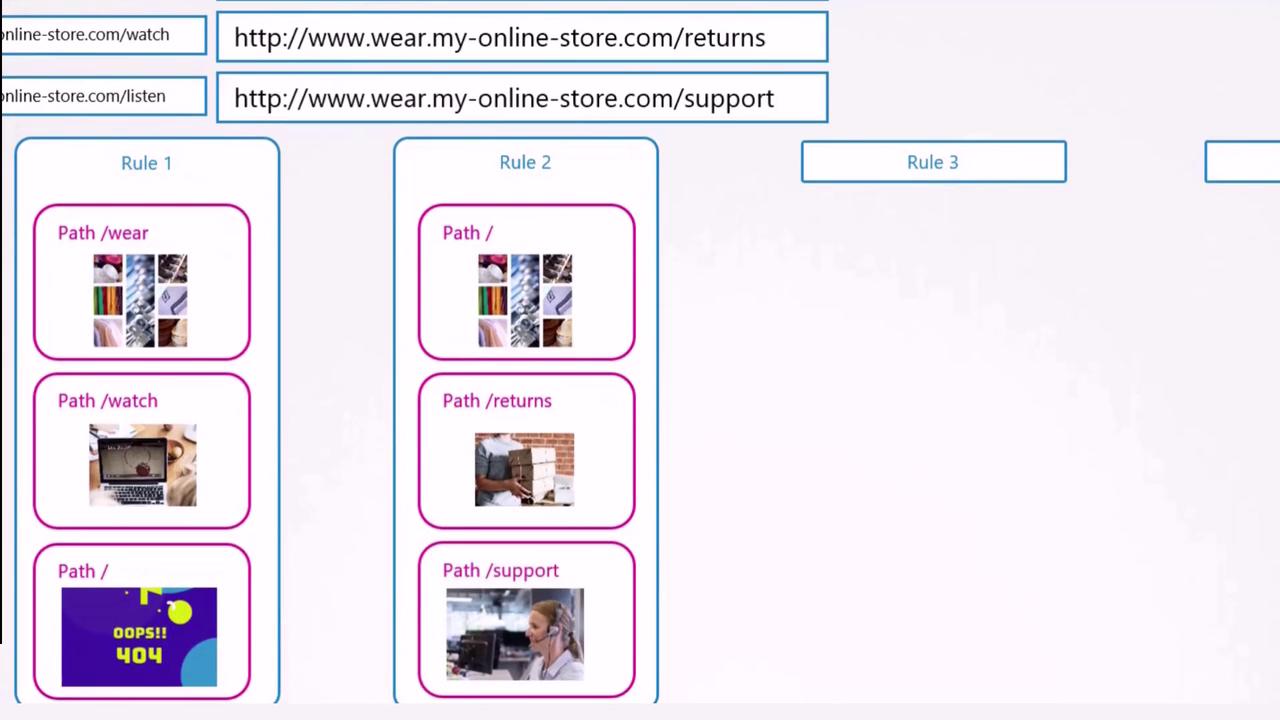
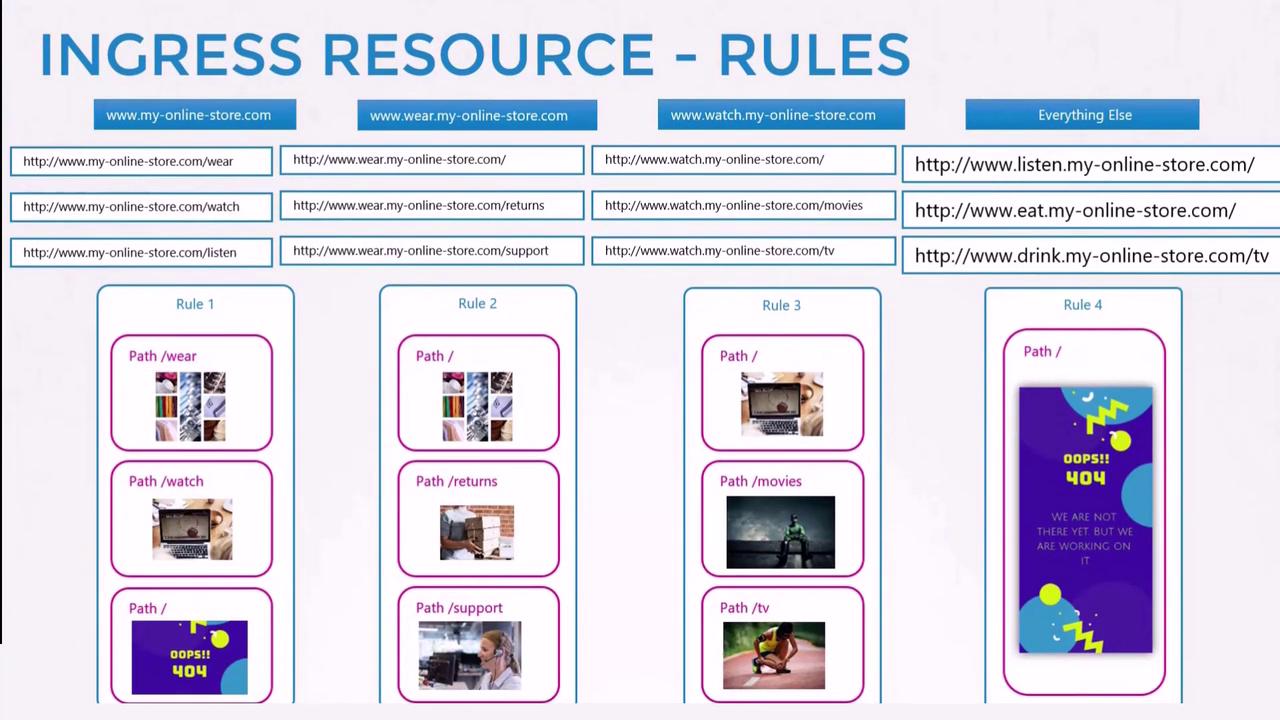
In this case, traffic directed to wear.my-online-store.com reaches the wear-service, while requests to watch.my-online-store.com are forwarded to the watch-service. You can also configure multiple paths under each host if needed.
If a user visits a URL that doesn’t match any defined rule (for example, myonlinestore.com/listen), you can specify a default backend to display a custom 404 page or message.
Ingress in Kubernetes provides a unified and simplified approach to managing external access. It enables host- or URL-based routing, handles SSL termination, and minimizes the complexity associated with managing multiple load balancers. By defining Ingress resources and controllers as native Kubernetes objects, you ease the deployment, maintenance, and scalability challenges.
In this article, we compared two approaches to configuring Ingress:
Splitting traffic by URL within a single rule using multiple paths.
Splitting traffic by domain name using separate rules.
Both strategies allow detailed routing configurations to ensure that each request is effectively directed based on the defined rules.
In practice, you can experiment with two types of labs:
An environment where the Ingress controller, resources, and applications are already deployed. Observe the configurations, gather data, and answer related questions.
More challenging scenarios where you deploy the Ingress controller and resources from scratch.
Good luck with your Kubernetes Ingress deployments, and happy learning! See you in the next article.