This article explains generating certificates for a Kubernetes cluster using OpenSSL, focusing on CA, client, and server certificates for secure communication.
In this article, we explain how to generate certificates for a Kubernetes cluster using OpenSSL. While tools like EasyRSA and CFSSL are also available, our focus here is on using OpenSSL. We will start by creating the Certificate Authority (CA) certificates, and then move on to generating client certificates for users and server certificates for core components.
To begin, generate the CA private key, create a certificate signing request (CSR) with the common name “KUBERNETES-CA”, and then self-sign it. The CSR includes all certificate details but is unsigned until the CA key is applied.Run these commands to create your CA certificates:
For the admin user, a private key is generated first. Then, a CSR is created with the common name “kube-admin”. The certificate is signed using the CA certificate and private key. This naming is essential since it is used within audit logs and other system functions.Run the following commands to generate the admin user’s certificate:
To differentiate admin users from basic users, you can include group details in the CSR by specifying the Organizational Unit (OU). For example, adding the group system:masters grants administrative privileges:
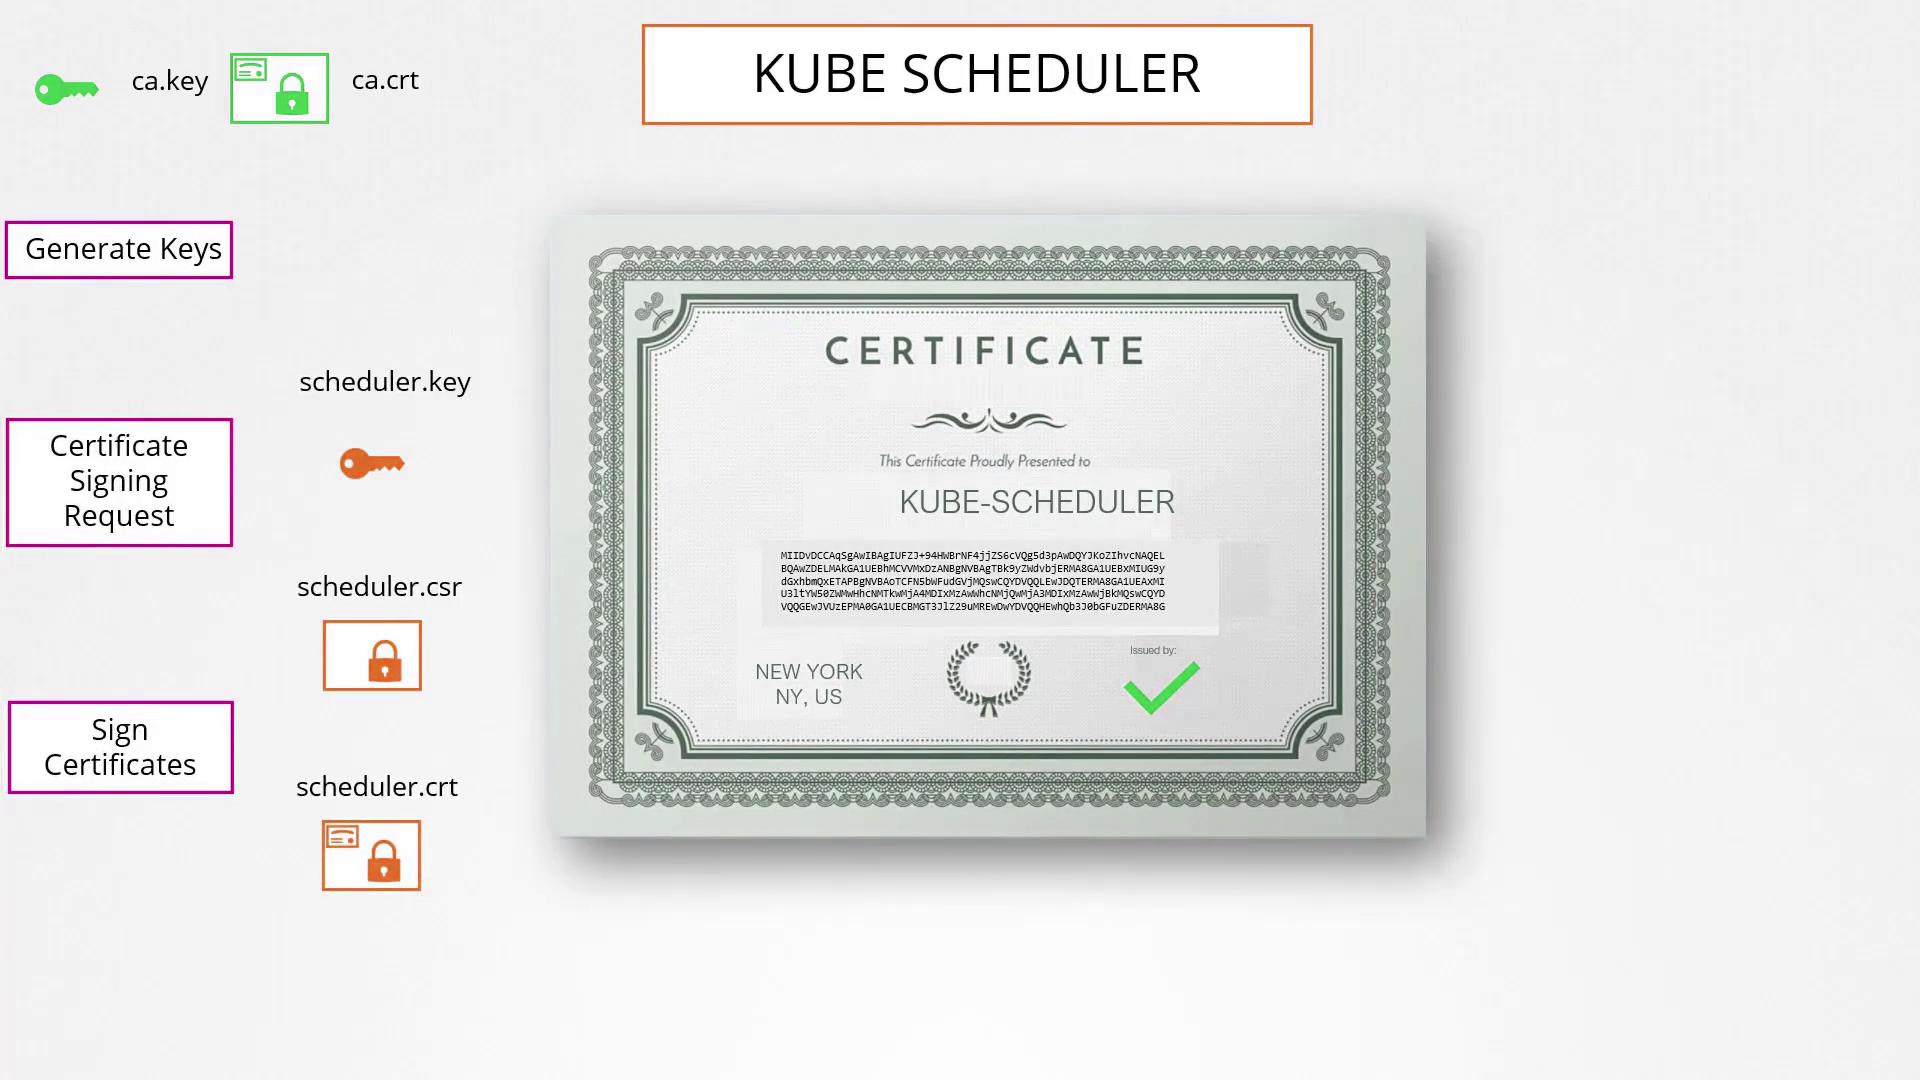
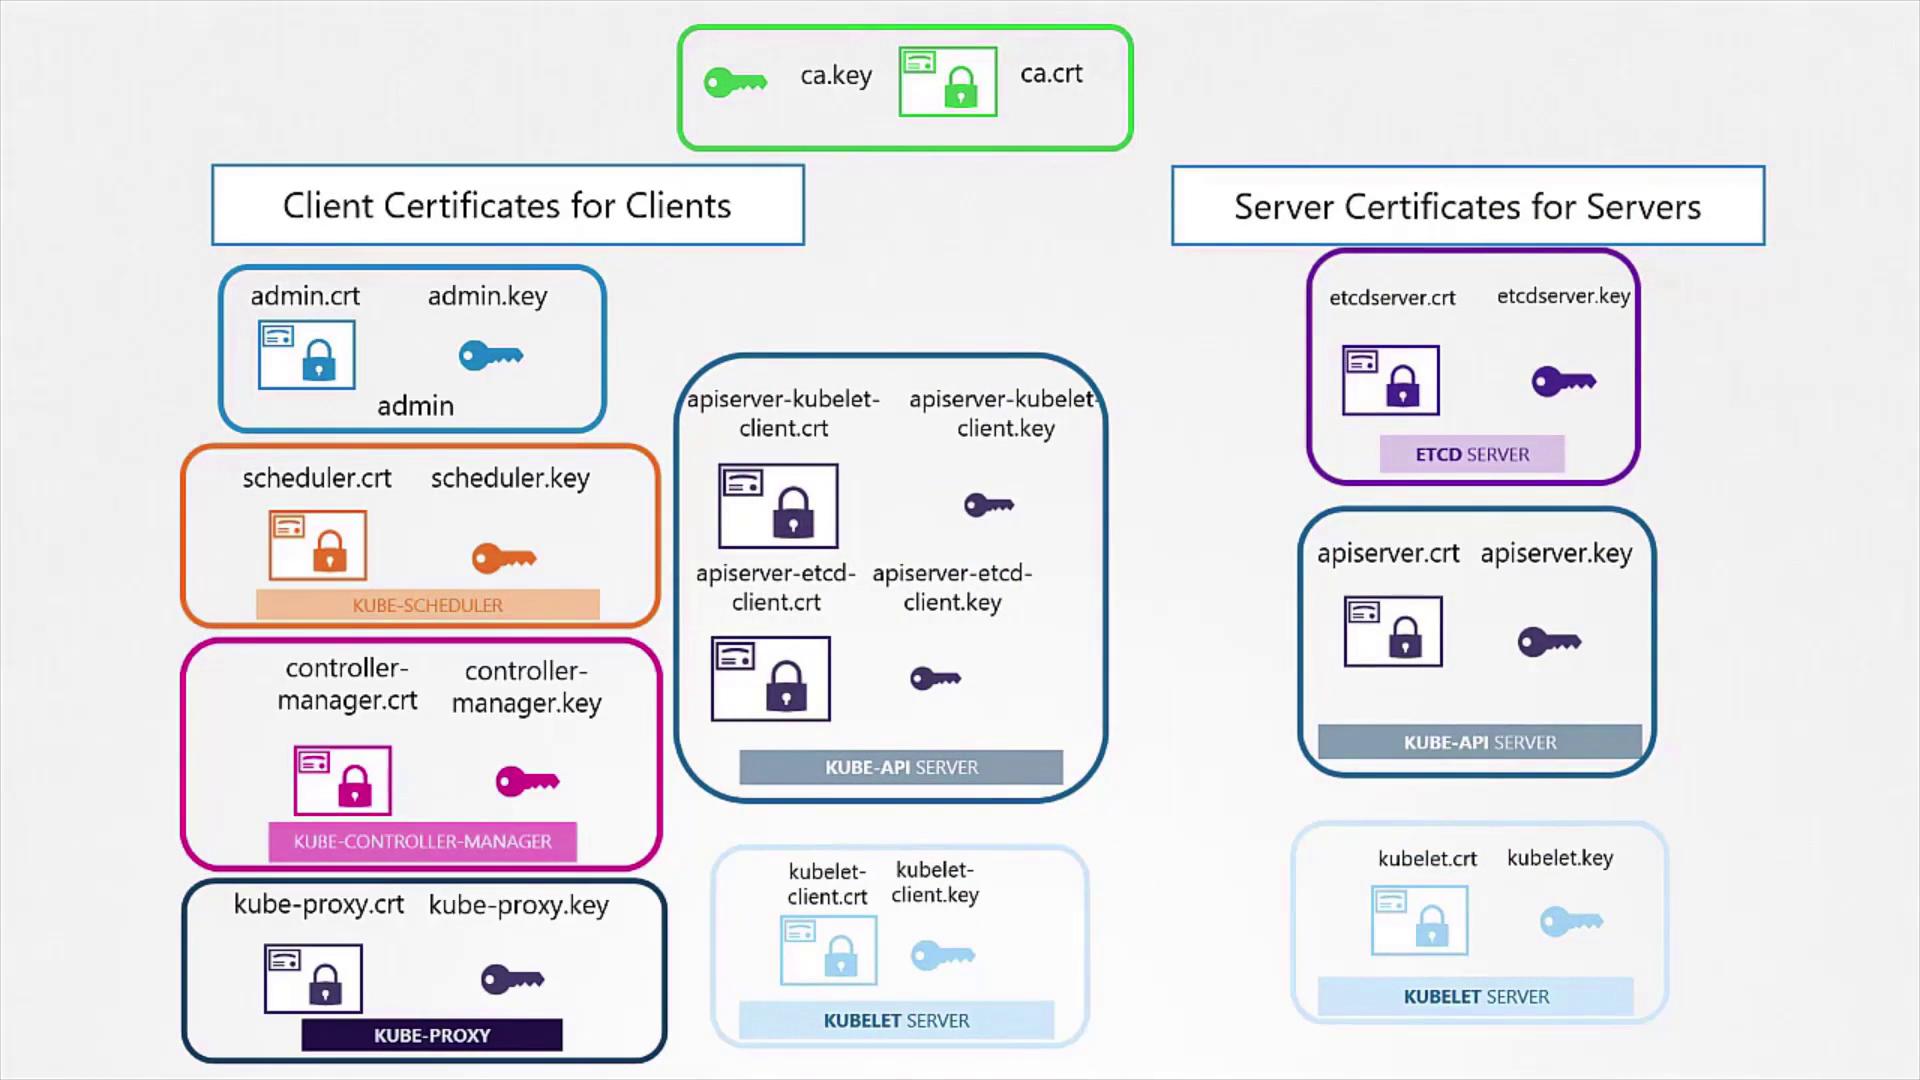
The above commands create a signed certificate indicating admin privileges. Similar procedures are used to generate certificates for other Kubernetes components (such as the kube scheduler, controller manager, and kube proxy). These certificates enable secure authentication with the kube API server, allowing REST API calls that use the key, client certificate, and CA certificate. For example:
Most Kubernetes clients consolidate these parameters into a configuration file called KubeConfig, which details the API server endpoint and corresponding certificates.
Both clients and servers must use a shared CA root certificate for secure communication. This mutual trust ensures that the certificates presented by each party are signed by a trusted authority, much like how browsers validate a website’s certificate.
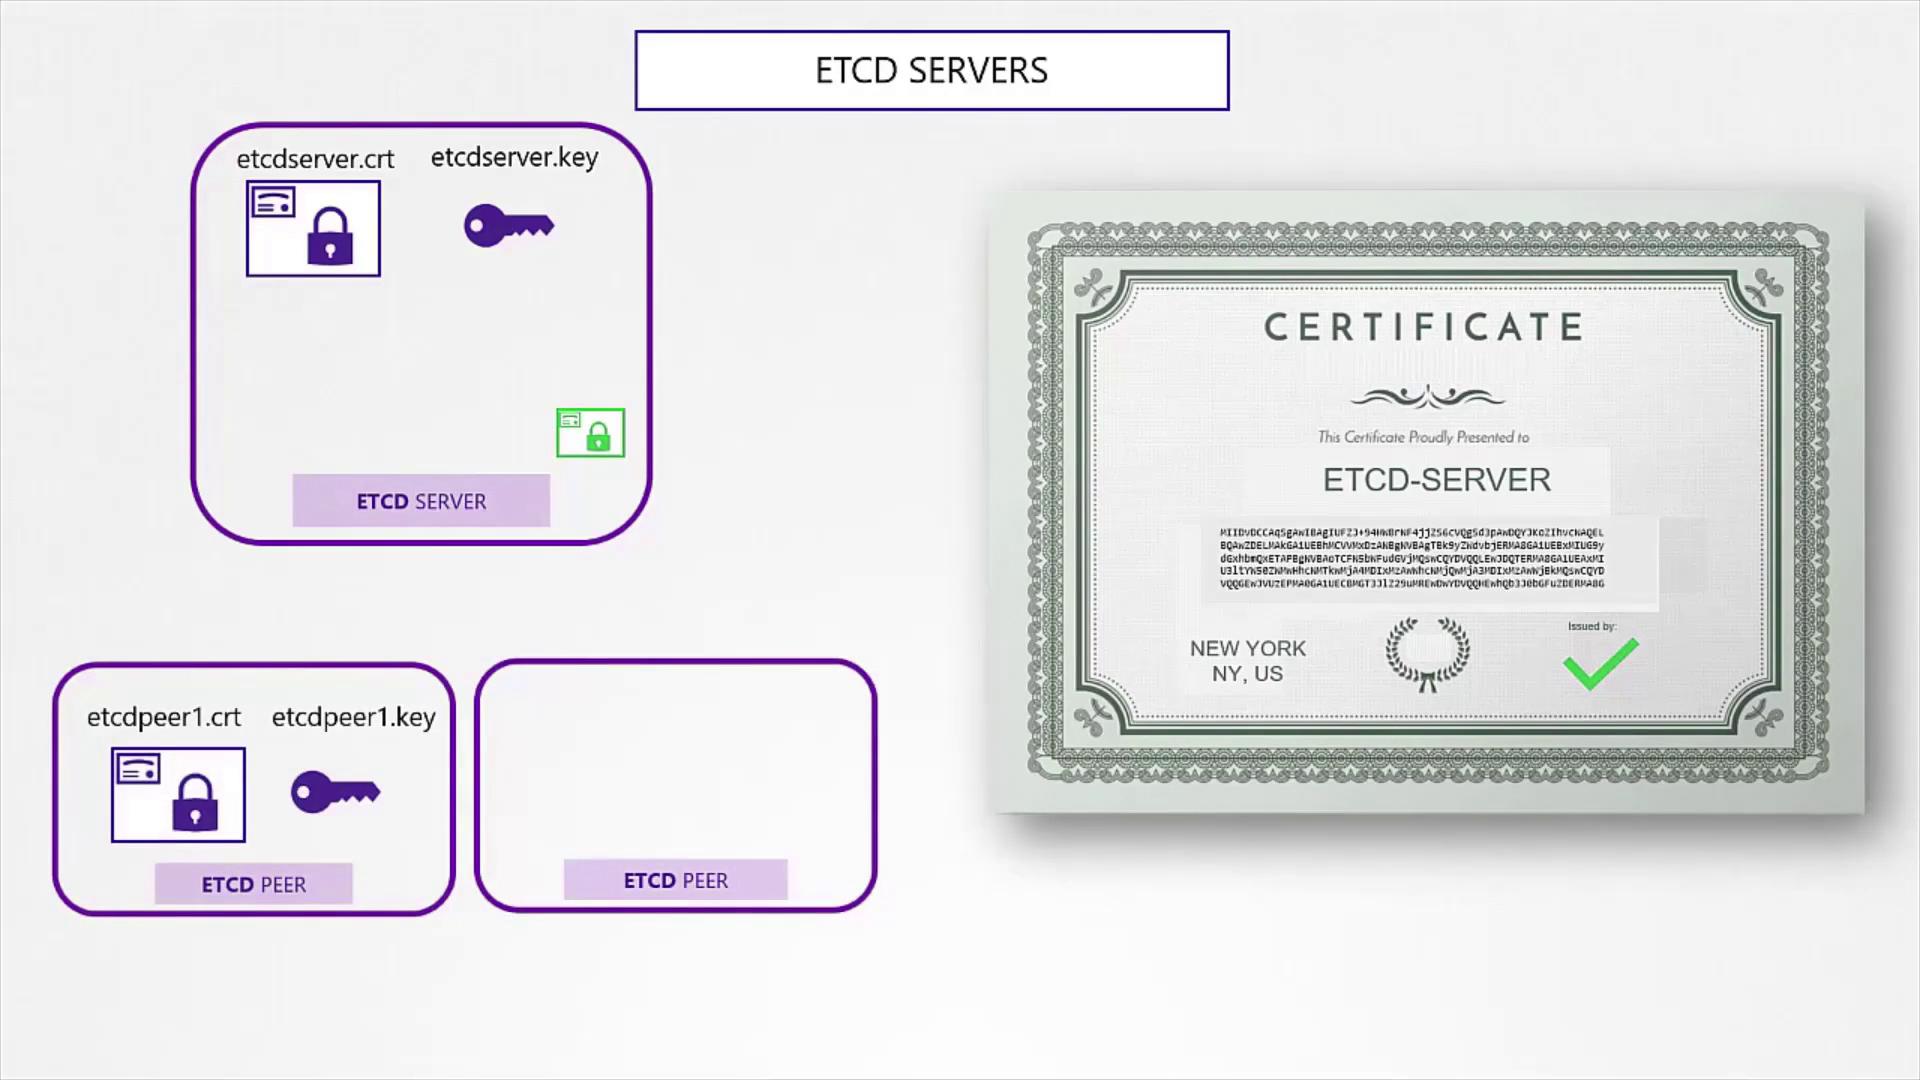
For the etcd server, which is critical in high-availability deployments, the certificate generation process is analogous to that for clients. The etcd server may also require additional peer certificates for secure inter-cluster communication.After generating the key and certificate for the etcd server, reference them in your etcd configuration file. For example, review your configuration via:
cat etcd.yaml
And the content of etcd.yaml might look like this:
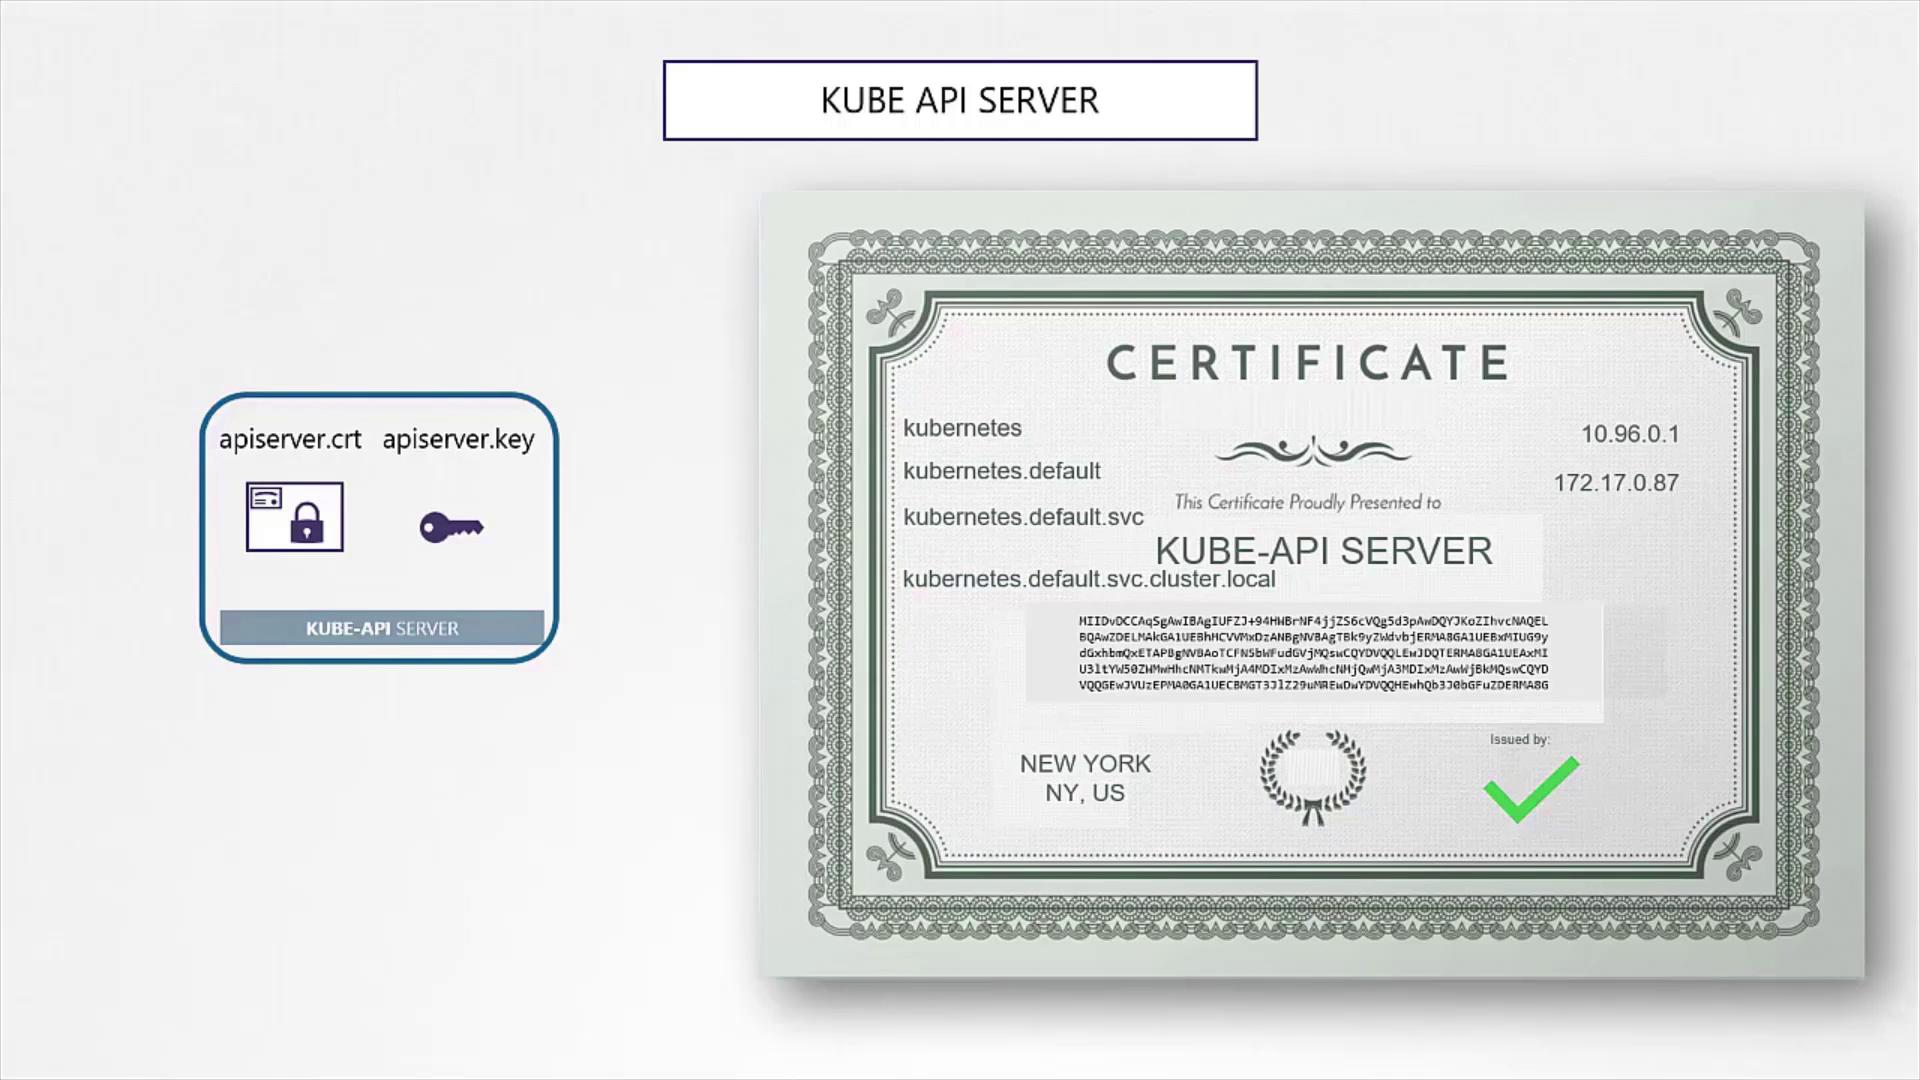
The kube API server is the central component of the Kubernetes control plane. This server is recognized by multiple DNS names and IP addresses, so its certificate must include all alternate names.
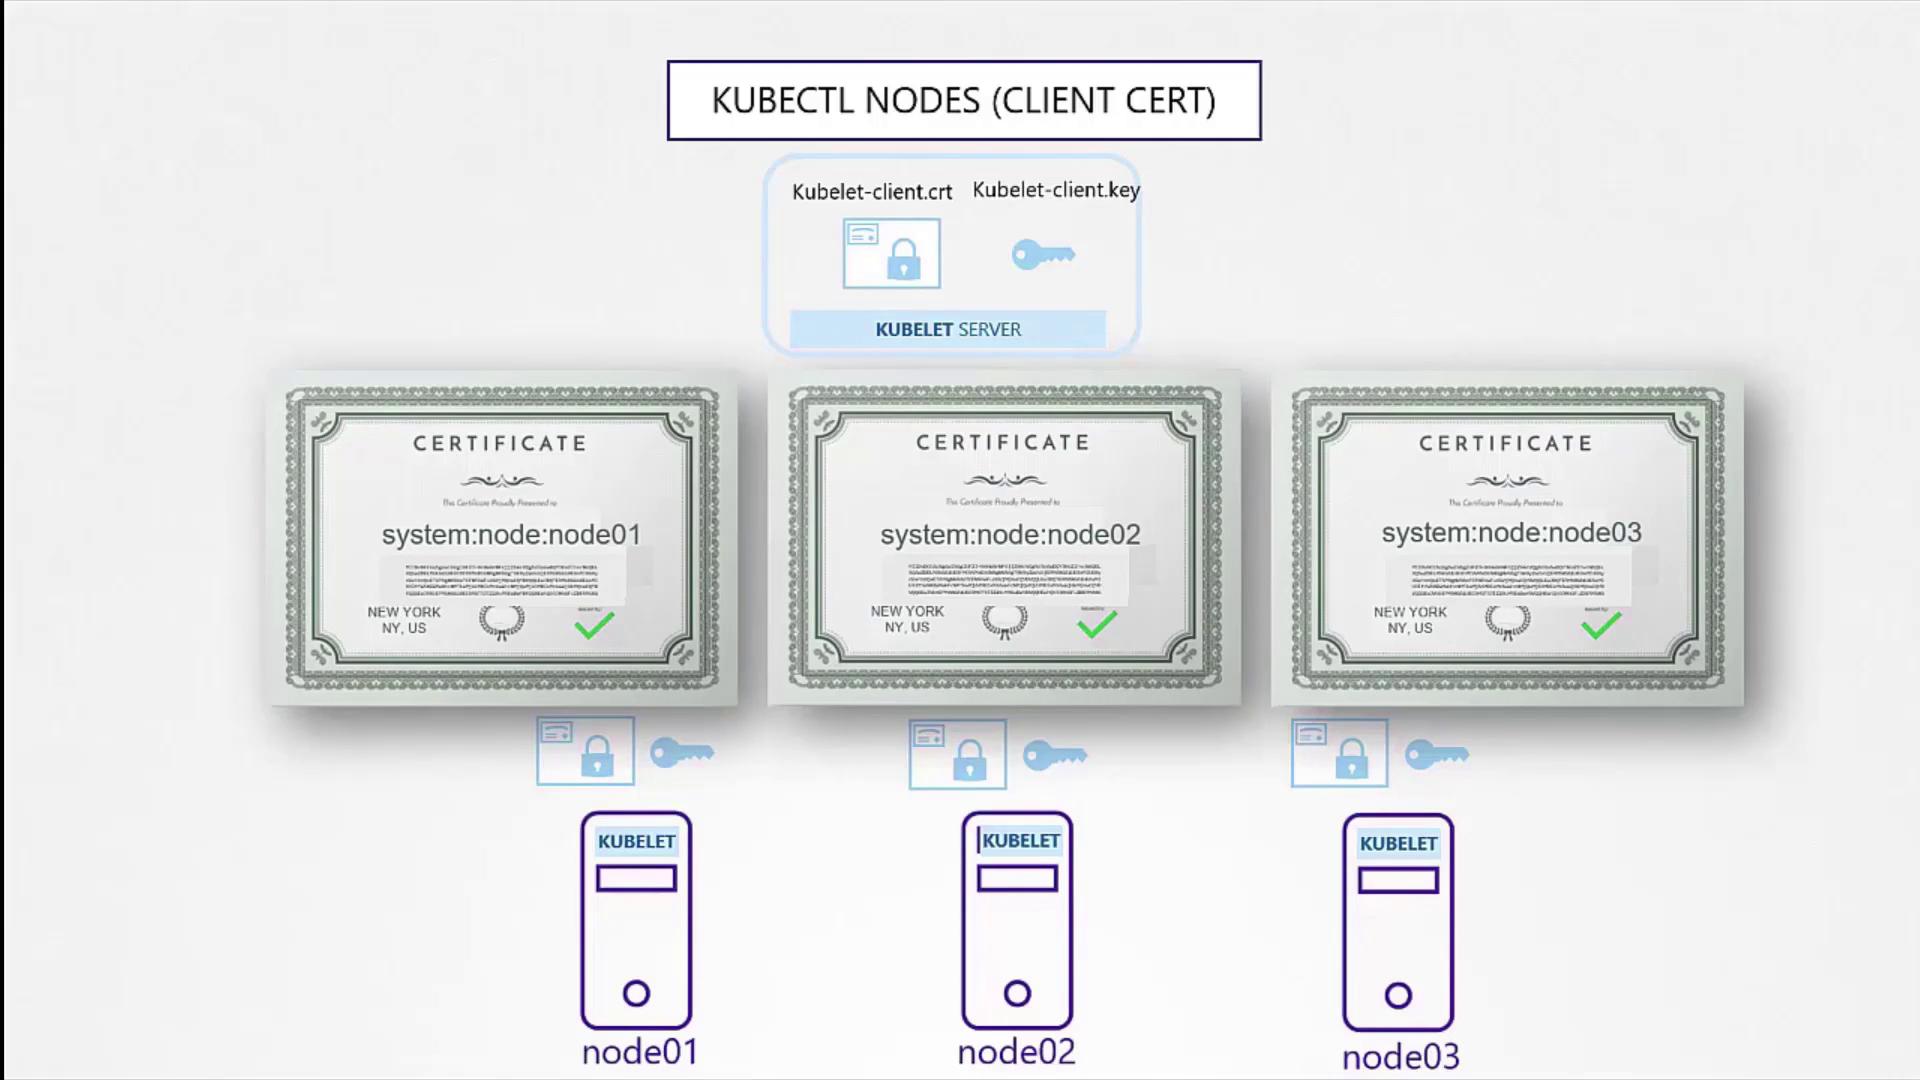
Each Kubernetes node runs a kubelet, which serves as an HTTPS API server to manage node operations. Every node must possess its own key and certificate pair, typically named after the node (e.g., node-01, node-02, node-03).The node-specific certificates are then referenced inside the kubelet configuration file. For example:
Client certificates for the kubelet enable authentication against the kube API server. They follow a naming convention using the prefix “system:node:” followed by the node name, ensuring that the API server assigns the correct permissions.
In this article, we covered the following key steps:
Generating the CA Certificates:
Creating a self-signed CA to sign all other certificates.
Creating Client Certificates:
Generating certificates for admin users and control plane components (like the kube scheduler, controller manager, and kube proxy) for secure authentication.
Securing the Kube API Server:
Producing a kube API server certificate that includes multiple DNS names and IP addresses to guarantee trust.
Generating Server-Side Certificates:
Producing certificates for the etcd server and node-specific certificates for kubelets to enable secure component-to-component communications.
All these certificates play a crucial role in ensuring secure communication within the Kubernetes cluster by verifying the identity of each component via the shared CA certificate.
In the next article, we will explore how to view certificate information and how KubeADM automates certificate configuration.Happy securing!