This article explores admission controllers in Kubernetes, which validate, mutate, or reject API requests before they are persisted.
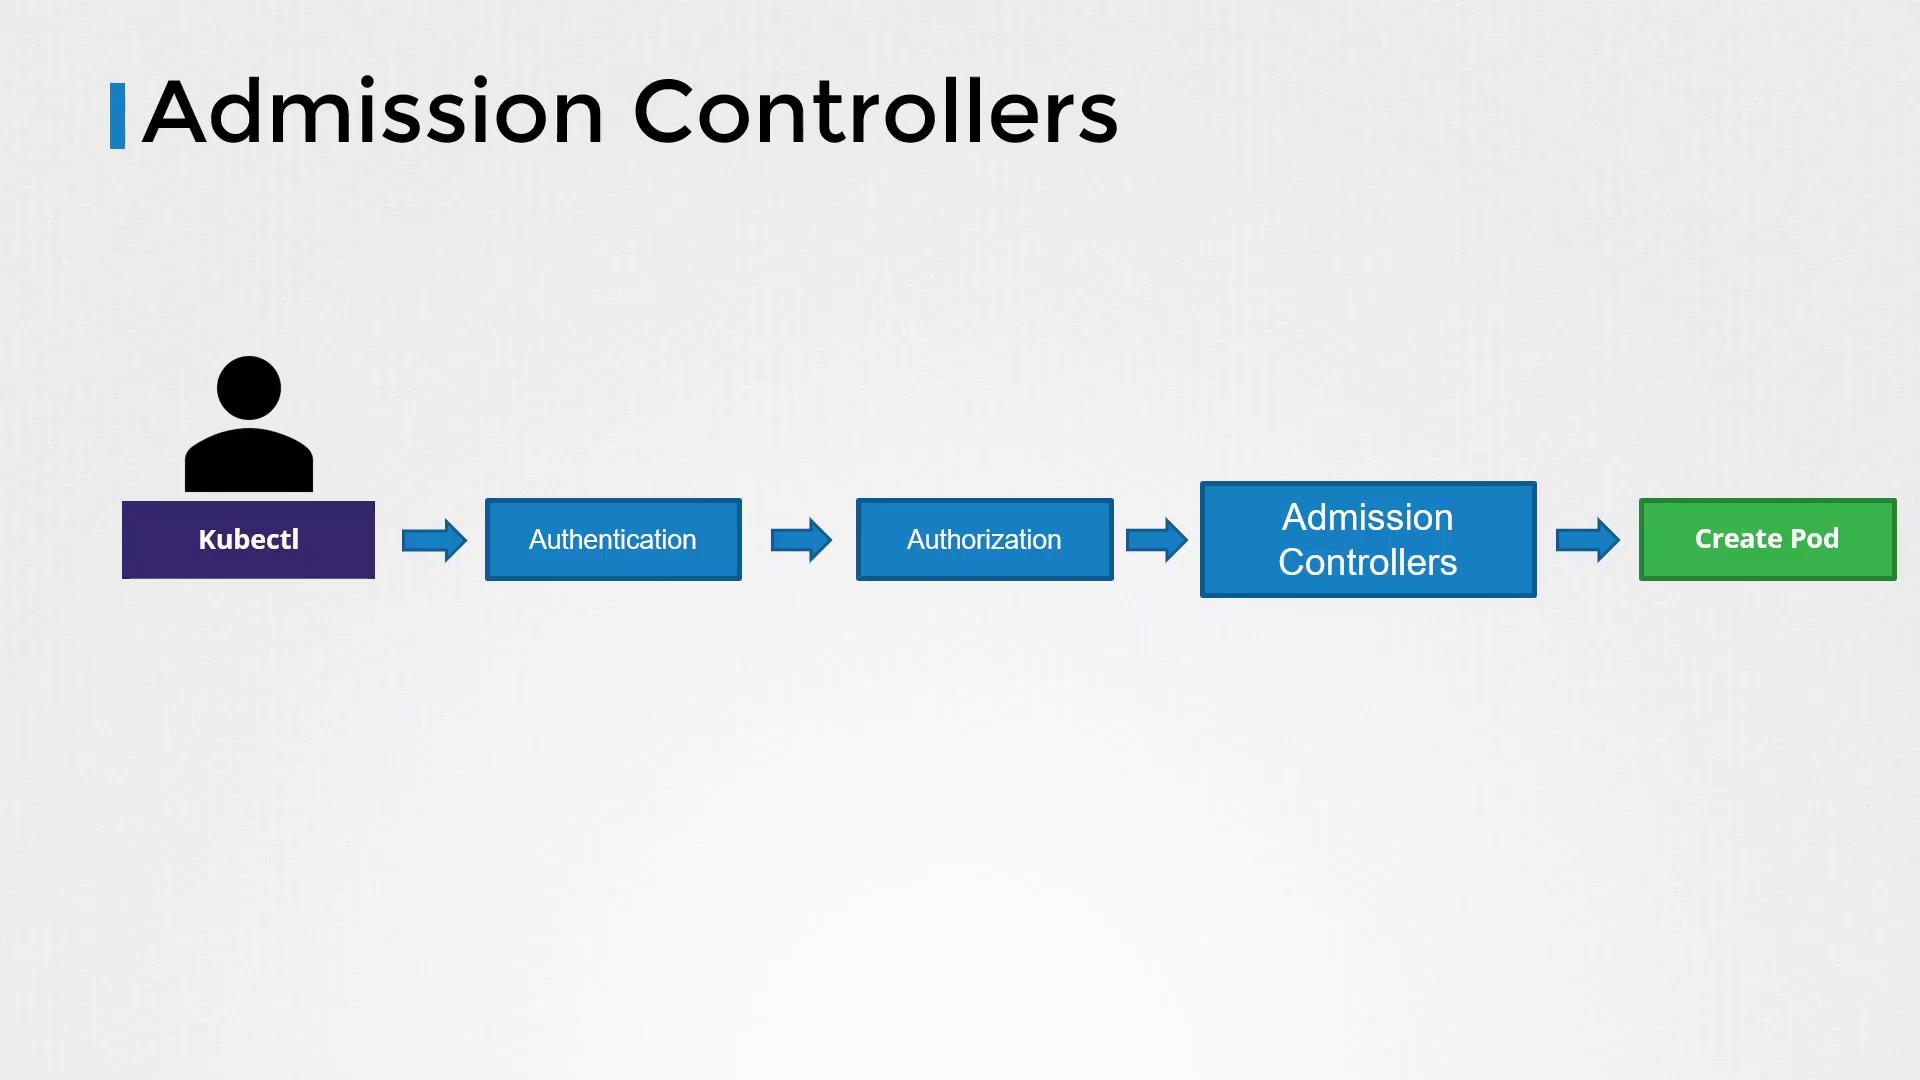
In this article, we explore admission controllers in Kubernetes—powerful components that validate, mutate, or reject API requests before they are persisted. Typically, users interact with the Kubernetes cluster using the kubectl utility. When a command such as creating a pod is issued, the request reaches the API server and is ultimately saved in the etcd database.
When a request is sent to the API server, it undergoes several critical steps:
Authentication:
The API server authenticates the request. For instance, when using kubectl, the KubeConfig file supplies the necessary certificates. You can view a snippet from the KubeConfig file using:
Only a portion of the base64-encoded certificate data is shown for brevity.
Authorization:
After authentication, the request is authorized. Kubernetes uses role-based access control (RBAC) to determine if the user has permission to perform the requested operation. For example, a role allowing the manipulation of pods might be defined as:
Beyond basic authentication and authorization, there are scenarios that require additional validations or modifications to incoming requests. Consider a pod creation request, where you might want to:
Ensure that images are only pulled from an approved internal registry.
Enforce that the image tag is not set to “latest.”
Reject requests if the container runs as the root user.
Modify the container’s security context or enforce specific metadata labels.
RBAC does not cover these complex validations or modifications. That is where admission controllers come into play; they provide an additional security layer by examining, modifying, or rejecting API requests before they reach etcd.
An alternate admission controller, the namespace auto-provision admission controller, can automatically create a namespace if it does not exist. Note that this controller is not enabled by default. Without auto-provisioning, running the command:
Copy
kubectl run nginx --image nginx --namespace blue
results in:
Copy
Error from server (NotFound): namespaces "blue" not found
To see which admission controllers are enabled by default, run:
Copy
kube-apiserver -h | grep enable-admission-plugins
If your cluster uses a kubeadm-based setup, execute this command within the kube-apiserver control plane pod:
To enable additional admission controllers, update the --enable-admission-plugins flag on the kube-apiserver. In a kubeadm-based setup, this update is performed in the kube-apiserver manifest file. For example, you might configure the API server service as follows:
After enabling the desired admission controllers, a pod creation request in a non-existent namespace behaves differently. With the namespace auto-provision controller enabled, executing:
Copy
kubectl run nginx --image nginx --namespace blue
will successfully create the pod. Upon listing namespaces with:
Copy
kubectl get namespaces
you should observe that the “blue” namespace has been automatically created:
Copy
NAME STATUS AGEblue Active 3mdefault Active 23mkube-public Active 24mkube-system Active 24m
Note that the namespace auto-provision and namespace existence admission controllers have been deprecated and replaced by the namespace lifecycle admission controller. The namespace lifecycle admission controller now ensures that requests targeting non-existent namespaces are rejected, while also safeguarding critical namespaces (such as default, kube-system, and kube-public) from deletion.
Admission controllers represent an advanced layer of security within Kubernetes by allowing for complex validations and modifications to API requests. They operate seamlessly in the background, ensuring that your cluster adheres to stringent security and operational policies. Practice deploying and configuring these controllers to strengthen your understanding and enhance your Kubernetes security posture.For further details, consider reviewing additional Kubernetes documentation on Admission Controllers and RBAC.