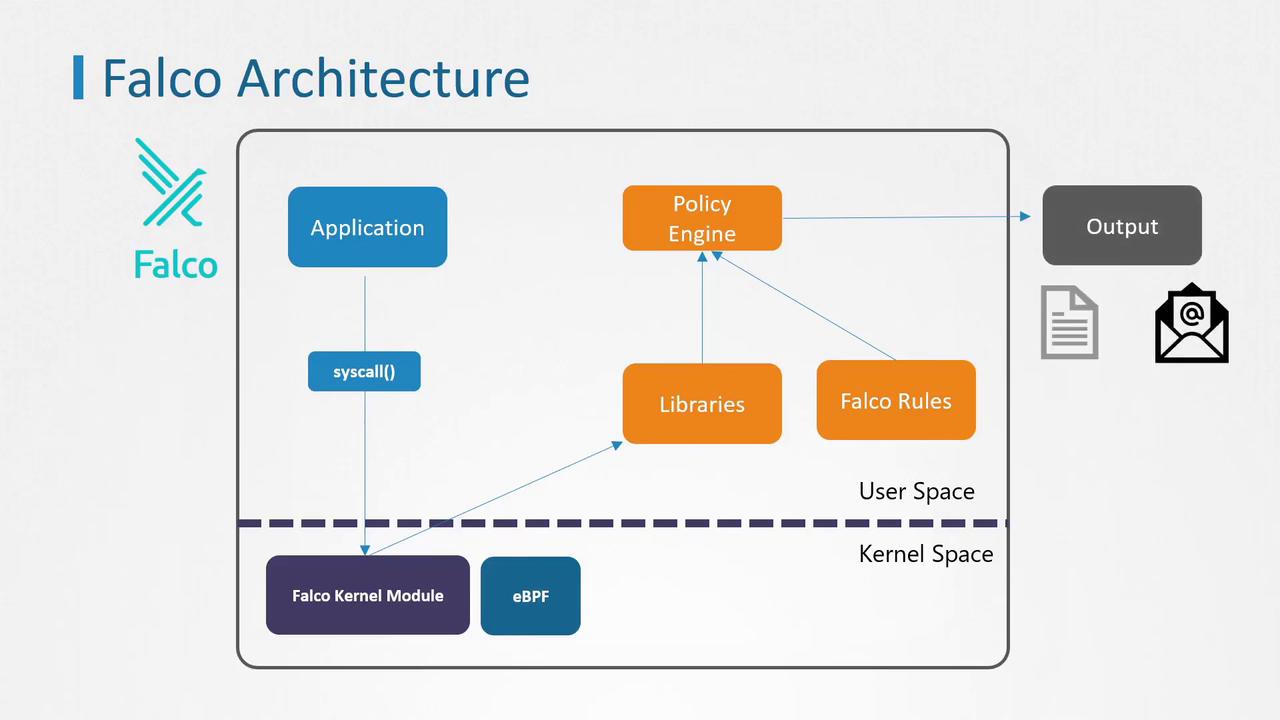
In this guide, we will walk through installing Falco on a Kubernetes cluster and show you how to use it to detect and analyze potential threats. Falco works by monitoring system calls from user-space applications into the Linux kernel. It captures these calls and processes them with its policy engine, which uses predefined rules to identify suspicious activities. When an anomaly is detected, Falco can alert administrators via syslog, standard output, Slack, email notifications, and other channels.Documentation Index
Fetch the complete documentation index at: https://notes.kodekloud.com/llms.txt
Use this file to discover all available pages before exploring further.
How Falco Operates
Falco has two methods to interact with the Linux kernel:-
Kernel Module Method
Falco can insert a kernel module, adding extra code to the Linux kernel. Although this approach is effective, it is considered intrusive. Some managed Kubernetes service providers restrict the use of kernel modules due to security policies. -
eBPF (Extended Berkeley Packet Filter) Method
Alternatively, Falco leverages eBPF to interact with the kernel in a less invasive way. This method is generally preferred by many providers for its lower impact on system integrity.
Installing Falco directly on a node as a service ensures that even in the event of a compromise, Falco remains isolated from the Kubernetes environment and continues to effectively detect suspicious behavior.
Installing Falco on a Node
Since Falco interacts directly with the kernel, installing it as a standard software package involves also installing the corresponding kernel module. Follow these steps to install Falco on a node:-
Import the Falco public key and add the repository:
-
Update the package list, install the appropriate kernel headers and Falco, then start the service:
Deploying Falco as a DaemonSet
If installing Falco directly on the node is not feasible, you can deploy it as a DaemonSet across all cluster nodes. The easiest way to achieve this is by using Helm charts. For detailed deployment instructions, please refer to the detailed steps provided in the reference section below.Verifying the Installation
After installing Falco, verify that the Falco pods are running on all nodes by executing:With Falco up and running, you are well-equipped to utilize its robust rules engine to detect potential threats and secure your Kubernetes cluster.