Overview of a JavaScript Application
A standard JavaScript application consists of several key components:-
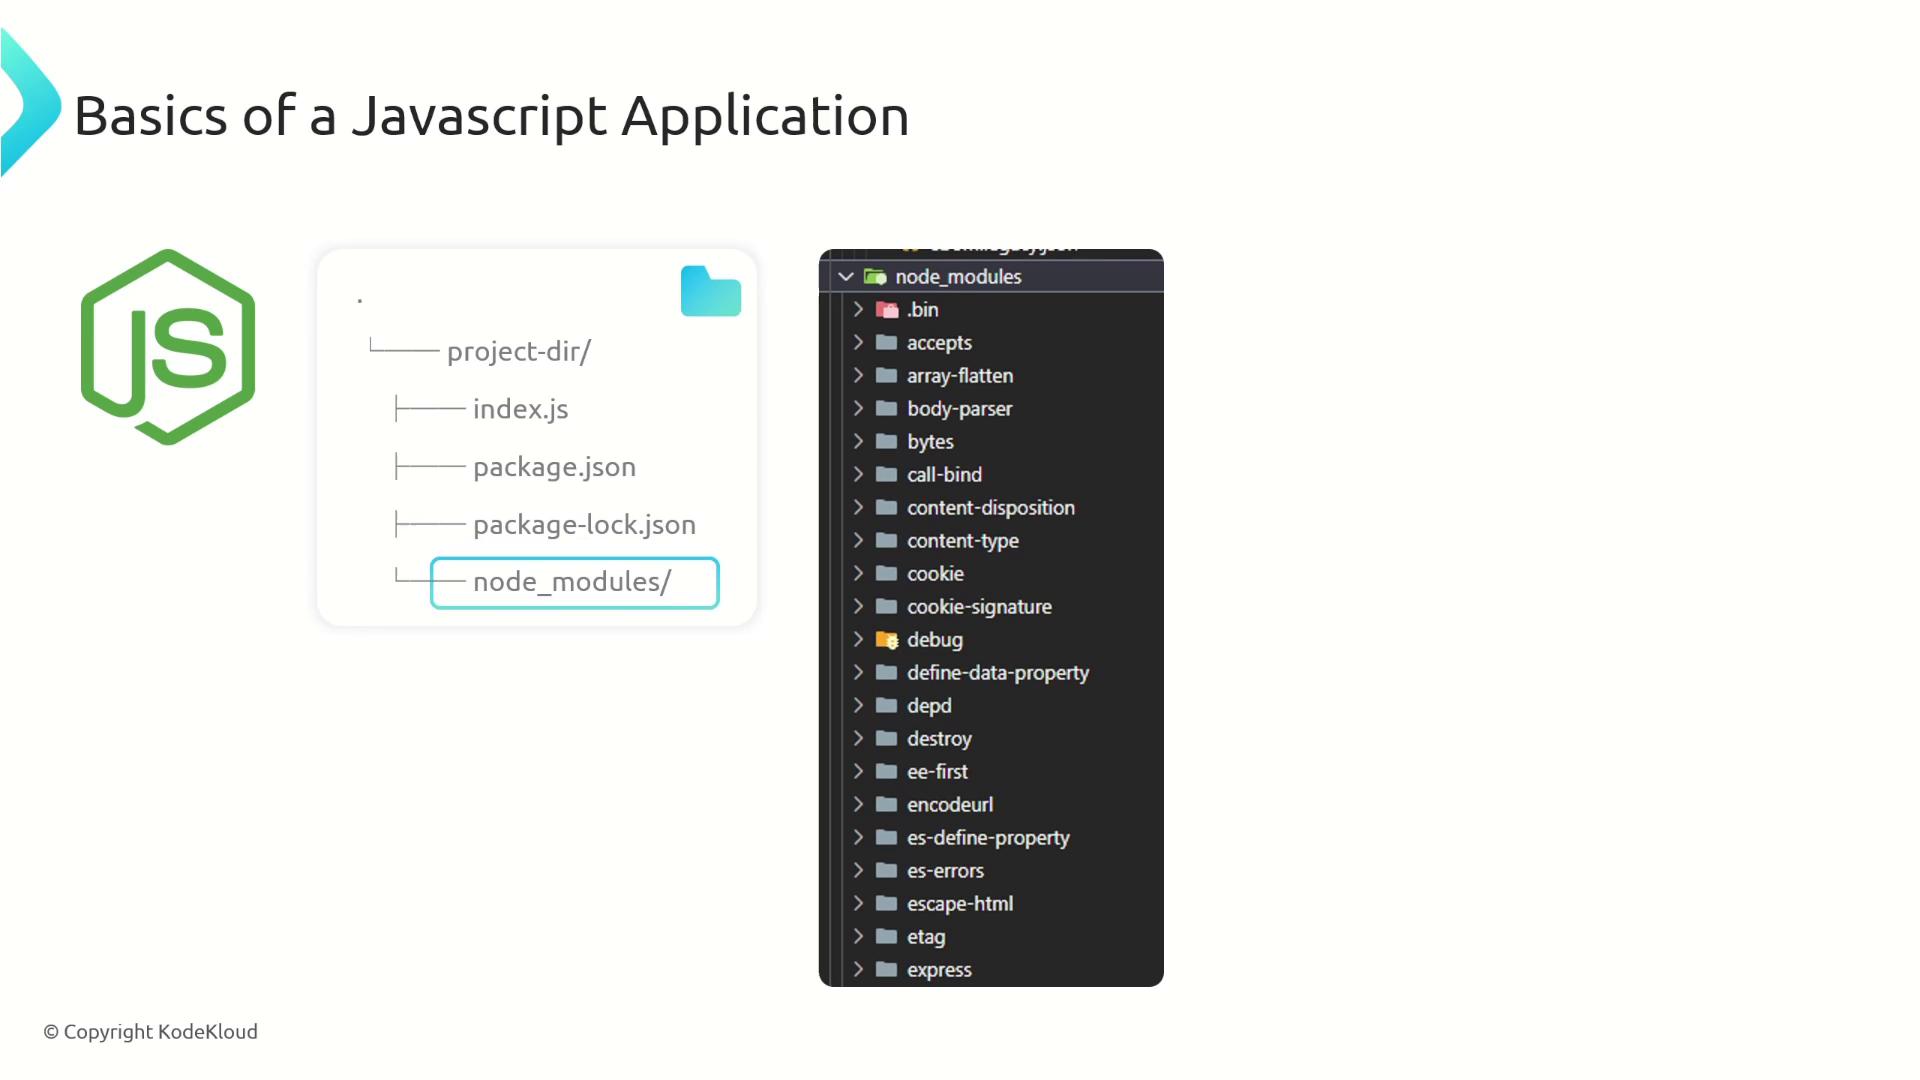
Entry Point (index.js):
This file contains the main source code of your application. In our example, all the logic is contained in a single file, although larger projects may distribute the code across multiple files. The entry point is conventionally namedindex.jsorapp.js. To run the application, execute the following command:Below is a simple example using the Express framework: -
Package Configuration (package.json):
Thepackage.jsonfile contains essential metadata about your project, including its dependencies. For instance, when using Express and UUID, your configuration might look like this:This file not only lists the dependencies but also specifies the required Node.js version for your application. -
Lock File (package-lock.json):
Thepackage-lock.jsonlocks dependencies to specific versions, ensuring consistency across development, CI/CD pipelines, and production environments. The buildpack later uses this file to detect any changes in dependency versions between builds. -
Dependencies Folder (node_modules):
After installing dependencies (for example, using npm), thenode_modulesfolder contains the installed packages. A typical JavaScript project usually includes the entry point (index.jsorapp.js), the package configuration (package.json), and thenode_modulesdirectory.
Buildpack Files Overview
A buildpack requires only a few fundamental files. In our example, these include:-
buildpack.toml:
This configuration file defines metadata for your buildpack, such as the API version, buildpack ID, version, and target platform. -
Detect Script (bin/detect):
This executable script determines whether the buildpack should run. For a JavaScript buildpack, it checks for the presence of apackage.jsonfile. If the file is missing, the script exits with a status code of 100; otherwise, it allows the build process to continue.
The detect script ensures that your buildpack is executed only for JavaScript applications by checking for the existence of a
package.json file.-
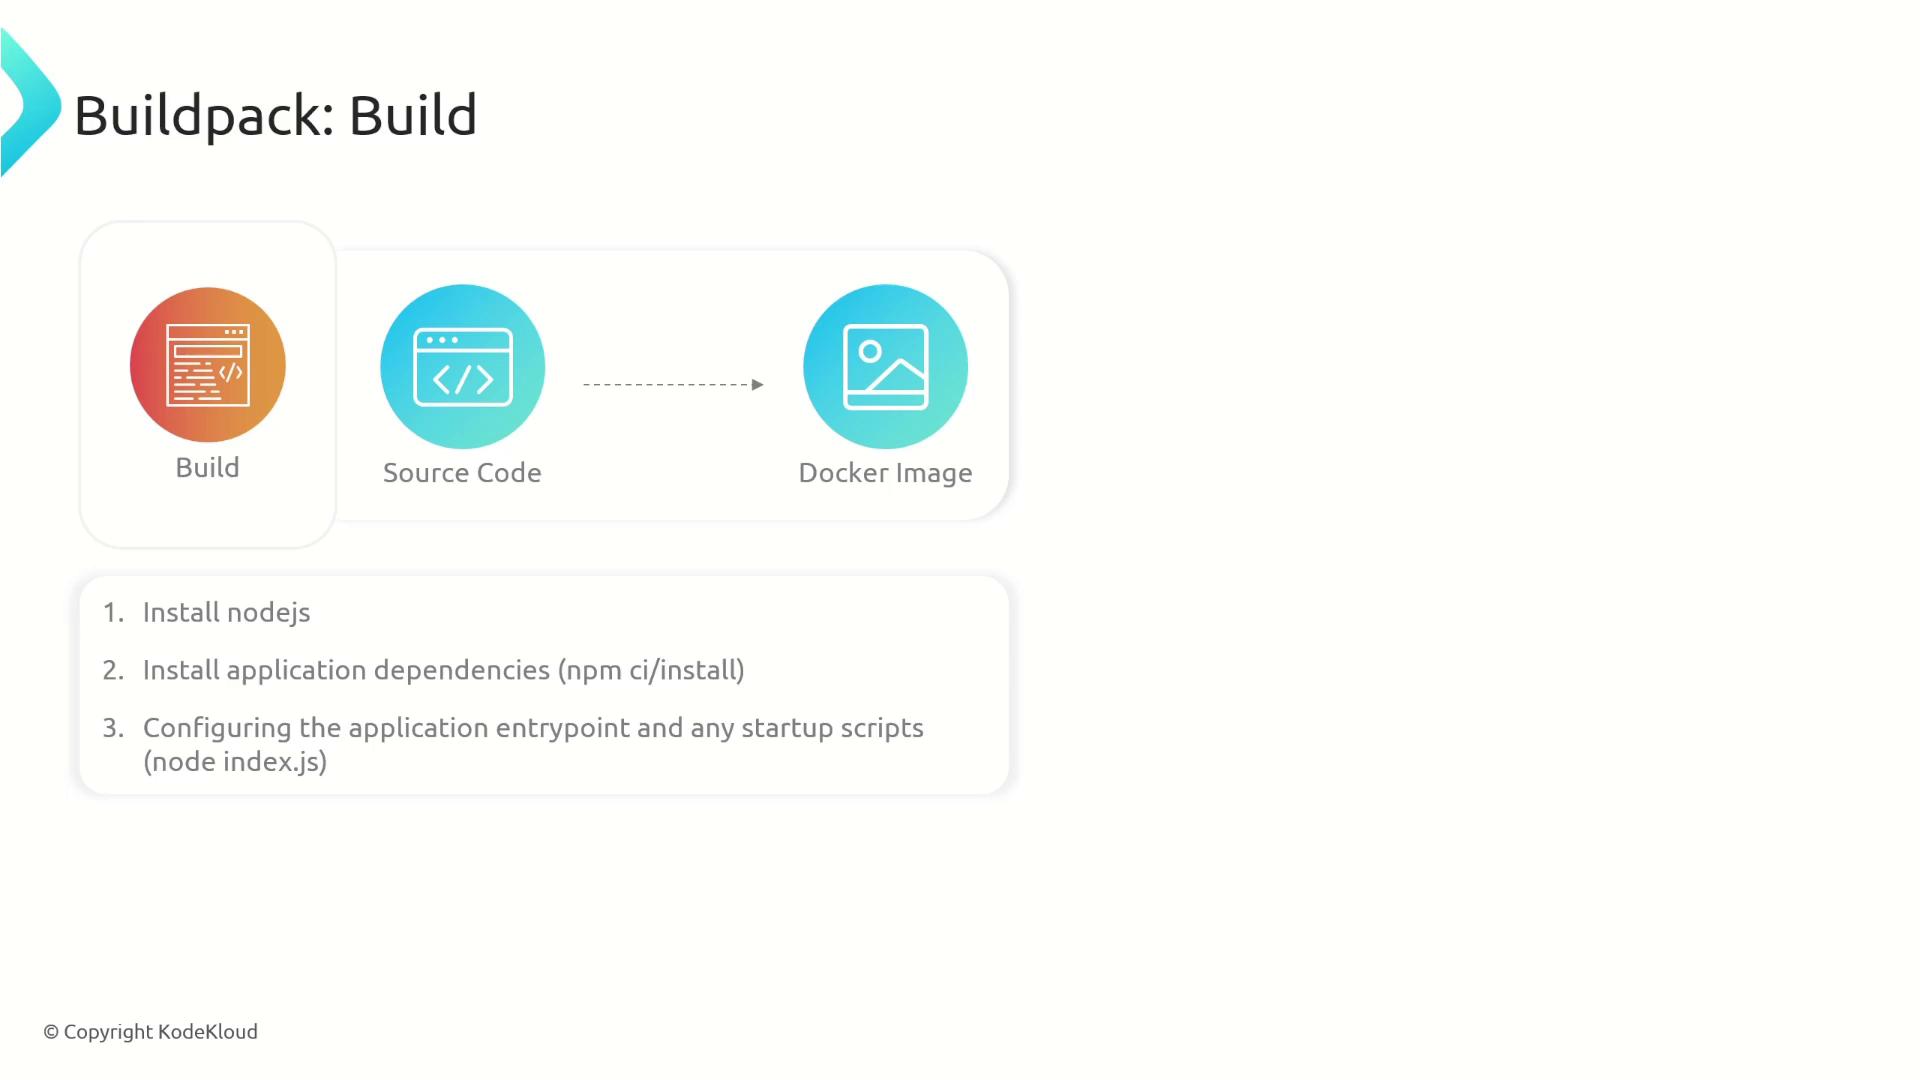
Build Script (bin/build):
This executable script transforms your application source code into a Docker (or OCI-compliant) image. Its tasks include setting environment variables, installing dependencies, compiling source code (if necessary), and configuring the application’s entry point. The Pack CLI offers a shortcut to generate this boilerplate. The following command creates a directory (in this example,js-buildpack) containing thebuildpack.tomlfile and abinfolder with the detect and build scripts:The generatedbuildpack.tomlwill resemble:
Detailed Look at the Detect Script
The detect script, located within thebin folder, is responsible for ensuring that the buildpack is applied only to JavaScript applications. It does so by verifying the presence of the package.json file:
package.json is found, the script exits with a zero status code, allowing the build process to proceed to the build script.
Detailed Look at the Build Script
The build script is pivotal in transforming your application’s source code into a containerized image. It performs several key operations:-
Installing Node.js:
The script downloads and extracts Node.js from its official distribution URL. -
Installing Application Dependencies:
It then uses eithernpm ciornpm installto install all dependencies specified in bothpackage.jsonandpackage-lock.json. -
Configuring the Application Entry Point:
The script creates alaunch.tomlfile in the directory defined by theCNB_LAYERS_DIRenvironment variable. This file specifies the command that will run when the container is started.
launch.toml) that sets the default process for running your application.
Building the Application Image
With the detect and build scripts in place, you can now create your application image using the following command:myapprepresents the name of the generated image.--path ./nodejs/specifies the directory containing your application’s source code.--buildpack ./js-buildpack/points to the folder containing your custom buildpack.--builder cnbs/sample-builder:jammindicates which builder to use (note that the builder will override its default buildpacks with the buildpack you specified).
launch.toml file.
This guide walks you through creating a custom JavaScript/Node.js buildpack, from understanding a typical application structure to crafting both the detect and build scripts, culminating in successfully building a containerized image.