DP-900: Microsoft Azure Data Fundamentals
Semi Structured Data
Demo Table Storage
In this walkthrough, you’ll learn how to create and manage Table Storage in an Azure Storage account. Table Storage offers a NoSQL key-value store that’s ideal for structured, non-relational data.
Prerequisites
- An active Azure subscription
- A standard Storage account (supports blobs, files, queues, and tables)
- Contributor or Storage Table Data Owner role on the storage account
1. Create a New Table
- Sign in to the Azure portal and open your storage account.
- In the left menu, select Tables under Data storage to view the table namespace.
- Click + Table, enter SalesOrders, and then click OK.
Note
A single storage account provides one table namespace. Within it, you can create multiple tables (for example, SalesOrders, Inventory, or Customers) for logical separation.
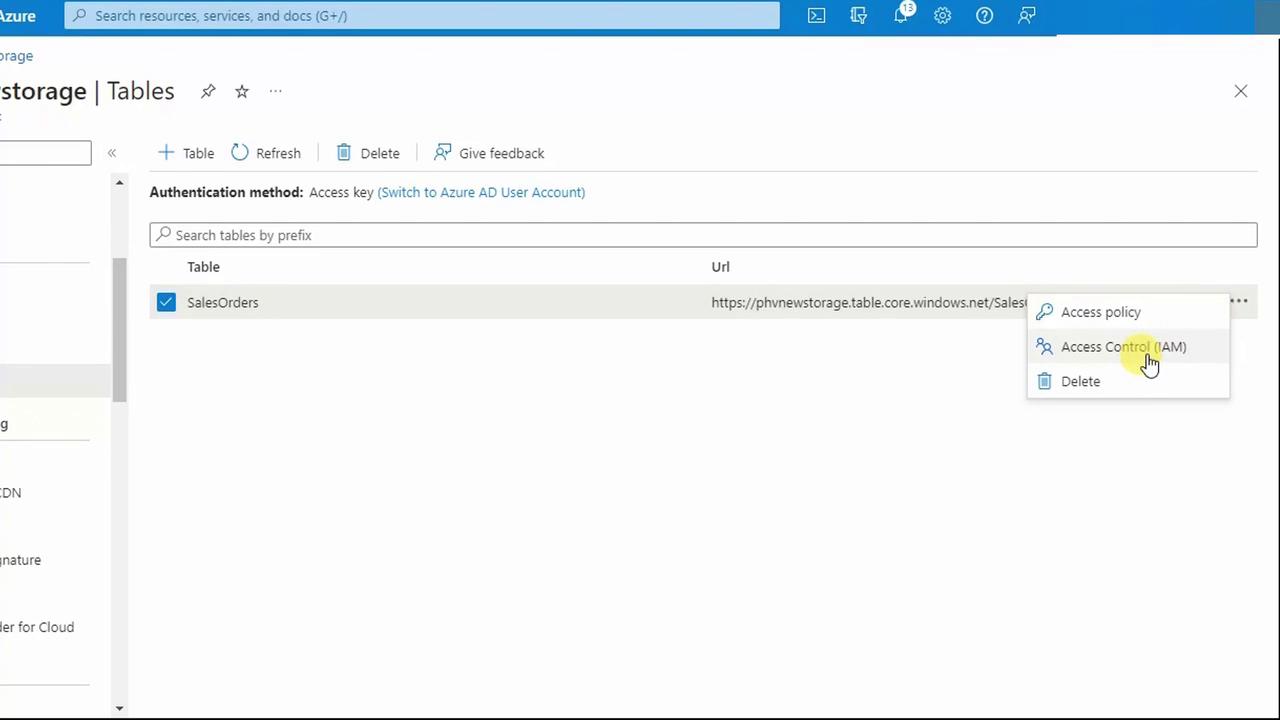
2. Explore the Storage Browser
To manage all your storage resources in one place:
- From the storage account menu, click Storage Browser.
- You’ll see containers, file shares, queues, and tables listed together.

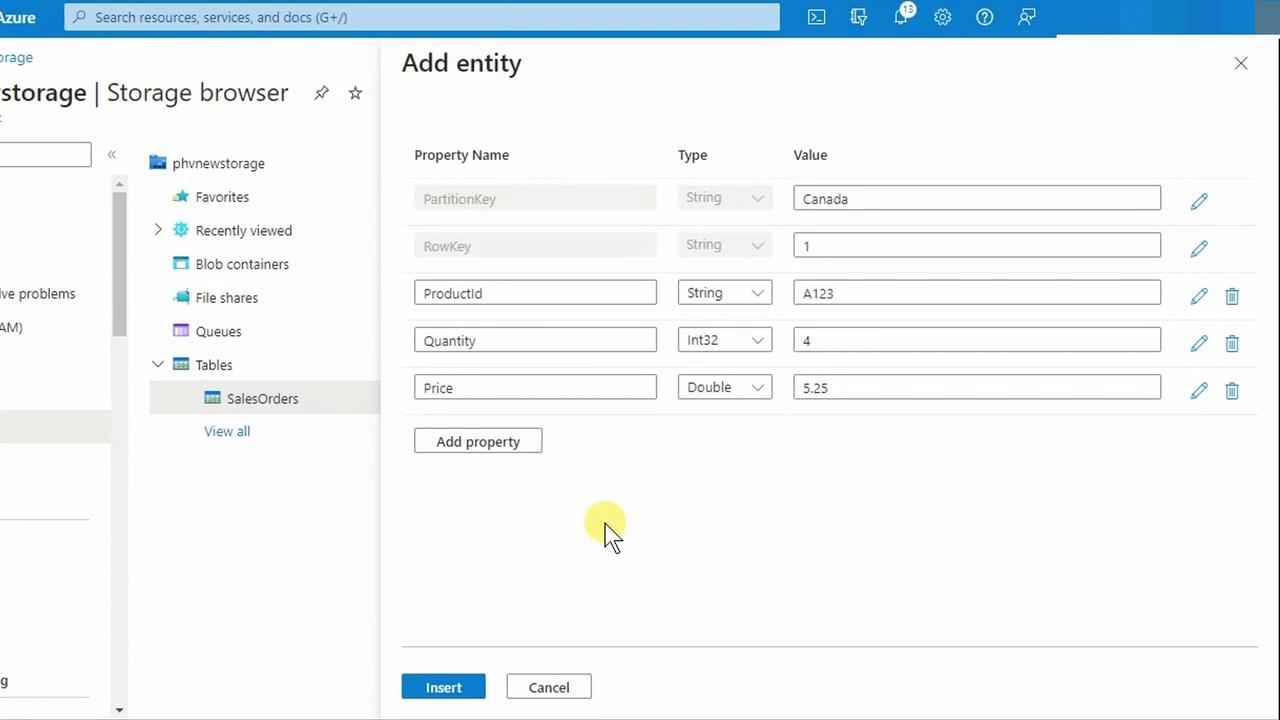
3. Add an Entity to Your Table
- In Storage Browser, choose Tables then select SalesOrders.
- Click Add Entity at the top of the table view.
Every entity requires two system keys:
- PartitionKey: Groups related entities for performance and scalability.
- RowKey: Uniquely identifies an entity within a partition.
Warning
Avoid duplicate PartitionKey+RowKey combinations, or your insert will fail with a conflict error.
Configure Your Entity
| Property | Type | Value |
|---|---|---|
| PartitionKey | String | Canada |
| RowKey | String | 1 |
| ProductId | String | A123 |
| Quantity | Int32 | 4 |
| Price | Double | 5.25 |
After entering these values, click Insert.
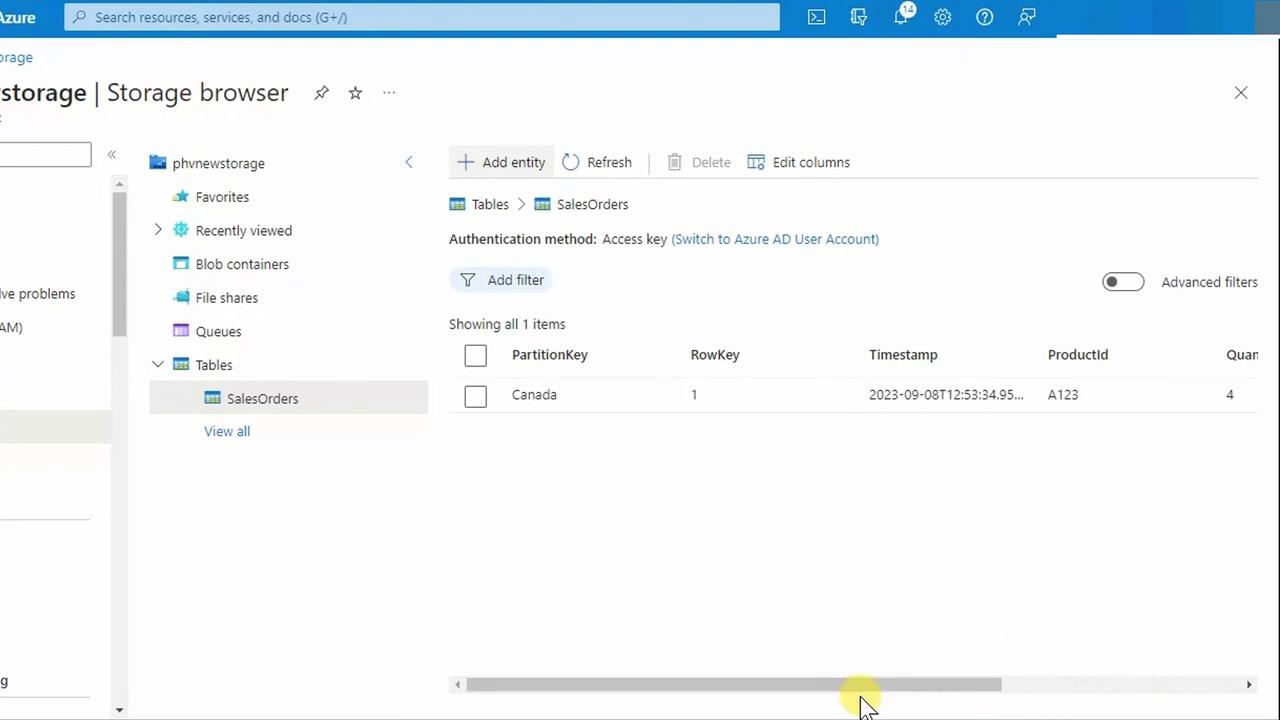
4. View and Verify Your Data
Once inserted, the entity appears in the table grid. You can scroll horizontally to see all columns, including the automatically assigned Timestamp.
Tip
If the portal interface feels limited, try Azure Storage Explorer for a desktop experience with more powerful browsing and management capabilities.
Next Steps
- Query your table using the Azure SDKs or REST API
- Implement batch inserts and deletes for bulk operations
- Monitor table metrics and optimize partition strategies
References
Watch Video
Watch video content