- Configure Image Promotion Policy
- Push and Promote an Image
- Configure Garbage Collection
- Links and References
Configure Image Promotion Policy
First, set up an automated policy to move images tagged asstable from your development repository (devimages) to production (prodimages).
- In the DTR UI, go to Repositories and select devimages.
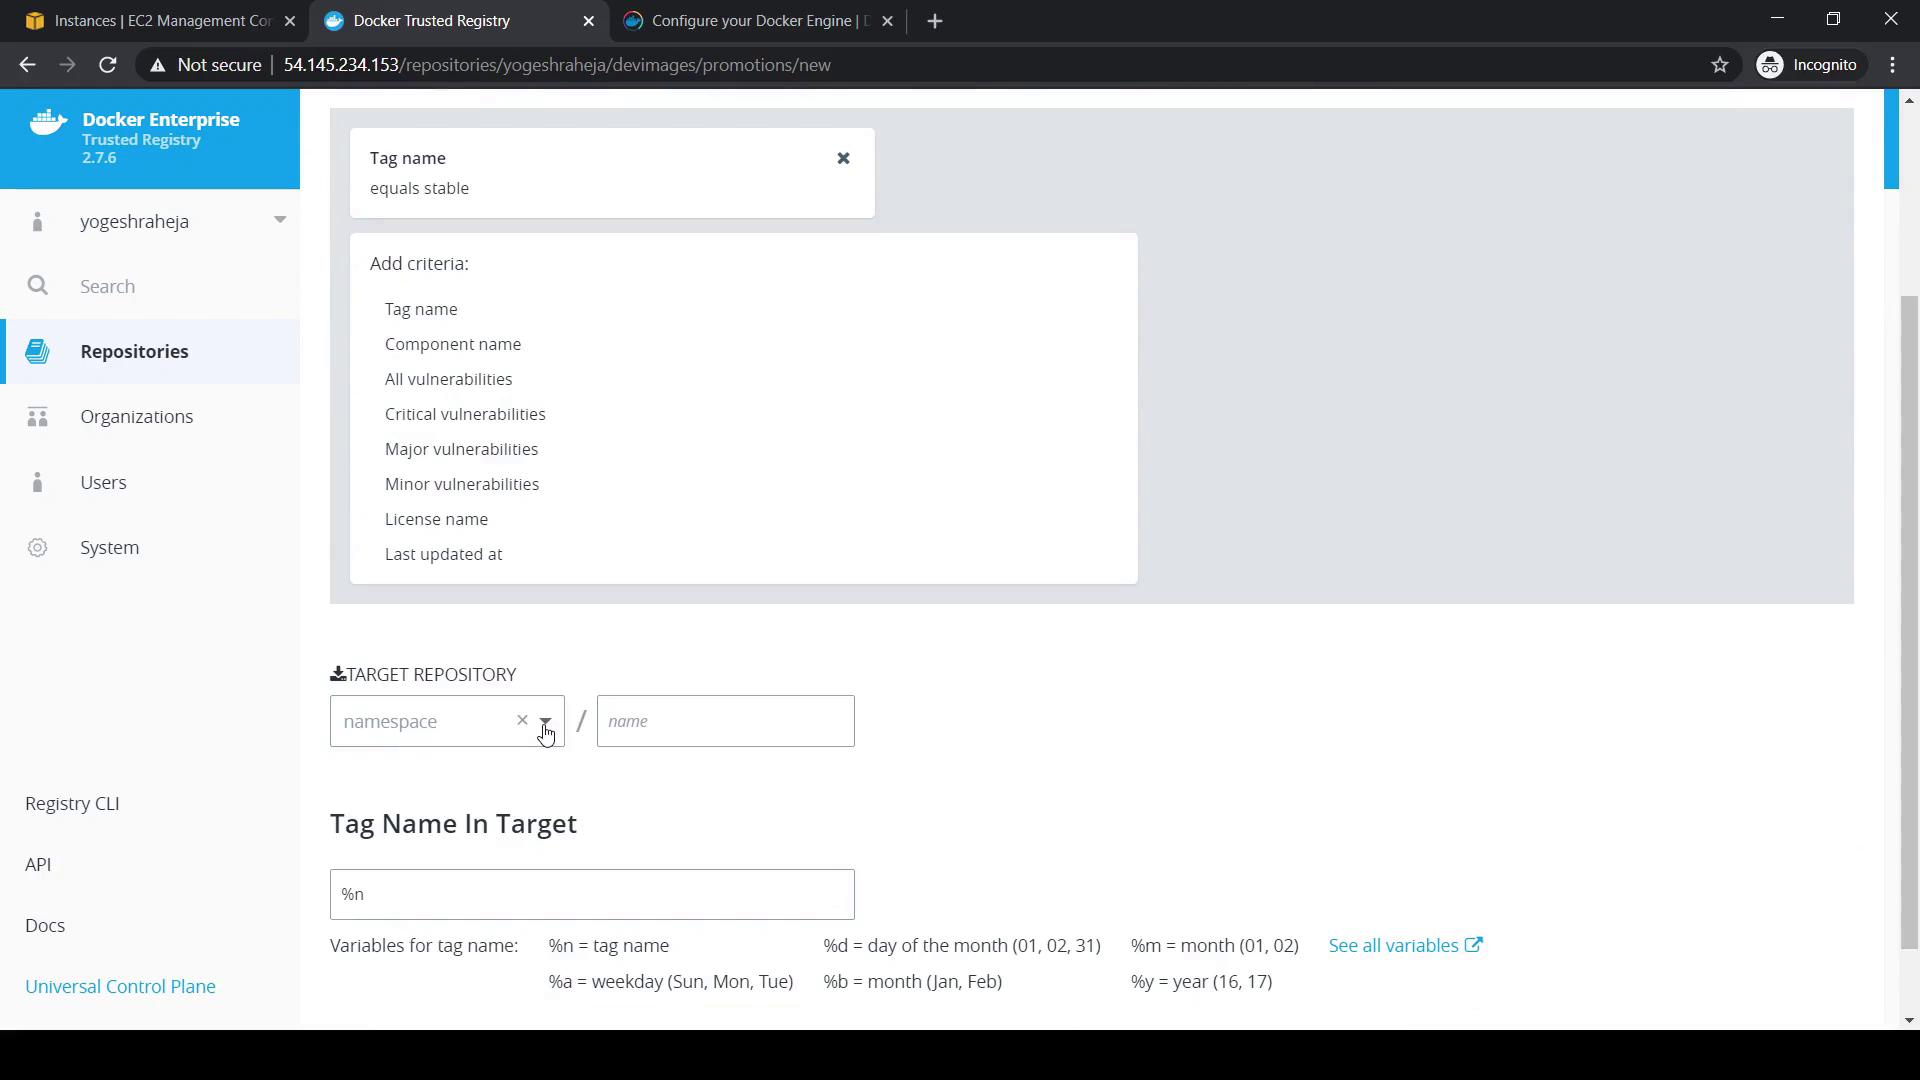
- Click Promotions and choose Tag Name as the criterion.
- Define the rule:
- tagName ==
"stable"
- tagName ==
- Click Add.
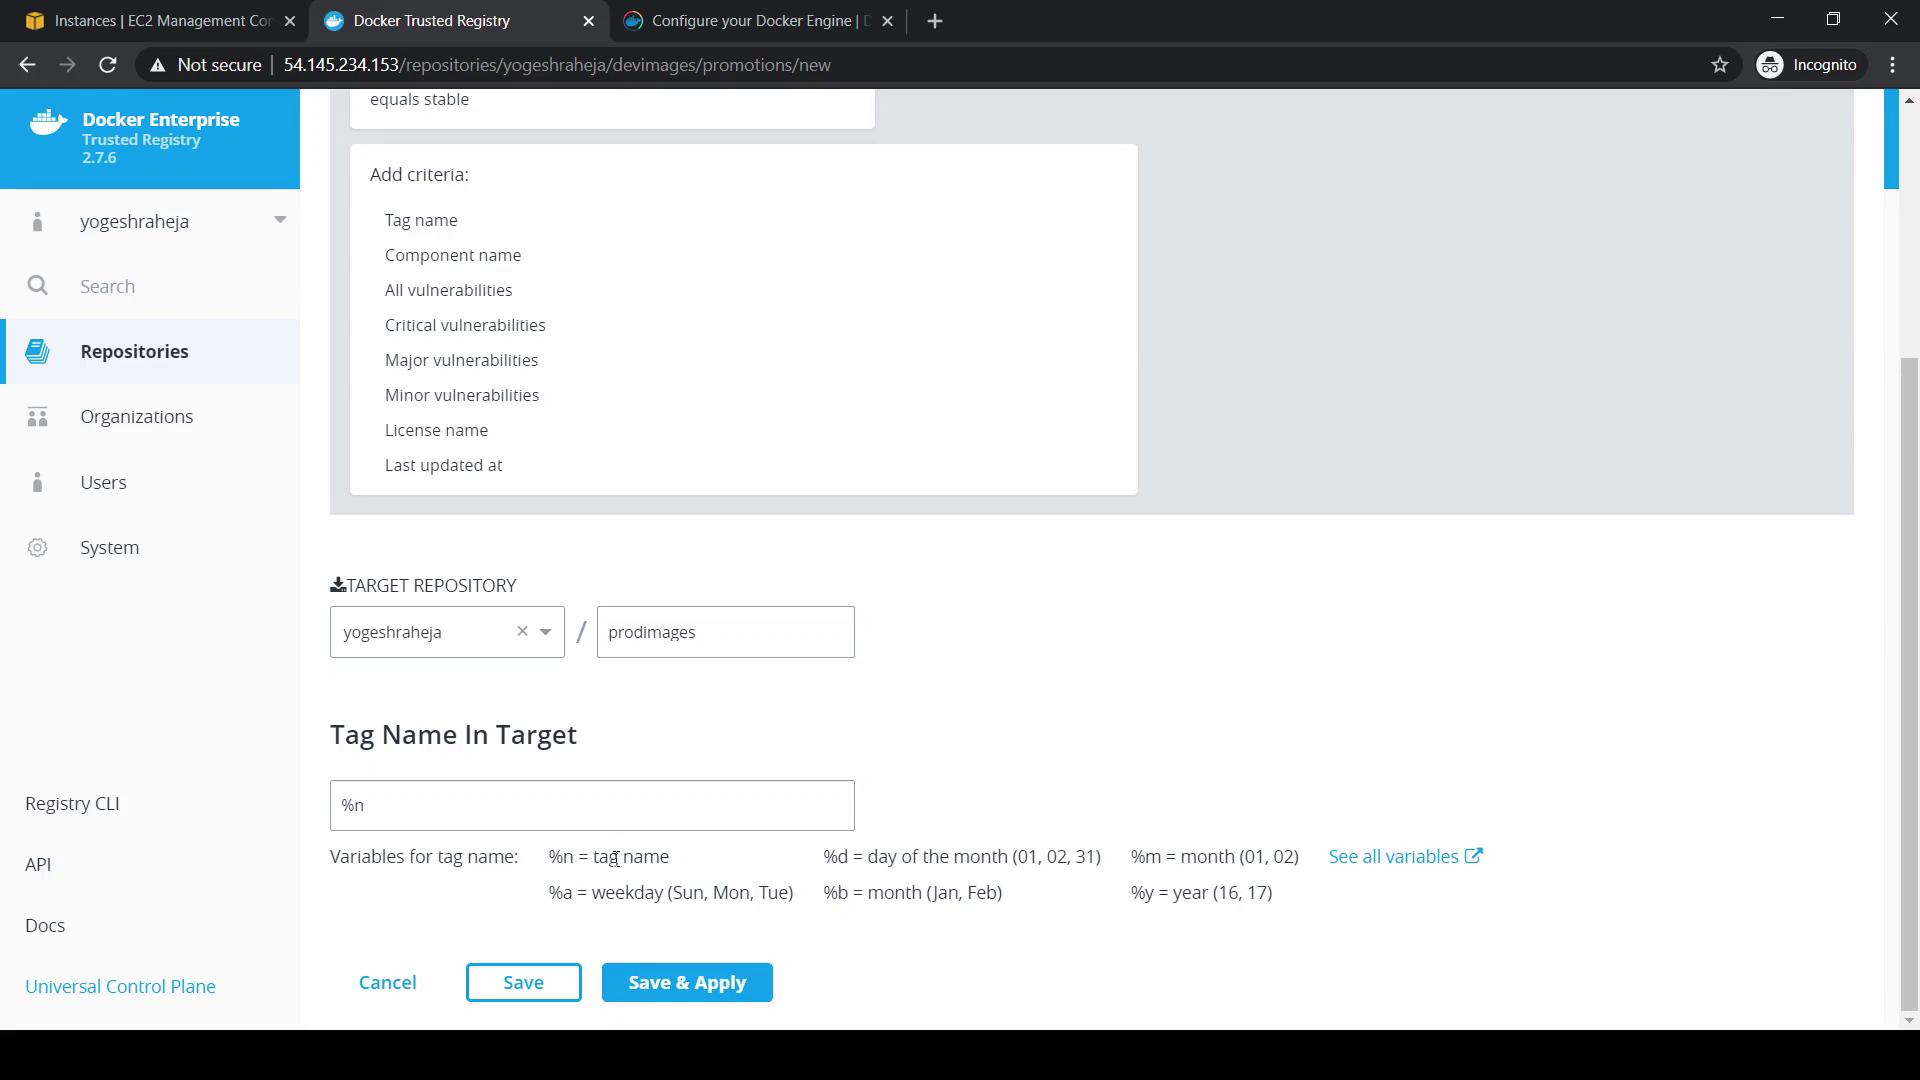
- Under Target Repository, pick prodimages.
- For Target Tag Name, enter
%nto preserve the original tag. - Save by clicking Save and Apply.
Make sure both
devimages and prodimages repositories exist and are empty before you create the policy.Push and Promote an Image
Tag and push an image withstable on your local machine to trigger the promotion:
- Refresh devimages.
- Under Promotions, Last Promoted will update to the current timestamp.
- Click Activity to view the detailed promotion log.
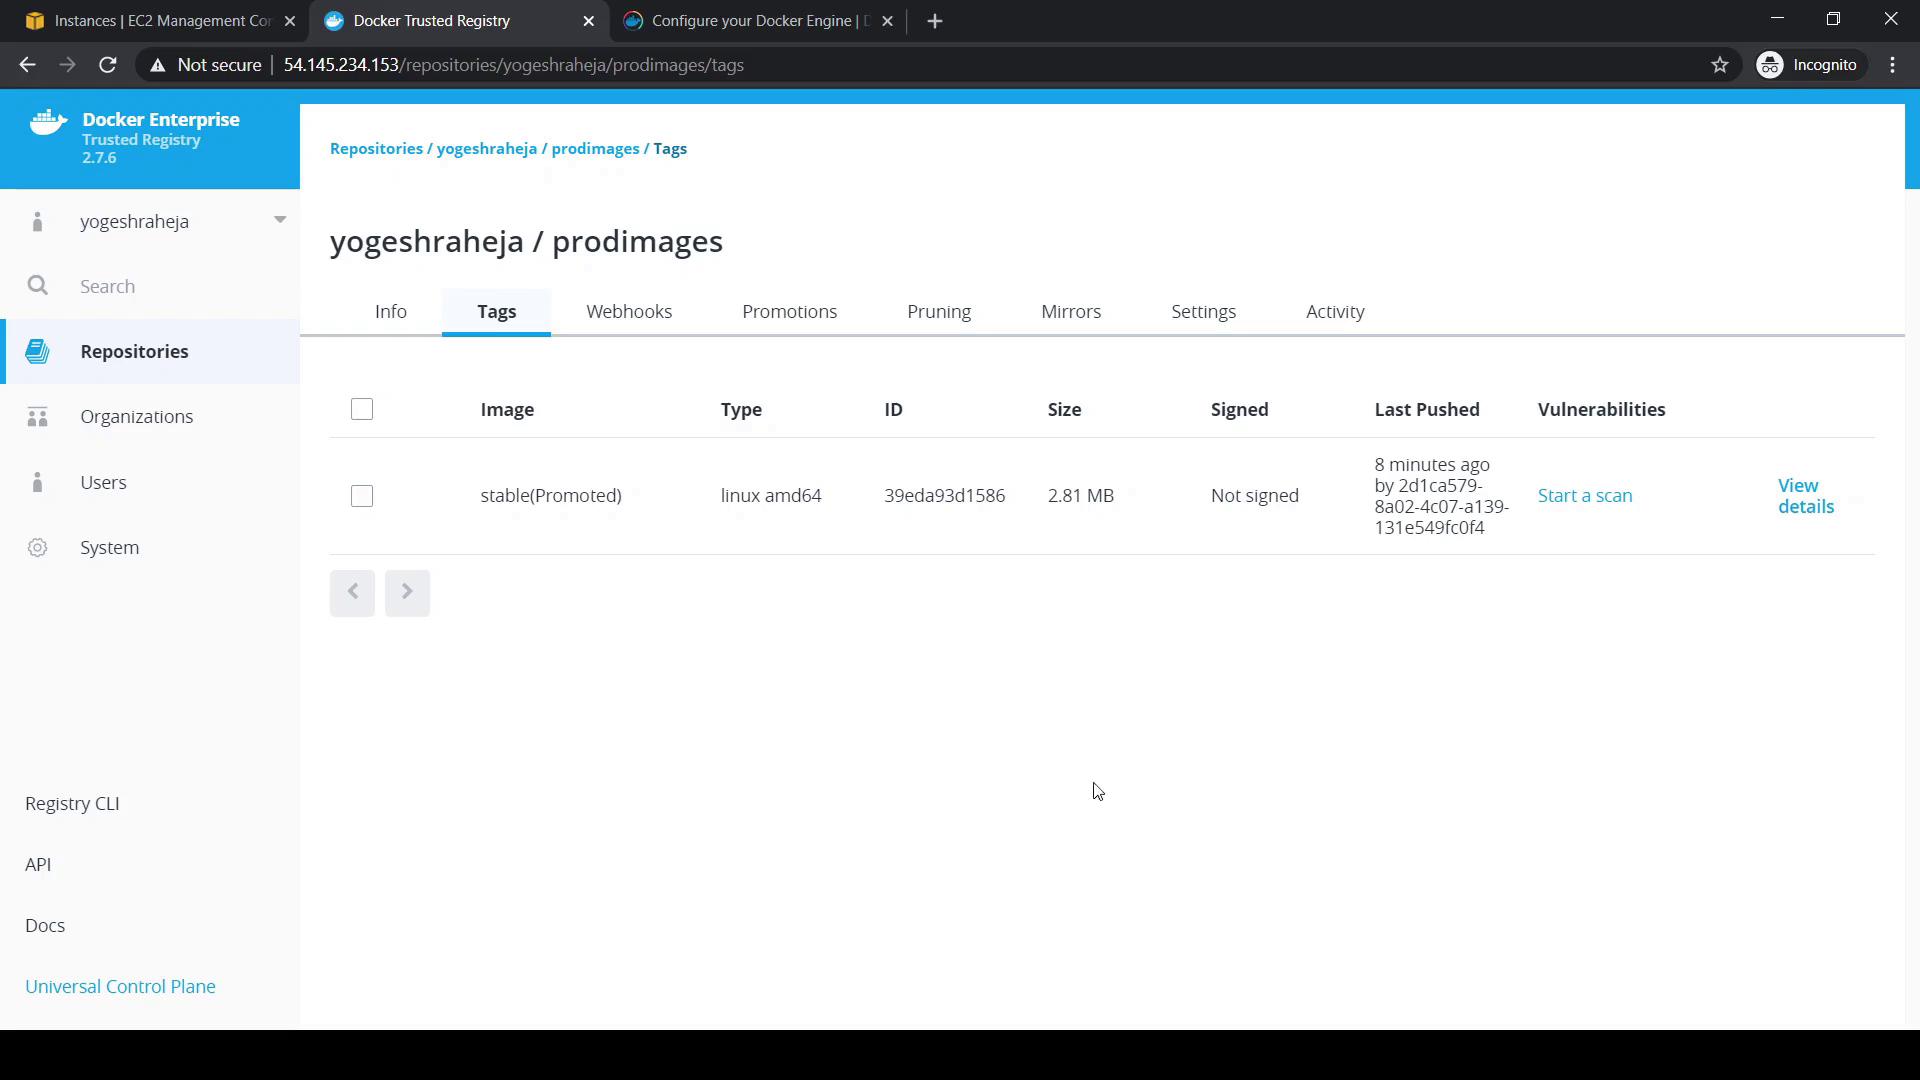
stable (Promoted) tag indicates that the image has been moved successfully.
Production repositories should only receive thoroughly tested images. Double-check your promotion rules to avoid deploying unverified containers.
Configure Garbage Collection
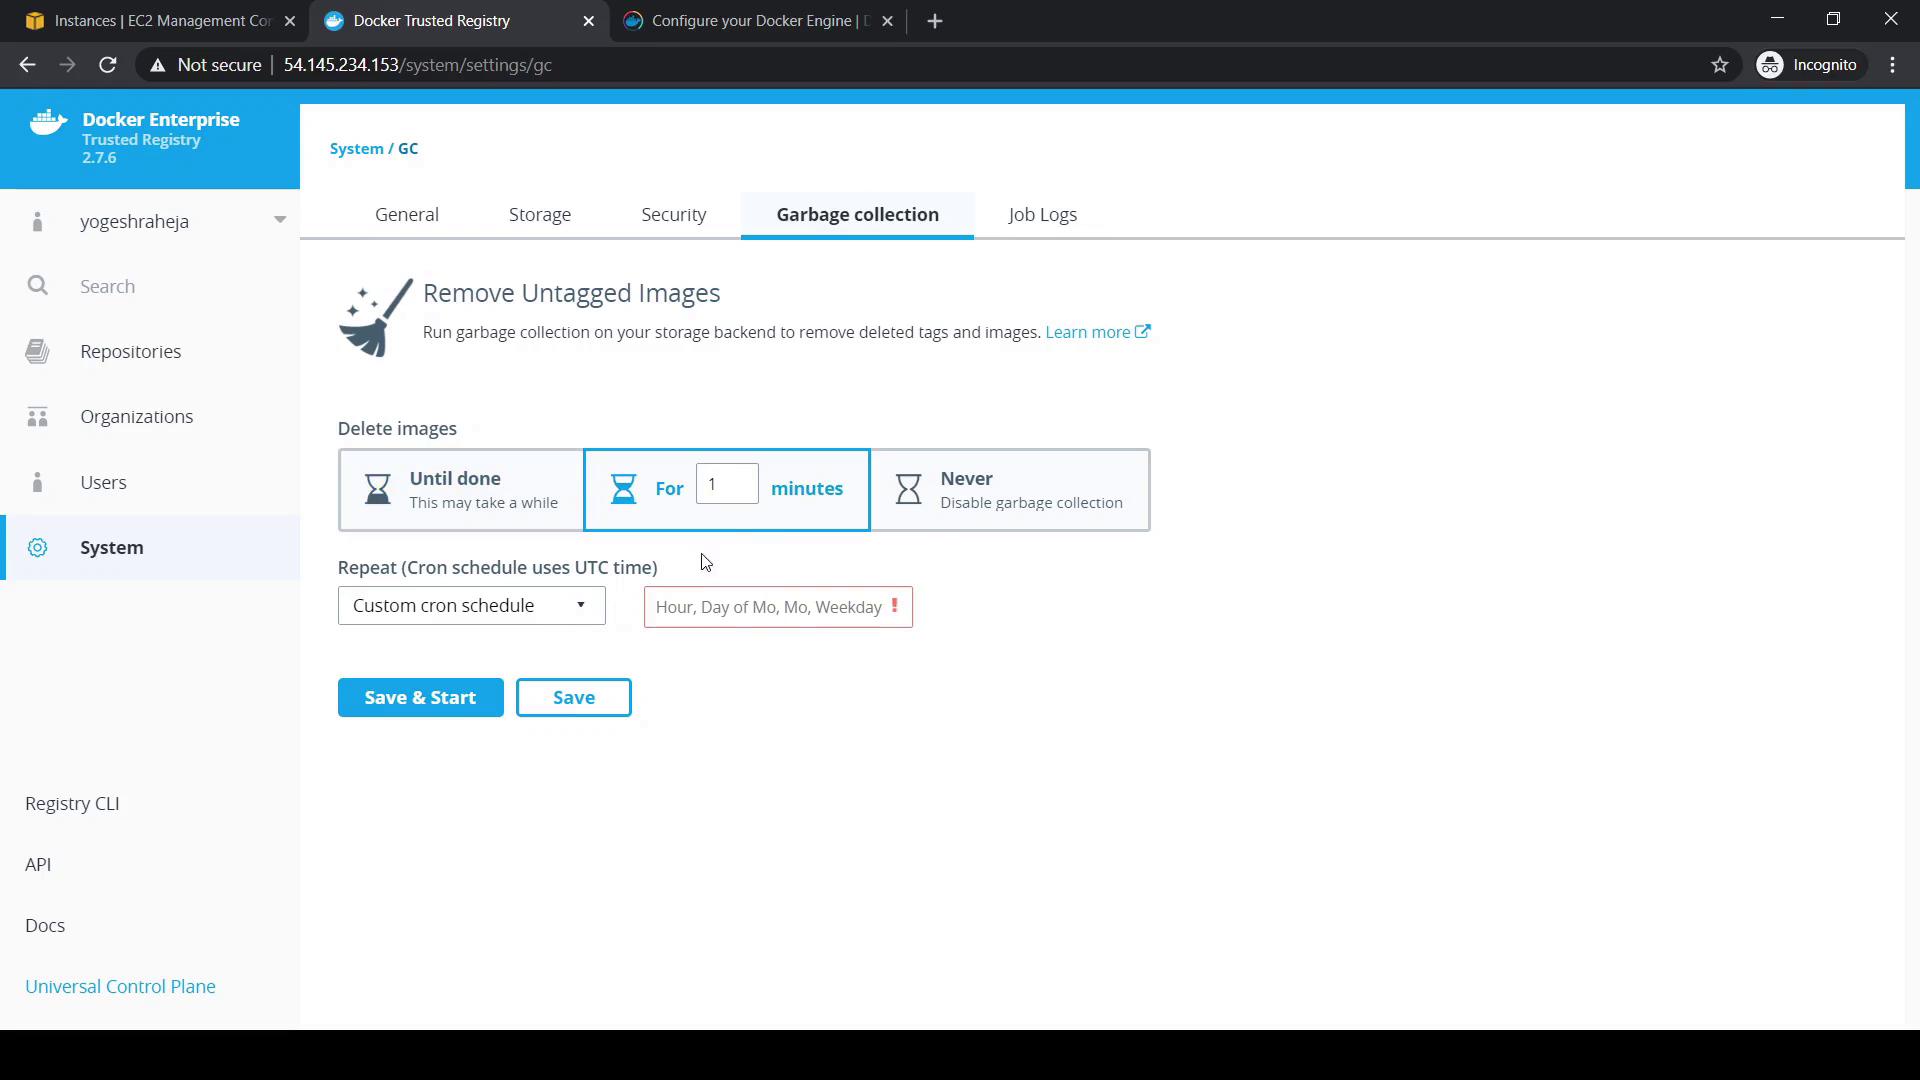
Over time, untagged images accumulate and consume disk space. DTR’s Garbage Collection removes these images based on your schedule.- Navigate to System > Garbage Collection in the DTR UI.
- Choose a collection mode:
| Mode | Description |
|---|---|
| Until Done | Runs until all untagged images are removed. |
| For a Defined Time | Runs for a specified duration (e.g., 10 minutes). |
| Never (Default) | Disables automatic garbage collection. |
- (Optional) Schedule it using a cron expression for regular cleanups.
- Click Save to apply.
By default, automatic garbage collection is disabled. Enabling it prevents your DTR storage from filling up.