Docker - SWARM | SERVICES | STACKS - Hands-on
Docker Compose
Demo Docker Compose
In this article, we explore how to enhance and upgrade a Docker Compose file. We start with a basic Compose file (version 1) and then upgrade it to version 3 to leverage advanced features like automatic network creation and improved DNS resolution.
Original Compose File (Version 1)
Below is the initial Docker Compose file (version 1):
redis:
  image: redis

db:
  image: postgres:9.4

vote:
  image: voting-app
  ports:
    - 5000:80
  links:
    - redis

worker:
  image: worker-app
  links:
    - db
    - redis

result:
  image: result-app
  ports:
    - 5011:80
  links:
    - db
While this version is simple, it lacks support for many of Docker Compose's advanced features. In this tutorial, we will upgrade the file to version 3 by adding a version declaration at the top and moving all configurations under a new "services" section.
Upgrading to Docker Compose Version 3
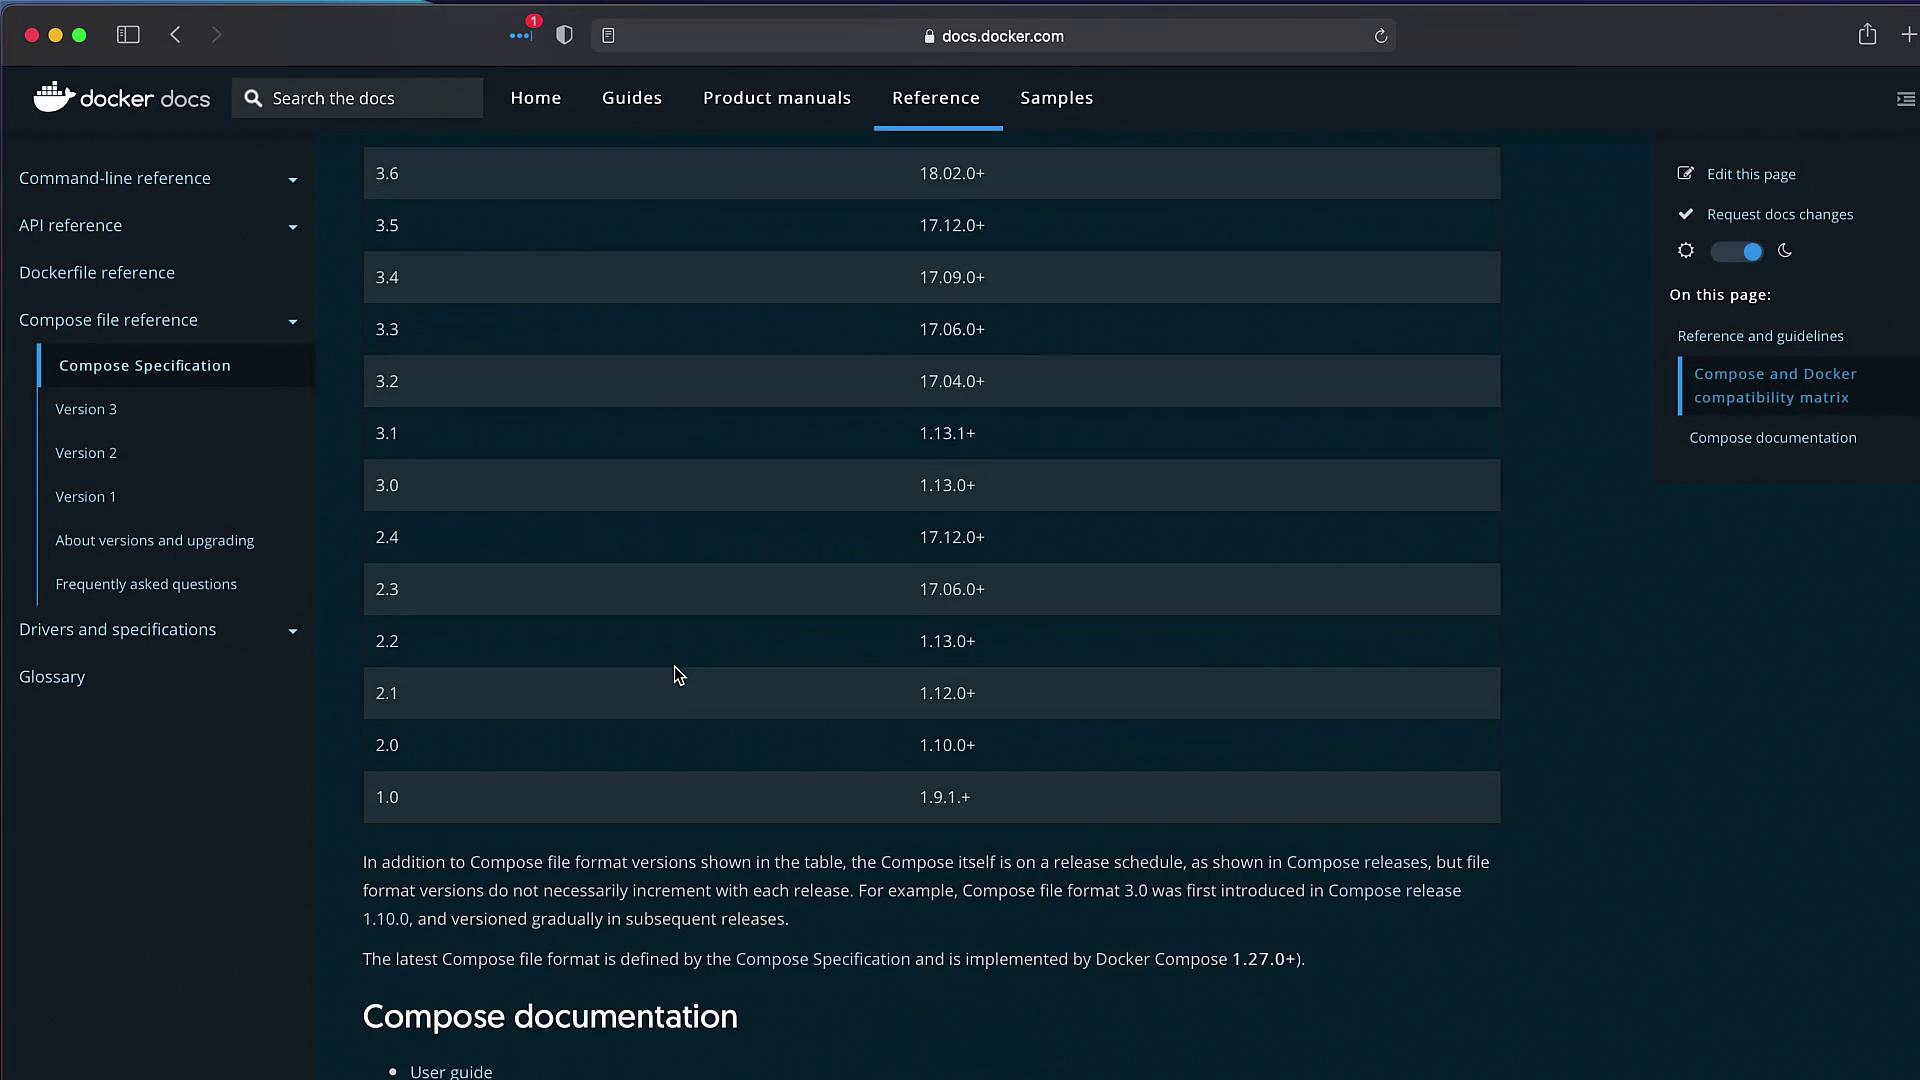
To update the file, start by referencing the Docker Compose file documentation. The documentation provides a comprehensive compatibility matrix that details the relationships between Compose file versions and Docker Engine requirements.
Minimal Update to Version 3
Here is the updated file with only minimal modifications:
redis:
  image: redis

db:
  image: postgres:9.4

vote:
  image: voting-app
  ports:
    - 5000:80

worker:
  image: worker-app

result:
  image: result-app
  ports:
    - 5011:80
Notice that the manual "links" sections have been removed. With version 3, Docker Compose automatically creates a network and provides DNS resolution between containers, eliminating the need for explicit linking.
Creating a "services" Section with the Version Declaration
The next step is to add the version declaration and create a "services" block. For example, you can update the file in an editor like VS Code by indenting all configuration lines under a new block. The revised file looks like this:
version: "3"
services:
  redis:
    image: redis

  db:
    image: postgres:9.4

  vote:
    image: voting-app
    ports:
      - "5000:80"

  worker:
    image: worker-app

  result:
    image: result-app
    ports:
      - "5001:80"
Note
When you deploy this updated configuration with the docker-compose up command, Docker automatically creates a network for the containers. All containers join the same network allowing services to refer to each other by name.
Deploying the Updated File
Deploy the application using the following command:
admin@docker-host $ docker-compose up
You might see output similar to the following:
WARNING: The Docker Engine you're using is running in swarm mode.
...
Creating network "code_default" with the default driver
Creating code_worker_1 ... done
Creating code_redis_1 ... done
Creating code_result_1 ... done
Creating code_db_1 ... done
Creating code_vote_1 ... done
In this example, "code" (derived from the directory name) prefixes the network and service names.
Handling PostgreSQL Environment Variables
When running the updated file, you may encounter an error where the worker or result apps cannot connect to the database. This issue is due to recent changes in the PostgreSQL image which now require the POSTGRES_PASSWORD environment variable to be set. Without it, the database fails to initialize properly.
Warning
Ensure that you update the database service with the required environment variables. Without POSTGRES_PASSWORD, dependent services may fail to establish a connection.
To resolve this, update the DB service configuration as follows:
version: '3'
services:
  redis:
    image: redis

  db:
    image: postgres:9.4
    environment:
      POSTGRES_USER: postgres
      POSTGRES_PASSWORD: postgres

  vote:
    image: voting-app
    ports:
      - "5000:80"

  worker:
    image: worker-app

  result:
    image: result-app
    ports:
      - "5001:80"
After saving the changes, bring the services up once more:
admin@docker-host $ docker-compose up
You'll see a similar output indicating the services and network are created successfully:
WARNING: The Docker Engine you're using is running in swarm mode.
Compose does not use swarm mode to deploy services to multiple nodes in a swarm. All containers will be scheduled on the current node.
To deploy your application across the swarm, use `docker stack deploy`.
Creating network "code_default" with the default driver
Creating code_worker_1 ... done
Creating code_redis_1 ... done
Creating code_result_1 ... done
Creating code_db_1 ... done
Creating code_vote_1 ... done
Verifying the Deployment
Once the deployment is successful, you can access the voting application via localhost on port 5000 and the results application on port 5001. For example, cast a vote for "cats" and verify that the results page shows 100% for cats. Changing the vote to "dogs" should update the results accordingly, confirming that your containerized setup is functioning as intended.
Conclusion
This article has demonstrated how to upgrade a Docker Compose file from version 1 to version 3, enabling modern features like automatic networking and enhanced DNS resolution. Happy containerizing, and see you in the next article!

Watch Video
Watch video content
Practice Lab
Practice lab