This guide covers deploying a multi-container voting application using Docker, including its architecture, components, and deployment steps.
Welcome to this guide on deploying the example voting application from the Docker samples repository. This demo showcases a multi-container application architecture using Docker, featuring several components. In this article, we review the application’s design, examine source code segments, and deploy the application using Docker commands. Later, we will expand this demo to incorporate Docker Compose, Docker Stacks, and Swarm services.
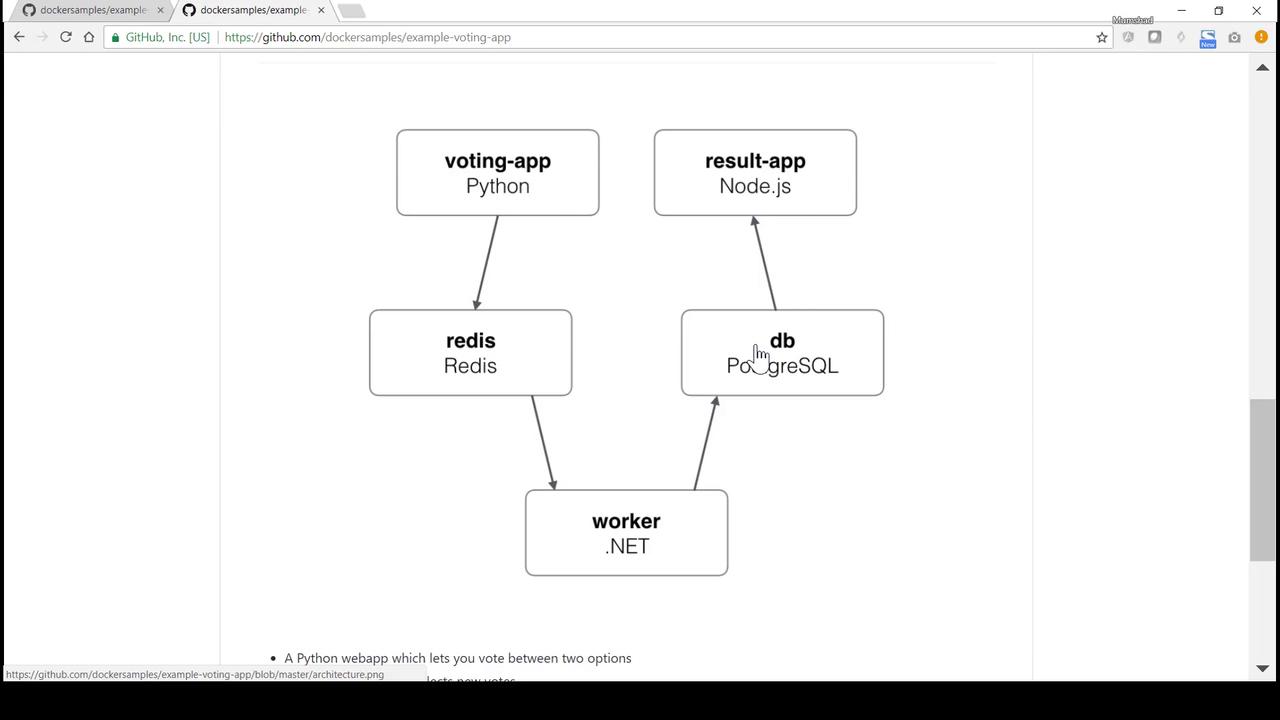
The voting application is composed of the following components:
A Python-based voting application (using Flask) that presents a web page for casting votes.
A Redis messaging service that temporarily stores votes.
A Java-based worker application that processes votes from Redis and updates a PostgreSQL database.
A Node.js-powered results application that queries PostgreSQL and displays real-time voting results.
Redis and PostgreSQL utilize official Docker Hub images, while the voting app, worker, and results components are custom-developed.Below is the architecture diagram that illustrates the interaction between these components:
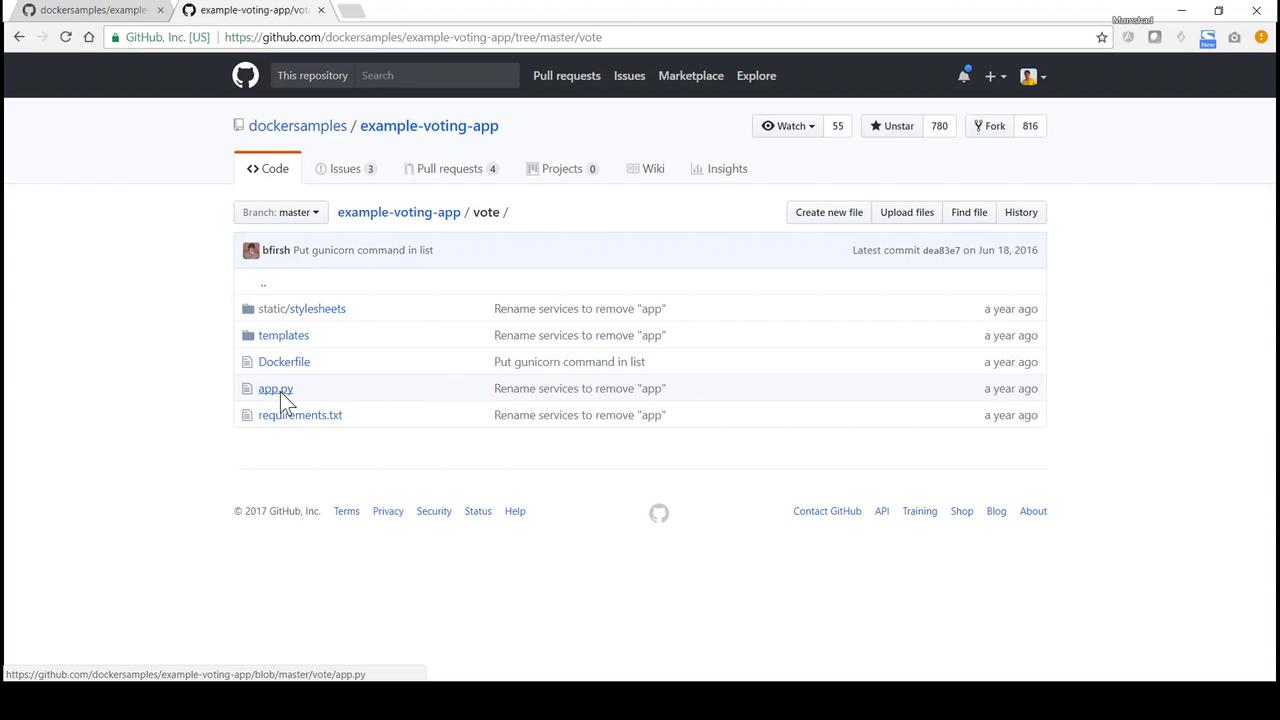
The repository organizes the custom applications into distinct folders. Let’s begin by exploring the voting application. Within the vote directory, the Flask application is defined in the file app.py. The application handles both GET and POST requests. In a GET request, it renders the main page (index.html), while the POST handler processes the vote by pushing vote data to Redis.Below is an example of the Python code for the voting application:
In the vote directory, you will also find the Dockerfile, which builds the voting application image. This Dockerfile uses the Python 2.7 Alpine image, installs dependencies from requirements.txt, copies the source code, exposes port 80, and runs the application using Gunicorn.
Copy
# Using official Python runtime base imageFROM python:2.7-alpine# Set the application directoryWORKDIR /app# Install our requirements.txtADD requirements.txt /app/requirements.txtRUN pip install -r requirements.txt# Copy our code into the containerADD . /app# Make port 80 available for links and/or publishingEXPOSE 80# Define the command to run when launching the containerCMD ["gunicorn", "app:app", "-b", "0.0.0.0:80", "--log-file", "-", "--access-logfile", "-", "--workers", "4", "--keep-alive", "0"]
Click on the vote directory in the repository to view files such as app.py and the Dockerfile. This overview helps in understanding how the application components are organized.
Below is a GitHub screenshot showing the repository page for the voting application with files like Dockerfile and app.py:
The worker is located in the worker folder. This Java-based application connects to Redis and PostgreSQL. It monitors Redis for new votes using a blocking pop operation. When a vote is received, the worker updates the PostgreSQL database.Here is a snippet of the Java code for the worker:
The corresponding Dockerfile for the worker uses the Microsoft .NET SDK image. It copies the source code, restores dependencies, publishes the application, and sets the startup command.
The results application, implemented with Node.js and Express, connects to PostgreSQL to fetch vote counts. It also uses websockets to emit live score updates to client browsers.Below is an excerpt from its server.js file:
Copy
io.sockets.on('connection', function (socket) { socket.emit('message', { text: 'Welcome!' }); socket.on('subscribe', function (data) { socket.join(data.channel); });});async.retry( { times: 1000, interval: 1000 }, function(callback) { pg.connect('postgres://postgres@db/postgres', function(err, client, done) { if (err) { console.error("Waiting for db"); } callback(err, client); }); }, function(err, client) { if (err) { return console.error("Giving up"); } console.log("Connected to db"); getVotes(client); });function getVotes(client) { client.query('SELECT vote, COUNT(id) AS count FROM votes GROUP BY vote', [], function(err, result) { if (err) console.error("Error performing query: " + err); else { var votes = collectVotesFromResult(result); io.sockets.emit('scores', JSON.stringify(votes)); } });}
The Dockerfile for the results app is based on a slim Node.js image. It installs dependencies from package.json, sets up the working directory, and starts the Node.js server on port 80.
Copy
FROM node:5.11.0-slimWORKDIR /appRUN npm install -g nodemonADD package.json /app/package.jsonRUN npm config set registry http://registry.npmjs.orgRUN npm install && npm lsRUN mv /app/node_modules /node_modulesADD . /appENV PORT 80EXPOSE 80CMD ["node", "server.js"]
The overall architecture including the results application is illustrated in the following diagram:
Navigate to the vote directory to inspect its contents:
Copy
cd votels
You should see files such as app.py, Dockerfile, and the directories static and templates.
View the Dockerfile to confirm its contents:
Copy
cat Dockerfile
Build the Docker image for the voting application:
Copy
docker build -t voting-app .
Run the voting application container by mapping host port 5000 to container port 80:
Copy
docker run -p 5000:80 voting-app
Open your browser and navigate to http://localhost:5000. You should see two options for casting your vote (for example, “Cats” and “Dogs”). Casting a vote without Redis running may result in a timeout error in the logs.
Deploying PostgreSQL for Worker and Results Applications
The worker and results applications depend on a PostgreSQL database. It is recommended to use PostgreSQL 9.4. If a container named “db” is running, remove it:
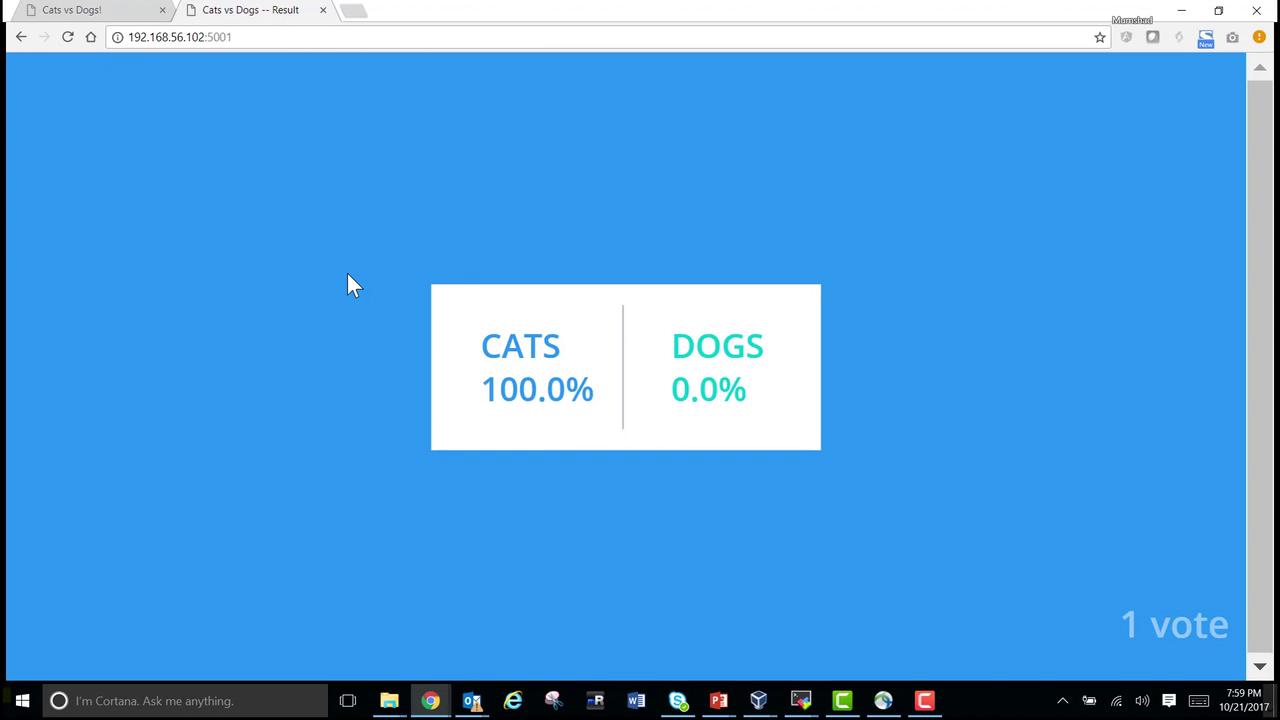
Run the results container, linking it to PostgreSQL and mapping host port 5001 to container port 80:
Copy
docker run -p 5001:80 --link db:db result-app
When you open your browser and visit http://localhost:5001, the results page displays the current vote counts. Any voting change registered by the voting application is processed by the worker and reflected on this page.Below is an image showing a sample voting result: