Event Streaming with Kafka

Kafka Connect Effortless Data Pipelines

Demo Kafka Connect Setting up Kafka using KRaft

In this walkthrough, you will provision an EC2 instance on AWS, install Apache Kafka in KRaft (Kafka Raft) mode, and prepare your environment to use Kafka Connect’s S3 Connector. By the end, you’ll have a running KRaft broker and controller ready to sync topics to Amazon S3.


1. Create an IAM Role for EC2

  1. Open the AWS Console and navigate to IAM → RolesCreate role.
  2. Select AWS service as the trusted entity and pick EC2.
  3. Attach the AmazonSSMManagedInstanceCore policy and click Next.
  4. Name the role Kafka-S3-demo and finish creation.

Note

For production, restrict permissions to only the resources your application requires.

The resulting trust policy will resemble:

{
  "Version": "2012-10-17",
  "Statement": [
    {
      "Effect": "Allow",
      "Principal": {
        "Service": "ec2.amazonaws.com"
      },
      "Action": "sts:AssumeRole"
    }
  ]
}

2. Launch an EC2 Instance

  1. Go to EC2 → Instances → Launch instance.
  2. Name it Kafka-S3-demo and choose instance type t2.medium.
  3. Under Key pair, select Proceed without a key pair (for demo only).
  4. Use the default security group.
  5. Increase the root volume to 16 GiB.
  6. In Advanced settings, attach the IAM role Kafka-S3-demo.
  7. Click Launch instance.

3. Connect via Session Manager

Once the instance state is running, select it and choose Connect → Session Manager → Connect.

The image shows an AWS EC2 dashboard with a running instance named "kafka_s3_demo," displaying details like instance ID, type, and IP addresses.

In the shell session, become root and navigate home:

sudo su
cd ~

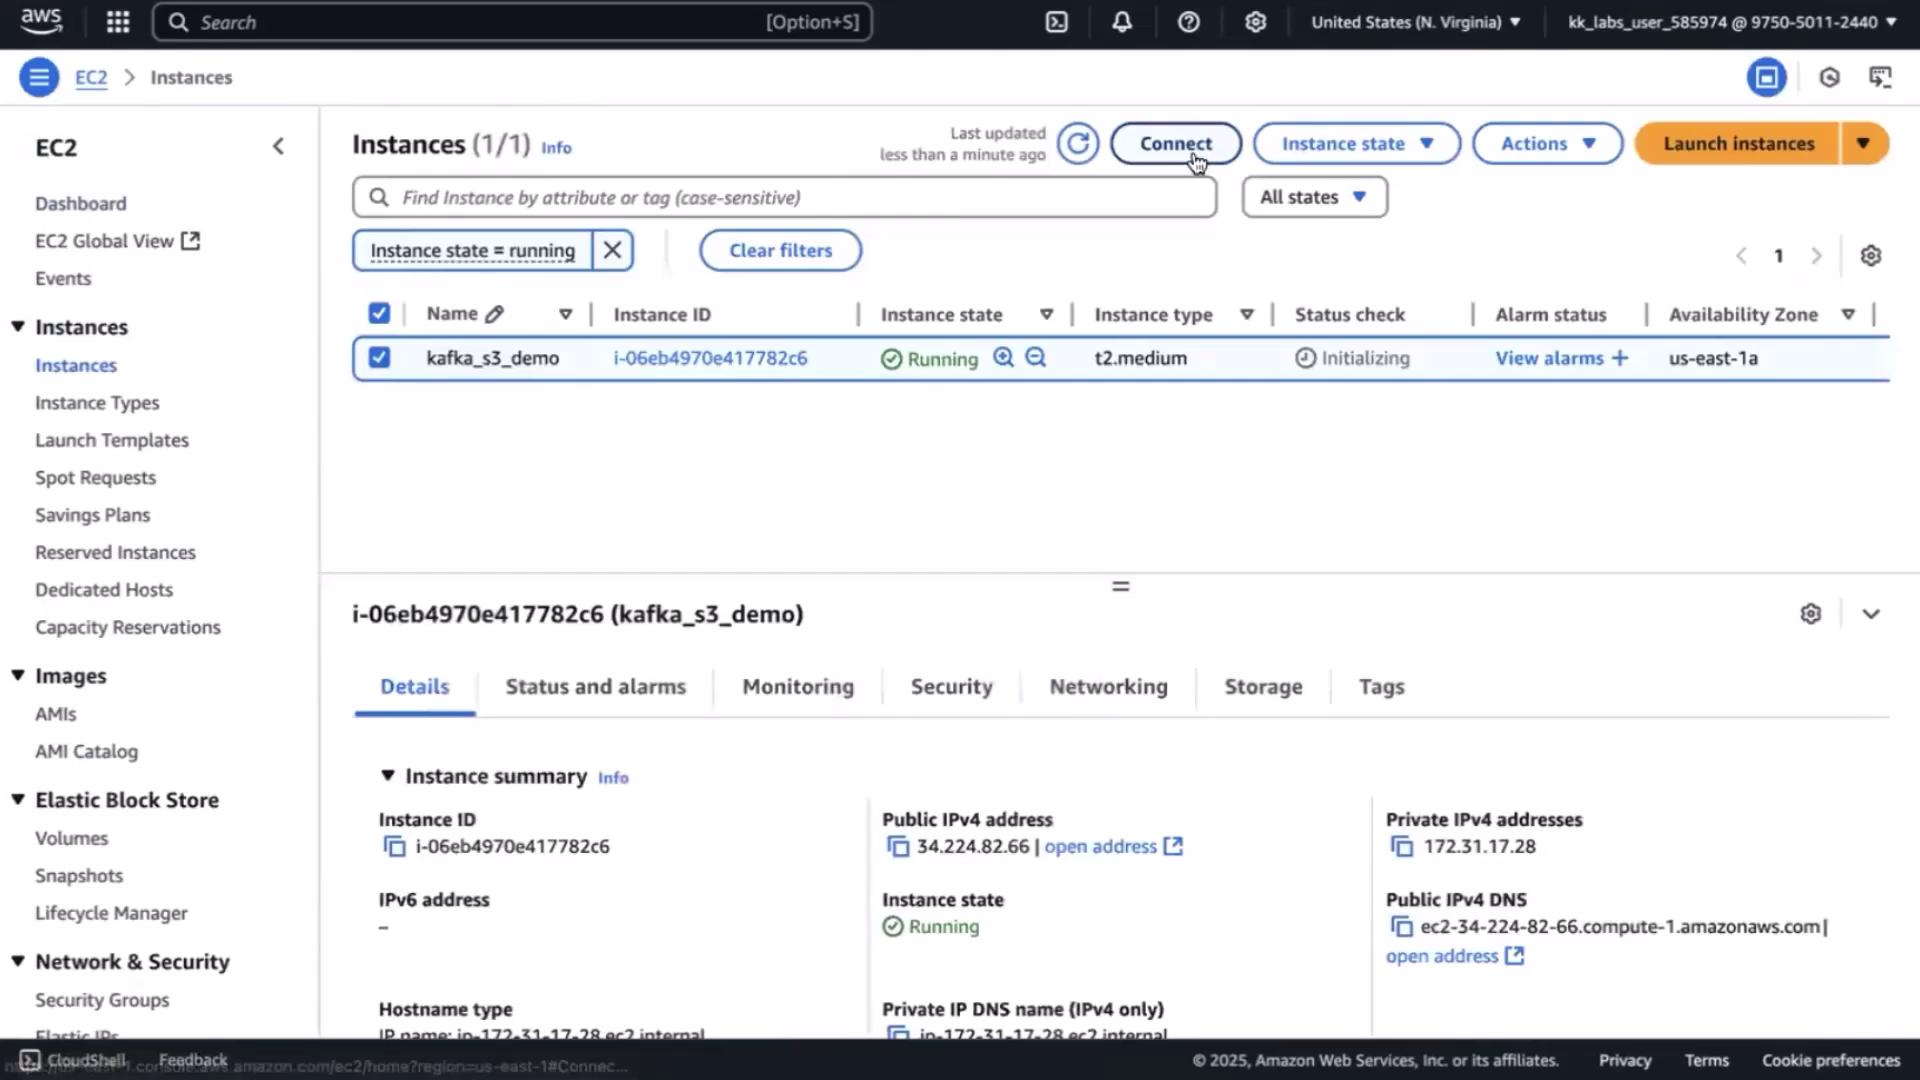
4. Download and Extract Kafka Binaries

# Fetch Kafka 3.0.0 (Scala 2.13)
wget https://downloads.apache.org/kafka/3.0.0/kafka_2.13-3.0.0.tgz
tar -xzf kafka_2.13-3.0.0.tgz

# Inspect directory structure
cd kafka_2.13-3.0.0
ls -l

You should see bin, config, and libs among other folders.


5. Install Java Runtime

Verify Java is present:

java -version

If missing, install OpenJDK 8:

yum install -y java-1.8.0-openjdk
java -version

Expected output:

openjdk version "1.8.0_442"
OpenJDK Runtime Environment Corretto-8.442.06.1 (build 1.8.0_442-b06)
OpenJDK 64-Bit Server VM Corretto-8.442.06.1 (build 25.442-b06, mixed mode)

6. Format Storage for KRaft

Generate a unique ID and format the combined logs directory:

UUID=$(uuidgen)
bin/kafka-storage.sh format \
  -t $UUID \
  -c config/kraft/server.properties

You should see:

Formatting /tmp/kraft-combined-logs

7. Configure Kafka for KRaft Mode

Open the KRaft properties:

vim config/kraft/server.properties

Update the following (replace <EC2_PUBLIC_IP> with your instance’s public IPv4):

process.roles=broker,controller
node.id=1
controller.quorum.voters=1@localhost:9093

######################## Socket Server Settings ############################
listeners=PLAINTEXT://0.0.0.0:9092,CONTROLLER://0.0.0.0:9093
inter.broker.listener.name=PLAINTEXT

advertised.listeners=PLAINTEXT://<EC2_PUBLIC_IP>:9092

Save and exit.


8. Open Port 9092 in Your Security Group

  1. In the EC2 Console, select Security Groups for your instance.
  2. Click Edit inbound rules.
  3. Add a Custom TCP rule for port 9092 from 0.0.0.0/0 (demo only).
  4. Description: Kafka Brokers.
  5. Save changes.

Warning

Allowing 0.0.0.0/0 exposes your broker to the internet. Restrict this in production.
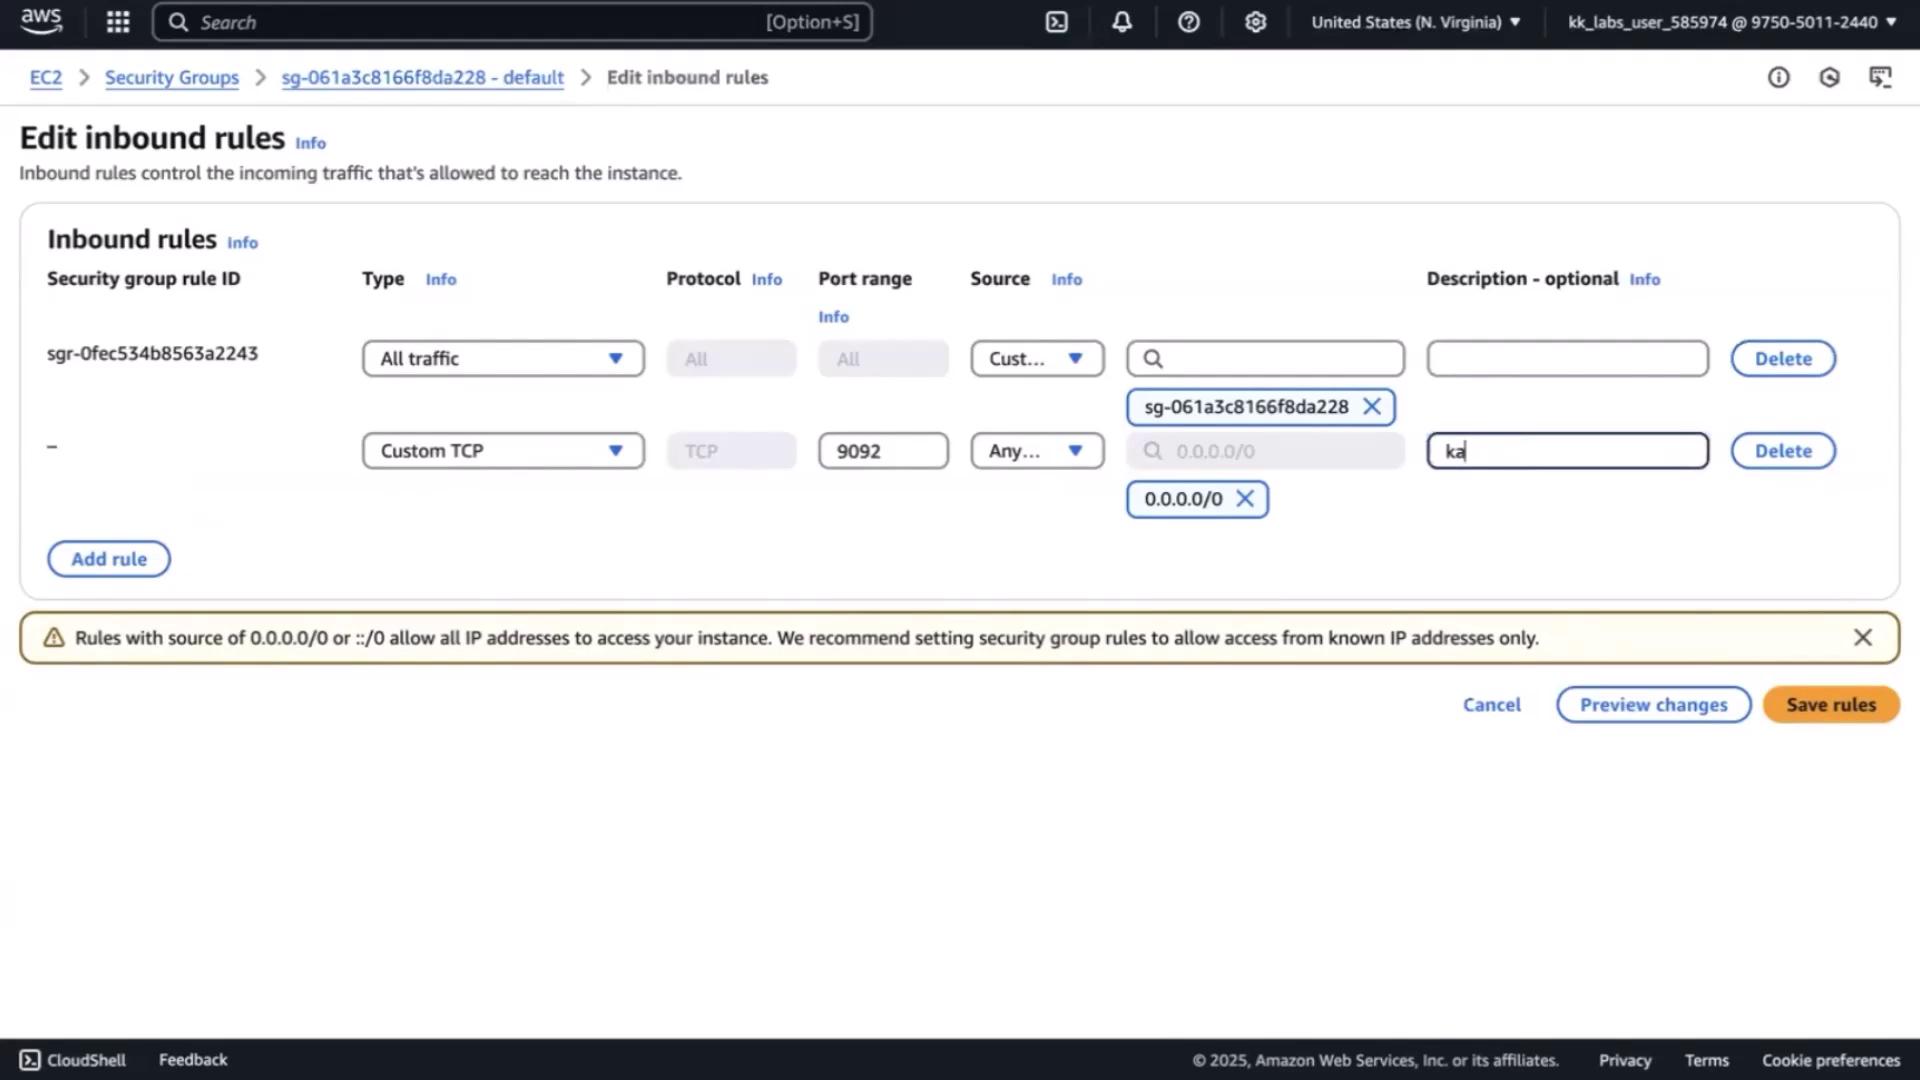
The image shows an AWS EC2 security group settings page where inbound rules are being edited, allowing all traffic and custom TCP on port 9092 from any source. A warning advises against allowing all IP addresses.

Below is a quick reference for Kafka ports:

PortProtocolPurpose
9092PLAINTEXTClient–broker communication
9093CONTROLLERController quorum and internal API

9. Start Kafka in KRaft Mode

Launch the broker and controller together:

bin/kafka-server-start.sh config/kraft/server.properties

Look for logs confirming both roles:

[2025-05-10 10:57:05,750] INFO Kafka version: 3.0.0
[2025-05-10 10:57:05,750] INFO Kafka Server started (kafka.server.KafkaRaftServer)

Next Steps

With your KRaft broker running, proceed to:

  1. Download the Kafka S3 Connector plugin.
  2. Configure connect-standalone.properties and s3-sink.properties.
  3. Launch the connector to start syncing topic data to Amazon S3.

Watch Video

Watch video content

Previous
Streaming data from Kafka to other systems