Event Streaming with Kafka

Project Building an Event Driven System

Demo Setting up Kafka on EC2

In this guide, you’ll deploy a single-node Apache Kafka broker on an AWS EC2 instance using KRaft mode (no ZooKeeper). The broker will serve as the event bus for your applications. You’ll complete the following steps:

StepActionKey Details
1Create IAM roleAttach AmazonSSMFullAccess
2Launch EC2 instancet2.medium, 16 GiB root, attach IAM role
3Connect via Session ManagerNo SSH keys needed
4Install Java & KafkaJava 8 (Corretto), Kafka 3.0.0
5Configure Kafka in KRaft modeEdit server.properties
6Open port 9092Inbound rule in security group
7Start broker & create a demo topickafka-server-start.sh, kafka-topics.sh

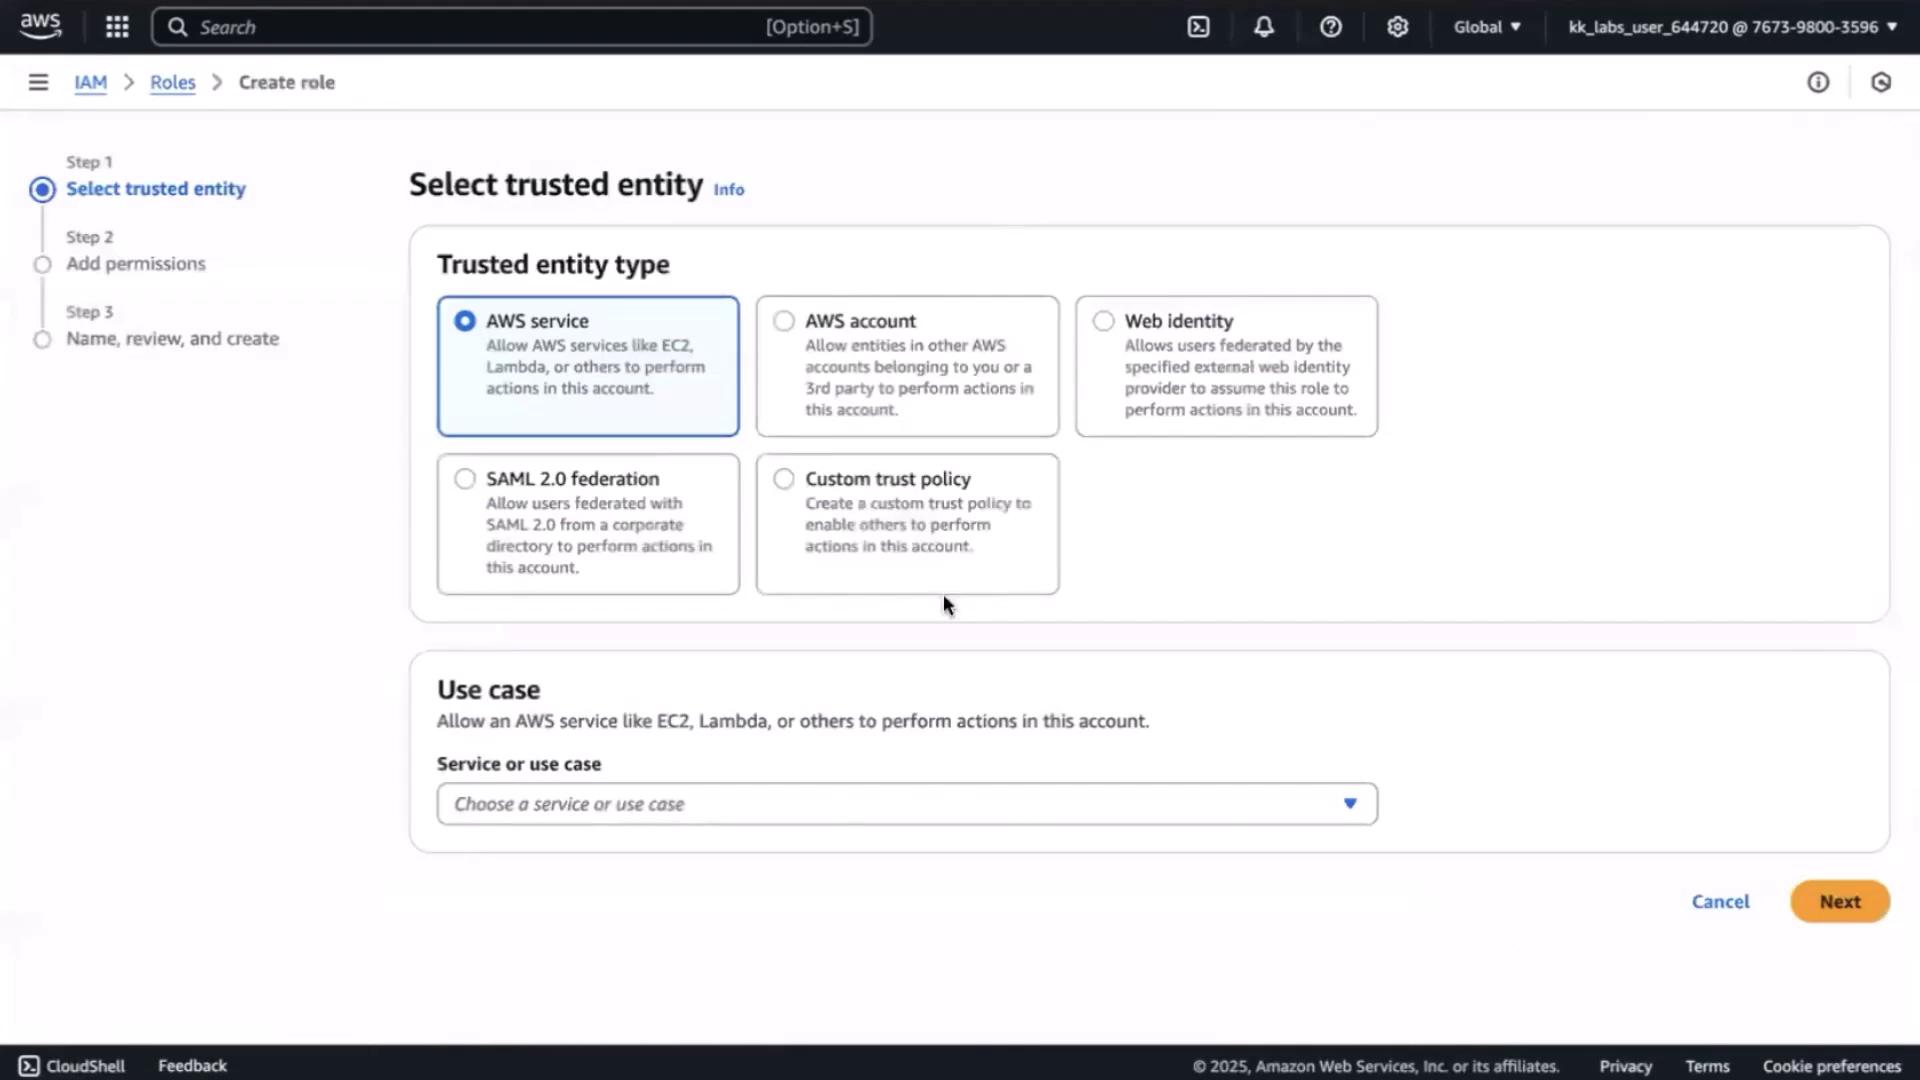
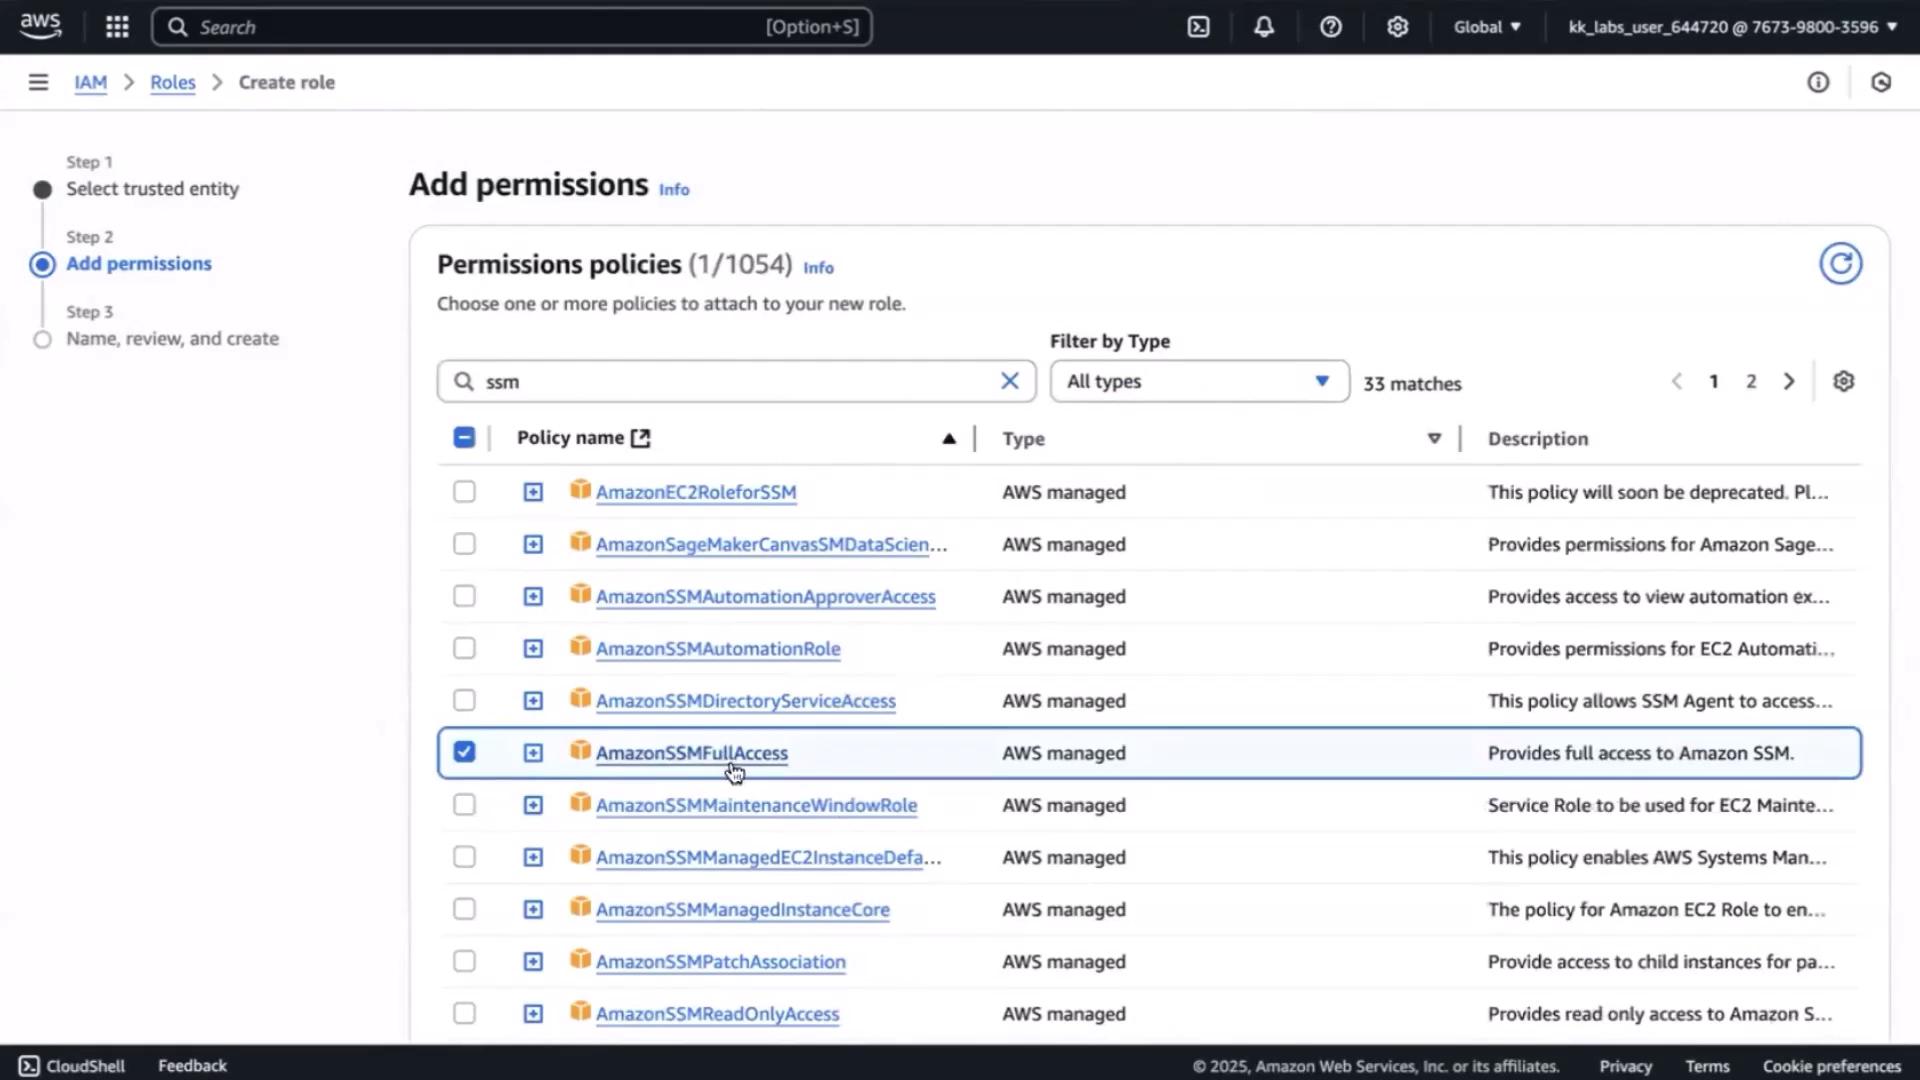
1. Create an IAM Role for EC2 with SSM Access

  1. In the AWS Console, go to IAMRolesCreate role.
  2. Choose AWS serviceEC2, then click Next.
  3. Search for SSM and attach the AmazonSSMFullAccess policy.
  4. Name the role KafkaDemo, then Create role.

The image shows an AWS IAM interface for creating a role, specifically the "Select trusted entity" step, with options for different trusted entity types like AWS service, AWS account, and Web identity.

The image shows an AWS IAM interface where a user is adding permissions to a role, specifically selecting the "AmazonSSMFullAccess" policy from a list of AWS managed policies.

After attaching, the role’s trust policy will allow EC2 to communicate with Session Manager:

{
  "Principal": {
    "Service": ["ec2.amazonaws.com"]
  }
}

This enables secure shell-less access via the AWS console.


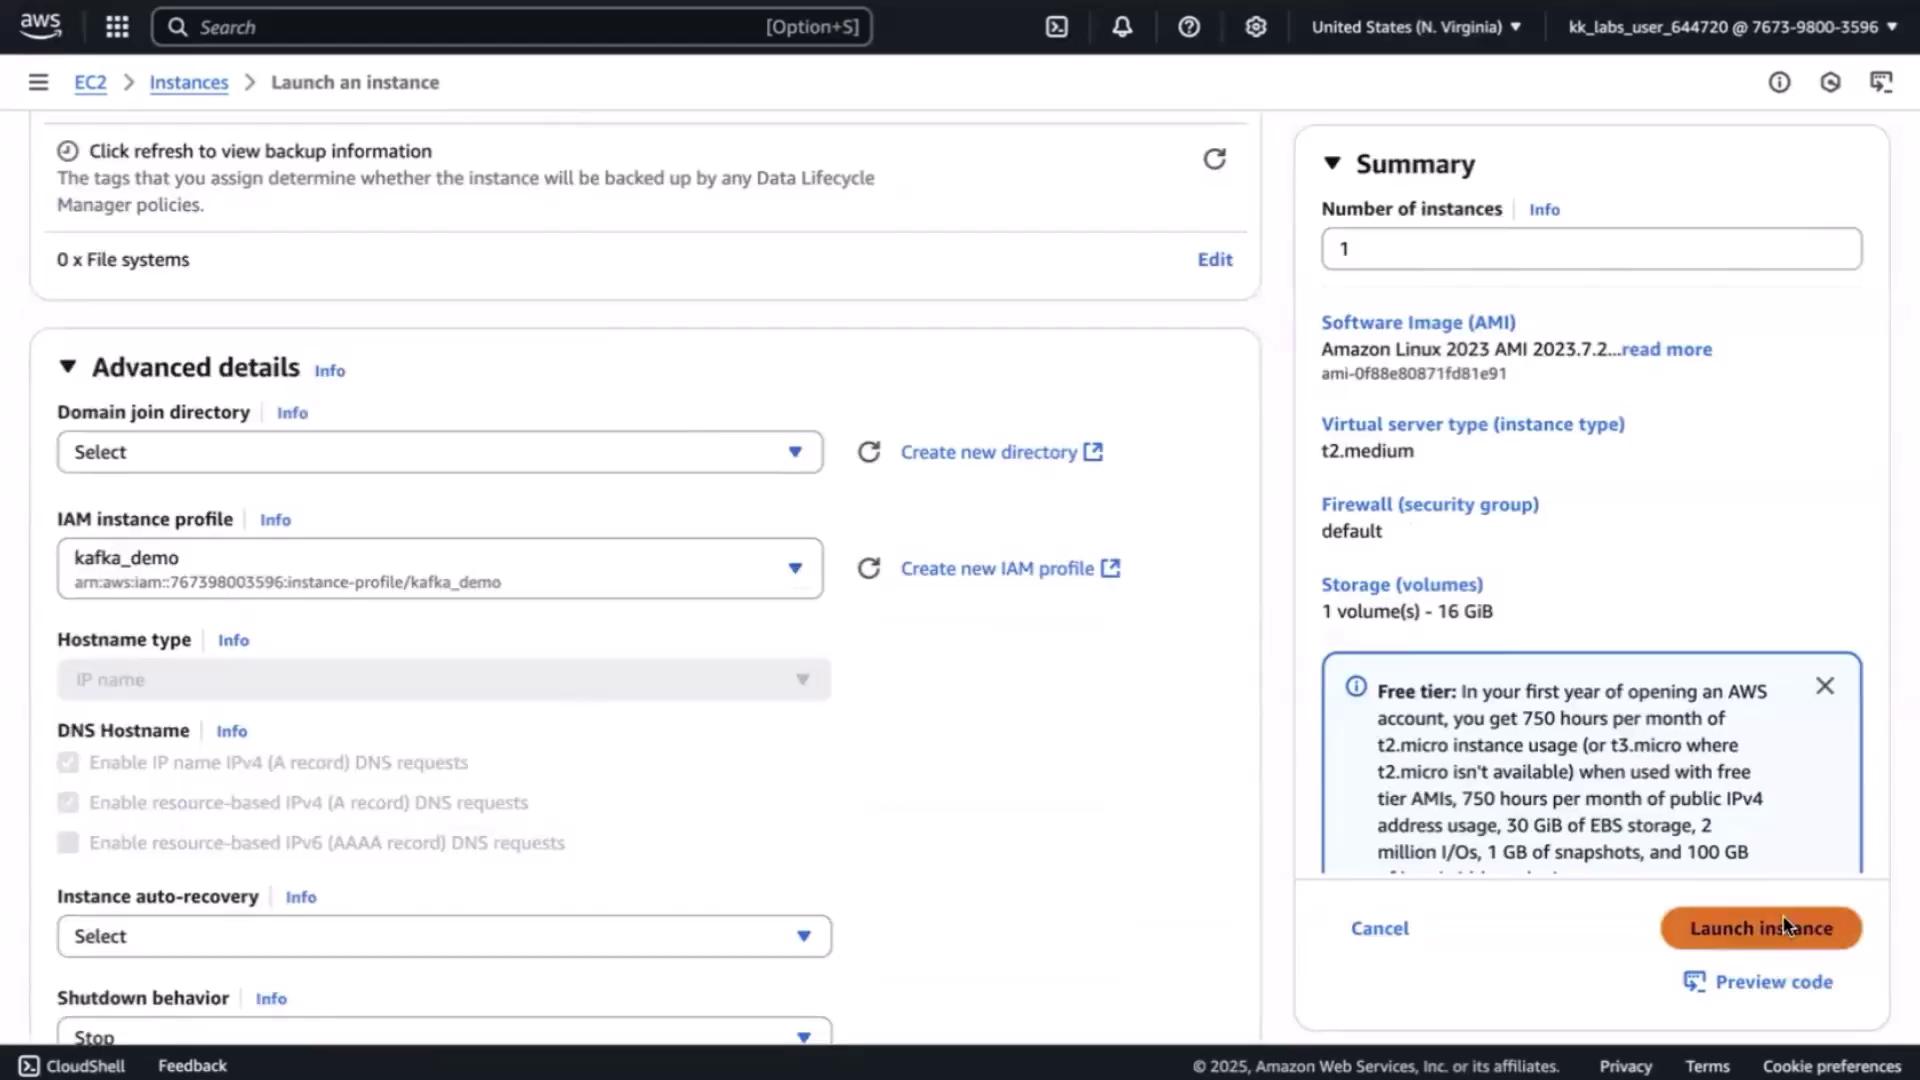
2. Launch the EC2 Instance

  1. Open the EC2 ConsoleLaunch instance.
  2. Configure:
    • Name: kafka-demo
    • Instance type: t2.medium
    • Root volume: increase to 16 GiB
    • IAM role: KafkaDemo
  3. Skip key pair selection (SSM will handle connectivity).
  4. Keep the default security group for now.
  5. Click Launch.

The image shows an AWS EC2 console screen where a user is configuring settings to launch an instance. It includes options for domain join directory, IAM instance profile, and a summary of the instance details like software image, instance type, and storage.


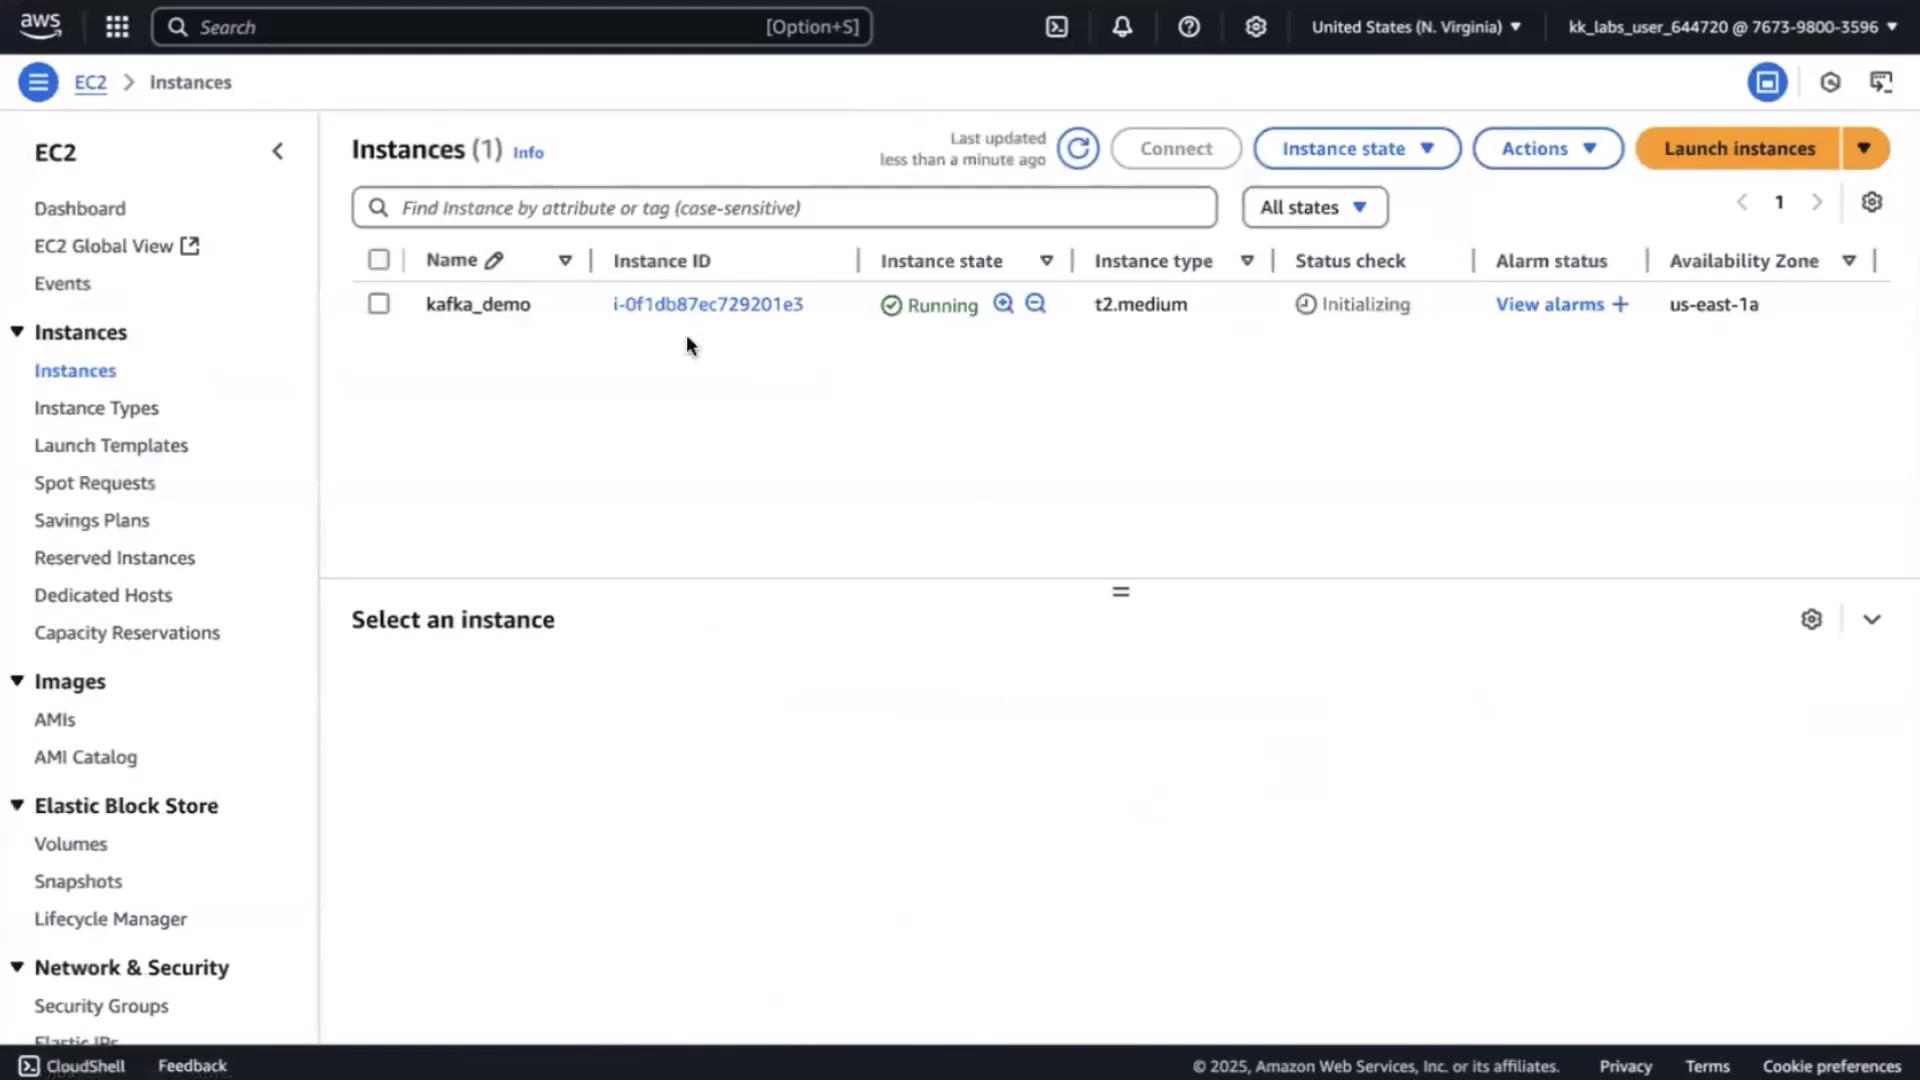
3. Connect via Session Manager

Wait until the instance state reads running. Then:

  • Go to Instances, select kafka-demoConnectSession ManagerConnect.

The image shows an AWS EC2 dashboard with one running instance named "kafka_demo," which is of type "t2.medium" and is in the "us-east-1a" availability zone.


4. Install Java and Kafka

In the Session Manager terminal, elevate privileges and install:

# Become root and navigate to home
sudo su
cd ~

# Download Kafka 3.0.0 for Scala 2.13
wget https://downloads.apache.org/kafka/3.0.0/kafka_2.13-3.0.0.tgz
tar -xzf kafka_2.13-3.0.0.tgz
cd kafka_2.13-3.0.0

# Verify Java; install Corretto if missing
if ! command -v java &>/dev/null; then
  yum install -y java-1.8.0-amazon-corretto
fi

# Confirm installation
java -version

Expected output:

openjdk version "1.8.0_442"
OpenJDK Runtime Environment Corretto-8.442.06.1 (build 1.8.0_442-b06)
OpenJDK 64-Bit Server VM Corretto-8.442.06.1 (build 25.442-b06, mixed mode)

5. Configure Kafka in KRaft Mode

Kafka 3.x’s KRaft protocol removes the need for ZooKeeper. Perform these steps:

  1. Generate a cluster ID

    bin/kafka-storage.sh random-uuid
    

    Copy the returned UUID (e.g., BMKCKvMMT64yxEZSmnTQ).

  2. Format the storage directory

    bin/kafka-storage.sh format \
      -t BMKCKvMMT64yxEZSmnTQ \
      -c config/kraft/server.properties
    
  3. Edit config/kraft/server.properties and update:

    # Roles and IDs
    process.roles=broker,controller
    node.id=1
    controller.quorum.voters=1@localhost:9093
    
    # Network listeners
    listeners=PLAINTEXT://0.0.0.0:9092,CONTROLLER://0.0.0.0:9093
    inter.broker.listener.name=PLAINTEXT
    
    # Replace with your instance’s public IP
    advertised.listeners=PLAINTEXT://<YOUR_EC2_PUBLIC_IP>:9092
    

Note

Make sure to replace <YOUR_EC2_PUBLIC_IP> with your EC2 instance’s actual public IP.


6. Open Port 9092 in the Security Group

Allow external clients to reach Kafka’s default port:

  1. In EC2 Console, select the instance → SecuritySecurity groups.
  2. Under Inbound rules, click Edit inbound rulesAdd rule:
    • Type: Custom TCP
    • Port: 9092
    • Source: 0.0.0.0/0 (or restrict to your subnet)
    • Description: Kafka broker
  3. Save rules.

The image shows an AWS EC2 security group settings page where inbound rules are being edited, allowing all traffic and custom TCP traffic on port 9092 from any source. A warning advises against using 0.0.0.0/0 for security reasons.

Warning

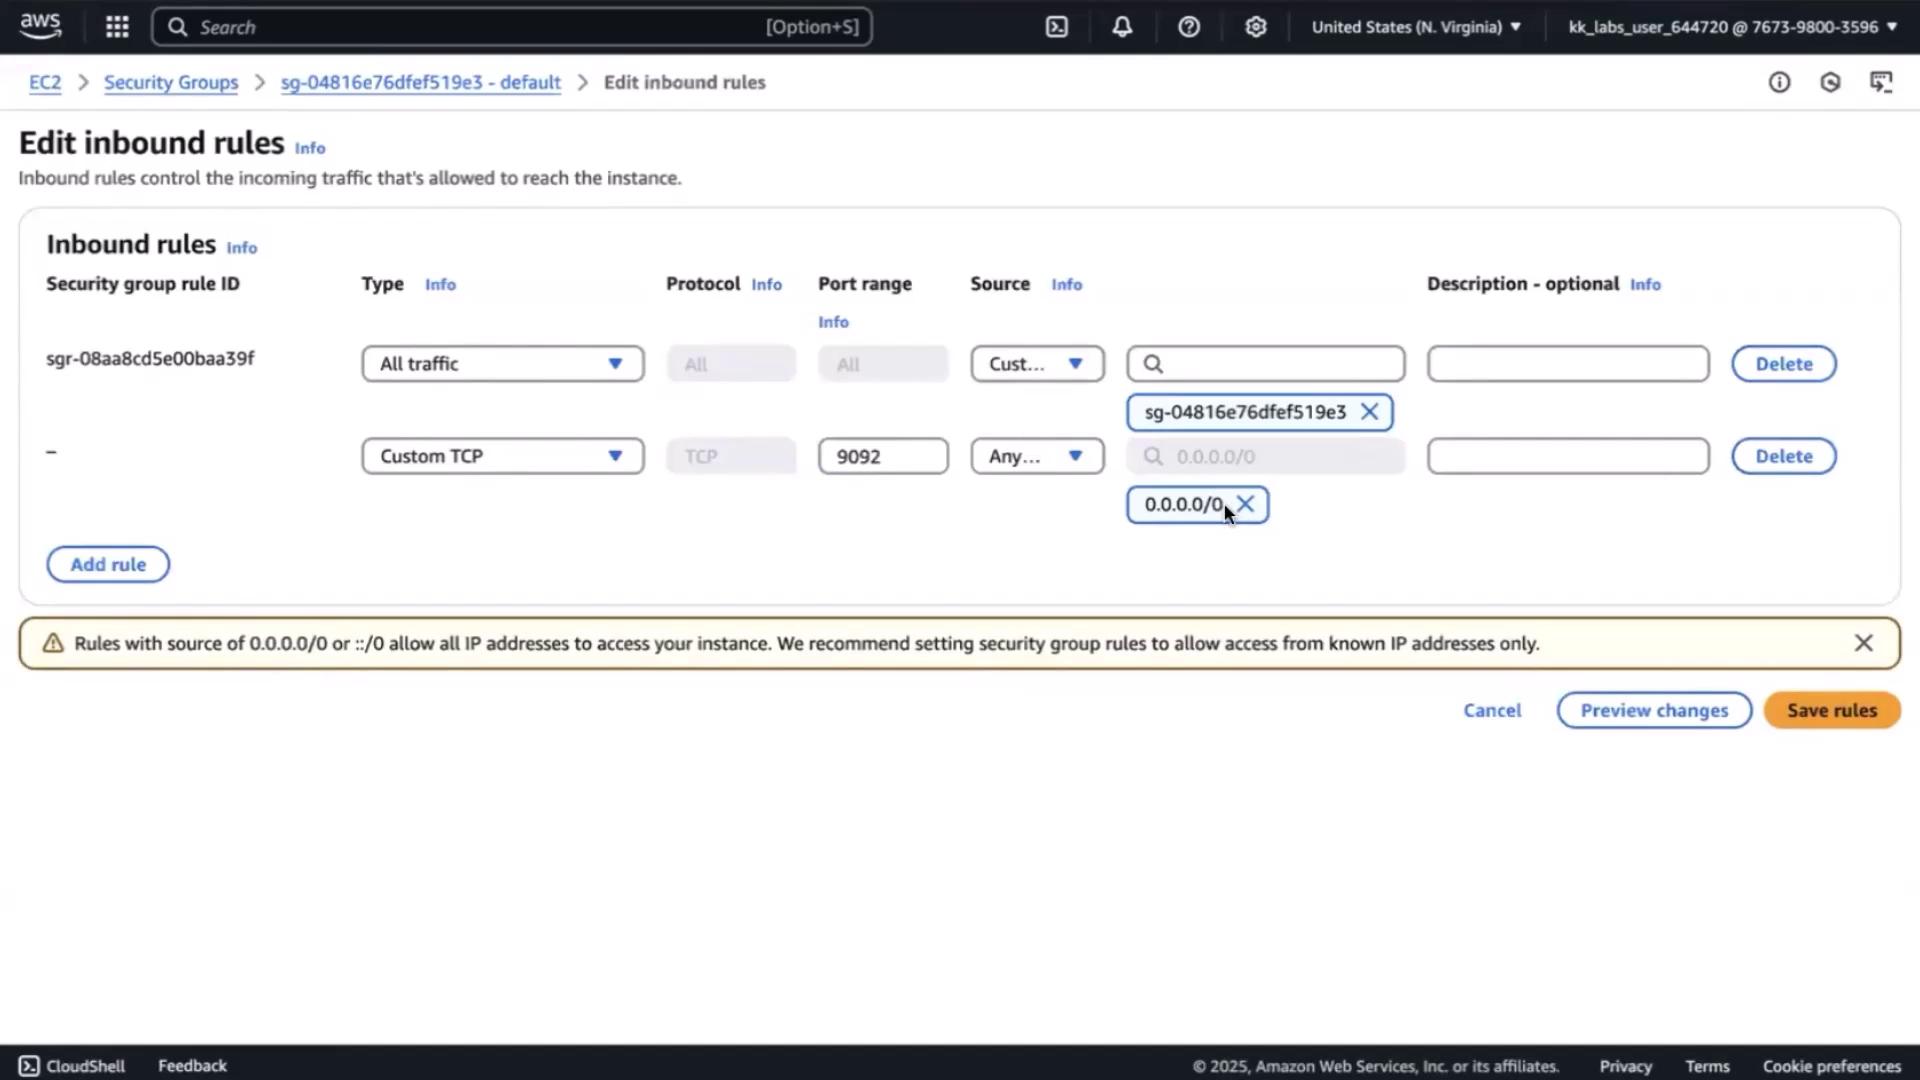
Opening port 9092 to 0.0.0.0/0 exposes your broker to the Internet. Limit the source to only trusted IP ranges when possible.


7. Start Kafka and Create a Topic

Start the Kafka broker

bin/kafka-server-start.sh config/kraft/server.properties

Verify the console logs for successful startup.

Create a demo topic

Open a new Session Manager shell (keep the broker running):

sudo su
cd ~/kafka_2.13-3.0.0

bin/kafka-topics.sh --create \
  --topic cartevent \
  --bootstrap-server <YOUR_EC2_PUBLIC_IP>:9092 \
  --partitions 3 \
  --replication-factor 1

You should see:

Created topic cartevent.

Congratulations! Your single-node Kafka broker on EC2 is now online and ready to accept messages.

Watch Video

Watch video content

Previous
Architecture Overview of Event Driven System