Fundamentals of MLOps

Model Deployment and Serving

Model Serving

Welcome to this detailed guide on model deployment and serving. In this lesson, we explore how a machine learning (ML) model is integrated into an application once it’s ready for production. Previously, we discussed how data scientists build models and collaborate with product managers and MLOps engineers to iterate during the development and experimentation phases. Now, we move on to integrating the ready model, a request often initiated by the product manager, and executed with precision by the MLOps engineer.

Consider the following real-world scenario: A pharmacy uses an inventory application managed by a pharmacist. When inventory is needed, the pharmacist submits a request through the app. The request travels to a warehouse where an inventory prediction dashboard analyzes historical data and predicts future inventory needs. Based on these predictions, the warehouse dispatches the required items to the pharmacy. This process not only ensures timely inventory management but also opens avenues for additional operational improvements.

The image illustrates a model deployment and serving process for inventory management, showing the flow from a pharmacist to an inventory application, and then to an inventory prediction dashboard connected to a warehouse.

Accurate product demand forecasting helps optimize inventory levels and improve warehouse efficiency. Automated scheduling can further streamline these operations.

The image is a diagram titled "Model Deployment and Serving," highlighting three steps: predicting product demand accurately, optimizing inventory levels efficiently, and automating warehouse task scheduling.

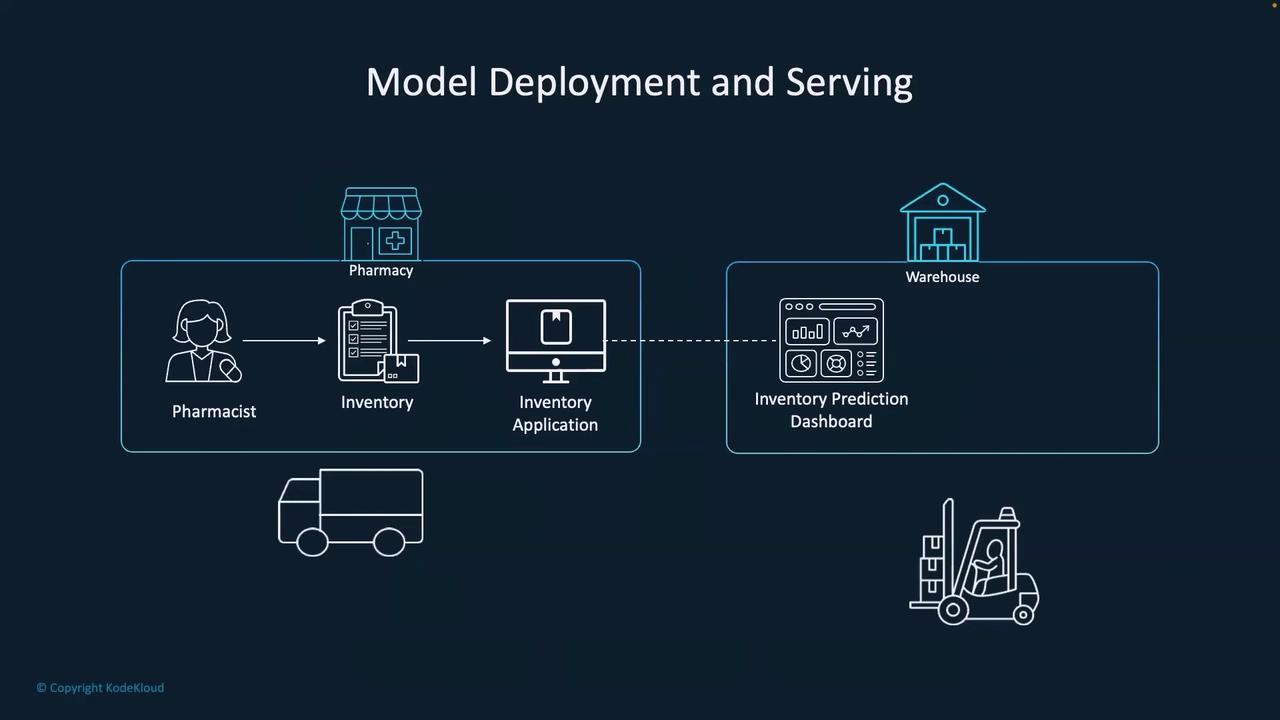
How the Inventory Prediction Dashboard Works

Within our inventory prediction dashboard, users select a branch and a month before clicking the green "Go" button. This action triggers a call from the frontend to a dedicated API endpoint—/predict—which hosts our ML model configured for inventory prediction. For instance, the dashboard might predict that a pharmacy at Dubai Mall in December 2025 will require four units of a specific medicine.

The image illustrates a model deployment and serving process for an inventory prediction dashboard, showing a flow from a frontend interface to an ML model and resulting predictions.

This prediction adds value in two distinct ways:

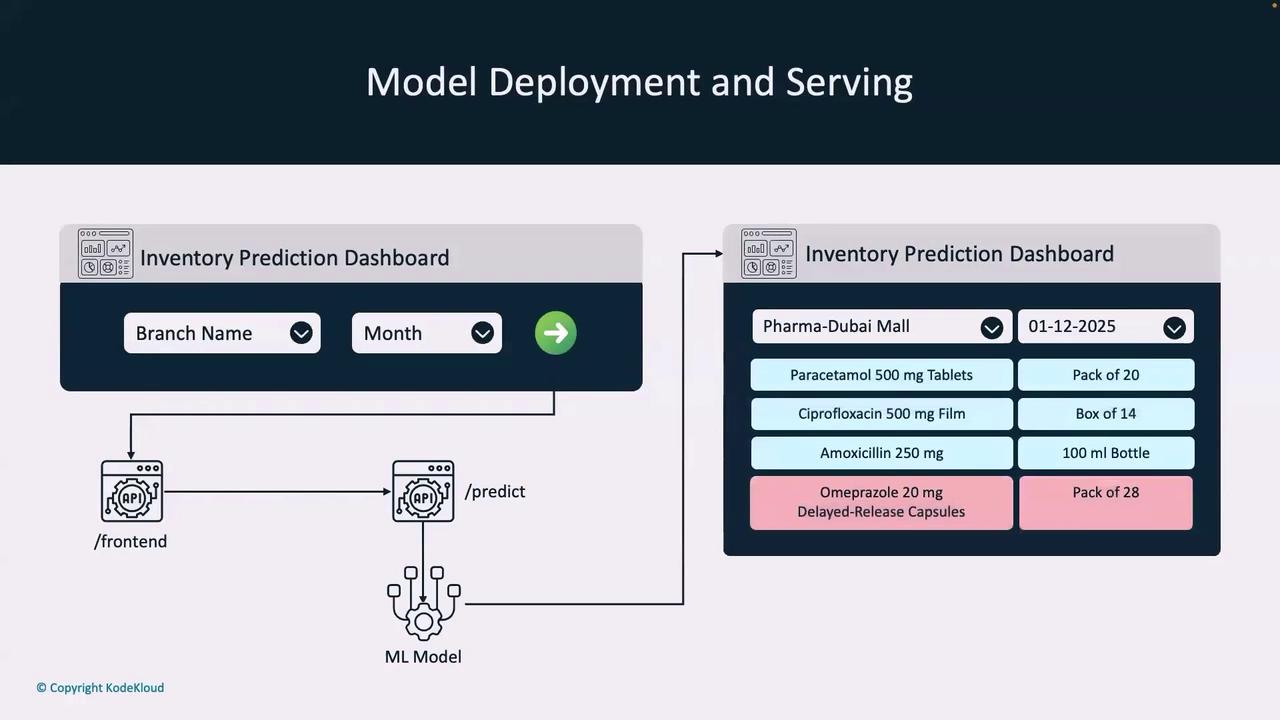
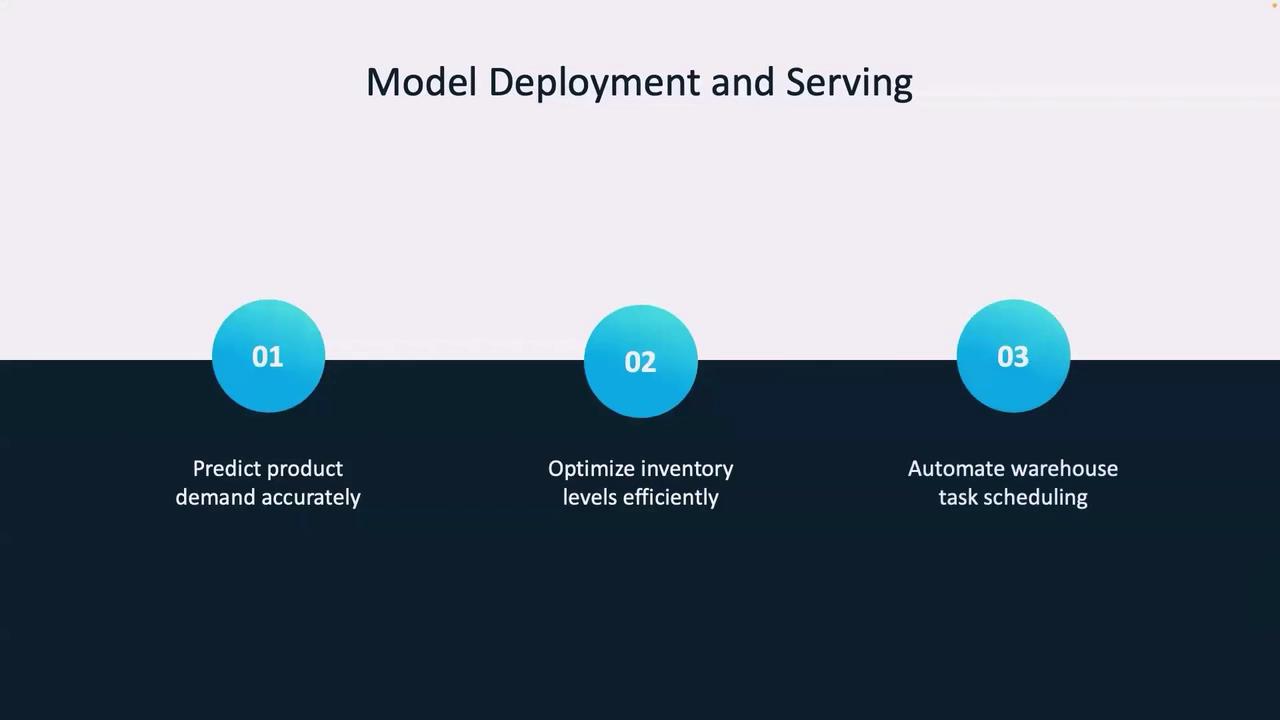
  • It supports proactive inventory planning by allowing purchase orders to be placed well in advance.
  • It enhances cost efficiency through reliable forecasts, paving the way for better vendor negotiations.

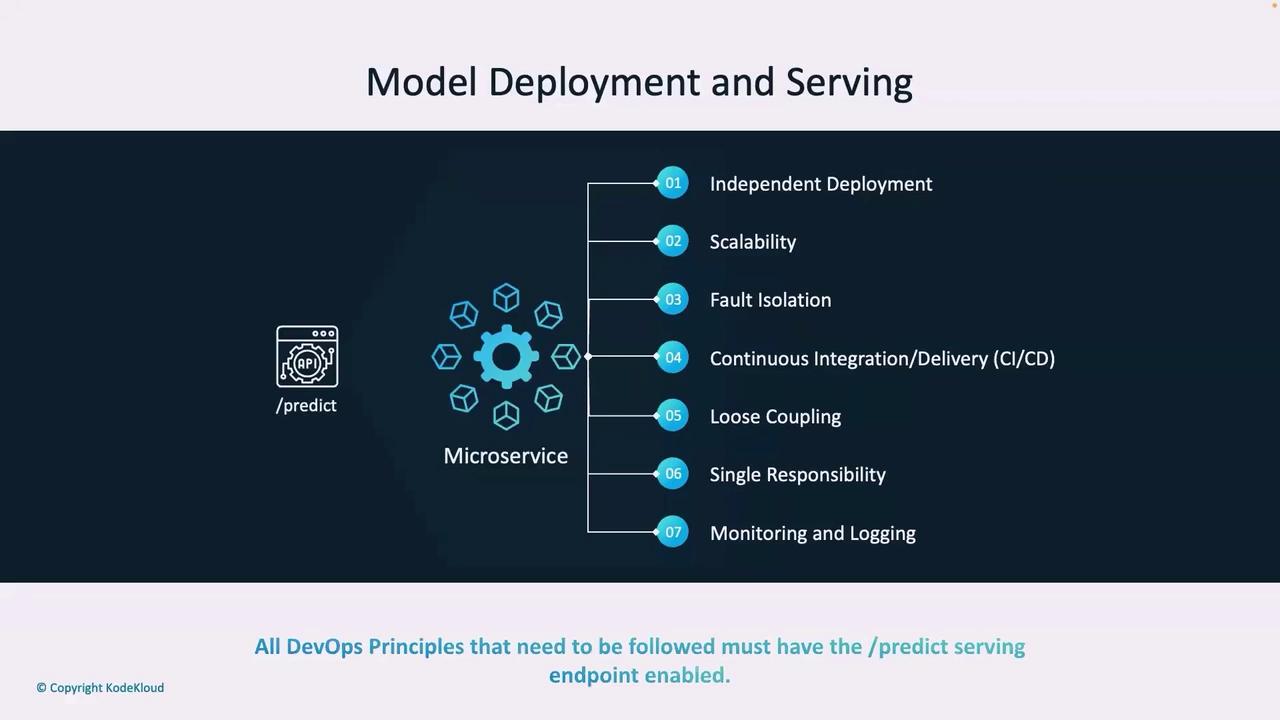
Transitioning to a Microservices Architecture

Once the ML model is ready, integrating it into an API shifts the deployment strategy towards a microservices architecture. The /predict endpoint is deployed as a microservice with the following core properties:

  • Independent deployability
  • Scalability
  • Fault tolerance
  • Dedicated CI/CD process
  • Loose coupling (single responsibility—inventory prediction)
  • Comprehensive monitoring and logging

These aspects align with core DevOps principles, demonstrating the synergy between MLOps and DevOps practices.

The image outlines key principles of model deployment and serving using microservices, including independent deployment, scalability, fault isolation, CI/CD, loose coupling, single responsibility, and monitoring and logging. It emphasizes that all DevOps principles must have the /predict serving endpoint enabled.

High-Level Deployment Process

Follow these high-level steps for successful model deployment and serving:

  1. Ensure the ML model is production-ready.
  2. Identify the source API calling the serving API, typically the frontend endpoint.
  3. Deploy the ML model as a microservice accessible via the /predict endpoint.

The image outlines a process for model deployment and serving, with three steps: "ML Model is ready," "Identify the source API that will call the Serving API," and "Deploy the ML model as a microservice."

Operational Workflow and Team Collaboration

In an operational context, the MLOps engineer queries, "Which backend service will call the ML model API?" The frontend engineer responds that their API is responsible for calling the /predict endpoint, passing two parameters: branch name and date. The endpoint then uses these inputs to generate an inventory prediction.

The image shows two engineers, labeled as MLOps Engineer and Frontend Engineer, sitting at a table with laptops, discussing model deployment and serving. The Frontend Engineer mentions passing parameters "branch_name" and "date."

The complete deployment process unfolds as follows:

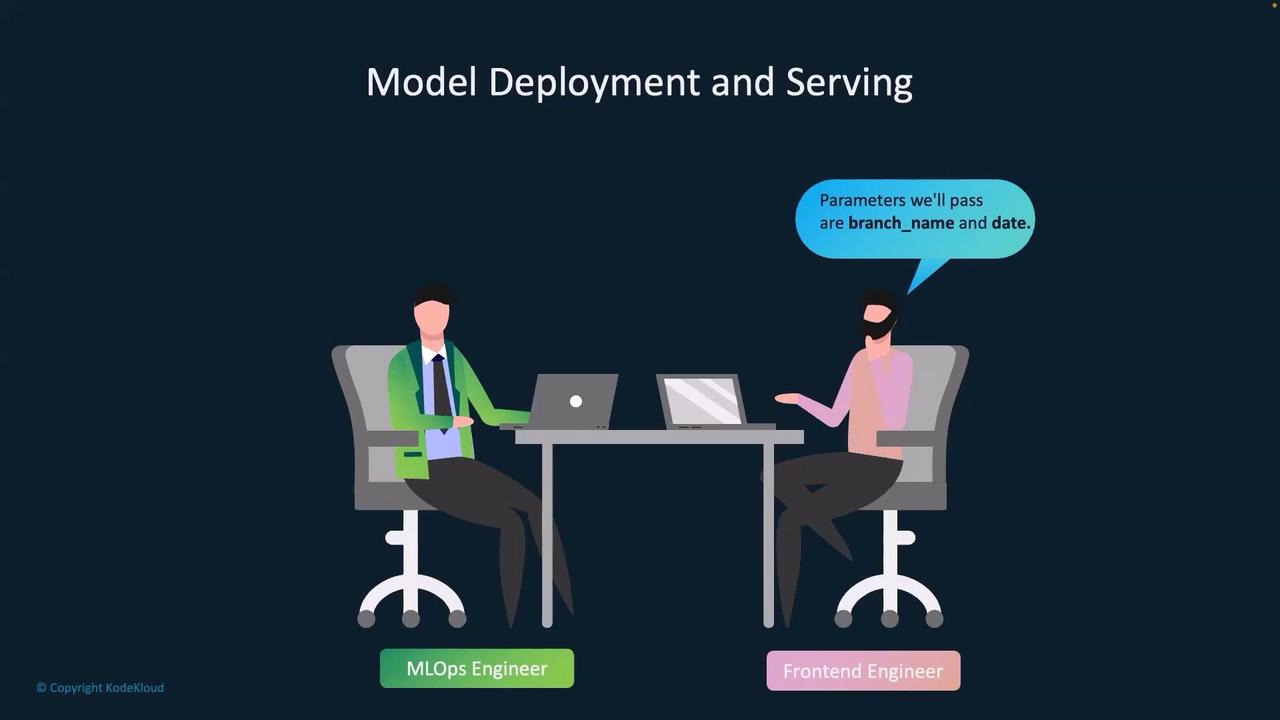
  • Deploy the API in a staging environment.
  • Frontend engineers update their code to call the /predict endpoint.
  • Conduct staging tests.
  • Transition to production by initially routing 10% of frontend traffic to the /predict endpoint.
  • Monitor the service and infrastructure.
  • Upon validation, route 100% of traffic through the /predict endpoint.

Collaboration Tip

Jointly agreeing on API parameters and communication protocols is essential for a smooth deployment process.

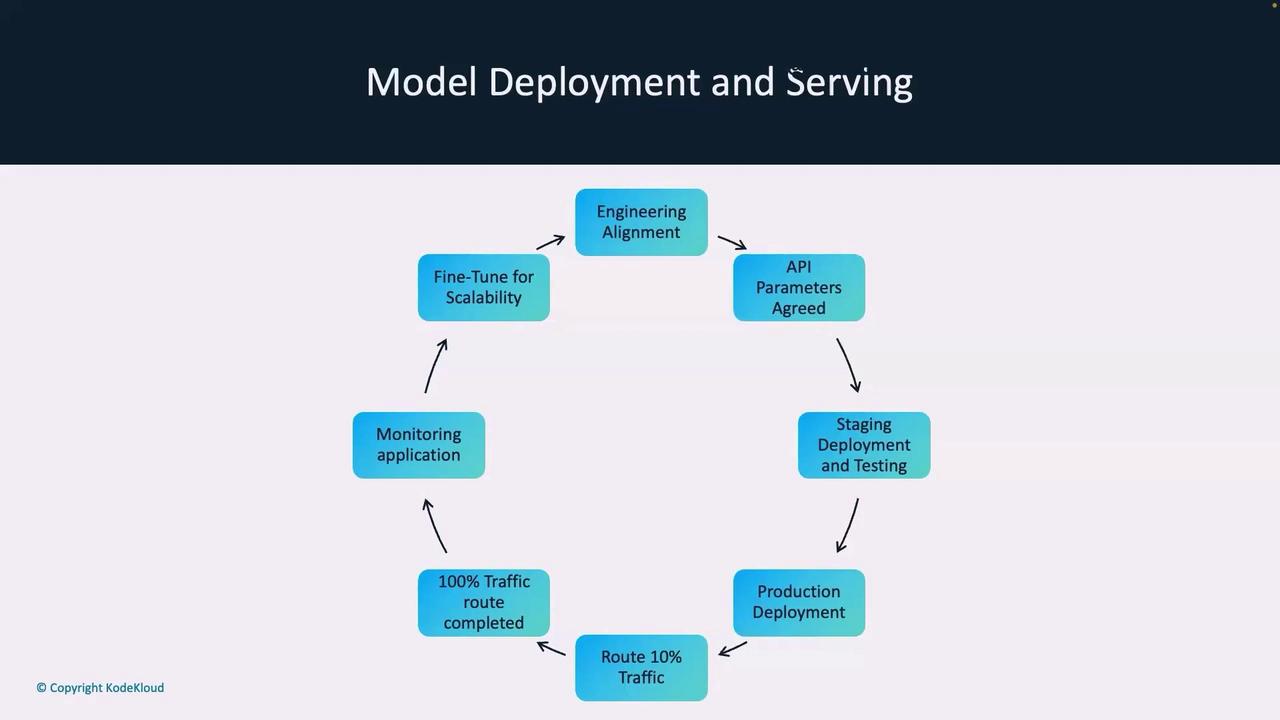
Visualizing the Deployment Lifecycle

The entire process can be visualized as a lifecycle encompassing:

  • Engineering alignment
  • API parameter agreements
  • Staging deployments with thorough testing
  • Production deployments with incremental traffic routing
  • Continuous monitoring and fine-tuning for scalability

The image is a flowchart illustrating the process of model deployment and serving, including steps like engineering alignment, API parameters agreement, staging deployment, and monitoring.

Summary

This guide has outlined how a simple ML model (e.g., stored in a pickle file) is transformed into a production-ready deployment within a microservices architecture. We demonstrated the roles of DevOps and MLOps engineers and underscored the importance of collaboration and adherence to microservices principles.

Next Steps

In the next lesson, we will delve into the differences between online serving and offline serving and discuss the concept of model drift.

Thank you for reading. We look forward to exploring more advanced topics with you in the upcoming lesson.

Watch Video

Watch video content

Previous
Demo MLflow Model Artifact and Versioning