GitOps with ArgoCD
ArgoCD AdvancedAdmin
ArgoCD Vault Plugin with ArgoCD
In this lesson, you'll learn how to install and configure the HashiCorp Vault plugin in ArgoCD. This Vault plugin enables ArgoCD to retrieve secrets directly from HashiCorp Vault during application manifest reconciliation.
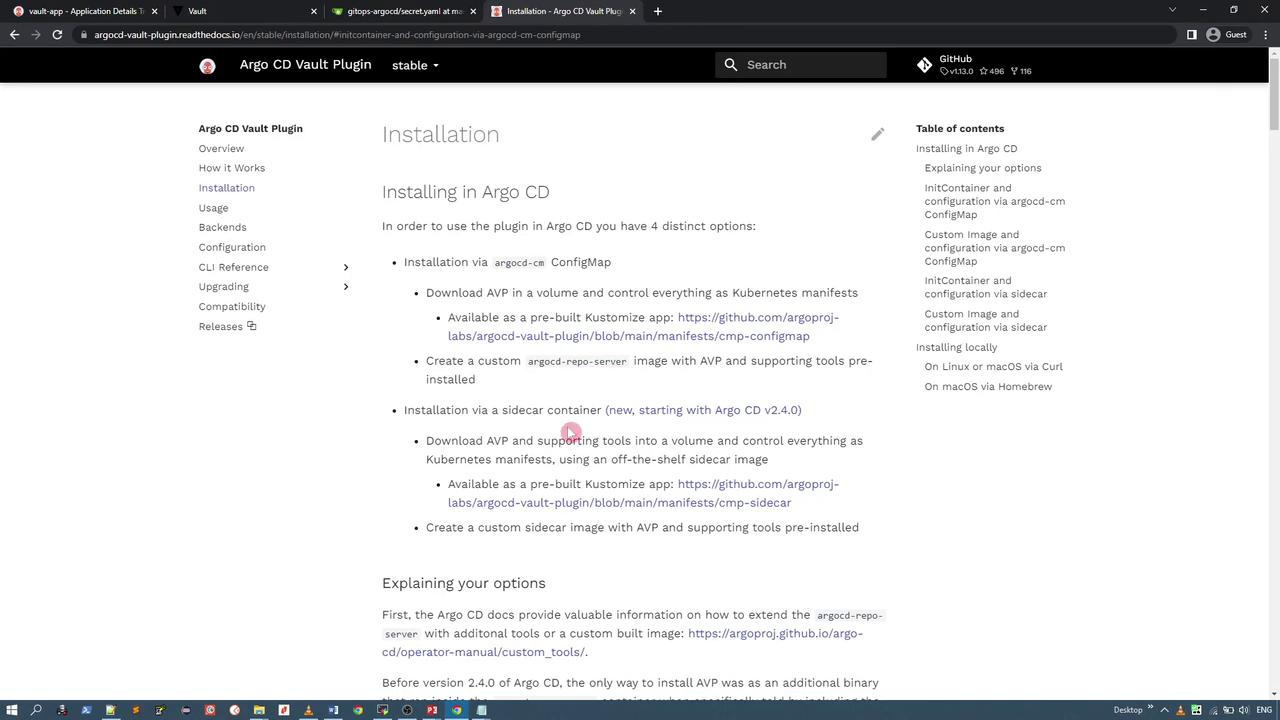
 We will follow the official documentation's approach using an initContainer and configuring the ArgoCD ConfigMap.
Below are the detailed steps and configuration examples.
1. Repository Server Deployment Configuration
The first step is to modify the ArgoCD repo server deployment. This configuration uses an initContainer that downloads the Vault plugin and makes it available to the main container through a shared volume.
Initial Deployment Example
apiVersion: apps/v1
kind: Deployment
metadata:
name: argocd-repo-server
spec:
template:
spec:
containers:
- name: argocd-repo-server
volumeMounts:
- name: custom-tools
mountPath: /usr/local/bin/argocd-vault-plugin
subPath: argocd-vault-plugin
volumes:
- name: custom-tools
emptyDir: {}
initContainers:
- name: download-tools
image: alpine:3.8
command: [sh, -c]
env:
- name: AVP_VERSION
value: "1.7.0"
args:
- >-
wget -O argocd-vault-plugin
https://github.com/argoproj-labs/argocd-vault-plugin/releases/download/v${AVP_VERSION}/argocd-vault-plugin
&& chmod +x argocd-vault-plugin && mv argocd-vault-plugin /custom-tools
In this deployment configuration, the ArgoCD repo server container mounts a volume named custom-tools
. The initContainer called download-tools
downloads the Vault plugin using wget
, sets executable permission with chmod +x
, and moves it to the shared volume.
Detailed InitContainer Example
For clarity, here is an alternative snippet that highlights the initContainer setup:
initContainers:
- name: download-tools
image: alpine:3.8
command: [sh, -c]
env:
- name: AVP_VERSION
value: "1.7.0"
args:
- wget -O argocd-vault-plugin https://github.com/argoproj-labs/argocd-vault-plugin/releases/download/v${AVP_VERSION}/argocd-vault-plugin
- chmod +x argocd-vault-plugin
- mv argocd-vault-plugin /custom-tools/
This setup downloads the plugin, ensures proper permissions, and places it in /custom-tools/
, which the repo server container will later mount.
2. Plugin Installation Using a Dockerfile
If you prefer embedding the plugin into a custom image, use a Dockerfile similar to the example below. This approach avoids using an initContainer by baking the Vault plugin directly into your image.
RUN apt-get update && \
apt-get install -y \
curl \
awscli && \
apt-get clean && \
rm -rf /var/lib/apt/lists/* /tmp/* /var/tmp/*
# Install the AVP plugin (as root so we can copy to /usr/local/bin)
ENV AVP_VERSION=0.2.2
ENV BIN=argocd-vault-plugin
RUN curl -L -o ${BIN} https://github.com/argoproj-labs/argocd-vault-plugin/releases/download/v${AVP_VERSION}/${BIN}
RUN chmod +x ${BIN}
RUN mv ${BIN} /usr/local/bin
# Switch back to non-root user
USER 999
Tip
Embedding the plugin in your custom image can simplify deployment in environments where using an initContainer is less desirable.
3. Configuring the Config Management Plugin
Once the Vault plugin binary is available, update the ArgoCD ConfigMap to instruct ArgoCD on how to invoke the plugin for manifest generation. Add the following configuration in your ConfigMap:
data:
configManagementPlugins: |-
- name: argocd-vault-plugin
generate:
command: ["argocd-vault-plugin"]
args: ["generate", "./"]
This configuration directs ArgoCD to execute the command argocd-vault-plugin generate ./
during the reconciliation process.
4. Updating the Repo Server Deployment with Vault Plugin Credentials
Below is a revised ArgoCD repo server deployment example. This configuration includes a secret reference for Vault credentials and updates the Vault plugin version to 1.7.1. Ensure that the environment variable is correctly defined as AVP_VERSION.
metadata:
name: argocd-repo-server
spec:
template:
spec:
containers:
- name: argocd-repo-server
volumeMounts:
- name: custom-tools
mountPath: /usr/local/bin/argocd-vault-plugin
subPath: argocd-vault-plugin
envFrom:
- secretRef:
name: argocd-vault-plugin-credentials
volumes:
- name: custom-tools
emptyDir: {}
initContainers:
- name: download-tools
image: alpine:3.8
command: [sh, -c]
env:
- name: AVP_VERSION
value: "1.7.1"
args:
- >
wget -O argocd-vault-plugin https://github.com/argoproj-labs/argocd-vault-plugin/releases/download/v${AVP_VERSION}/argocd-vault-plugin &&
chmod +x argocd-vault-plugin &&
mv argocd-vault-plugin /custom-tools/
volumeMounts:
- name: custom-tools
mountPath: /custom-tools
automountServiceAccountToken: true
After deploying these changes using, for example, kubectl edit deployment argocd-repo-server -n argocd
, the repo server downloads the Vault plugin and processes manifests containing Vault annotations.
5. Creating an Application Using Vault Secrets
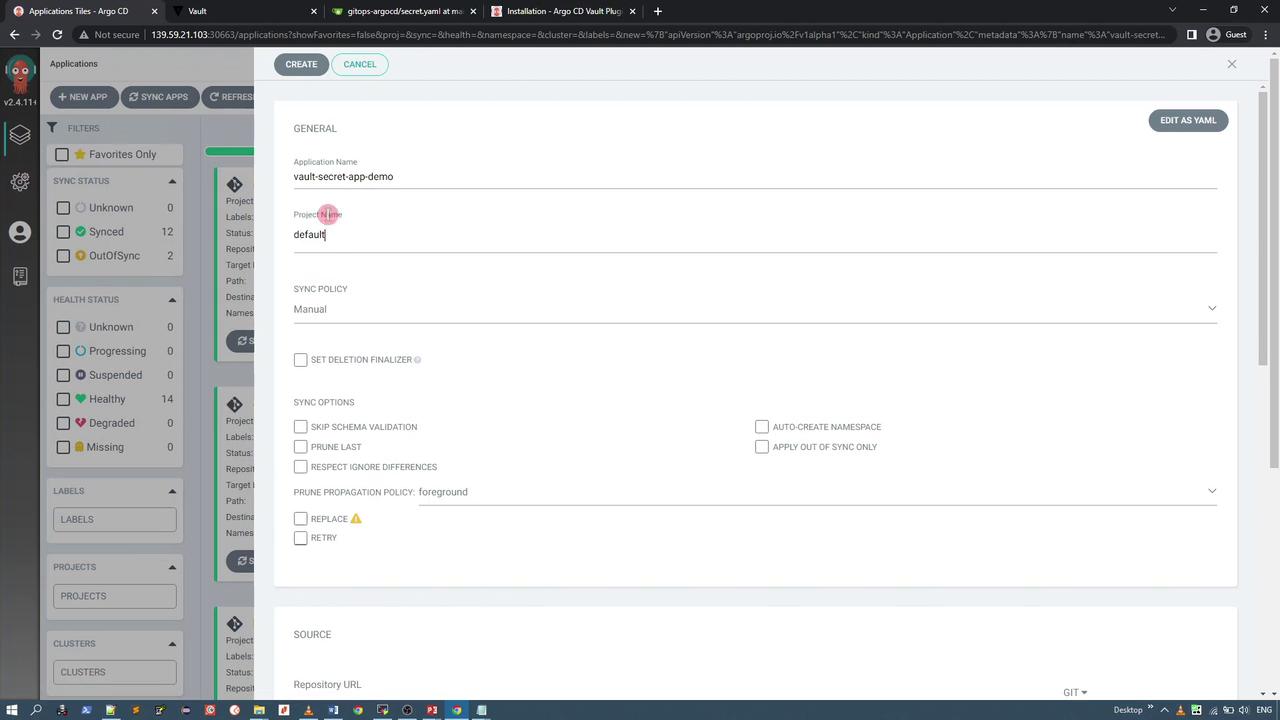
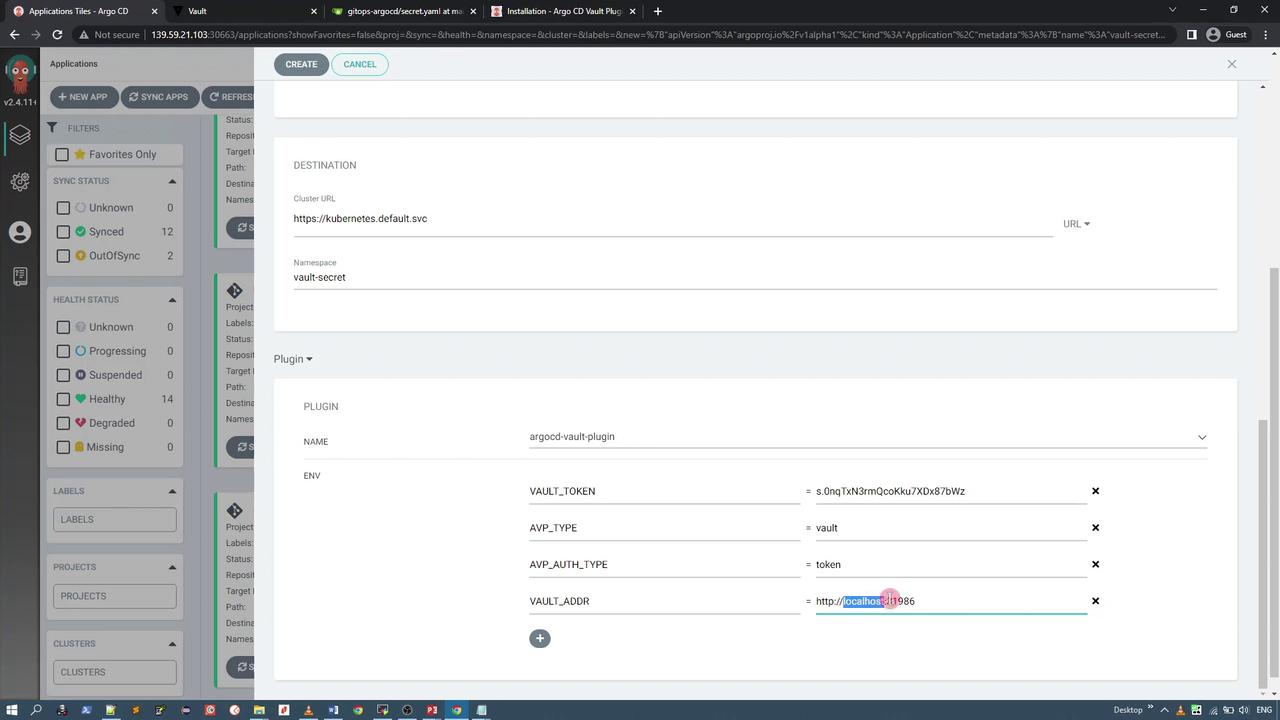
To use the Vault plugin, enable it within your ArgoCD application. In the ArgoCD UI, create a new application (e.g., Vault Secret App Demo) within the default or demo project. Configure the sync policy to manual and let the target namespace be automatically created.
Within your Git repository, include a secret manifest that uses an annotation to specify the Vault path. An example manifest is:
kind: Secret
apiVersion: v1
metadata:
name: app-crds
annotations:
avp.kubernetes.io/path: "credentials/data/app"
type: Opaque
stringData:
apiKey: <apikey>
username: <username>
password: <password>
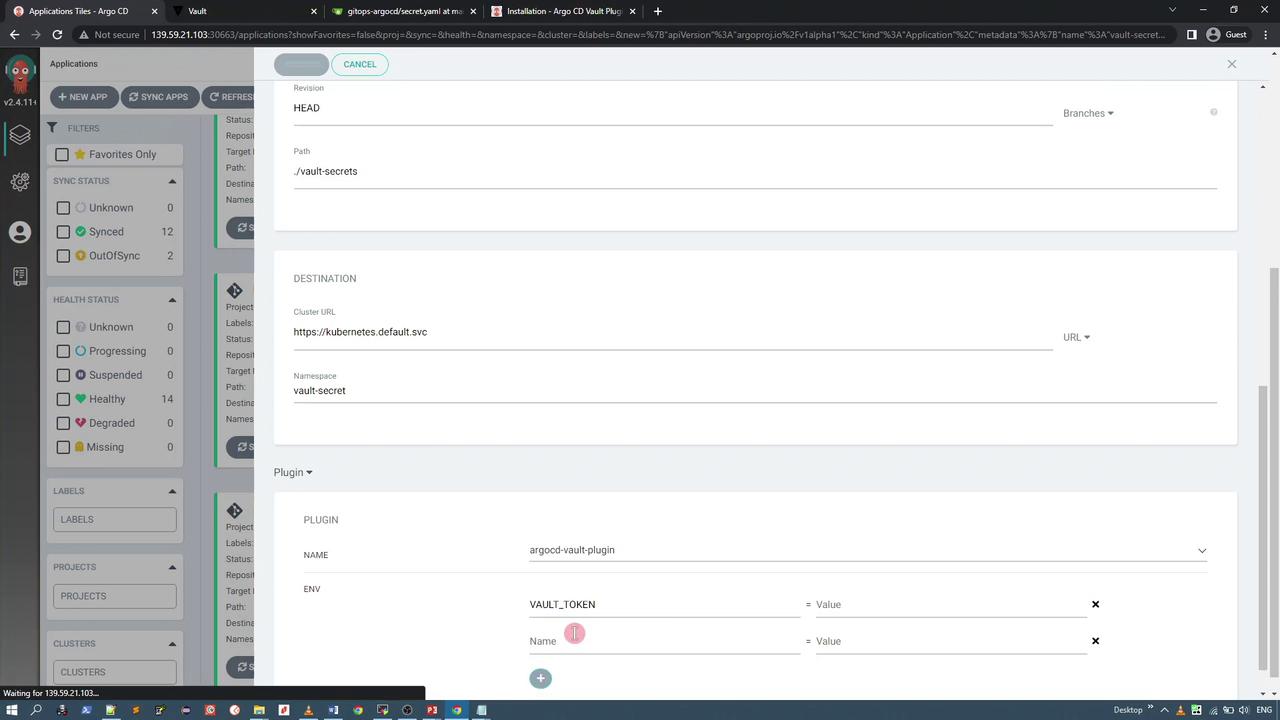
When the application is synchronized, the Vault plugin detects the annotation, connects to Vault (using the configuration provided either in the repo server’s secret or hard-coded), fetches the secret data from the specified path, and outputs a final Kubernetes Secret manifest.
In your ArgoCD application settings, configure the following Vault parameters (adjust based on your environment):
- AVP_TYPE: vault
- AVP_AUTH_TYPE: token
- VAULT_ADDR: e.g., http://vault-app.vault-demo.svc.cluster.local:8200
- VAULT_TOKEN: (Your Vault token)
Once configured, the application will connect to Vault and generate the desired manifest with resolved secret data.
6. Verifying the Application Deployment
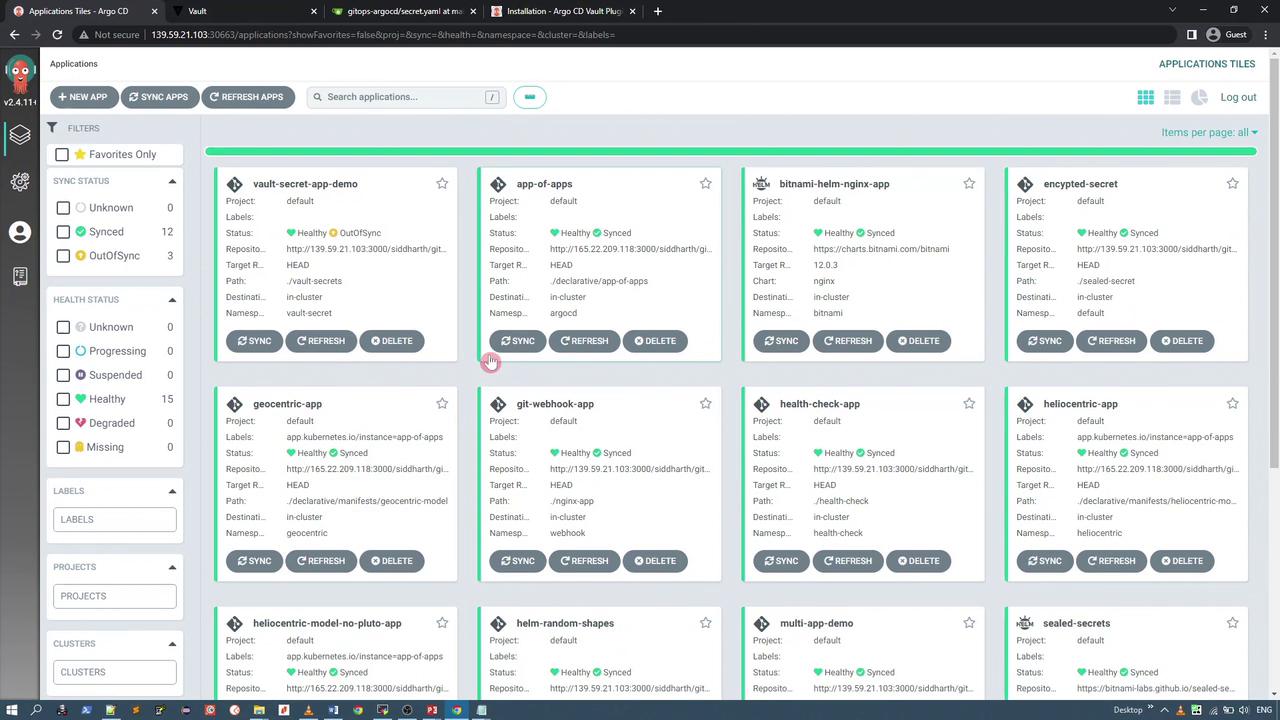
After deploying your application, check the ArgoCD dashboard to ensure that the application status is synced and healthy.
Inspect the application details to confirm sync status and health. The Vault plugin replaces the secret placeholders with the actual data fetched from Vault.
To verify the new Kubernetes Secret with resolved data, run:
# Verify the namespace and secret
kubectl get ns
kubectl -n <target-namespace> get secrets
To check the content of a secret, decode a value by replacing <secret-name>
and <key>
:
kubectl -n <target-namespace> get secret <secret-name> -o json | jq -r '.data["<key>"]' | base64 -d
7. Additional CLI Configuration
You can perform further adjustments using the command line. For example, edit the repo server deployment or ConfigMap with these commands:
kubectl -n argocd edit deploy argocd-repo-server
kubectl -n argocd edit cm argocd-cm
After applying your changes, check the pod status:
kubectl -n argocd get po
Also, verify your Vault environment file (e.g., vault.env
):
cat vault.env
A sample vault.env
file may look like this:
VAULT_ADDR=http://vault-app.vault-demo.svc.cluster.local:8200
VAULT_TOKEN=s.OnqTXn3rmQoKuK7Xb87bWz
AVP_TYPE=vault
AVP_AUTH_TYPE=token
Reminder
Always double-check your Vault credentials and make sure that all environment variables are correctly configured to ensure secure secret management.
Conclusion
In this lesson, we demonstrated how to integrate HashiCorp Vault with ArgoCD using the Vault plugin. The key steps included:
- Modifying the ArgoCD repo server deployment to download the plugin via an initContainer.
- Optionally baking the plugin into a custom Docker image.
- Configuring the ArgoCD ConfigMap to register and invoke the plugin.
- Creating an application with Vault annotations so that the plugin fetches the secret data from Vault.
- Verifying the application’s deployment using both the ArgoCD dashboard and CLI tools.
By following these steps, you enhance your GitOps workflow with robust secret management through Vault integrated with ArgoCD.
Thank you.
Watch Video
Watch video content
Practice Lab
Practice lab