Overview
By default, the Consul UI provides read-only access to services, nodes, the Key/Value store, and cluster status. To enable write operations—like managing ACLs and service intentions—you must turn on ACL enforcement and log in with a valid token. This demo walks you through using the bootstrap (master) token to unlock full ACL management capabilities in the UI.- A running Consul cluster with ACL enforcement enabled
- A valid bootstrap (master) token
- Browser access to the Consul UI (usually http://<consul-server>:8500/ui/)
1. Logging In with an ACL Token
- Navigate to the Consul UI in your browser.
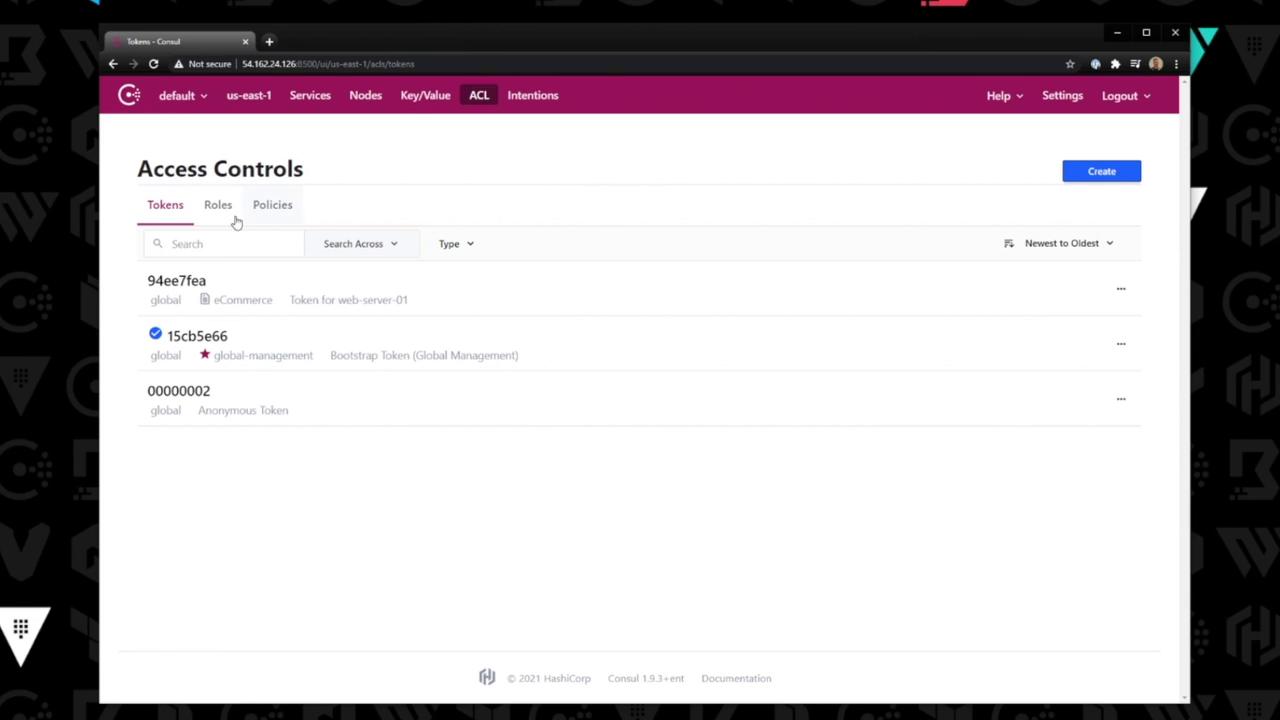
- Select the ACL tab. If you’re not authenticated, you’ll see: You are not authorized. You must be granted permissions to access this data.
- Click Login. When prompted, paste your bootstrap token and submit.
- After successful authentication, the ACL management interface loads:
Treat your bootstrap token like a root credential. Avoid sharing it or embedding it in scripts. Always store tokens in a secure vault or use a short-lived token for day-to-day operations.
2. Managing ACL Entities
Once logged in, the ACL section exposes three main entities:| Entity | Description | UI Actions |
|---|---|---|
| Tokens | Create, revoke, and modify ACL tokens | New Token, Revoke, Edit |
| Roles | Group multiple policies under a single role | New Role, Assign Policies |
| Policies | Define fine-grained permission rules | New Policy, Edit, Clone |
Creating and Editing
- To create a token or role, click New Token or New Role in the corresponding tab.
- To edit an existing policy (e.g.,
e-commerce), switch to Policies, select the policy, and update its HCL or JSON definitions.
3. Example: Editing a Policy
- Click the Policies tab.
- Select the
e-commercepolicy from the list. - Modify the rules in the editor pane and click Save.
- Verify changes by assigning the policy to a role or creating a token scoped to it.