HashiCorp Certified: Vault Associate Certification

Compare Authentication Methods

Demo Vault Authentication using the UI

This guide demonstrates how to authenticate to HashiCorp Vault using the Vault UI. You’ll learn how to log in with your preferred method, retrieve your client token, and switch to the CLI.

Prerequisites

Ensure the following authentication methods are enabled in your Vault cluster:

Auth MethodDescriptionDocumentation
tokenStatic token authenticationToken Auth
userpassUsername/password loginUserpass Auth
OktaSingle sign-on with OktaOkta Auth

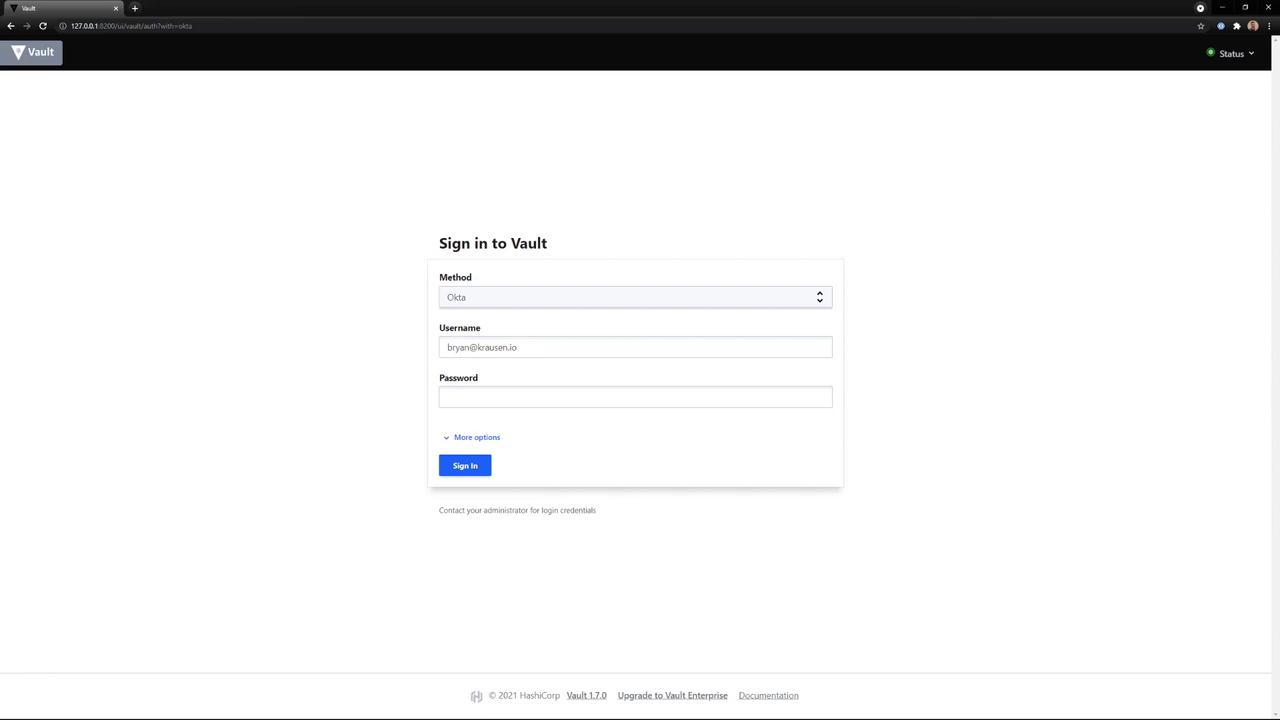
Step 1: Access the Vault UI

Open your browser and navigate to:

http://<your-vault-address>:8200

You will see the login screen where only the enabled methods appear in the dropdown.

Note

Only methods enabled on your Vault server will show up in the dropdown. Contact your administrator if you need a new auth method enabled.

Step 2: Select and Authenticate

  1. From the dropdown, choose Okta (or any enabled method).
  2. Enter your Username and Password.
  3. Click Sign In.

The image shows a login page for "Vault" with fields for method, username, and password, and a "Sign In" button. The method selected is "Okta," and there are options for more settings.

After successful authentication, Vault redirects you to its home screen.

Step 3: Explore the Vault Home Screen

On the UI home screen, you can:

  • Browse Secret Engines (e.g., cubbyhole, secret)
  • View and manage Tokens
  • Configure Policies

Click the user menu in the top-right corner to copy the client token issued during login.

The image shows a web interface for HashiCorp Vault, displaying a list of secret engines, including "cubbyhole" and "secret." The interface includes options for managing tokens and adding new engines.

Step 4: Use Your Token in the CLI

Once you have your token, you can authenticate the Vault CLI:

# On Windows:
C:\> vault login s.TEKrNn3Cv53pZdbPh8xg41Pu
Success! You are now authenticated. The token information displayed below
is already stored in the token helper. You do NOT need to run "vault login"
again. Future Vault requests will automatically use this token.

Key                      Value
---                      -----
token                    s.TEKrNn3Cv53pZdbPh8xg41Pu
token_accessor           M0xoSDLdcWQyI19yLrdUKhI8
token_duration           767h58m21s
token_renewable          true
token_policies           ["bryan" "default"]
identity_policies        []
policies                 ["bryan" "default"]
token_meta_policies      bryan
token_meta_username      [email protected]

C:\> set VAULT_TOKEN=s.TEKrNn3Cv53pZdbPh8xg41Pu

# On Linux/macOS:
$ export VAULT_TOKEN=s.TEKrNn3Cv53pZdbPh8xg41Pu

Note

After exporting VAULT_TOKEN, all subsequent Vault CLI commands will use this token automatically. Consider adding this line to your shell profile for convenience.

Switching from the UI to the CLI lets you leverage commands not yet available in the interface.


References

Watch Video

Watch video content

Previous
Demo Vault Authentication using the API