In this guide, you will learn how to configure HashiCorp Vault’s AWS Secrets Engine using the assumed_role credential type to obtain temporary, cross-account AWS credentials. Vault runs in Account A (ID ending in 6147 ) and will assume a role in Account B (ID ending in 2126 ) to generate scoped credentials.
Table of Contents
Verify Vault Cluster Health Prepare Target AWS Account (Account B) Inspect Existing Role (Optional) Create a Customer-Managed Policy Create a Role Trusted by Vault’s Account Enable & Configure AWS Secrets Engine Define Vault Role for Cross-Account Access Generate & Use Temporary Credentials Flowchart Conclusion References
1. Verify Vault Cluster Health First, ensure your Vault cluster in Account A is initialized, unsealed, and active.
Expected output:
Key Value Initialized true Sealed false Version 1.6.0+ent Storage Type raft HA Enabled true
IAM Role Permissions for Vault EC2 Nodes Attach a policy to your Vault EC2 instances that permits required AWS API actions:
Sid Effect Action Resource PermitEC2ApiAccessForCloudAutoJoin Allow ec2:DescribeInstances*PermitRoute53AccessForLetsEncryptValidation Allow route53:GetChange, route53:ListHostedZones*PermitActionsForCloudWatchLogs Allow logs:CreateLogGroup, logs:CreateLogStream, logs:PutLogEvents, logs:DescribeLogStreamsarn:aws:logs:us-east-1:634211456147:log-group:vault_audit_logs:*
{ "Statement" : [ { "Sid" : "PermitEC2ApiAccessForCloudAutoJoin" , "Effect" : "Allow" , "Action" : [ "ec2:DescribeInstances" ], "Resource" : "*" }, { "Sid" : "PermitRoute53AccessForLetsEncryptValidation" , "Effect" : "Allow" , "Action" : [ "route53:GetChange" , "route53:ListHostedZones" ], "Resource" : "*" }, { "Sid" : "PermitActionsForCloudWatchLogs" , "Effect" : "Allow" , "Action" : [ "logs:CreateLogGroup" , "logs:CreateLogStream" , "logs:PutLogEvents" , "logs:DescribeLogStreams" ], "Resource" : "arn:aws:logs:us-east-1:634211456147:log-group:vault_audit_logs:*" } ] }
2. Prepare Target AWS Account (Account B) In Account B, you will create an IAM policy and role that Vault in Account A can assume.
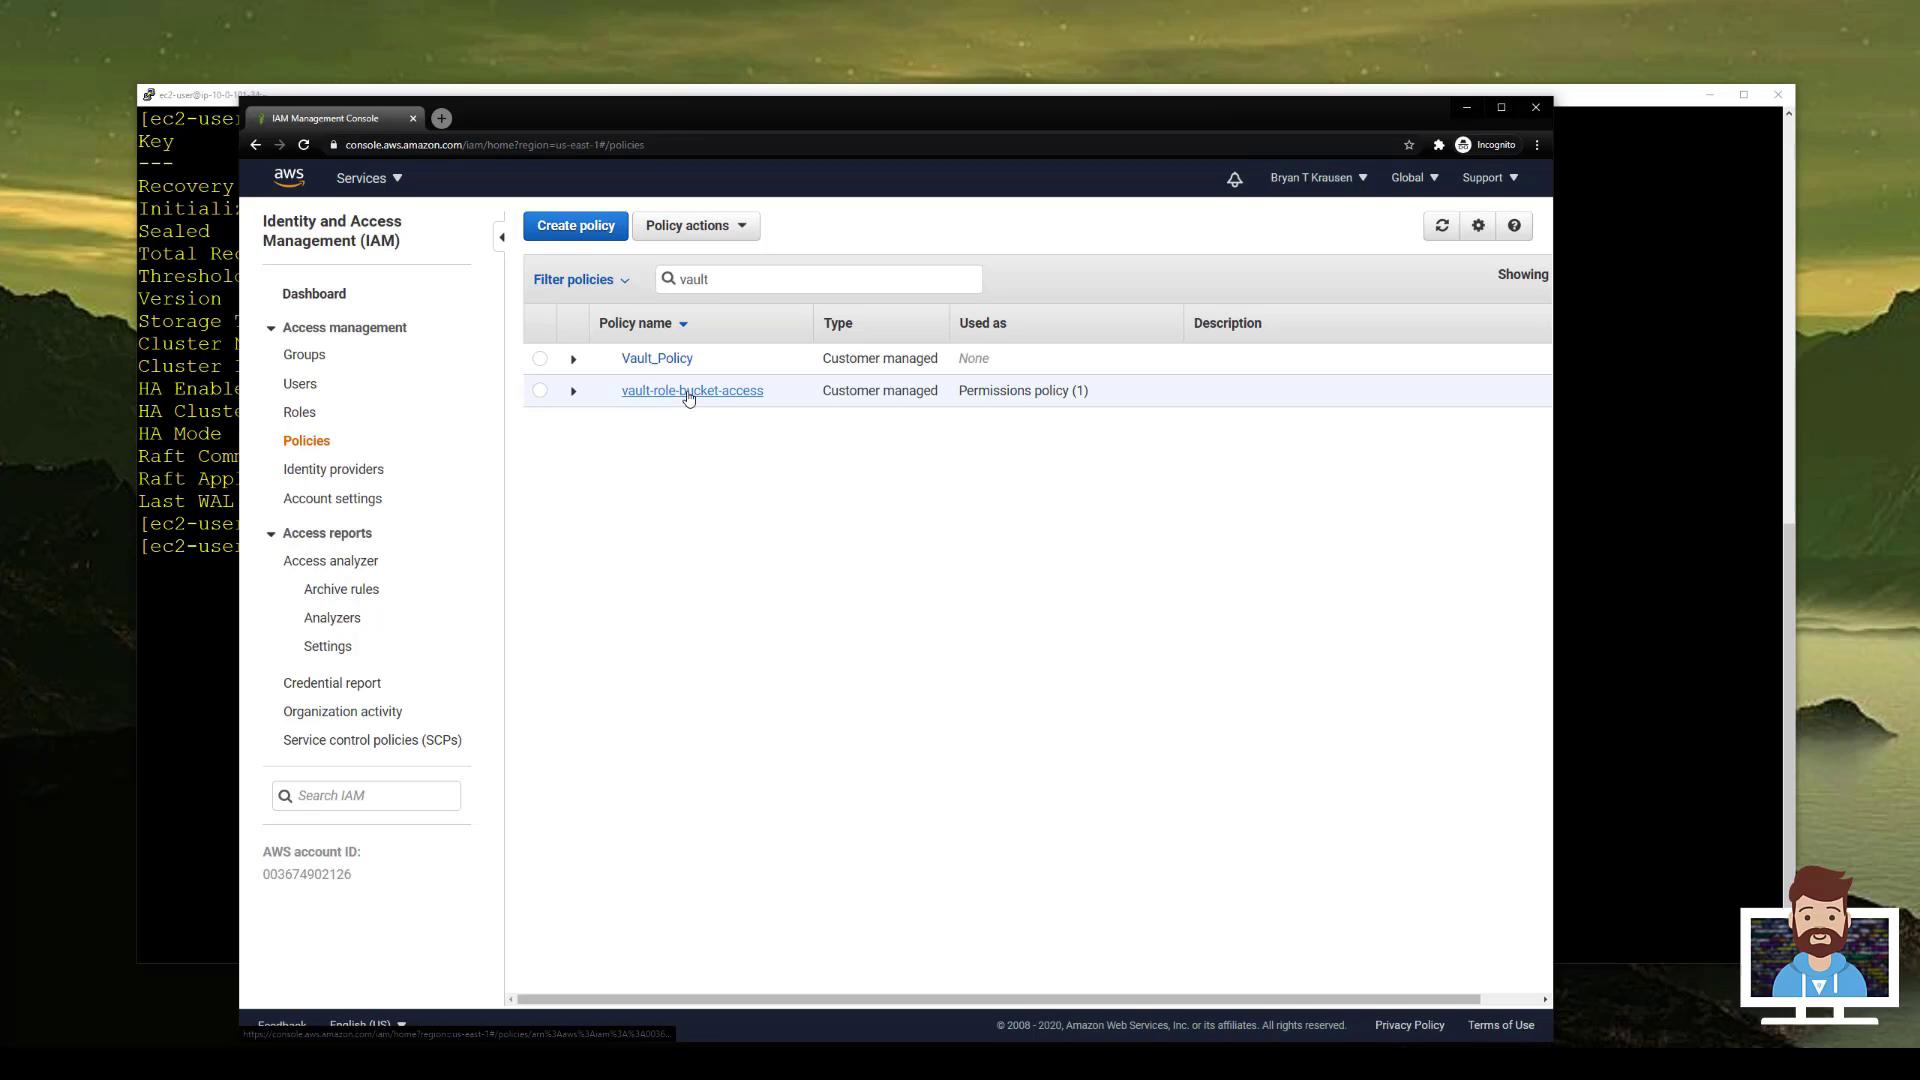
2.1 Inspect Existing Role (Optional) 2.2 Create a Customer-Managed Policy Navigate to IAM > Policies > Create policy in the AWS Console and add S3 access permissions:
{ "Version" : "2012-10-17" , "Statement" : [ { "Effect" : "Allow" , "Action" : [ "s3:GetObject" , "s3:ListBucketVersions" , "s3:ListBucket" , "s3:GetObjectVersion" ], "Resource" : [ "arn:aws:s3:::bryankrausen/*" , "arn:aws:s3:::bryankrausen" ] }, { "Effect" : "Allow" , "Action" : [ "s3:ListAllMyBuckets" , "s3:ListBucket" ], "Resource" : "*" } ] }
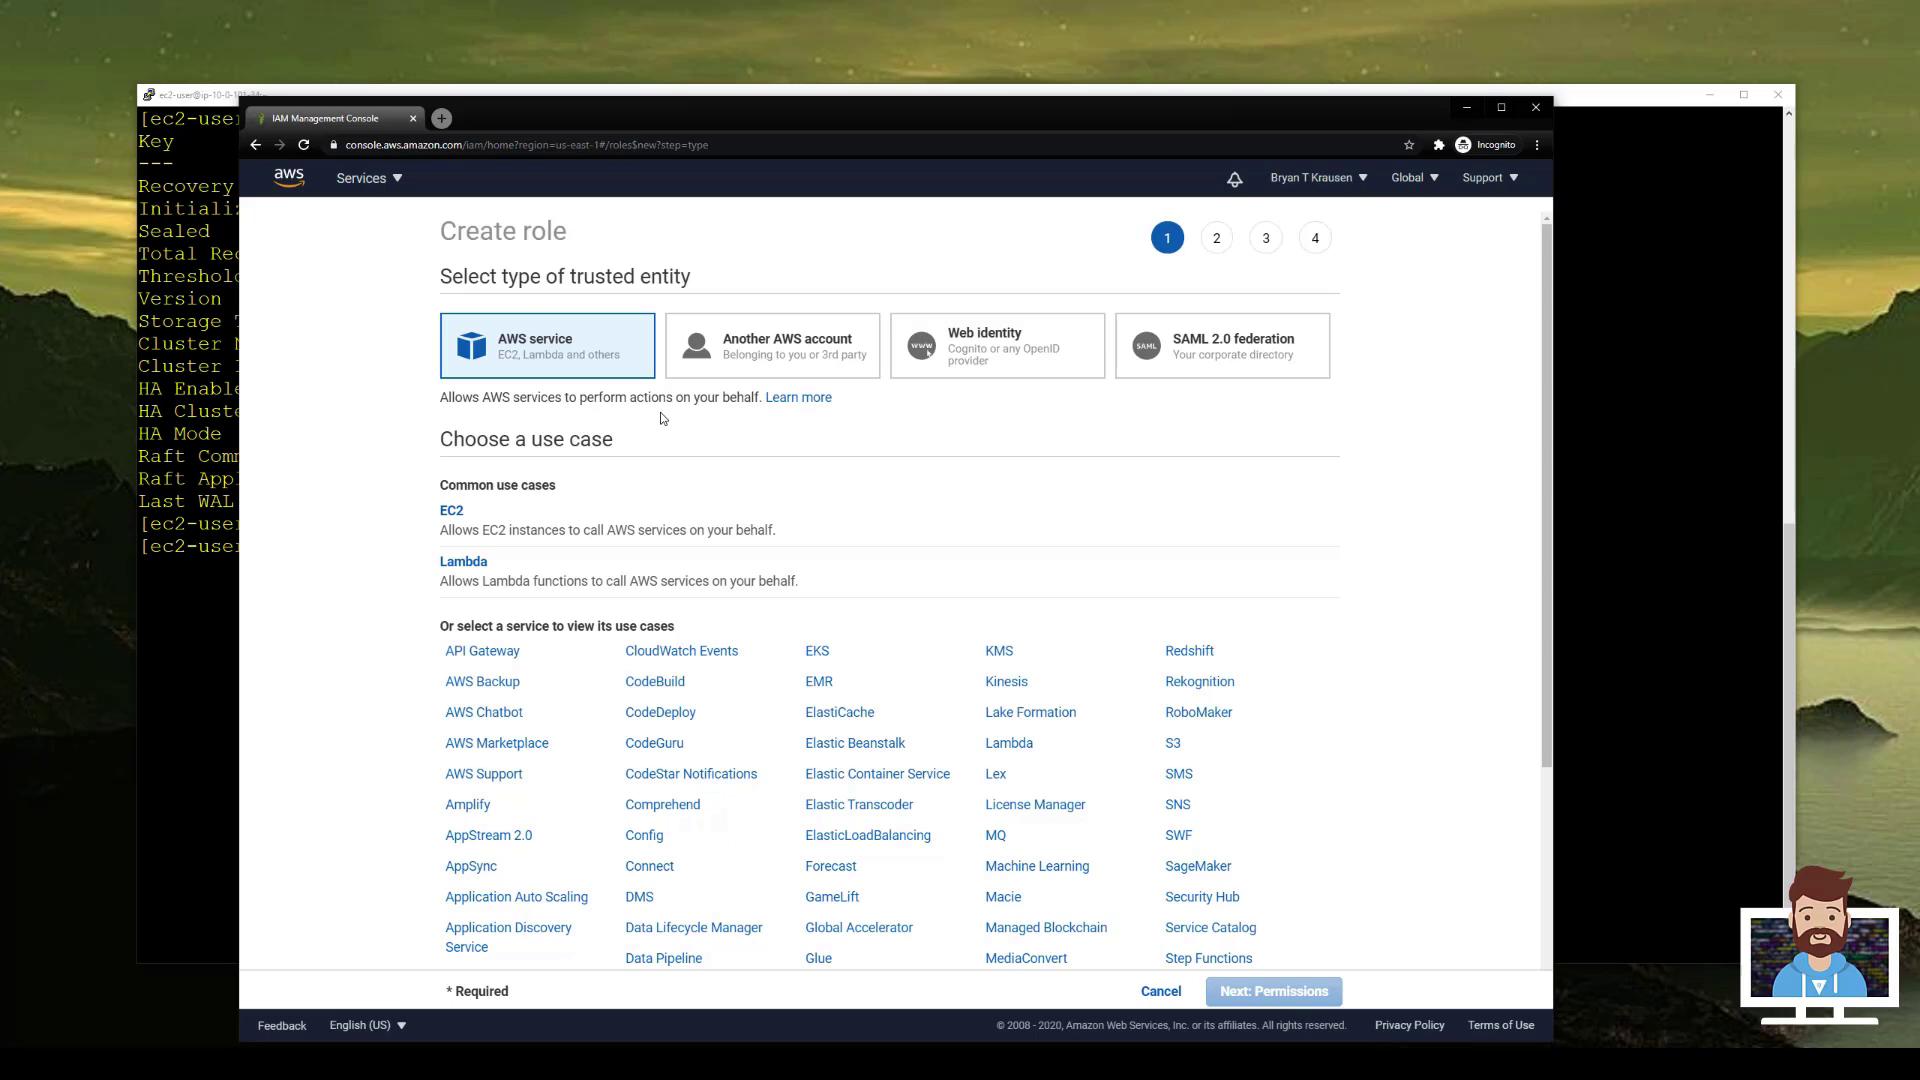
2.3 Create a Role Trusted by Vault’s Account
Go to IAM > Roles > Create role .
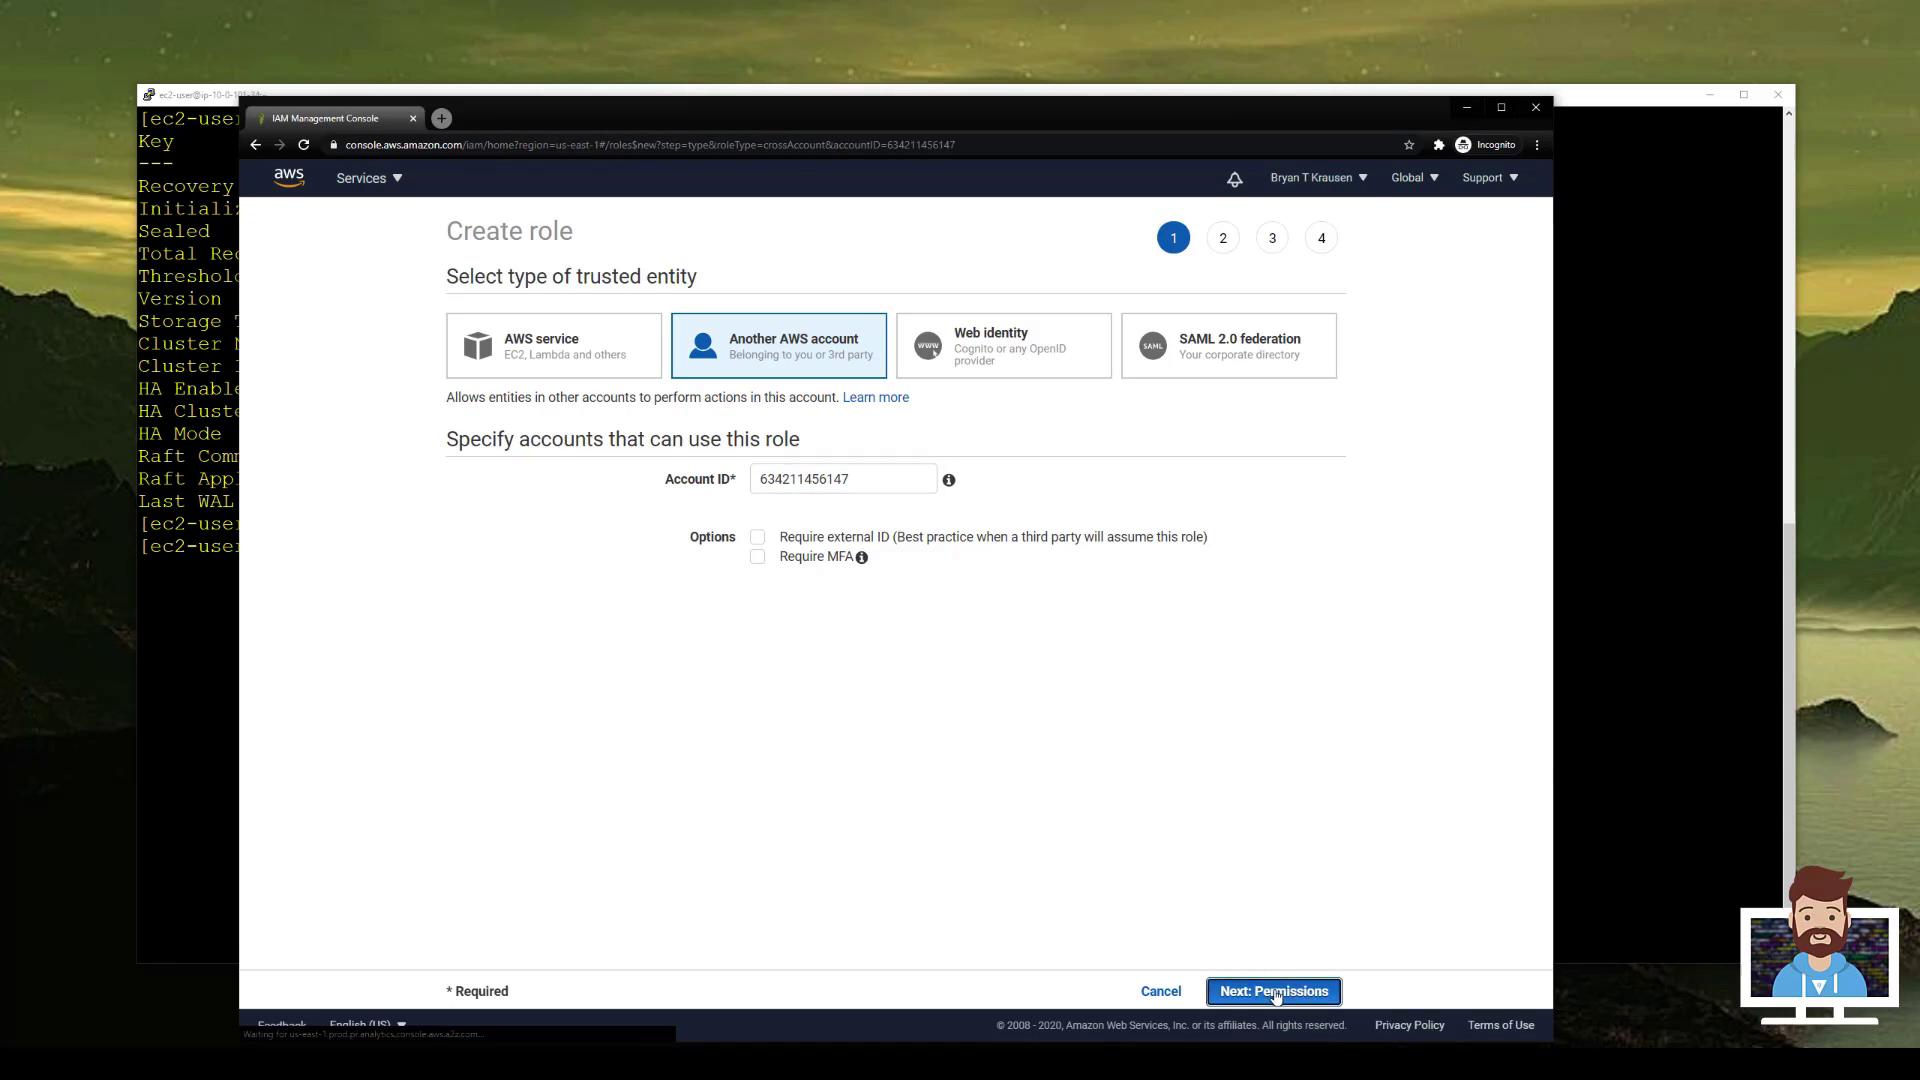
Select Another AWS account as the trusted entity and enter Vault’s Account ID (...6147).
Attach the policy you just created (e.g., vault-role-bucket-access ).
Name the role vault-role-bucket-access and complete creation.
Back in Account A, enable and configure Vault’s AWS Secrets Engine.
Success! Enabled the aws secrets engine at: aws/
Next, update the IAM role policy attached to your Vault servers to permit assuming the new cross-account role:
{ "Sid" : "PermitAccessToCrossAccountRole" , "Effect" : "Allow" , "Action" : "sts:AssumeRole" , "Resource" : [ "arn:aws:iam::083674922126:role/vault-role-bucket-access" ] }
Apply your changes (for example, via Terraform):
Apply complete! Resources: 0 added, 1 changed, 0 destroyed.
To support multiple target roles or accounts, add additional role ARNs to the Resource array in the PermitAccessToCrossAccountRole statement.
4. Define Vault Role for Cross-Account Access Create a Vault role that references the IAM role in Account B:
vault write aws/roles/s3_access \ role_arns=arn:aws:iam::083674922126:role/vault-role-bucket-access \ credential_type=assumed_role
Success! Data written to: aws/roles/s3_access
5. Generate & Use Temporary Credentials
Generate STS credentials with a 1-hour TTL:vault write aws/sts/s3_access ttl=1h
Key Value lease_id aws/sts/s3_access/abcdef123456 lease_duration 1h access_key ASIAQBWYRKXZMN3NMZ secret_key /gqnjob/P9E/Kg+Wi2nGKAJ6M79iYlMszAUg2 security_token FQoGZXIvYXdzEJr//////////wEaDM...
Export credentials to your shell:Linux/macOS:
export AWS_ACCESS_KEY_ID = ASIAQBWYRKXZMN3NMZ export AWS_SECRET_ACCESS_KEY = / gqnjob / P9E / Kg + Wi2nGKAJ6M79iYlMszAUg2 export AWS_SESSION_TOKEN = FQoGZXIvYXdzEJr ////////// wEaDM ...
Windows PowerShell:
SET AWS_ACCESS_KEY_ID = ASIAQBWYRKXZMN3NMZ SET AWS_SECRET_ACCESS_KEY =/ gqnjob / P9E / Kg + Wi2nGKAJ6M79iYlMszAUg2 SET AWS_SESSION_TOKEN = FQoGZXIvYXdzEJr ////////// wEaDM...
Use the temporary credentials:2021-08-01 12:00:00 bryankrausen 2021-07-30 09:15:12 krausen-cloudtrail 2021-07-25 17:45:08 vault-advanced
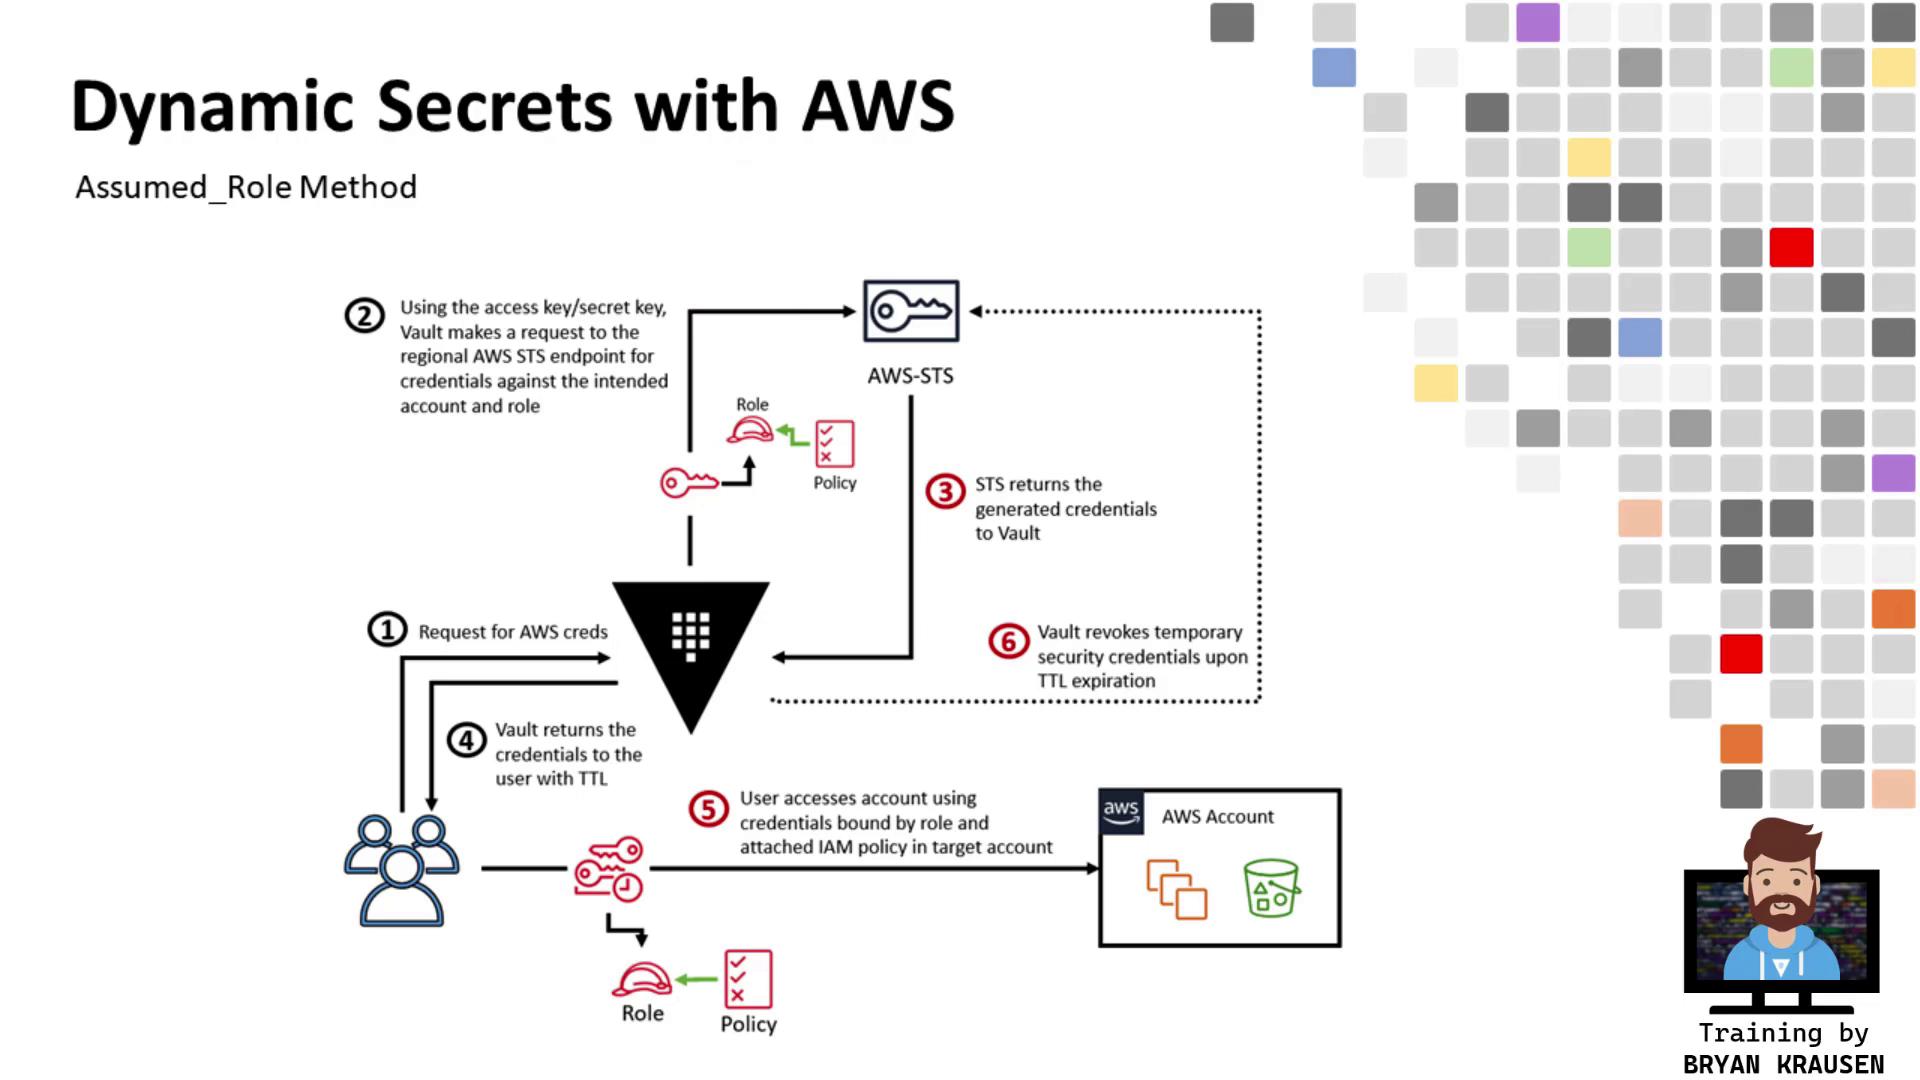
6. Flowchart 7. Conclusion You have successfully configured Vault’s AWS Secrets Engine to assume a role in a separate AWS account, generate temporary credentials scoped to that role’s permissions, and consume those credentials to perform cross-account operations. This architecture is highly scalable—simply extend the IAM policy and add Vault roles for additional accounts or use cases.
8. References