HashiCorp : Terraform Cloud
Terraform Cloud Workflows
Lab Solution GitOps Workflow using Terraform Cloud
In this lab, you’ll implement a GitOps workflow by integrating Terraform Cloud workspaces with a GitHub repository. You’ll make infrastructure changes in the development branch and workspace, then promote them through staging to production using pull requests. Terraform Cloud will handle all plan and apply operations automatically.
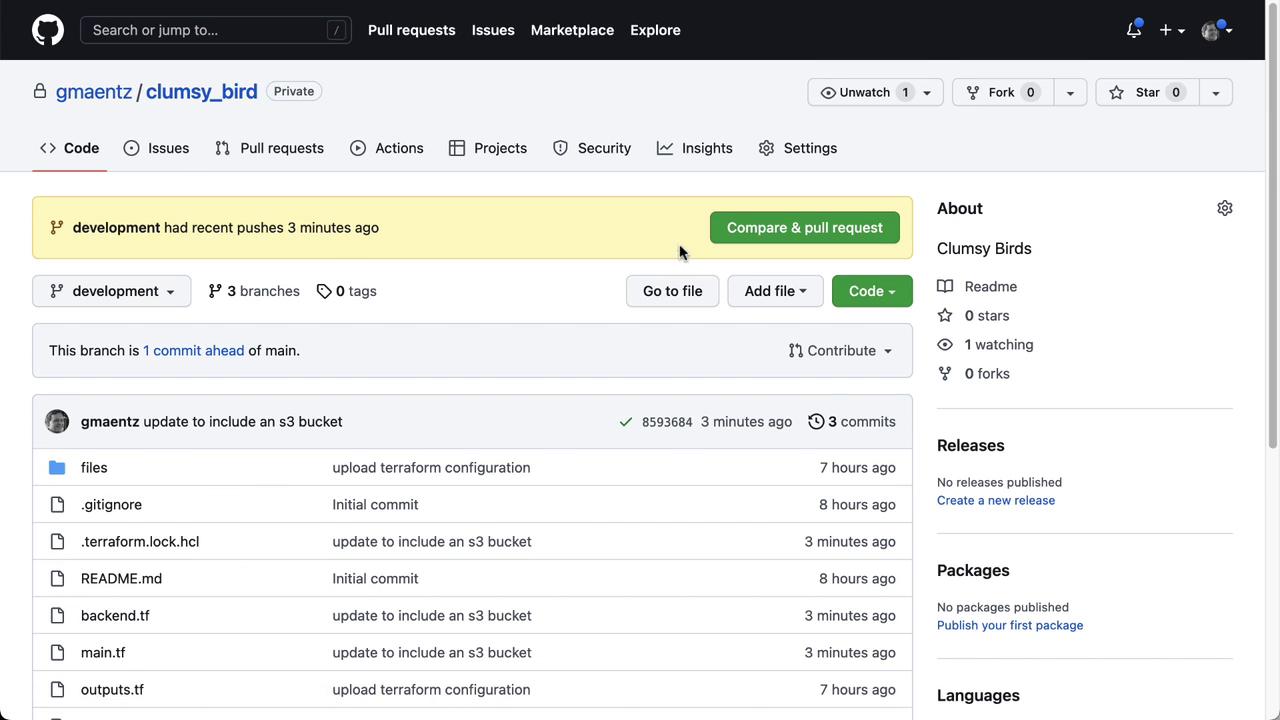
1. Review GitHub Repository and Terraform Cloud Workspaces
First, inspect the Clumsy Bird repository structure and branch layout:
Next, open Terraform Cloud and confirm you have three VCS-connected workspaces:
Note
Each workspace must map to a Git branch (development, staging, main) for GitOps workflows to work seamlessly.
Here’s a quick overview:
Workspace | Branch | Purpose |
---|---|---|
devops-aws-myapp-dev | development | Development environment |
devops-aws-myapp-staging | staging | Pre-production testing |
devops-aws-myapp-prod | main | Production environment |
Finally, check your AWS console to see the existing EC2 instances for Clumsy Bird:
2. Clone the Repository and Checkout the Development Branch
In your terminal (e.g., VS Code integrated terminal), clone the repo and switch to development
:
cd ~/vcs
git clone https://github.com/gmaentz/clumsy_bird.git
cd clumsy_bird
git checkout -b development origin/development
3. Add an S3 Bucket Module in main.tf
Update your Terraform configuration by appending the S3 bucket module:
module "s3_bucket" {
source = "terraform-aws-modules/s3-bucket/aws"
bucket_prefix = "${var.prefix}-s3-${var.environment}"
acl = "private"
versioning = {
enabled = true
}
}
This module leverages your existing prefix
and environment
variables.
4. Configure the Terraform Cloud Backend
Ensure your backend.tf
points to the dev workspace:
terraform {
cloud {
organization = "Mastering-Terraform-Cloud"
workspaces {
name = "devops-aws-myapp-dev"
}
}
}
5. Authenticate, Initialize, and Validate
Log into Terraform Cloud, initialize the configuration, and validate:
terraform login
terraform init
terraform validate
A successful validation means your syntax and backend config are correct.
6. Preview Changes with terraform plan
Run a speculative plan in Terraform Cloud:
terraform plan \
-var="prefix=my-app" \
-var="environment=dev" \
-var="region=us-east-1" \
-var="owner=you" \
-var="project=clumsy_bird"
You should see four new resources to add for the S3 bucket.
7. Commit and Push to development
Since this workspace is VCS-driven, CLI apply
is disabled. Commit and push your updates:
git add main.tf backend.tf
git config user.email "[email protected]"
git config user.name "Your Name"
git commit -m "Add S3 bucket module for development"
git push origin development
Warning
Do not attempt terraform apply
locally when using a VCS-connected workspace. All applies must occur in Terraform Cloud.
8. Observe the Terraform Cloud Run
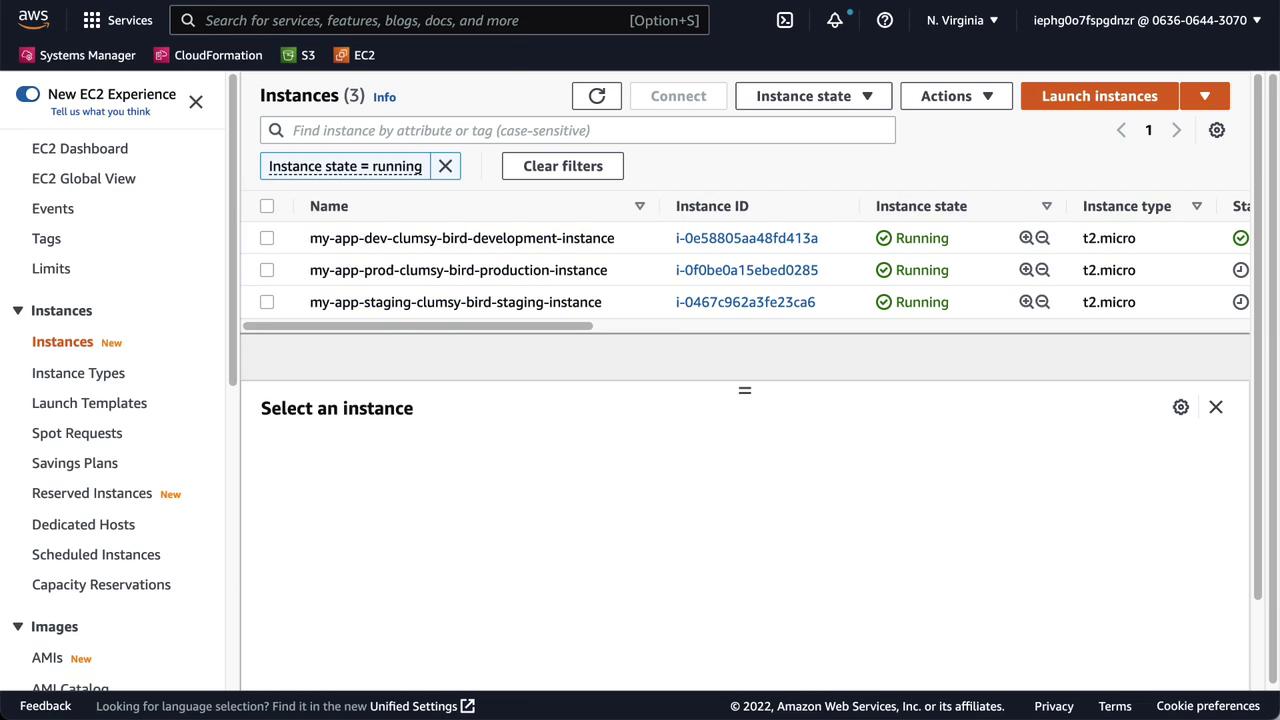
After pushing, Terraform Cloud will automatically plan and apply in the dev workspace. View the run details:
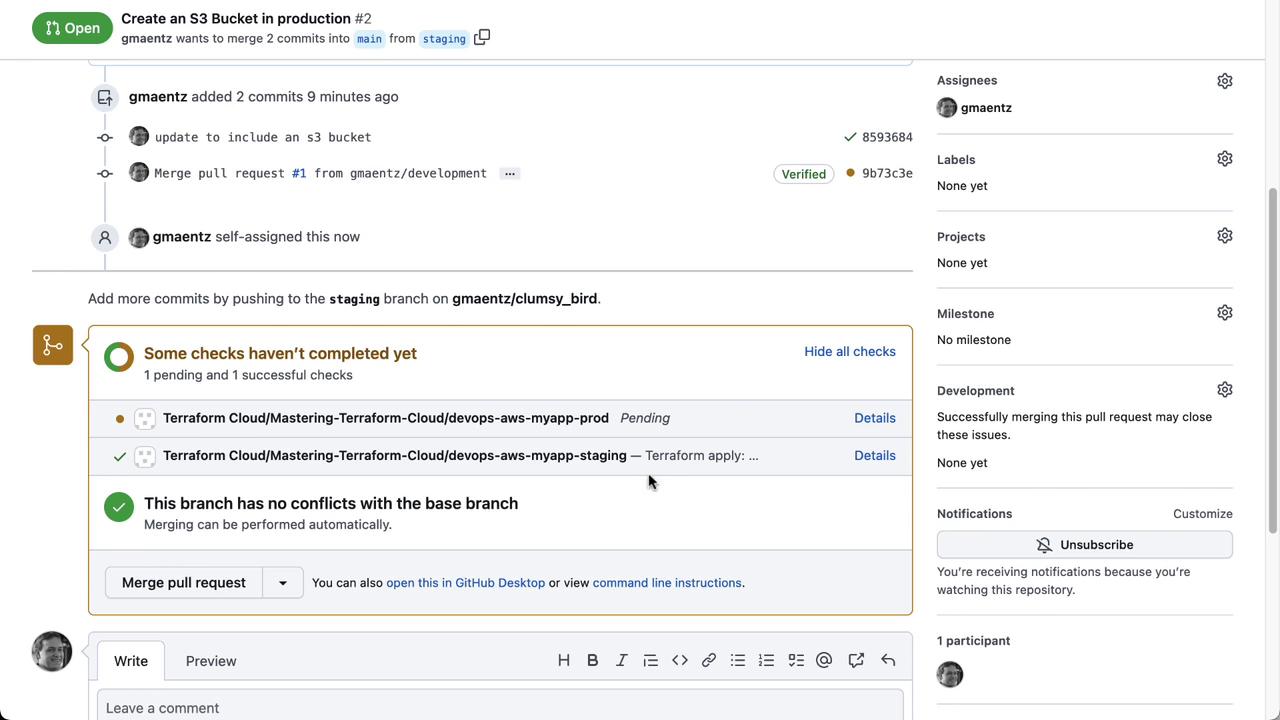
9. Promote to Staging via Pull Request
Create a PR from development
into staging
on GitHub:
Once the PR is open, Terraform Cloud runs a speculative plan in staging:
Click Details to review:
When checks succeed, merge the PR.
10. Verify Staging Apply
After merging, Terraform Cloud detects the new staging
commit and applies the changes:
Once complete:
Finally, confirm the new bucket in the AWS S3 console:
11. Promote to Production
Repeat the PR process from staging
into main
:
Terraform Cloud runs the final plan for prod:
Merge the PR. Once the apply finishes, verify all three buckets exist:
Conclusion
You’ve successfully implemented a GitOps workflow using Terraform Cloud and GitHub. By mapping workspaces to branches, adding an S3 bucket module, and promoting changes through pull requests, you’ve automated infrastructure provisioning across development, staging, and production.
Links and References
Watch Video
Watch video content