HashiCorp : Terraform Cloud

Terraform Cloud Workflows

Lab Solution Terraform to GitHub

In this tutorial, you’ll learn how to integrate Terraform Cloud with your GitHub account to enable the Version Control Workflow. By registering GitHub as a VCS provider, any commit to your repository automatically triggers terraform init, plan, and apply in Terraform Cloud.

Prerequisite: A GitHub account.


1. Create a GitHub Repository

  1. Log in to GitHub and click New repository.
  2. Configure the repository as follows:
SettingValue
Repository nameclumsy_bird
DescriptionYour project description
VisibilityPrivate
Initialize withREADME
.gitignore templateTerraform
  1. Click Create repository.

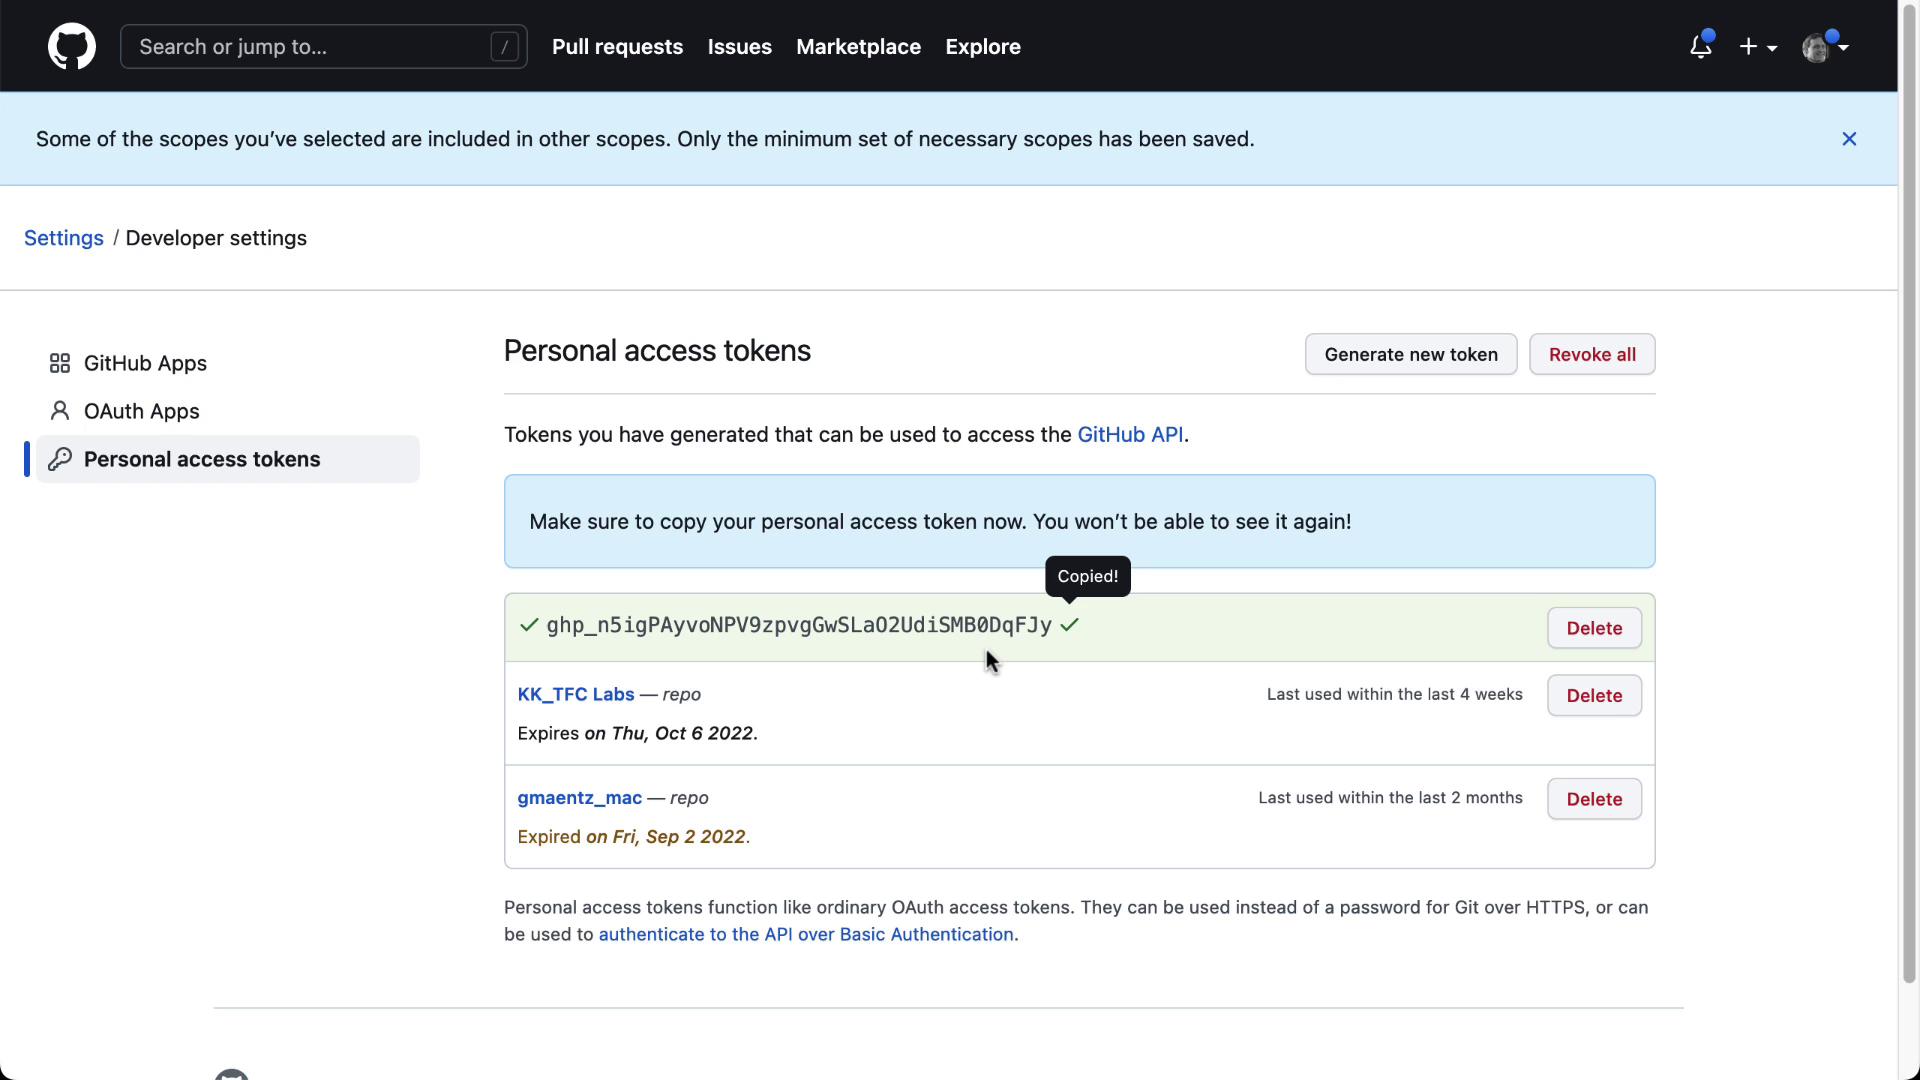
2. Generate a GitHub Personal Access Token

You need a Personal Access Token (PAT) with repo scope to allow Terraform Cloud to read your repository.

  1. In GitHub, go to Settings > Developer settings > Personal access tokens.
  2. Click Generate new token, select repo scope, then Generate token.
  3. Copy the token now—you won’t be able to see it again.

The image shows a GitHub settings page for personal access tokens, displaying generated tokens with options to delete or generate new ones.

Warning

Keep your PAT secure. Do not commit it to any repository or share it publicly.


3. Clone the Repository Locally

In your local or lab environment, clone and push the initial commit:

cd ~/VCS
git clone https://github.com/<your-org>/clumsy_bird.git
cd clumsy_bird

# Add your Terraform code or update README
git add .
git commit -m "Initial Terraform configuration"
git push origin main

Verify the three files (README.md, .gitignore, your Terraform code) in GitHub:

The image shows a GitHub repository named "clumsy_bird" with several files related to Terraform configuration. It includes details like commit messages and timestamps.


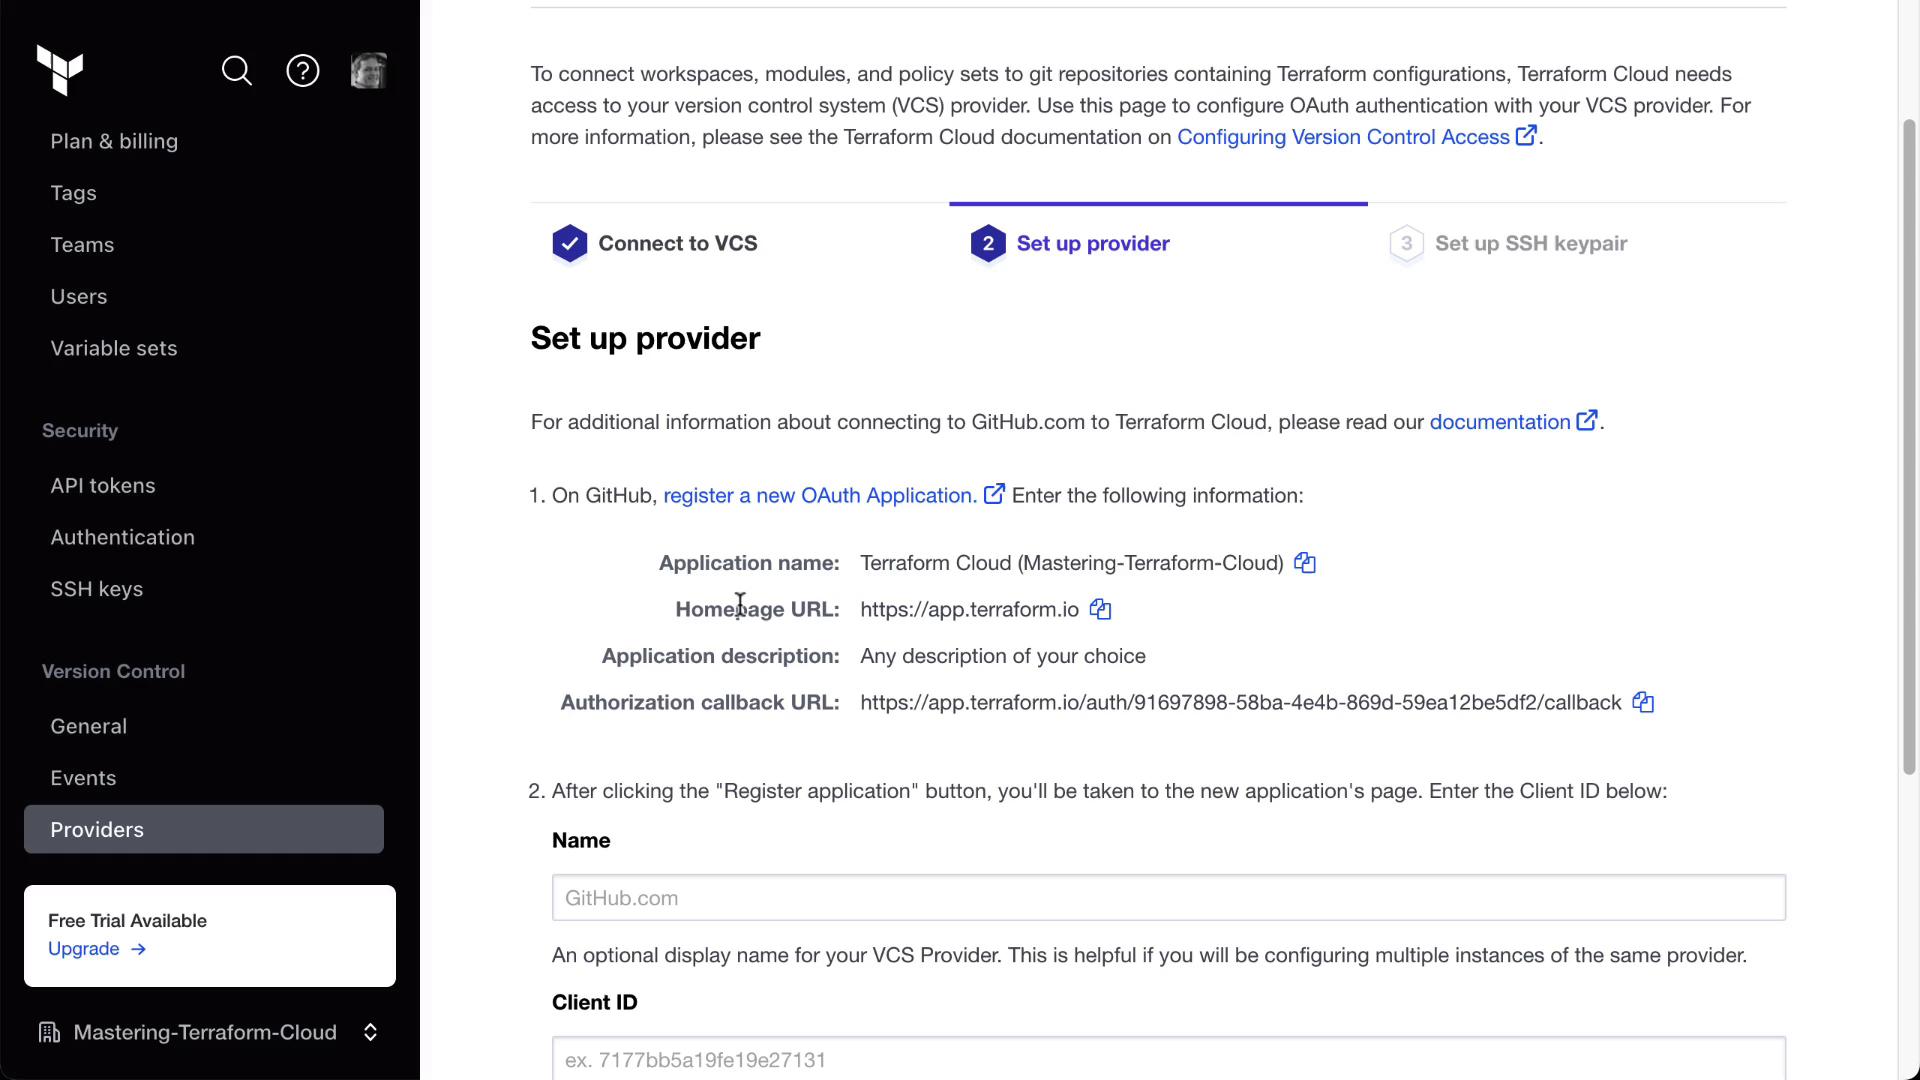
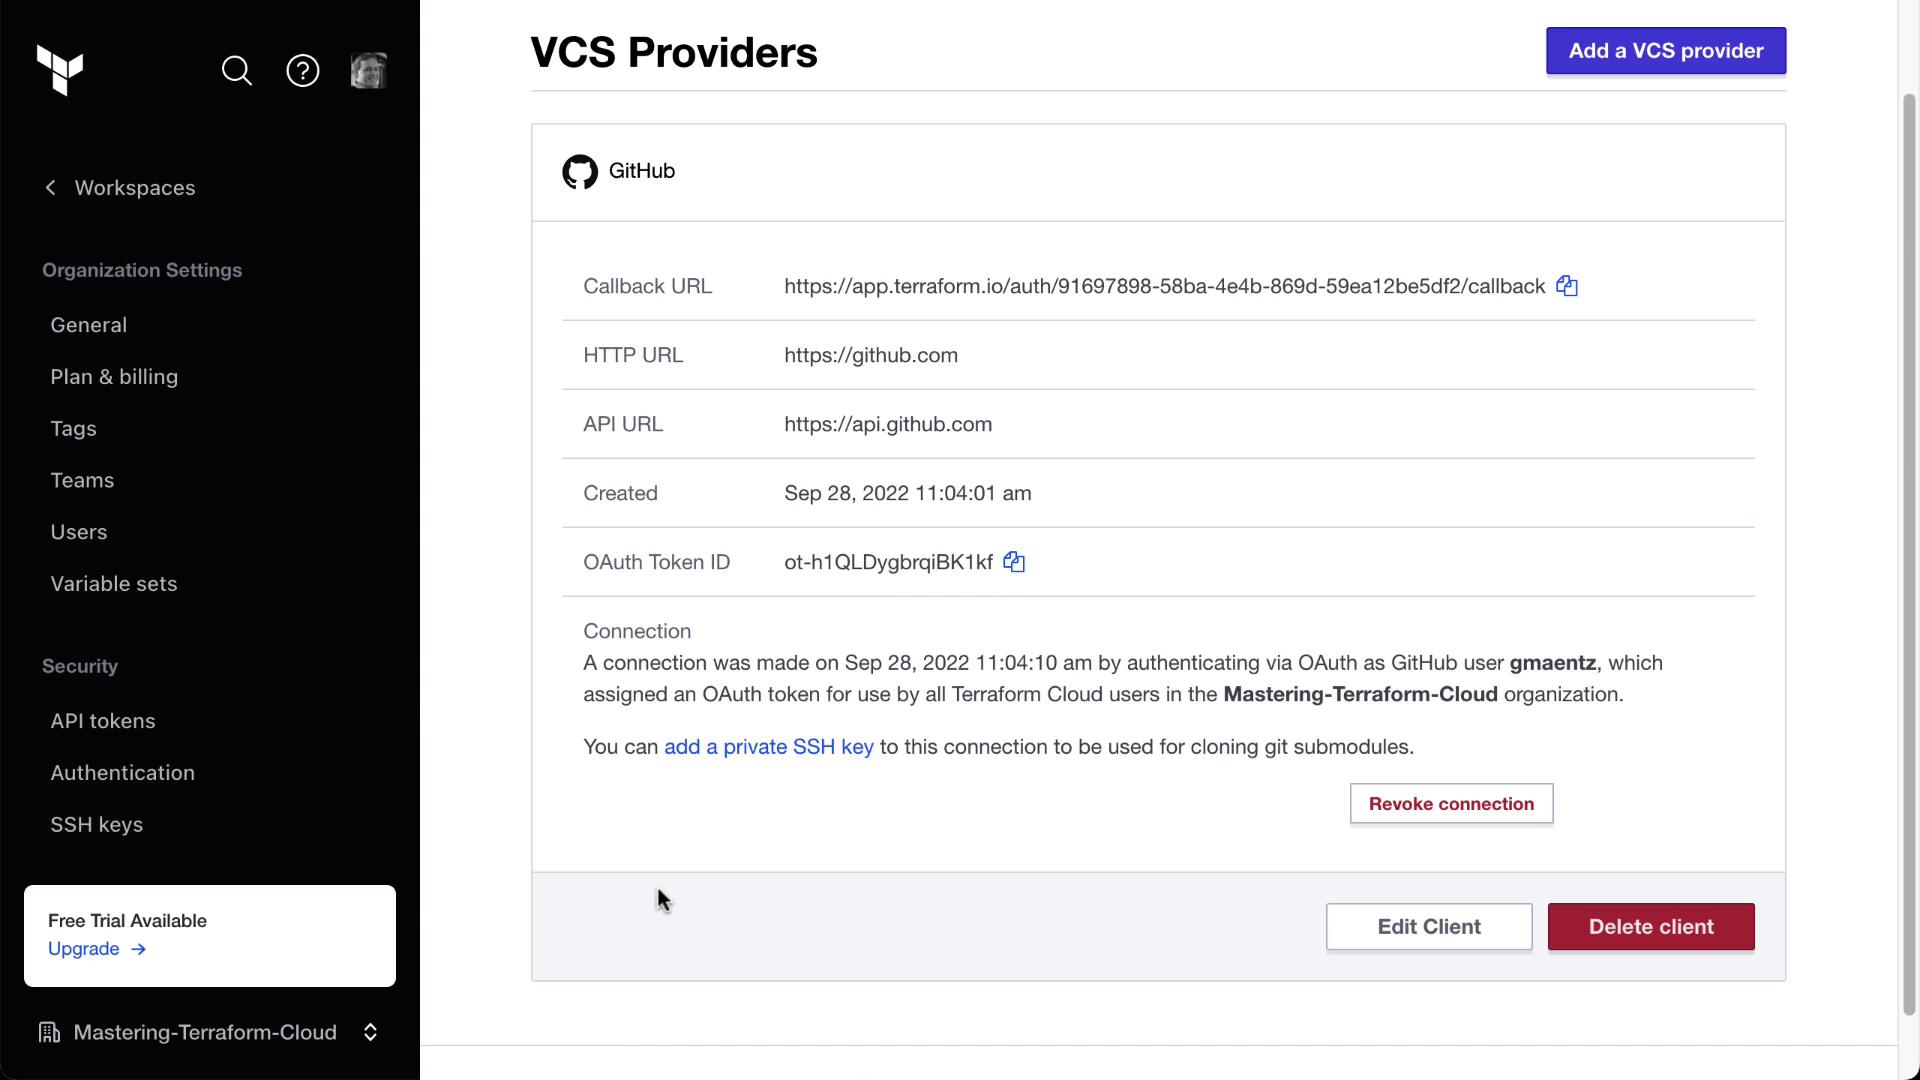
4. Configure GitHub as a VCS Provider in Terraform Cloud

  1. In Terraform Cloud, navigate to Settings > VCS Providers.
  2. Click Connect new providerGitHub.
  3. Follow the instructions to register a new OAuth application on GitHub:

The image shows a setup page for connecting a version control system (VCS) provider to Terraform Cloud, with instructions for registering a new OAuth application on GitHub. The sidebar includes options like Plan & Billing, Security, and Version Control.

The image shows a setup guide for connecting GitHub to Terraform Cloud, including instructions for registering a new OAuth application and entering details like application name, homepage URL, and authorization callback URL.

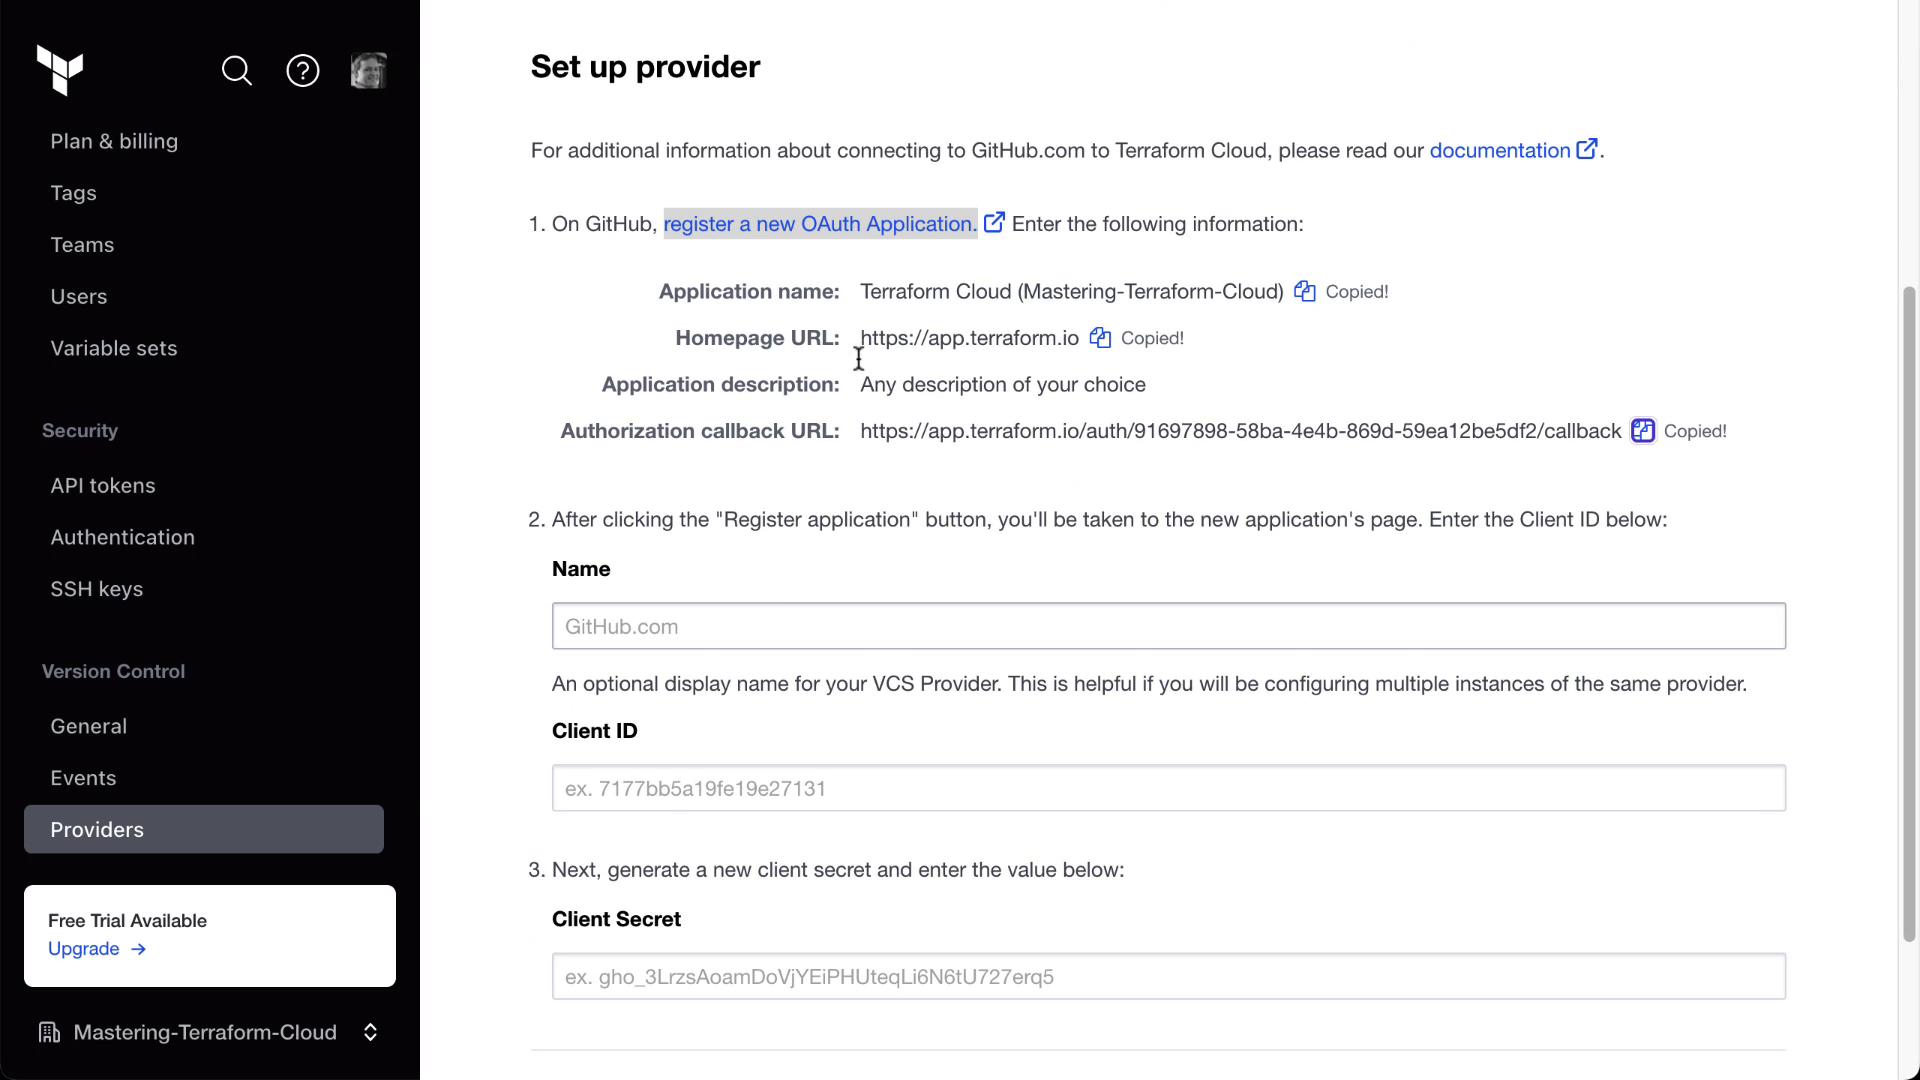
  1. After registering the app, copy the Client ID and Client Secret:

The image shows a settings page for a Terraform Cloud application on GitHub, displaying details like the client ID and client secrets, with options to manage user tokens and generate new secrets.

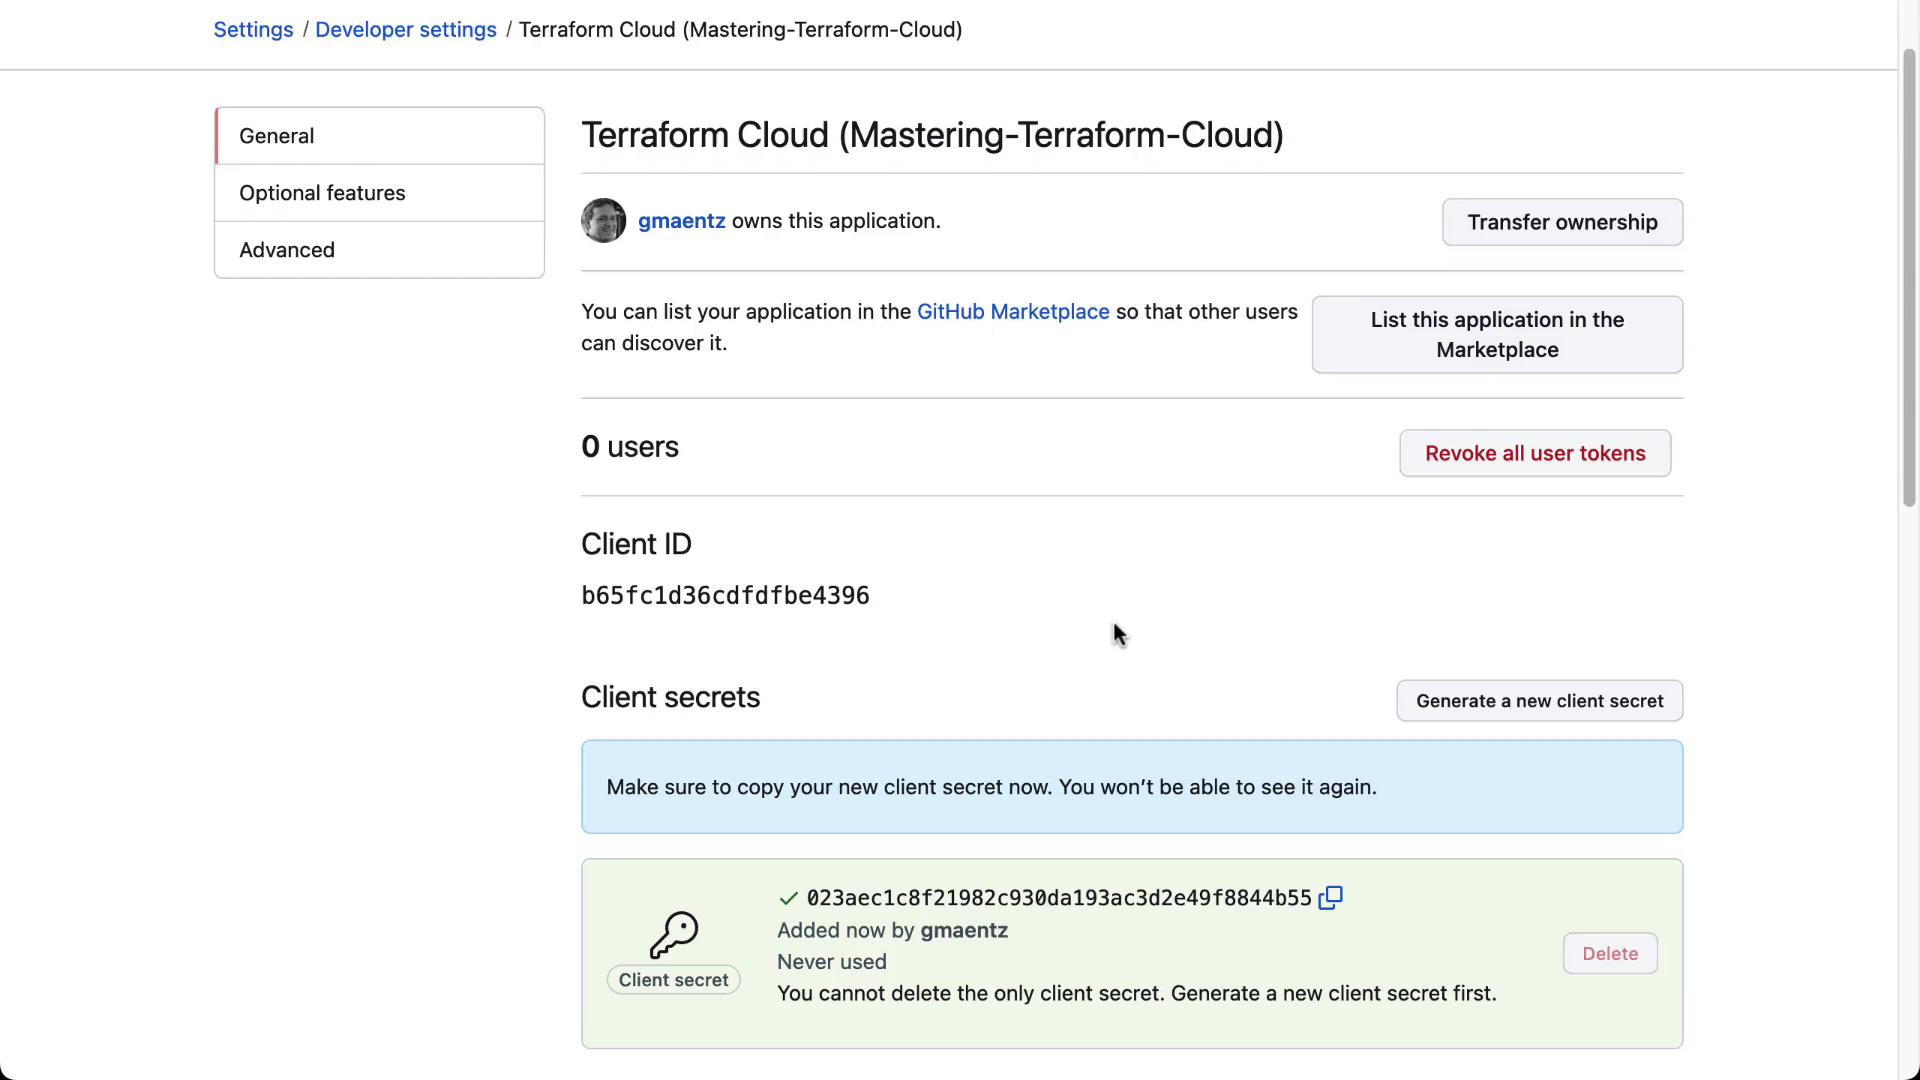
  1. Back in Terraform Cloud, enter the Client ID, Client Secret, and click Connect and continue. Then authorize the OAuth app.

Note

If you prefer SSH-based access instead of HTTPS, generate an SSH key pair and upload the public key in your GitHub OAuth settings:

ssh-keygen -t rsa -m PEM -f "~/.ssh/service_terraform" -C "service_terraform_enterprise"

Once connected, GitHub appears as a VCS provider:

The image shows a VCS Providers settings page for GitHub in Terraform Cloud, displaying details like callback URL, HTTP URL, API URL, creation date, and OAuth token ID. There are options to edit or delete the client and add a VCS provider.


5. Associate the Workspace with Your GitHub Repository

  1. In your Terraform Cloud workspace, go to Settings > Version Control Workflow.
  2. Select the GitHub provider and choose your repository (<your-org>/clumsy_bird).

The image shows a Terraform Cloud interface where a user is choosing a repository for version control. The selected repository is "gmaentz/clumsy_bird" from a list of available repositories.

  1. Enable the following options:
OptionDescription
Auto ApplyAutomatically apply approved plans
Automatic Run TriggersTrigger runs on VCS events
Speculative PlansCreate a plan on pull requests without applying
  1. Click Save settings.

The image shows a settings page for a workspace in Terraform Cloud, focusing on run triggers, version control, and pull request options. It includes options for automatic run triggering and other settings related to version control and submodules.


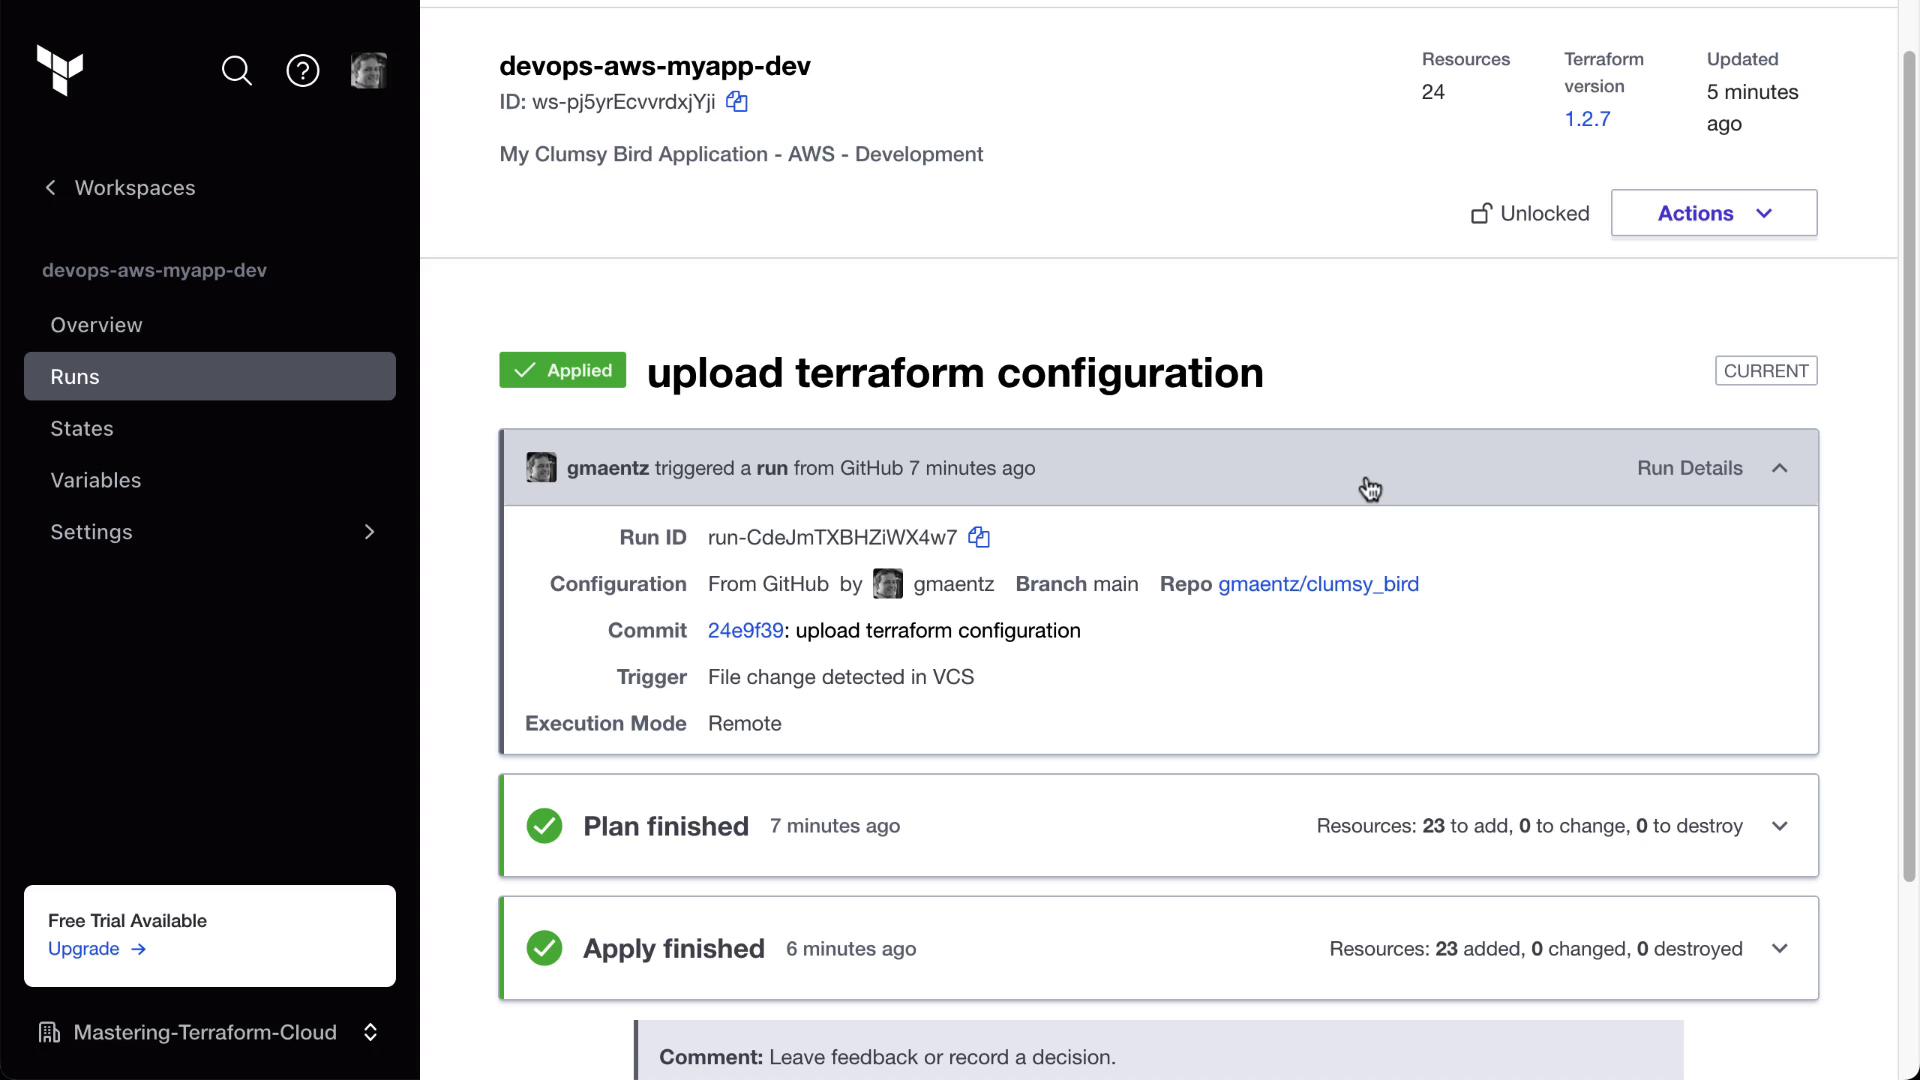
6. Verify the Connection and Trigger a Run

After saving, Terraform Cloud will detect the latest commit and automatically start a run. In the workspace overview, you’ll see the plan and apply details:

The image shows a Terraform Cloud workspace overview for "devops-aws-myapp-dev," displaying details of the latest run, including resource changes and configuration updates.

You can inspect the commit that triggered the run. For example, this simple deployment script runs as part of a Terraform provisioner:

#!/bin/bash
sudo apt -y update
sudo apt -y install cowsay unzip git build-essential nodejs curl npm node-grunt-cli

# Clone Clumsy Bird application
mkdir -p /src
git clone https://github.com/ellisonleao/clumsy-bird /src/clumsy-bird

Once connected, any future commit to clumsy_bird will kick off terraform init, plan, and apply in Terraform Cloud:

The image shows a Terraform Cloud interface displaying a successful run of a Terraform configuration upload from GitHub, with details about the commit and execution. The plan and apply processes have finished, adding 23 resources.


Conclusion

You have successfully linked Terraform Cloud with GitHub using the Version Control Workflow. Every code change now triggers automated infrastructure provisioning.


Watch Video

Watch video content

Practice Lab

Practice lab

Previous
Terraform Cloud Workflows