This lesson demonstrates applying authorization policies in an Istio service mesh to secure applications by controlling traffic access.
In this lesson, we demonstrate how to apply authorization policies at both the namespace and workload levels in an Istio service mesh. These policies are essential for securing your applications by explicitly allowing or denying traffic.
First, verify that your application is running. Then, apply an authorization policy to the default namespace. This policy, which contains no selectors and an empty spec, denies all traffic to all workloads within the namespace.
The output should confirm that the policy was created:
authorizationpolicy.security.istio.io/allow-nothing created
It may take a few moments for the new policy to propagate. When you access your application using a browser, you should see an “RBAC: access denied” message because Istio lacks any rules that allow traffic:
RBAC: access denied
To further test the effect of this policy, generate continuous traffic with this command:
while sleep 0.01; do curl -s "http://${INGRESS_HOST}:${INGRESS_PORT}/productpage" &> /dev/null; done
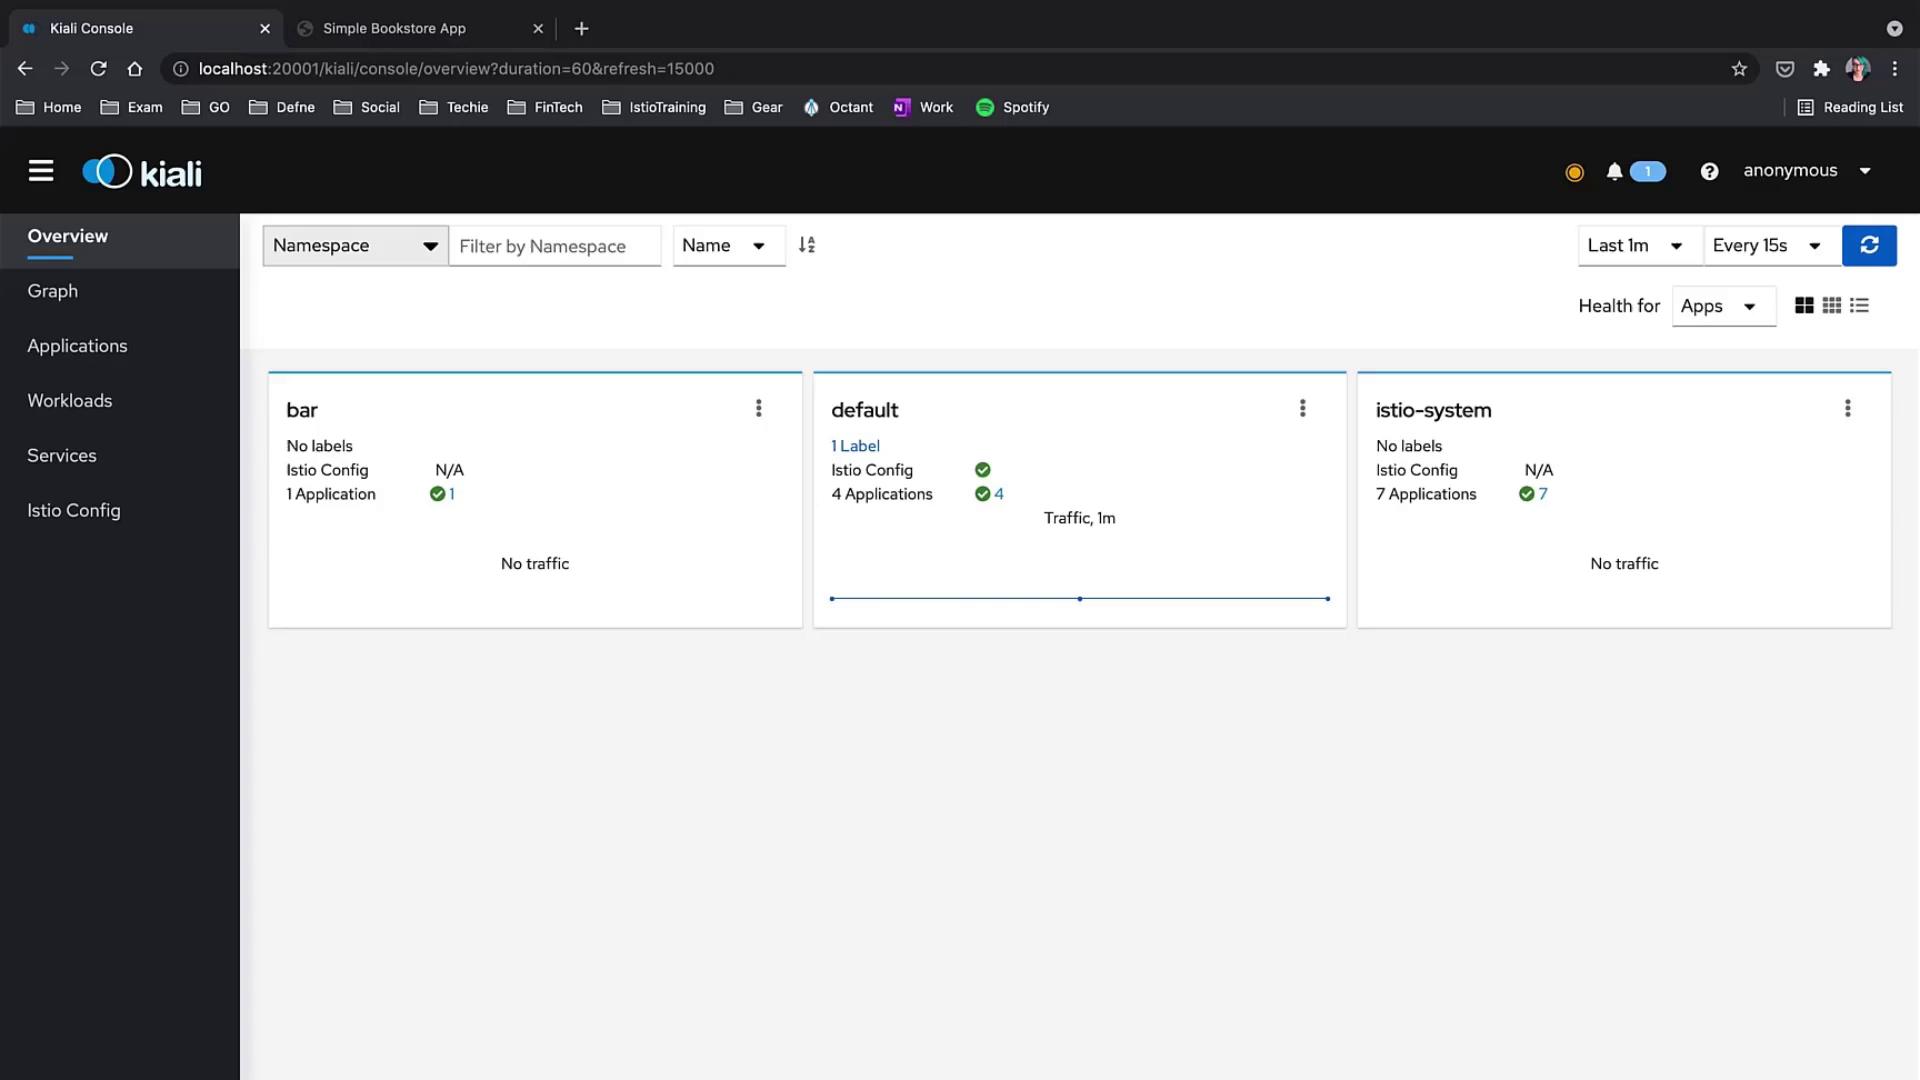
Check your product page application both in the browser and on the Kiali dashboard. You will observe that no traffic passes through and error messages related to RBAC access denial appear in the pod logs.
Examine the distributed traces in your tracing system; a dark red grouping of traces often highlights problematic traffic.
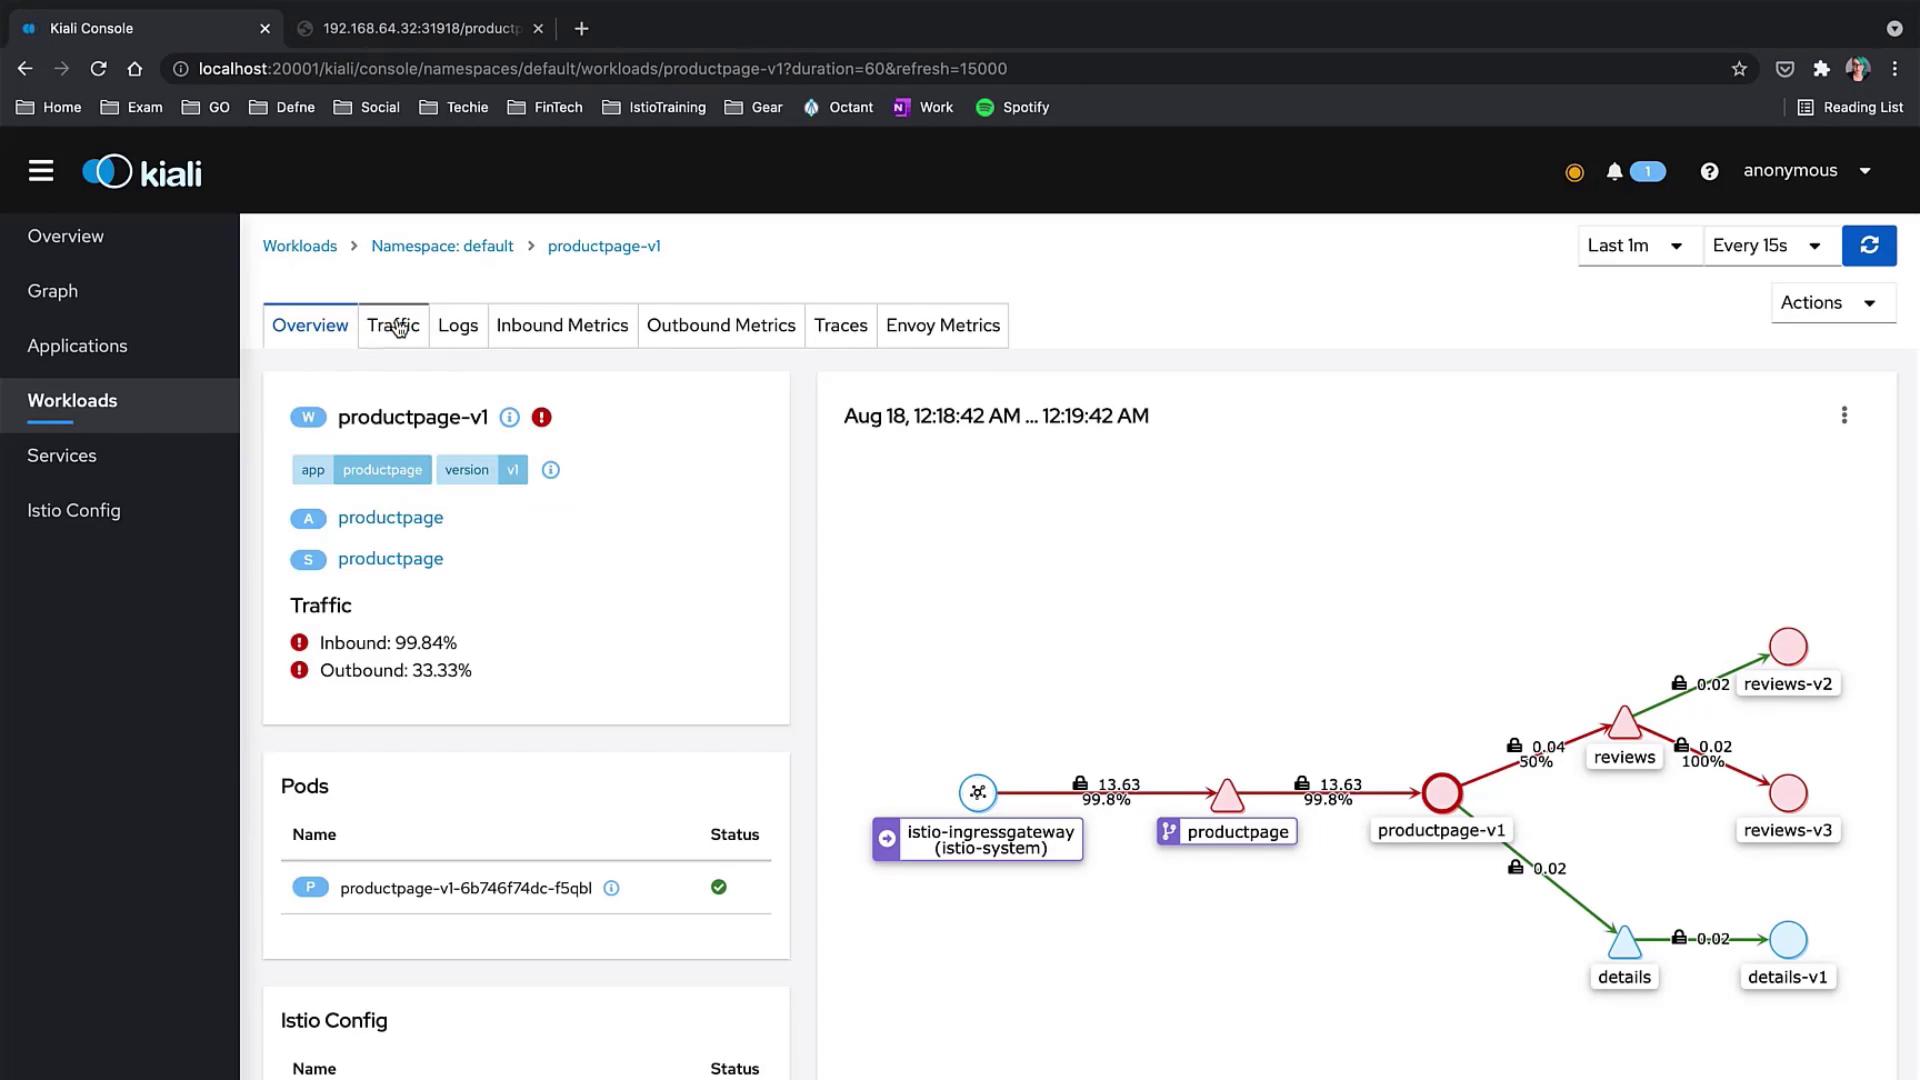
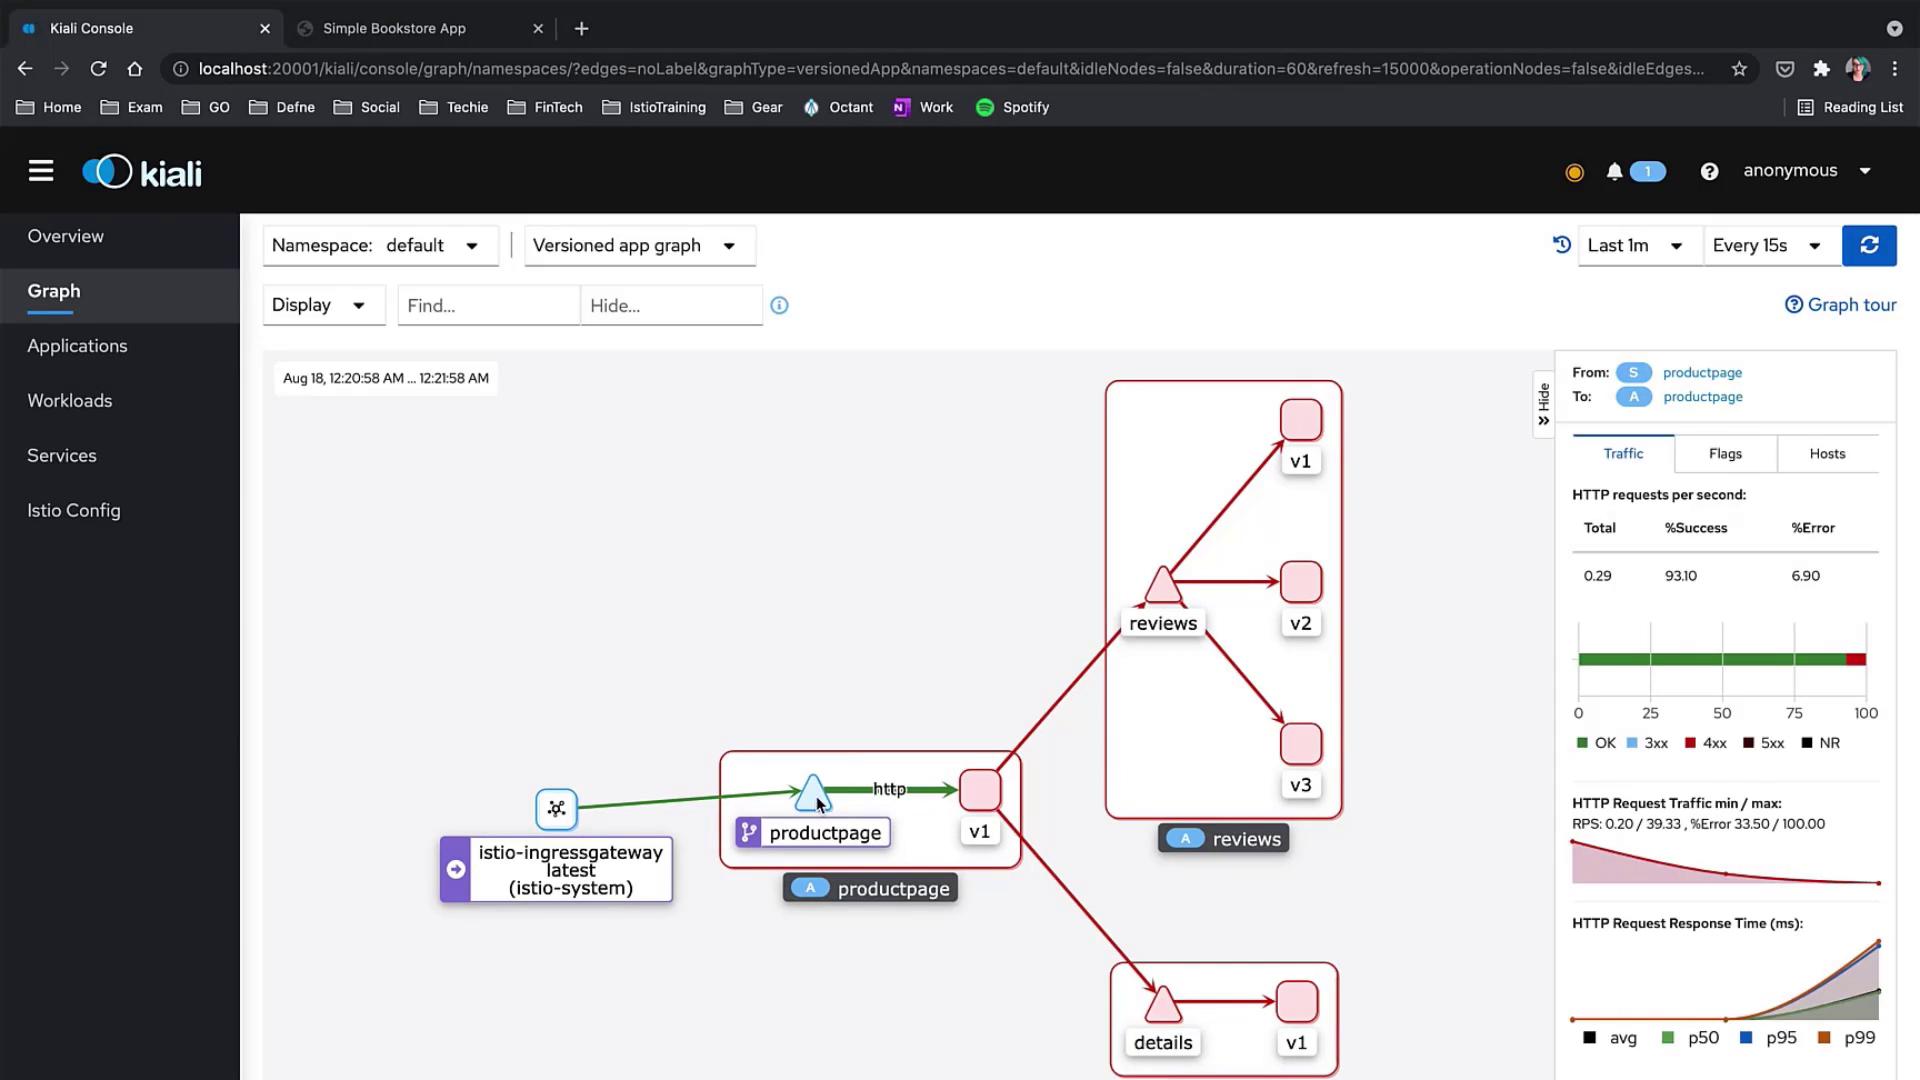
After applying this policy, refresh your browser. The product page should now load correctly, while other services remain inaccessible. The Kiali dashboard will show a green connection from the ingress to the product page, confirming that allowed traffic flows as expected.
This policy applies to workloads with the label app: details and permits HTTP GET requests from the product page service account (bookinfo-productpage):
Create a policy for the reviews service. This policy selects workloads labeled with app: reviews and allows GET requests from the product page service account:
After applying this policy, the reviews component should become accessible. However, if ratings are still generating errors (with red indications in the Kiali graph), further action is needed.
Address the issues with the ratings service by creating a policy that selects workloads with the label app: ratings and permits GET requests from the reviews service account (bookinfo-reviews):
Once enabled, the entire application should operate as expected. The full product page will be displayed in the browser and the Kiali graph will indicate a green status, confirming allowed traffic flows.
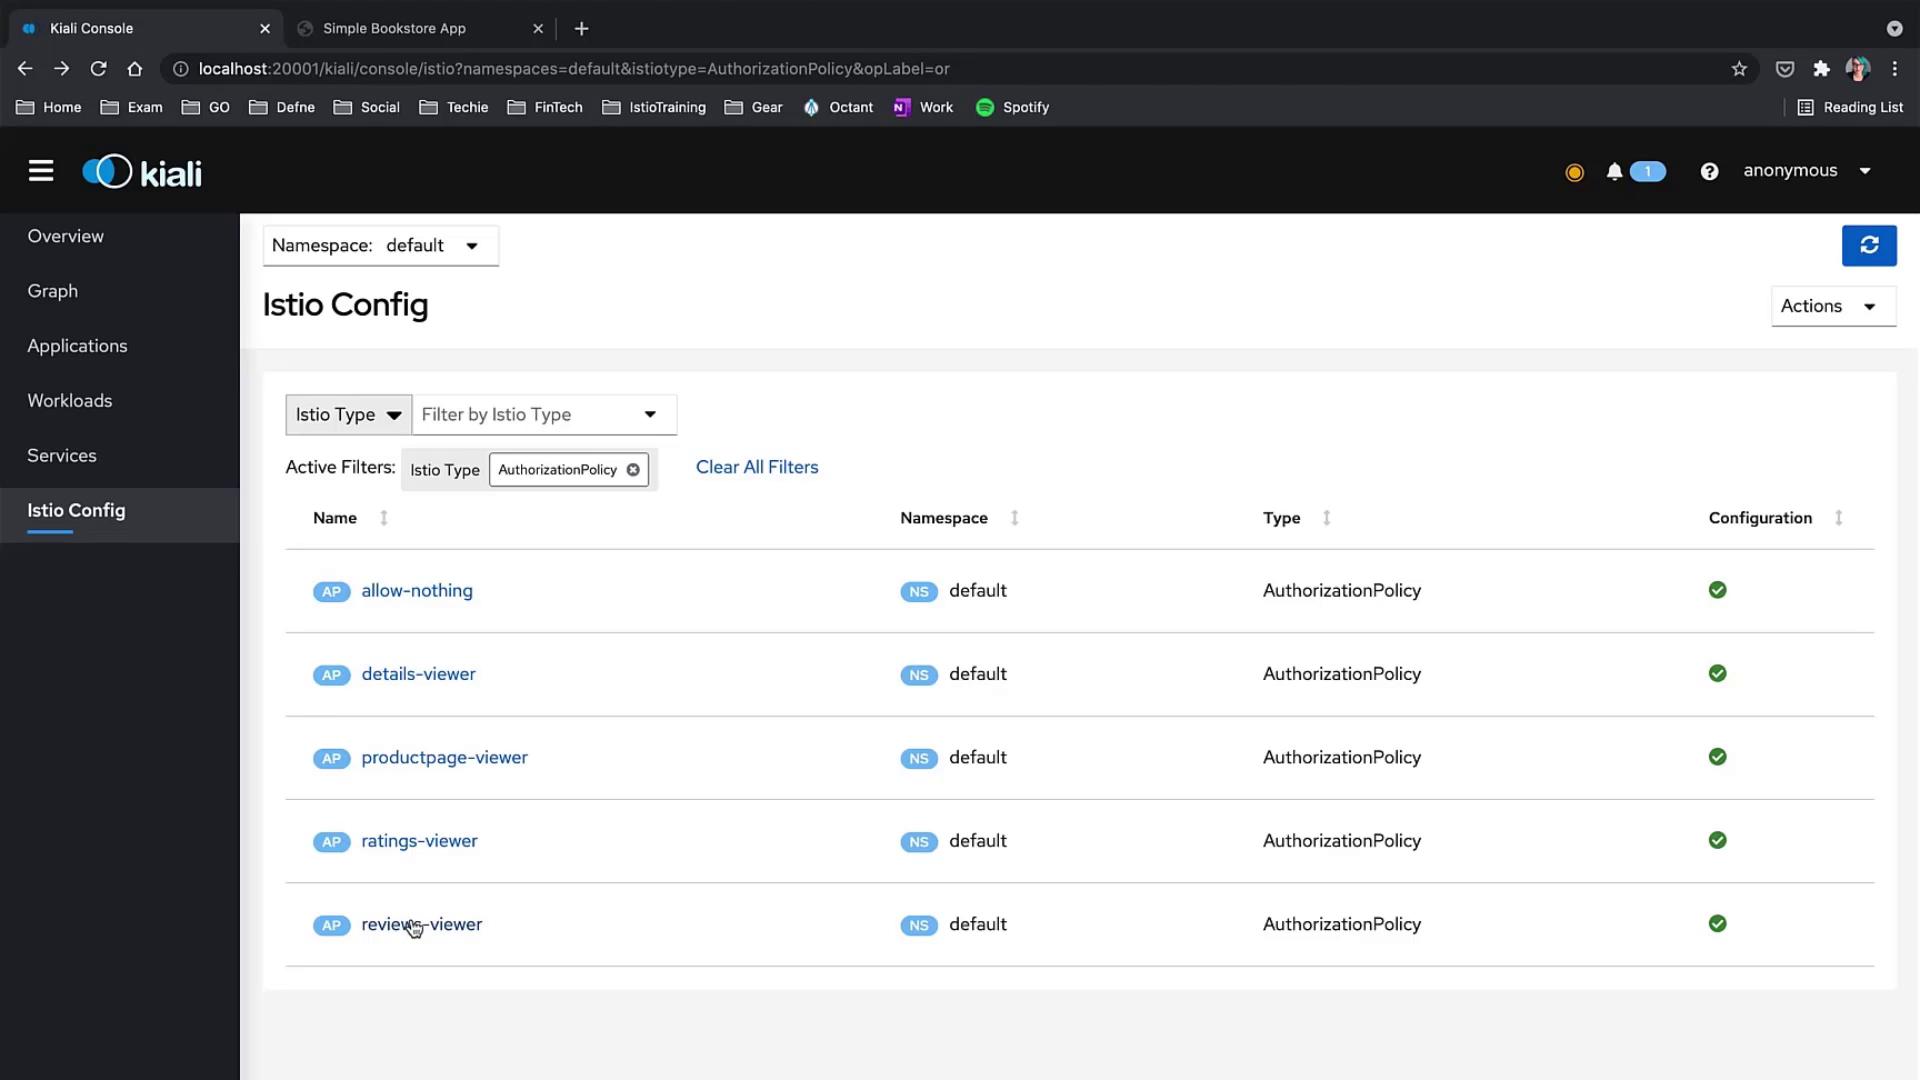
Take a moment to review the overall Istio configuration. In the configuration section, you will see the global “allow nothing” policy applied across the mesh along with the specific viewer policies for each component.
Any traffic not explicitly allowed by the defined policies (such as POST requests or traffic from unrecognized sources) will be denied. This strict approach is critical for maintaining a robust security posture.
By sequentially applying targeted authorization policies, you can effectively secure your Istio service mesh while selectively enabling access to critical components of your application. For more details, consult the Istio Documentation.For further reading on securing microservices, see: