Jenkins Pipelines
Jenkins Administration and Monitoring
Job Restrictions
In this lesson, we explore the Jenkins Job Restrictions plugin, a powerful tool for enhancing your security and streamlining job execution. With this plugin, you can restrict job execution to specific nodes, enforce naming conventions, and even block triggers based on particular user IDs.
Installing the Plugin
To install the Job Restrictions plugin:
- Navigate to Manage Jenkins.
- Click on Manage Plugins.
- Find and install the Job Restrictions plugin.
- Restart Jenkins after the installation is complete.

Configuring Job Restrictions on a Node
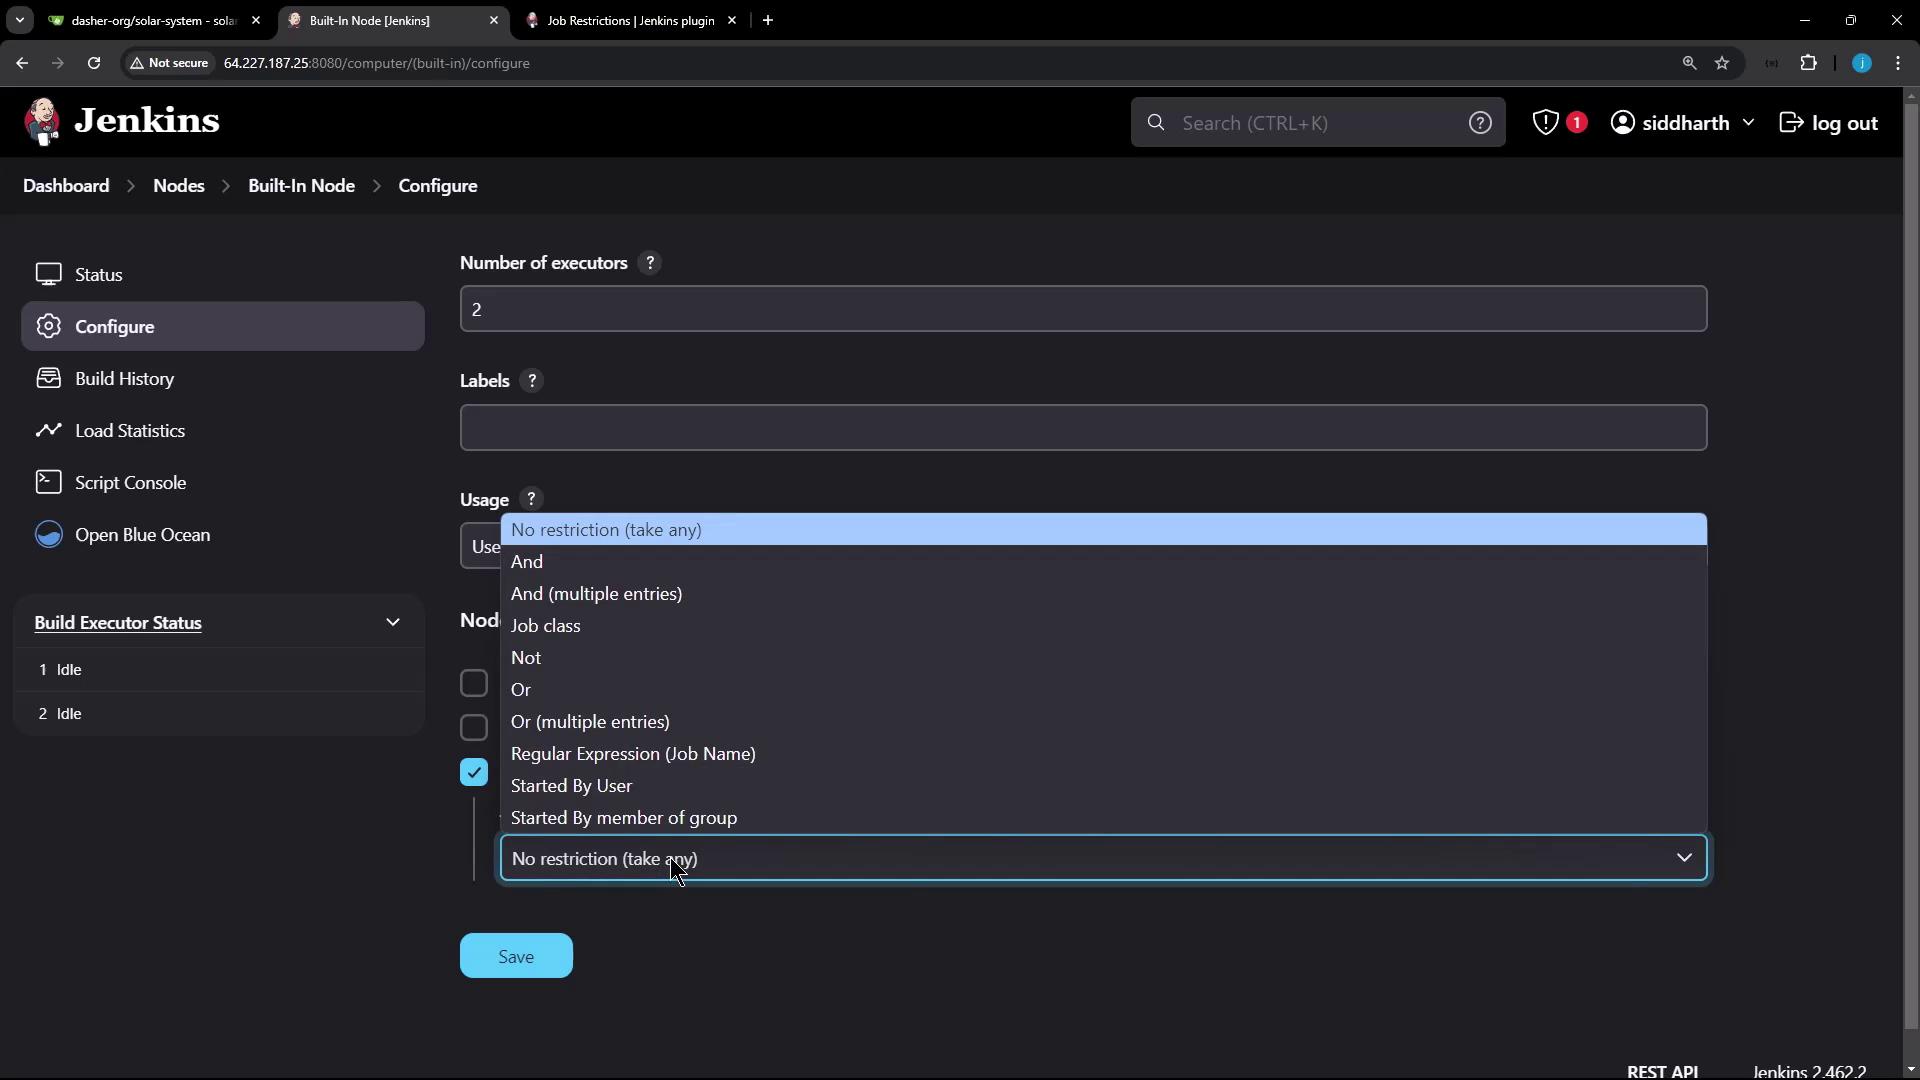
After installing the plugin, you can apply restrictions to your Jenkins nodes. Follow these steps to configure a restriction on a node:
- Go to Nodes.
- Select Built-In Nodes (or choose the specific node to configure).
- Click Configure.
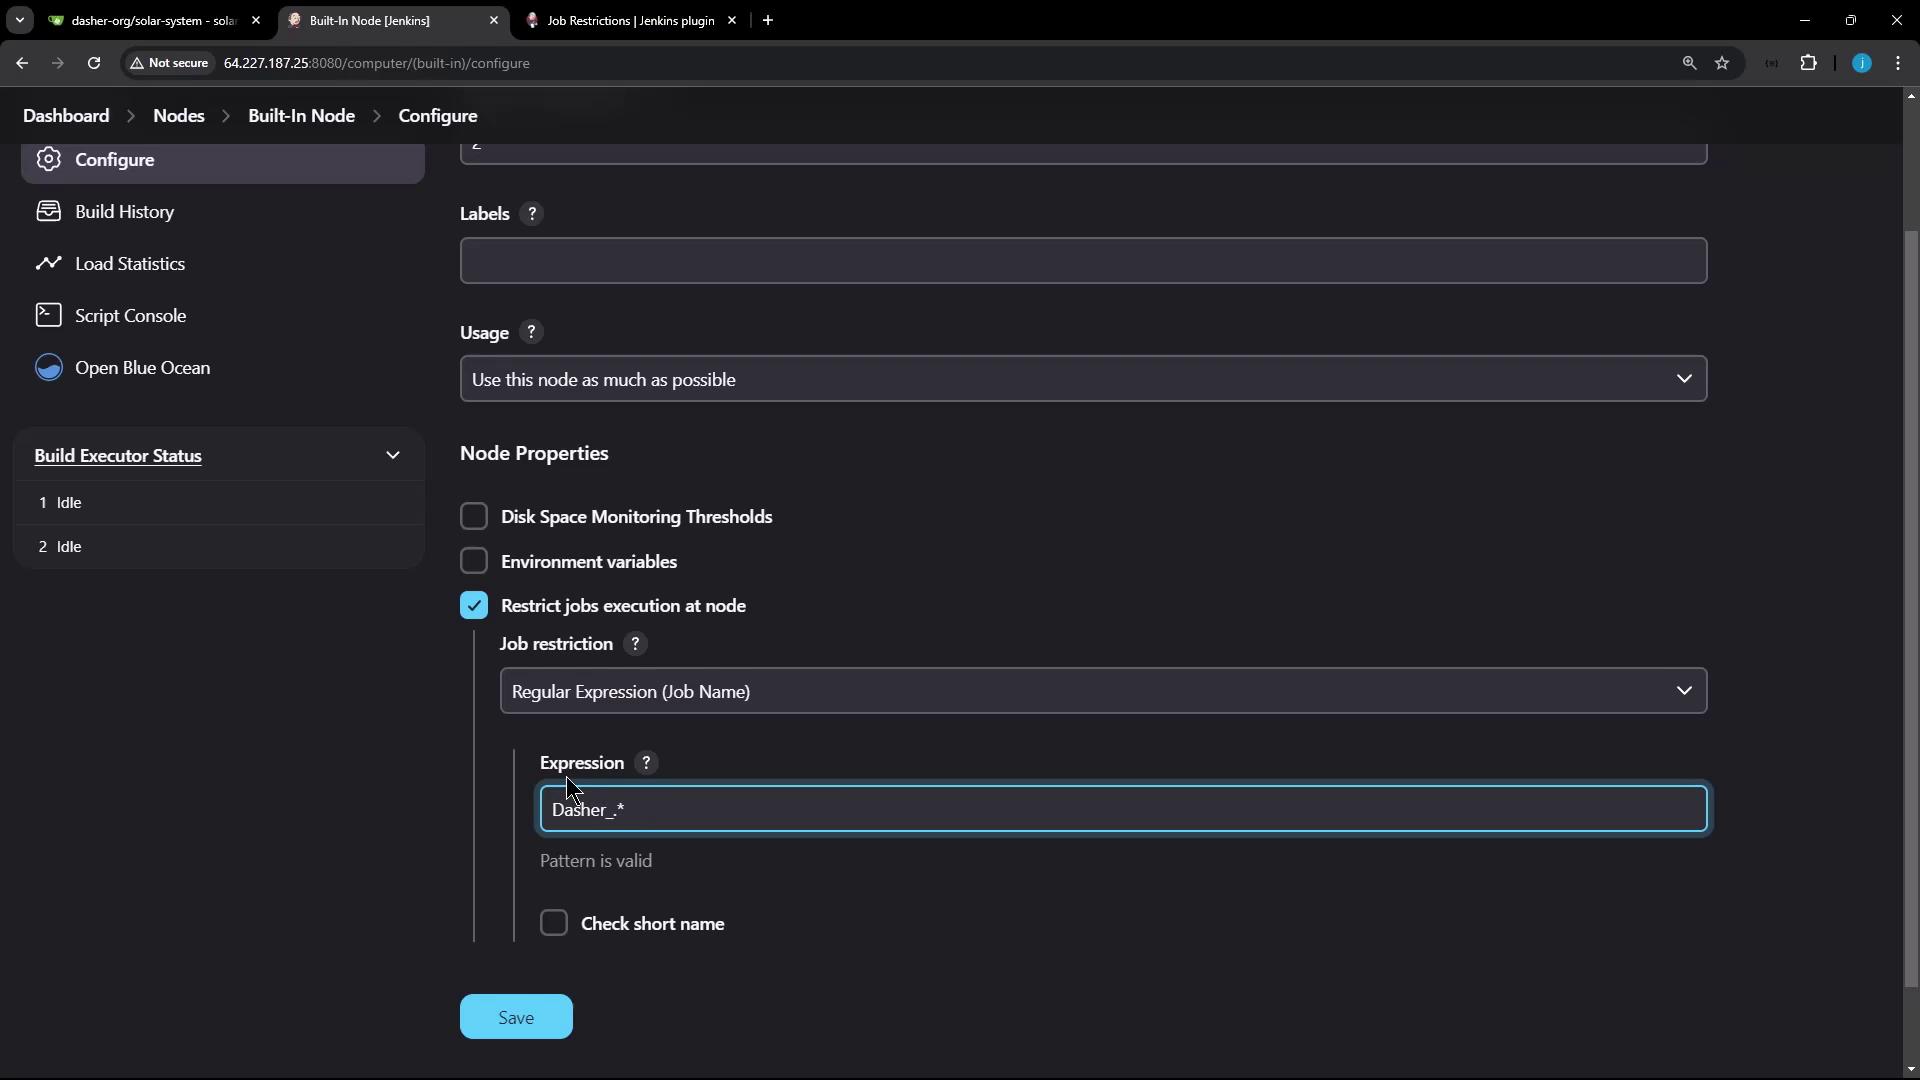
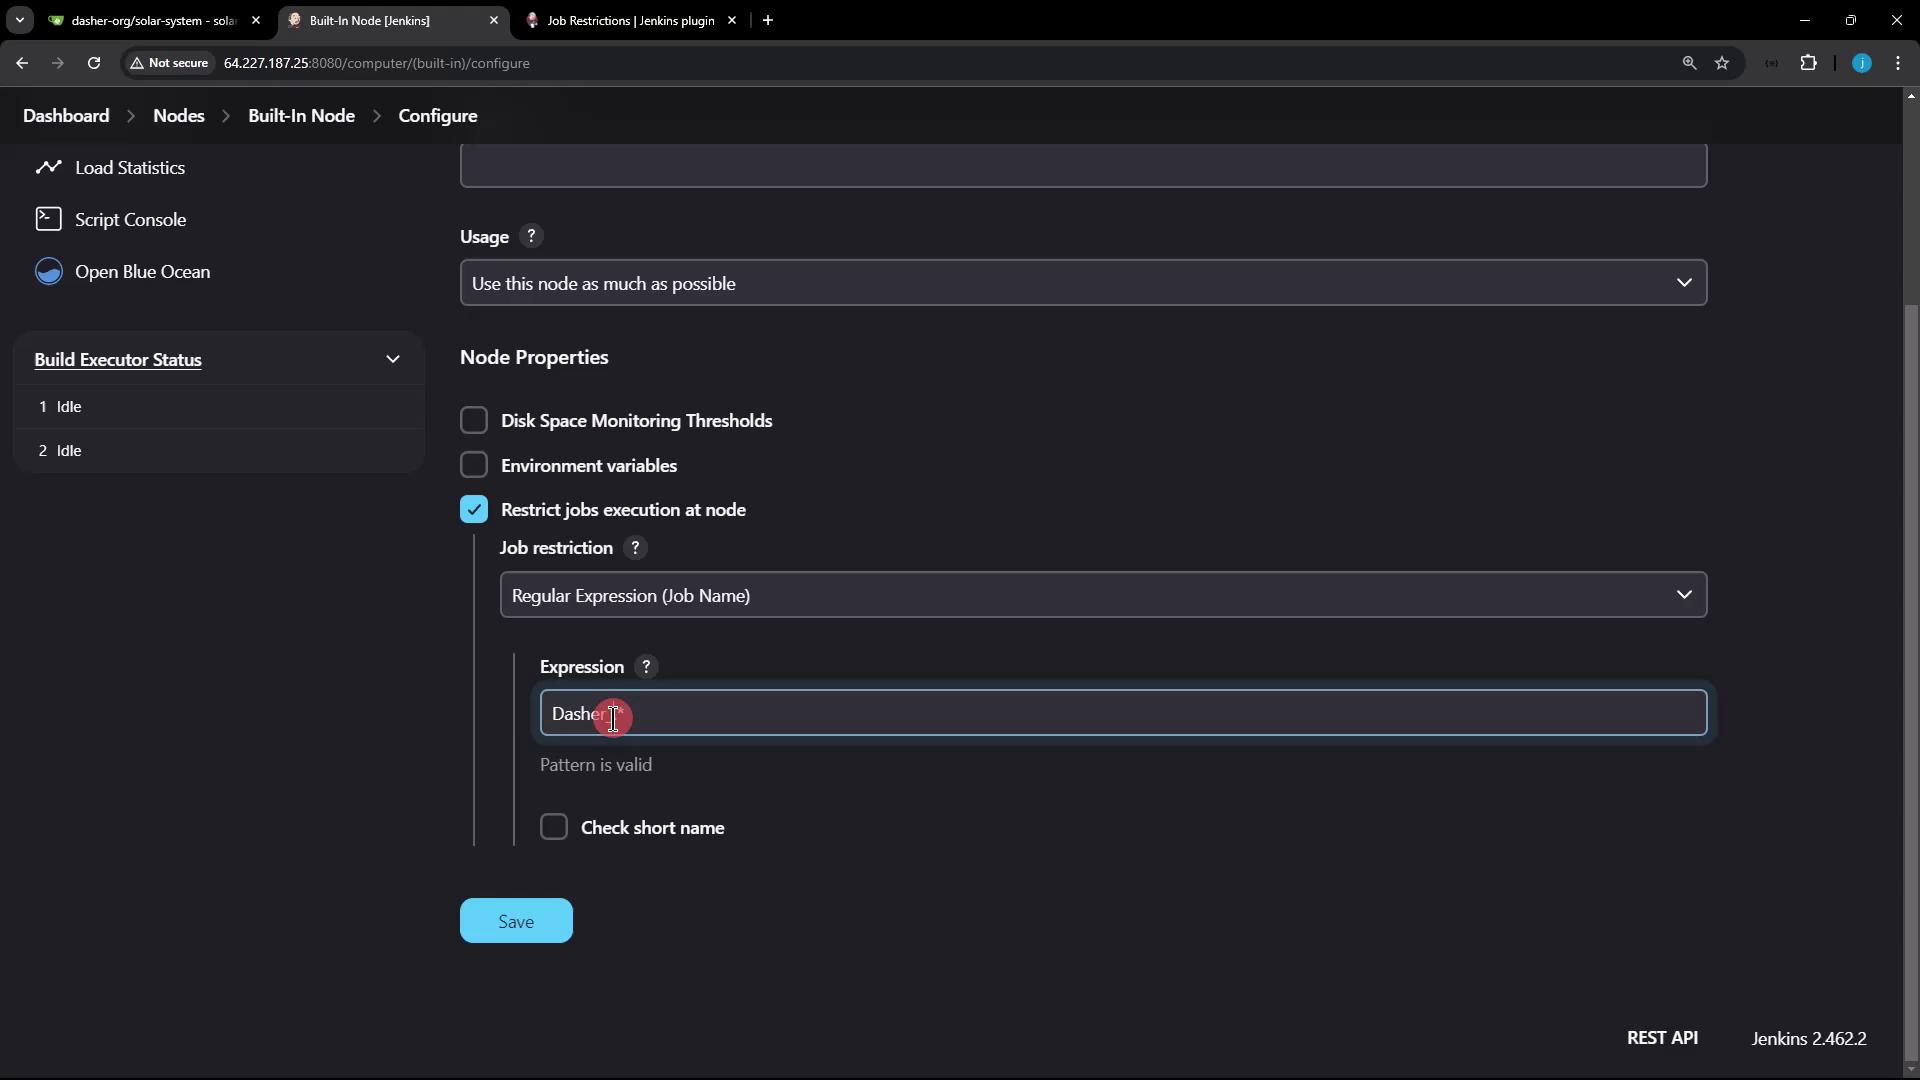
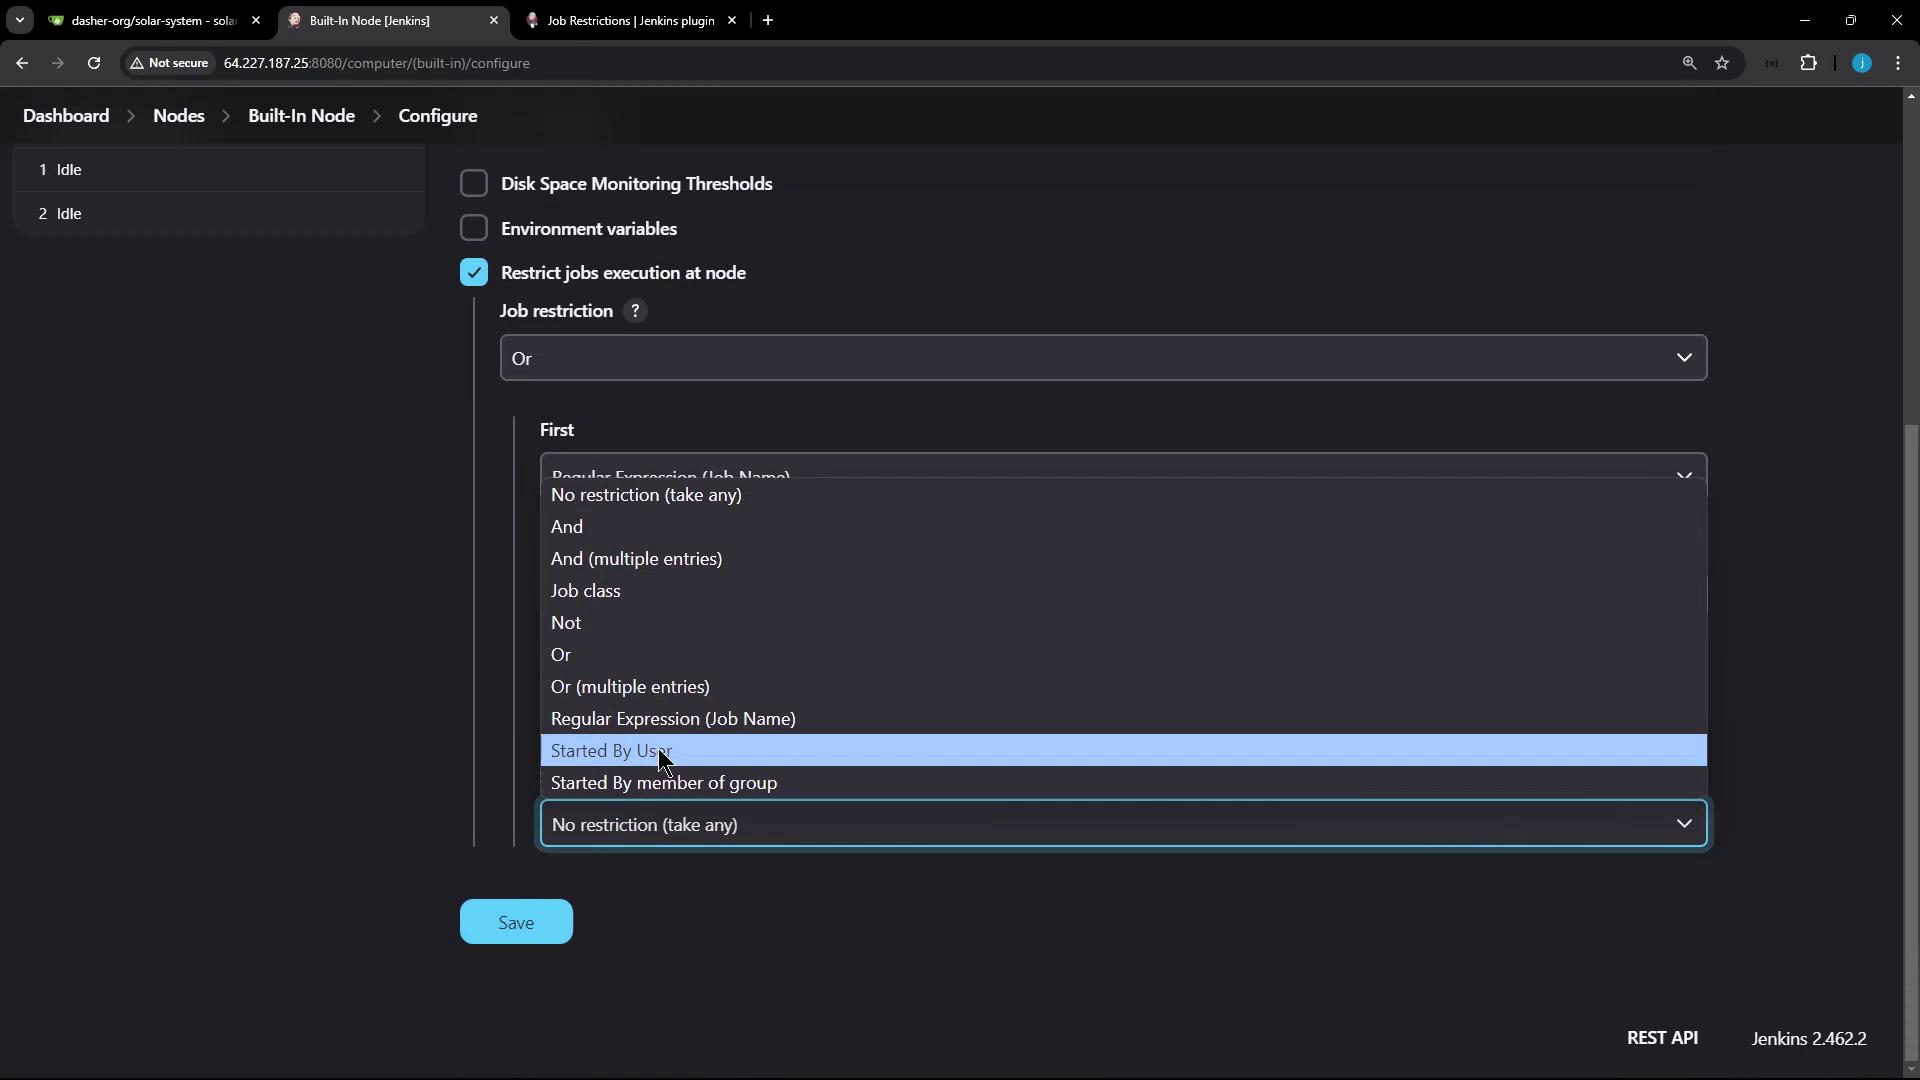
- Enable the “Restrict job executions at node” option.
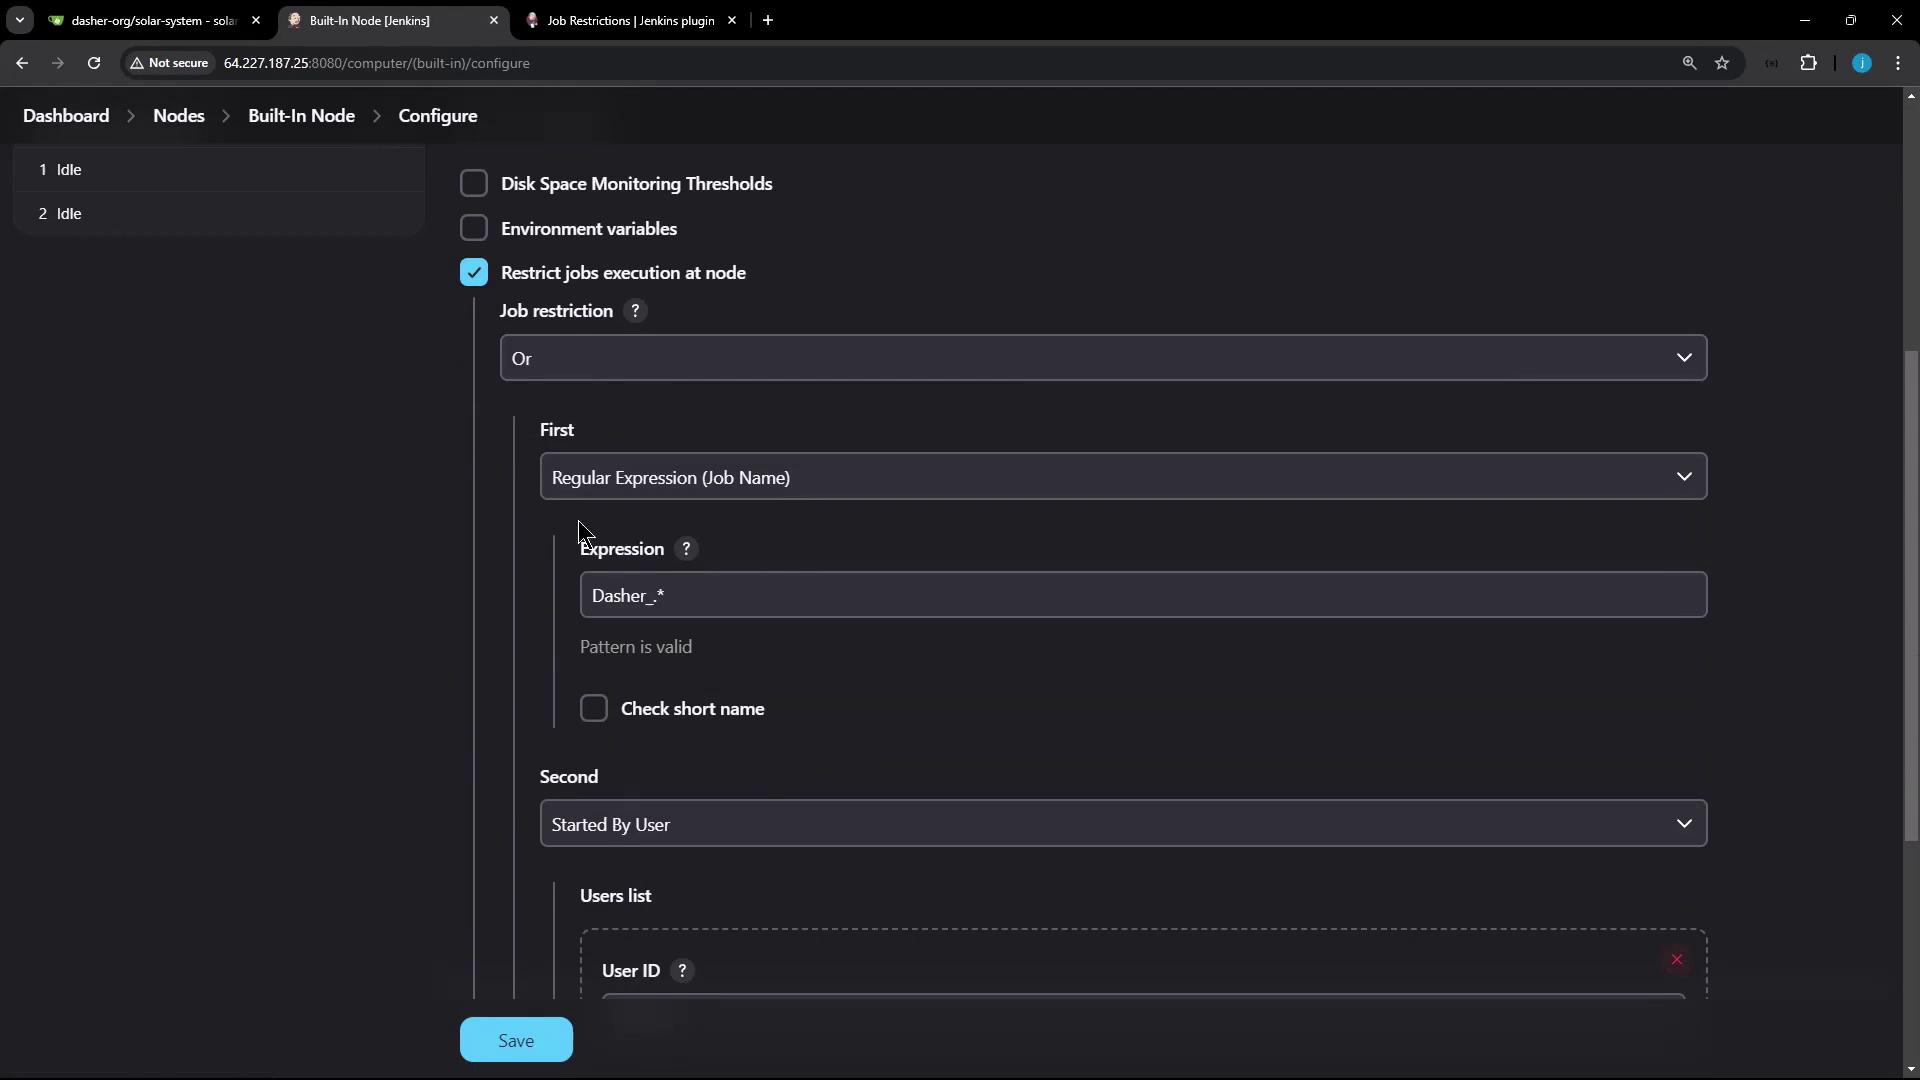
At this point, there are no restrictions set. To add one, let’s enforce a regular expression rule where the job name must start with "Dasher_". Enter the following regular expression:
Dasher_.*
This pattern ensures that only jobs beginning with "Dasher_" are permitted on the node. Save the configuration after adding this restriction.
Customizing Restrictions
You can combine conditions using AND, OR, or NOT operators for finer control. For instance, you might require that a job name follows a certain pattern or is triggered by a specific user.
Testing the Restriction
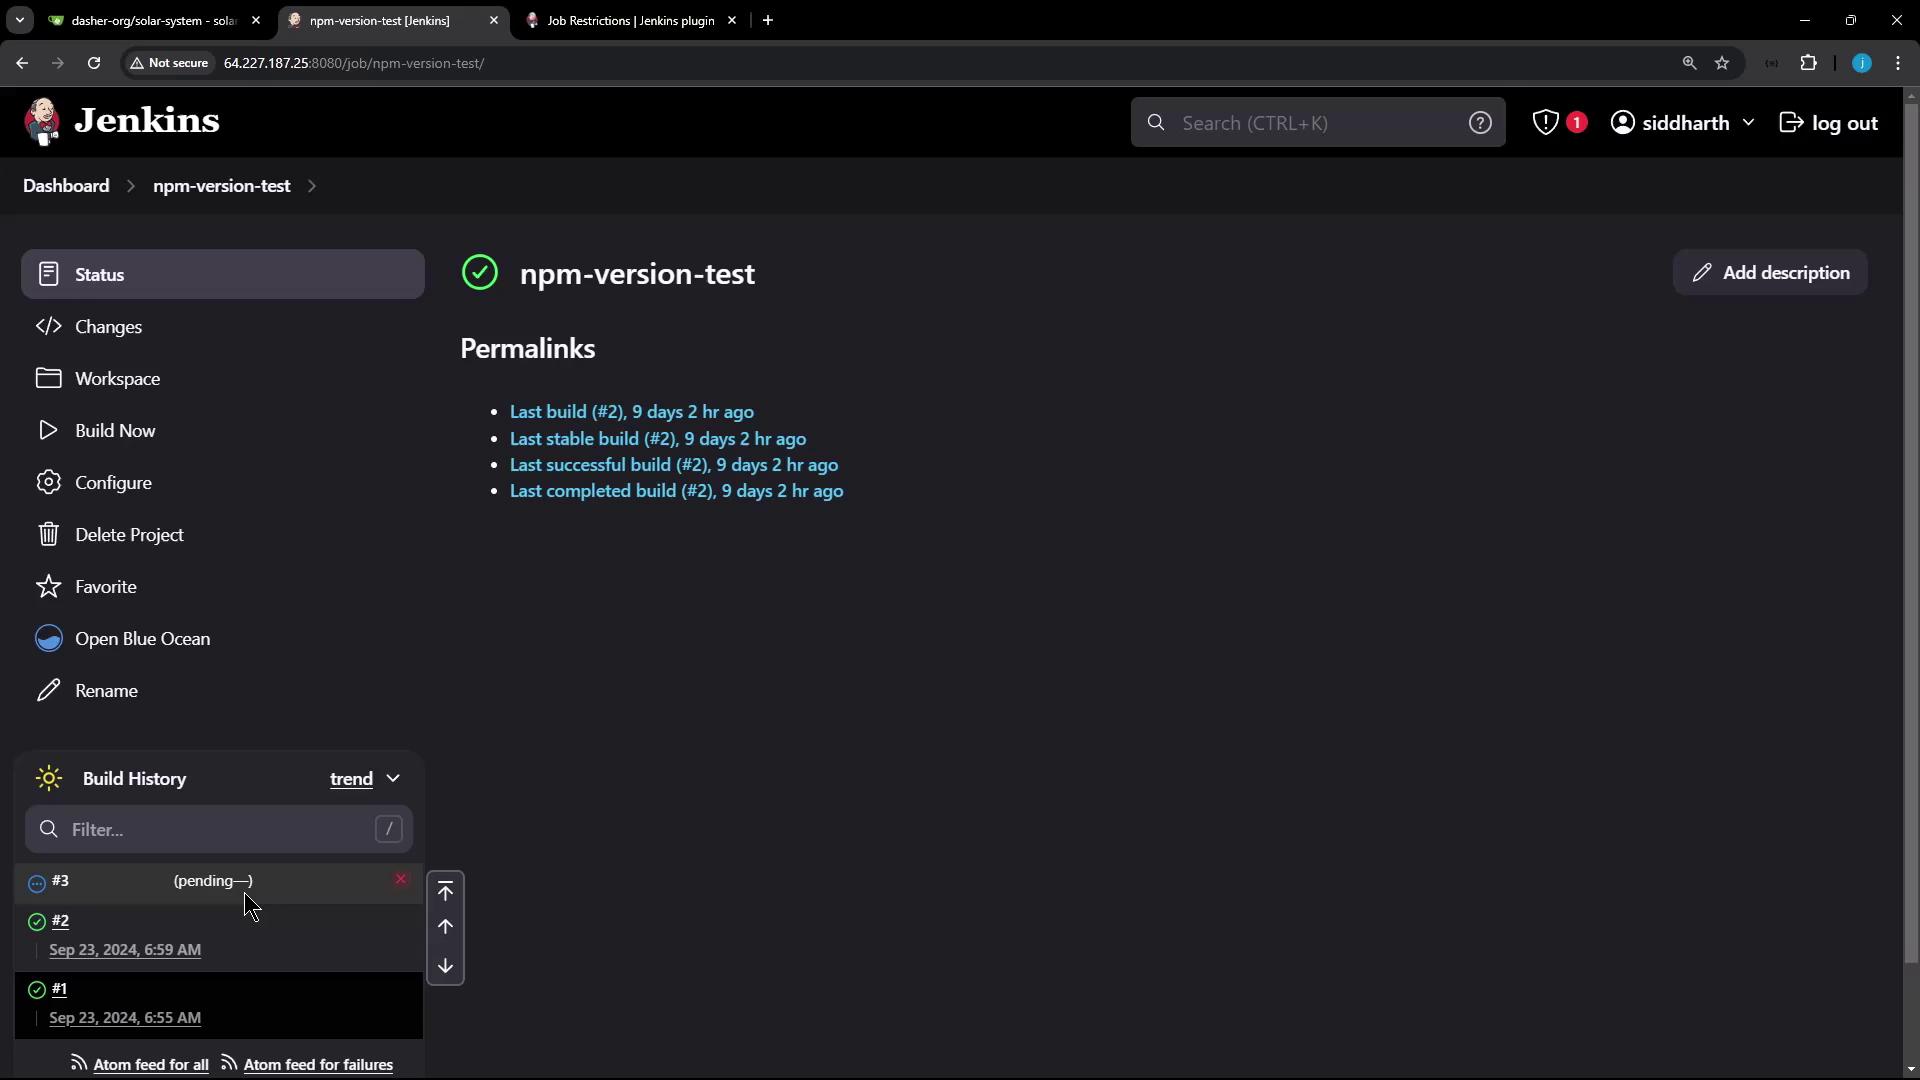
Once configured, return to the Jenkins dashboard to test the plugin by triggering one of your projects. For example, try building the "NPM version test" job with the following steps:
- Click Build Now on the job.
- Refresh the dashboard.
Since the job name does not start with "Dasher_", it will remain in a pending state and will not start automatically.
Creating a Job That Meets the Restriction
Next, create a new freestyle job that complies with the defined restrictions:
- Name the job
Dasher_test_job. - Add a simple build step that executes a command like
echo "hello".
After saving the job, trigger the build. Because the job name starts with "Dasher_", it should run successfully.
Once verified, you might consider adding further conditions, such as restricting execution by user ID. For example, you can configure the node to also require that the job is triggered by a user with the ID "Emma".
To enforce multiple conditions:
| Condition Type | Example | Description |
|---|---|---|
| Job Name Restriction | Regular Expression: Dasher_.* | Ensures job names start with "Dasher_" |
| User ID Restriction (Optional) | Specific User: "Emma" | Only allows jobs triggered by "Emma" to run on the node |
Save your configurations. Now, if you trigger a job that does not satisfy at least one of these conditions—for example, a job not initiated by "Emma" or having an incorrect name—it will remain in a pending state. When logged in as "Emma", the job should execute as expected.
Finally, verify the setup using the OR condition by revisiting Manage Jenkins > Nodes > Configure.
This configuration demonstrates how the Job Restrictions plugin can secure your Jenkins environment by combining multiple conditions to control job execution.
Summary
The Job Restrictions plugin empowers you to enforce stringent execution conditions, allowing only jobs that meet specific criteria to run on designated nodes. This enhances both workflow control and overall security in your Jenkins setup.
That concludes our lesson on using the Job Restrictions plugin in Jenkins. Happy building!
Watch Video
Watch video content